Blog

  • Storing Potatoes for Winter

    Storing Potatoes for Winter

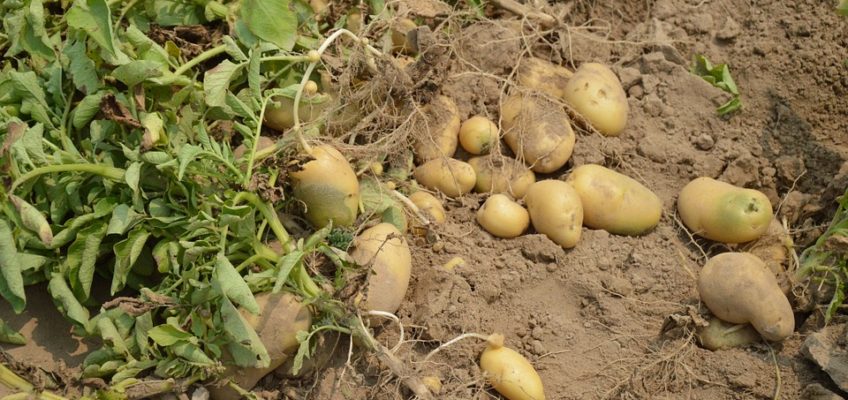
    Potatoes are one of the best crops you can grow! Nutritious, substantial sources of food, they also keep well over the winter, if you know how to store them right. Whether you’ve been growing them and would like to do a big harvest to keep them all over the winter, or you’re buying them in bulk from the farmer’s market before it closes from the winter, it’s important to use the best storage practices so they don’t rot or sprout through the winter months. Potatoes are wonderful for hearty winter dishes so it’s imperative to store them well!

    Here are a few tips for keeping potatoes preserved over the winter:

    Keep it cold

    Wherever you choose to keep your potatoes, make sure you have a cold environment. This is what old-fashioned cellars were commonly used for. The ideal location will have a relative humidity of 95% so that the potatoes don’t dry out, and stay around 45 to 50 degrees Farenheight. This can be your basement, unheated garage, enclosed back or front porch or of course, a cellar.

    Keep them separate

    One very important tip is to keep your potatoes away from fruits or onions, which put off gasses that will cause the potatoes to rot and spoil much faster. You want to keep the potatoes anywhere they won’t be trapped with the gas from these fruits, so in their own containers with plenty of room in between the gassy produce.

    Cure the potatoes

    Before you pack them up for storage completely, it can help to spread them out in a well-ventilated tray, in a single layer, to let some air circulate and to dry the skins a bit. Leave them here for several weeks before packing in their long-term storage.

    Pack them up

    You can use boxes, baskets or even plastic laundry hampers, to pack up the potatoes. The most important thing is to have air circulation throughout the container the potatoes are in, so if you are using a box make sure there are some holes or slats in the side. You can use shredded paper, newspaper or even very dry hay or straw to pack the potatoes. Make sure they’re just not all piled up on top of each other, and spread them out in between the dry medium you’ve chosen.

    Check them frequently

    Obviously, you should be using the potatoes throughout the winter, or maybe you’re not, but either way, you want to check the potatoes frequently to make sure they’re not rotting. Poke through each of your containers from time to time and eliminate any rotting potatoes and the surrounding medium. If you are frequently taking from your potato stash this should be easy, just check the rest of them each time you take some to use.

    If you liked this, you might also enjoy…

    Natural Healing Techniques Doctors Don’t Want You to Know…

    The Weight-Reducing Magic of Yoga…

    The Ultimate Woodworking Course..


  • Easy Perennial Greens

    Often we think of taking the easy way out as a bad thing, but in gardening it can be best way to do things.  One example is perennial greens.  After getting a perennial green started and established, your yield is going to increase for years.  You will also not have down time in your garden while you wait for seeds to sprout, then to mature, and then go to seed again so you can get the next generation.  Perennial greens also give you a chance to nurse an injured or sick plant back that you couldn’t do if it’s life expectancy is only a few months.  These are a few easy to grow super producers you should have in your garden.

    Okinawa Spinach

    Okinawa spinach is a hardy bush with leaves that are either green with purple on the bottom, or green on both sides.  Its benefits are still under investigation but it is said to help lower cholesterol and fight cancer.  It will flower and go to seed but like many other perennial it is better grown from cuttings made from the younger stems.  When harvesting it is better to remove whole branches than to pluck leaves, the plant quickly recovers.  It is best eaten raw or juiced.

    Sorrel

    Sorrel is a low growing plant that resembles leaf varieties of lettuce when it is young.  As it matures the plant will grow in diameter but remain low.  You can buy seeds, but once you get a good clump established, you can propagate it easily by using root divisions.  Sorrel has a tangy taste that is a great addition to a salad, but can be overpowering if it is the base, and it is a great addition to otherwise bitter green juice.

    Tree Kale

    Tree Kale (sometimes called tree collards) is the king of perineal greens.  It can reach massive proportions compared to other greens growing taller than 6 feet, and in full sun will also grow wide.  Its leaves are thick dark green, but have a light taste.  They can be eaten in salads as a base, added to sandwiches, are since an established plant can easily give you more than a pound of leaves each harvest and can be harvested regularly, even daily, it is great to juice.  It may occasionally go to seed, but the seedlings are unpredictable and most plants are grown cuttings of smaller branches.


    Instead of only planting and then replanting, make some room in your garden for the plants that only get better with age.

    If you liked this, you might also enjoy…

    Natural Healing Techniques Doctors Don’t Want You to Know…

    The Weight-Reducing Magic of Yoga…

    The Ultimate Woodworking Course..

  • Canning Tips for Those Just Starting Out

    Canning Tips for Those Just Starting Out

    You are a homesteader, then it typically means you have a garden. This means you are growing vegetables and fruit more than likely. You cannot eat all the food right away in most cases, so you want to can it to preserve it. There are some excellent benefits to canning in addition to having all that extra food in the house.

    One of the primary benefits is that you do not have to worry about any added chemicals to the food. In addition, it tends to taste quite a bit better than commercial canned food. It is also quite a bit easier than most people think, and it can be fun.

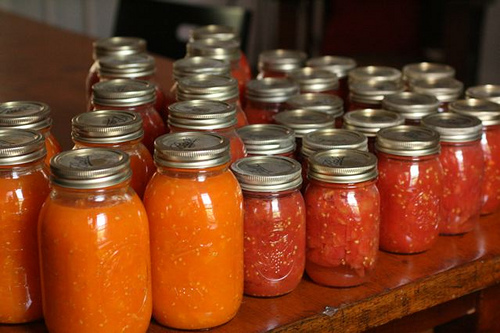
    First of all, you need to make sure you have all the right equipment. You need to have a number of canning jars and lids, as well as a canner. Those just beginning will likely want to start with a water bath canner. You can find kits available, and they will usually include tongs for lifting the jars as well as a ladle.

    Make sure you sterilize the jars, the lids, and the rings. You can do this by washing them in warm soapy water, rinsing them, and then boil them. A good tip is to remove the jars when you’re ready to can, but leave the lids and rings in the water until you are ready to close up the cans – this ensures they remain sterile.

    In addition, be sure to slice up your fruits or vegetables to the right size for the jars, and only fill up to the fill line on the jars. Follow the instructions for your canner, and then let the jars cool once you have finished canning. Label them and then store them in dark place.

    If you liked this, you might also enjoy…

    Natural Healing Techniques Doctors Don’t Want You to Know…

    The Weight-Reducing Magic of Yoga…

    The Ultimate Woodworking Course..

  • Water Conservation Tips

    Even though you might have plenty of access to clean and fresh water right now, it doesn’t mean that will always be the case. There may come a time when you have to conserve the water you have for survival. In addition, unless you have your own well already – which is a good idea if it is possible in your area – you are probably paying for water. As you can see, learning to conserve water now has the potential to pay off for you in a number of ways. Let’s look at some of the different ways that you can start conserving.

    First, you don’t always have to water your lawn. In fact, it might just be one of the biggest wastes of water. Let the grass become dormant during the summer months, and let the rain take care of the watering for you. Simply not watering the lawn is one of the simplest ways to conserve water.

    Another very good and very simple tip that you can use to help conserve water is simply reusing household water. This is also called using greywater. Consider reusing the water when you do dishes to water your garden. By reusing water in this manner, you will be able to help your garden to survive even in a drought without overspending on your water bill.

    Something else you might want to do is go through the house and look at all of the faucets. If there is even a small leak or a drip, it could mean wasting a substantial amount of water each month. Make repairs if you find the need. Even a single relatively small leak could be wasting up to 20 gallons of water each day.

    These are just some of the simplest and most effective methods of conserving water for your home.


    If you liked this, you might also enjoy…

    Natural Healing Techniques Doctors Don’t Want You to Know…

    The Weight-Reducing Magic of Yoga…

    The Ultimate Woodworking Course..

  • What Items Should You Never Compost?

    What Items Should You Never Compost?

    Composting is something that every homesteader should do. It allows you to recycle food and other material and to create richer soil at the same time. However, there are only some items that you should not add to the compost pile. Let’s look at some of the elements that you should not add to the compost pile, as well as the reasons why.

    Never put any meat scraps into the compost pile. The same goes for bones. There are a couple of reasons for this. First, it has the potential to attract vermin. In addition, it is going to cause the compost pile to stink. Never put waste from carnivorous animals onto the compost pile either. You can put on regular manure, but you should never put anything from a carnivorous animal – this goes for pets, such as your cats and dogs. The reason for this is simple – it has the potential to add parasites to the compost, which you would then end up putting in the garden and eating.

    Do not put any wood that has been chemically treated into the compost pile either. There is a good chance that the chemicals will get into the compost. Do not place walnut shells into the compost pile either. It contains a chemical that can be toxic to certain plants.

    Never put oil or grease into the compost pile. It will not break down, and it can cover the other items in the pile, which means they will not break down either. You should not put any weeds in the compost pile, especially if they have seeds. If you do, you are just going to end up with weeds in the garden.

    Keep composting, but make sure you know exactly what is going into compost pile each day.


    Carpentry master course anyone can do…

    The secret to mastering the paleo diet…

    Doctors don’t want you to know these naural healing secrets…

  • Homemade Bird Feeders

    Homemade Bird Feeders

    During the fall and winter, as trees die and snow eventually covers the ground, many birds have a harder time finding their food than during the spring and summer months. But unlike their hibernating woodland counterparts, birds still look for sustenance in the coldest months!

    A very nice way to help them out a bit, and attract beautiful birds into your yard is to make your own bird feeder. It’s very easy to make and doesn’t require much at all.

    This is a great indoor, snow day craft for little ones. You can make the bird feeders with them, then hang them on a tree within view of the house, and then watch the birds come and feed from it! So much better than TV.

    Another great thing about this craft is it uses pinecones, which can often be found on the ground in abundance during the winter. So if you have several on your property or in a park or along hiking trail you like to visit, this is a great way to use them up. It’d make a great activity for a children’s birthday party, or a homeschool or church group craft as well.

    What You Need:

    • Pinecones
    • Peanut butter
    • Cornmeal
    • Birdseed
    • Ribbon, twine or wire
    • Large bowls, pans or wide plates

    What You Do:

    1. Spoon some peanut butter into a bowl. It’s impossible to say how much you need as that will be based on the size of the pinecone and the consistency of the brand of peanut butter you have, but to give a rough idea, 1/2 a cup for 2 or 3 pinecones is probably a good place to start.
    2. Mix in a bit of cornstarch, about 2 tsp per 1/2 of the peanut butter, and stir to combine. You might need more; the idea is to make the peanut butter more gritty so that the birds can eat it easier.
    3. Pour your birdseed, about 2 or 3 cups to start, into your bowl, pan or wide plate. You just need a big enough area to be able to roll the pinecone around in the birdseed.
    4. Secure your ribbon, string or wire to the pinecone. You will probably want to tie it around the middle and train some up the side so that it can be hung. It doesn’t have to be perfectly symmetrical, it just has to be secure and able to be hung from a tree.
    5. Using a spoon or wide popsicle stick, spread the peanut butter mixture over the pinecone. Try to fill as much of the gaps as you can with peanut butter.
    6. Roll the pinecone in the birdseed, pressing the seeds into the peanut butter and the gaps in the pinecone.
    7. Shake the pinecone off over the container that the birdseed is in, just so you don’t make a mess on your way to hang them!
    8. Once you’re done putting the peanut butter and seed on the pinecones, hang them in a tree and enjoy the sight of happy birds with lots of free food!

    If you enjoyed this you might also like:

    How to get started with Aquaponics.

    Grow your own food, better, faster, stronger….

    DIY Home Energy System…

    Click Here To Get The Best Survival Medical Course…

  • Super-Simple DIY Pest Repellent for the Garden

    Super-Simple DIY Pest Repellent for the Garden

    As you probably know, most commercially available pest-repellants are full of harmful chemicals that you wouldn’t want anywhere near your house, children, or pets, let alone near the garden that you’re growing your food in.

    Even if you don’t spray chemicals right on the leaves of your plants, spraying them around the perimeter, either to kill grass, weeds or bugs, will trickle into the soil and can easily be absorbed through the roots of your plants, and you don’t want that.

    But there is a very easy, at-home solution for keeping pests out of your garden, and it’s safe enough to use regularly.

    The solution is very simple: vinegar and peppermint essential oil. You can spray it around the perimeter of your garden, however NOT on any plants you want to keep alive, vinegar kills plants! If you have a fence around your garden it would be ideal to coat the fence with the spray every week or so, and the strong, pest-repelling scent of the peppermint oil is sure to keep pests away.

    What you need:

    Peppermint essential oil

    Vinegar

    Spray bottle

    Label (optional but recommended)

    What you do:

    1. Pour your vinegar into the spray bottle.
    2. Add about 25 drops of your peppermint essential oils
    3. Put the top back on the spray bottle, and shake to combine. You’ll want to do this before you use each time just to make sure the oil is evenly dispersed throughout the bottle
    4. Label if you like. This is highly recommended if you use spray bottles for other garden uses, as vinegar is something you definitely don’t want to get mixed up with say, a neem oil spray or fertilizer!

    And that’s it! If you can create a barricade around your garden of the strong vinegar and peppermint oil scent, it will greatly reduce the pests in your garden without putting toxic chemicals in your food.

    If you enjoyed this you might also like:

    DIY Home Energy System…

    Click Here To Get The Best Survival Medical Course…

    Check Out These Mind Blowing Survival Skills…

  • Simple Steps Towards Self-Reliance

    Simple Steps Towards Self-Reliance

    If you’re homesteading, you’re probably already pretty self-reliant. But if you’re not and you wish you were, there are still many ways you can become more self-reliant, no matter where you’re living. Every little thing you can do counts, and also will help you assess just how much you rely on “the system” and what you can do to change that.

    Here are a few simple ideas to reduce your dependence on, say, multi-national corporations or globalized trade, and more on yourself and the resources that are available in your community. It might be called “self” reliance, but really, relying on our communities, local farmers, artisans, and small-scale production, is a huge leap towards resource independence.

    Buy Food Local and Seasonal

    It might some adjustments to your diet, but find out what grows in your area and shop according to what you can purchase locally and seasonally. Find local farmers markets, community gardens and local food production like bakeries or butchers that specialize in local meat.

    Learn to Cook

    Learning to cook as much as you can from scratch will give you a better idea of what the food you like to eat requires. It also will help you be more independent from large-scale food production and narrow the food you eat down to more local, fresh, organic ingredients.

    Make Something With Your Hands

    Whether it is knitting, weaving, carpentry, soap or candle making, learning to make something yourself, instead of buying it from the store, is not only fun, it will make you feel just a bit more able to survive on your own, without the support of lots of large-scale industries.

    Buy Something Handmade

    Obviously you probably don’t have the time or resources to make everything you use on a day-to-day basis for yourself, so shopping for handmade, local, artisan items yourself is a great way to supplement what you can’t do. Soap, food products, clothing, fabrics, furniture, purses, belts and wallets, even art or metal work are usually made by people who work hard to create unique, beautiful and high-quality items. If you can’t find much locally, Etsy is another great way to support small artists and keep money between individuals, not big companies.

    If you enjoyed this you might also like:

    DIY Home Energy System…

    Click Here To Get The Best Survival Medical Course…

    Check Out These Mind Blowing Survival Skills…