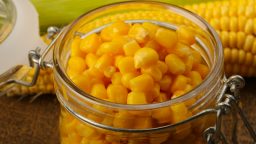
A fond childhood memory is sitting on the back porch with my brother as we pulled husks off the bushels of corn on the cob. Somehow, we would always end up falling to the floor in a pile of husks with corn silk stuck in our hair laughing our heads off. You’d think our mom would have been upset, but all she could do is laugh with us.
Since then I have assumed my mother’s role, canned many a cob of corn, and want to share with you how to process ‘doing it yourself’ canning corn. If you have never canned corn before, it may seem like a lot of work, but it’s the raw pack method, which is easier than other ways. If you follow these easy steps, you will accomplish some of the most significant things about homesteading—being self-reliant, saving money, and feeding your family the best kind of food.
Gather Equipment and Ingredients
- Pressure Cooker – necessary to kill bacteria like botulism that can kill you if not cooked at 240 degrees in a pressure cooker since using stovetop doesn’t get hot enough.
- Mason canning jars with lids and rings to match
- Kernel stripper or sharp knife
- Jar lifter, tongs, and canning funnel
- Large pot of water at boiling temperature
- Shallow pan or cookie sheet
- Towels and hot pads
- Labels for jars and a thin tip marker
- Canning salt for flavor – the amount is optional
- A bushel of freshly picked corn on the cob – follow directions on the pressure cooker for exact amounts for the quantity desired.
[Video] This strange method will make your food last for 2 years without refrigeration…Try it Here>>>
Preparation
- To begin you can either shuck the husks or just bend back each husk and use it to hold the cob as I slice off the kernels.
- Remove the silk with a kitchen brush and rinse corn cobs in cold water.
- Cut the kernels off each cob with a cookie sheet placed underneath to catch the kernels.
- Slide the kernels from the cookie sheet into a large bowl.
- Sterilize the jars, lids, and rings in the pot of hot water, remove right before filling.
- Using the funnel, fill each jar with corn up to an inch from the top.
- Add salt if desired – but no more than ½ tsp. for each pint or 1 tsp. for each quart.
- Fill each jar with hot water up to an inch from the top.
- Giggle the jars to remove any bubbles.
- Wipe the edge of each jar making sure they are not cracked, place lids on, and tighten rings securely.
Cooking
- Using jar lifter, place jars in a pressure canner/cooker according to the user manual (if at high elevation, check instructions for the proper setting).
- Close lid and cook pints for 55 minutes or quarts for 1 hour and 25 minutes.
- Once done, turn off the cooker and wait for the pressure gauge to return to zero before opening.
- Remove jars with the lifter placing on a towel to drain out of the way.
- Let jars cool and check lids to make sure they are sealed. If the covers pop when touched, they are sealed.
- Write the contents and date on labels with a marker and apply to jars.
- Place jars in a cool, dry place until you are ready to
Conclusion
You can use the corn for all kinds of recipes from salads to enchiladas, and you will love how much better it tastes than the store-bought can or frozen versions. By the way, do not throw away the corn husks or cobs—use for composting. If you have children that can help with shucking the husks, let them have fun with it and send us some pictures.


