Tag: coconut oil

  • 5 Step DIY Soap

    5 Step DIY Soap

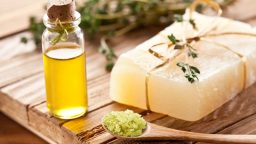
    Making your own soap can be a fun and creative experience. You have the advantage to create a product that is safer than those available in stores and something that is free of perfumes or chemicals. You can also save money over time by making your own soap when compared to products in stores that contain the same natural ingredients. Need another good reason? You can sell it and make a reasonable profit to help you buy the things you need.

    If you are creative with making soap, you can use molds to make natural skin care products into tiny works of art. Or you can make basic soap that is just as nourishing for your skin. There are various recipes and methods that you can try for soap-making so that each batch you make can be different and unique.

    You can use milk or water to create your homemade soap, but using milk can sometimes be tricky, and the recipes that you may find in books or online may not mention that you can substitute milk for water. If you decide to use milk, keep in mind that it will cause the mixture to heat up faster, so you may want to wait until you are more experience with soap-making before you start using milk. However, once you do, the milk will give your soap a creamier color. Natural goat’s milk is a good source if you want to try it.

    Using colors in homemade soap is a fun way to make the process more creative. You can use natural colorants such as spirulina, cocoa, or paprika to create a rainbow of colors. A mixture of Spirulina and nettle creates green soap while paprika crates a nice orange tone. Cocoa can turn out either brown or purple, and annatto creates a bright yellow soap.

    How to Make Homemade Natural Soap

    The equipment that you will need for soap-making shouldn’t be used for anything else, and it should be very clean. For mixing bowls, you should use glass, stainless steel, tempered glass, or enamel. Do not use copper or aluminum since they can react to the lye. Use styrene plastic or silicone spoons for mixing. You can use silicone baking pans or purchase special molds designed especially for soap-making. You will also need a quart and a pint-sized canning jar, newspaper, stainless steel thermometer, and an old towel.

    Additives

    There are several additives that you can use when making soap including herbs like lavender and chamomile, essential oils, natural colors, oatmeal, ground coffee, salt, or aloe vera gel.

    Ingredients:

    • 2/3 cup coconut oil
    • 2/3 cup olive oil
    • 2/3 cup almond or grapeseed oil
    • ¼ cup of lye
    • ¾ cup of cool water

    Directions

    Cover your work area and put on protective gloves. Measure water into a quart jar. Measure lye, making sure you have the exact amount. Slowly pour lye into the water, stirring as you pour. Stand back to avoid any fumes. When the water clears, set aside.

    Add all three oils together in the pint jar. Heat up in microwave or place in a pan of water to heat up to 120 degrees. The lye should have come down to around 120 degrees by then. Wait for both to cool to between 105 and 95 degrees. You don’t want it to get any cooler than that or it will ruin the soap.

    Related Article:  “Homemade Citrus Cleaner”

    Once everything is at the right temperature, pour oils into a mixing bowl. Slowly add the lye, stirring until it’s mixed. You need to get the lye in contact with the soap as much as you can. After around 5 minutes of stirring, the soap mixture should lighten in color and thicken. Once it has a pudding texture, it is at “trace”.

    Add in herbs, essential oils, and any other additives. Stir thoroughly and pour the mixture into molds. Cover with plastic wrap. Set it in the old towel and wrap up. This will keep the heat inside and start the soap making process

    After 24 hours has passed, it’s time to check the soap. If it is still soft, allow it to sit for 12-24 more hours. Once it’s cold, place on parchment paper. Allow the soap to cure for 4 weeks and turn it once a week to expose all sides to air. Once it is fully cured, wrap the soap in wax paper or place in an airtight container.
  • How to Detox With Coconut Oil

    How to Detox With Coconut Oil

    Our modern lives are full of toxins. Air pollution, manufacturing chemicals, preservatives in food, you name it. These toxins degrade our health and compromise our immune system.

    Detoxing has become very popular for this reason, and many people report incredible transformation after trying a “cleanse” for a short time. If you’d like to try some detoxing, coconut oil is a really great way to do this.

    Coconut oil is incredibly nutritious, and packed with important fatty acids and have many great health benefits, including:

    • Increased brain activity
    • Digestive support
    • Blood sugar regulation
    • Heart and cardiovascular health
    • Protection against cancer
    • Cholesterol regulation
    • Increased energy
    • Immune system boosting
    • Efficient fat burn
    • Thyroid support
    • Anti-fungal, anti-bacterial, and anti-microbial properties

    To begin a detox with coconut oil, you’ll want to generally cleanse your whole diet too. You don’t have to stop eating all the foods you love, just commit to avoiding processed foods, fast food, and junk food, as well as white sugar for at least one week. You’ll notice a huge difference from this alone!

    Then, take 2 tbs of raw virgin coconut oil mixed with warm water every 2 hours. You can mix this into other drinks, have in bulletproof coffee in the morning, or mix into soups and stews. Do this for 3-7 days for amazing detox results.

    Once you start to detox, you might experience “die-off” or a slight sickness from the toxins leaving your body. You’ll want to make sure to drink lots of water, take Vitamin C, and drink lemon or lime water too. Activated charcoal tablets can also help too. Fresh fruit can really take the edge off too.

    When you’re done, try to stick to healthier foods if you can, and continue to incorporate coconut oil into your diet.

    If you enjoyed this, you might also like….

    Can You Defend Your Family When SHTF?

    Natural Healing Secrets You Need to Know…

    Effective Primal Diet Hacks…


  • Coconut Oil Candy Recipe

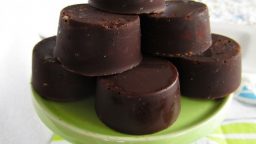
    Coconut Oil Candy Recipe

    In case you have been living under a rock, coconut oil has soared in popularity in recent years for being an insanely healthy superfood. Regular consumption of coconut oil will provide a multitude of benefits, including:

    • Reducing wrinkles and sagging skin
    • Fighting fungus and bacterial infections
    • Supporting the pancreas, liver and kidneys
    • Preventing Alzheimer’s
    • Easing digestion
    • Improving bone health
    • Maintains healthy blood sugar
    • Reduces cholesterol

    The problem is, most people won’t feel like swallowing a spoonful of coconut oil daily. It is, of course, easy to incorporate into your diet by cooking with it or putting in smoothies, but if you are someone with a regular sweet tooth trying to eat healthier, this delicious recipe is a godsend.

    If you love chocolate, want to eat more coconut oil, and love easy recipes, this is for you!

    These delicious coconut oil candies are insanely easy to make, and totally delicious. And the very best part? They’re totally healthy for you, and you have an excuse to eat them every day. Also, since the main ingredient is good-fat-rich coconut oil, they’re filling so while they’re sweet and delicious, they’re also quite filling and satisfying.

    Ingredients: 

    • 1 cup organic coconut oil
    • honey, maple syrup, agave or stevia (to taste)
    • 1/4 cup cocoa powder
    • Candy molds, ice cube trays, or a small baking pan
    • 1/2 tsp vanilla extract
    • Salt (optional)

    Directions: 

    1. First, get your candy molds, ice cube trays, or baking pan ready. You will be pouring the candy mixture into whatever container you are using and refrigerating, so make sure you’ve got space in the fridge for it. If you’re using candy molds, it can be helpful to lay them all out on a candy sheet and clear one shelf of the fridge, for example.
    2. Melt the coconut oil in a small saucepan over low heat (unless it is warm enough in your home that it’s already in a liquid state, in which case, procced to step 3)
    3. Once the coconut oil is fully liquid (don’t let it get too hot, just warm enough to be melted), stir in your sweetener, vanilla extract, the salt if you’re using it, and the cocoa powder. 2 tbs of maple syrup is what I usually use, so just taste it to see its sweet enough for you.
    4. Mix everything thoroughly, then pour into your candy molds, ice cube trays, or pan.
    5. Refrigerate for about an hour, until the candy is fully hardened. Then transfer to an airtight container and keep in the refrigerator.

    Hope you enjoy these delicious healthy treats as much as I do!

    Natural Healing Techniques Doctors Don’t Want You to Know…

    The Weight-Reducing Magic of Yoga…

    The Ultimate Woodworking Course..