Page 3 of 5
1 2 3 4 5
Cooking – Page 3 – Homesteader Depot

Tag: Cooking

  • How To Make Caramelized Onions in a Slow Cooker

    How To Make Caramelized Onions in a Slow Cooker

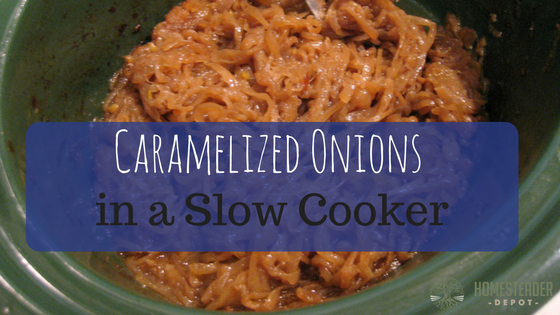
    I don’t know about you, but I love caramelized onions. What I don’t love is spending half an hour in front of my stove, stirring the onions and waiting for them to get to just the right degree of caramelized.

    Caramelized onions are a delicious addition to a wide variety of dishes, from soups to salads to pork chops and beyond. They can make a very simple, dressed-down seem like it’s straight out of a fancy French restaurant. Of course, the fancy part of it is probably due to the careful process of making caramelized onions, which many home cooks won’t feel they have the time for.

    This is why I was very thrilled recently to find this hack for making caramelized onions in a slow cook cooker.

    Not only does is this process a simple, hands-off way to make caramelized onions that doesn’t require constant stirring at the stove, but it can help you make a large batch of caramelized onions to keep in your fridge or freezer for many dishes to come. Not only can you add a lovely bit of gourmet class to each meal, you can do it with very little effort on your part!

    This is a great option for processing onions you find on sale, or a large harvest if you’re lucky enough to grow onions on your homestead.

    Here’s how:

    Ingredients

    1 large bag onions

    1/4 cup butter (1/2 stick typically)

    2 tsb salt

    4 tbs brown sugar

    Directions

    1. Slice your onions into thin rings, as best you can. They don’t have to be perfect.
    2. Place them in the slow cooker and cut the butter up into a few cubes, scattering them around the onions. Throw in the salt and brown sugar and give a good stir.
    3. Put your slow cooker on low.
    4. In about an hour, stir the onions again.
    5. Check the onions every now and then for about 8 hours, stirring when you can.
    6. Once they are brown and golden, you’ve got yourself easy caramelized onions! Let cool to room temperature and pack into bags and jars to refrigerate or freeze.

    How easy was that? I’m getting hungry just thinking of the delicious smell this will fill your kitchen with. Enjoy!

    If you enjoyed this, you might also like….

    Do You Have What You Need to Hold Down the Fort?

    Natural Healing Secrets You Need to Know…

    Effective Primal Diet Hacks…

  • The 11 Commandments of Cast Iron Care (Graphic)

    The 11 Commandments of Cast Iron Care (Graphic)

    Most people who own and regularly use cast iron can’t gush enough about it. You might wonder what all the hype is about cast iron, and you also might wonder why people are so legalistic about cleaning it.

    The thing is, they’re really not so difficult to care for, at all, and no matter how much they wear or rust, it’s actually usually pretty easy to get them back in shape again, if you know what you’re doing.

    The great news about cast iron is that if you use them regularly, you really don’t have to do very much at all to keep them conditioned.

    I found this graphic recently on Pinterest, from Southern Living Magazine, that has the “11 commandments of cast iron”, and I think they’re great suggestions. I thought I’d share it with you guys so you can see that cast iron care is really not so complicated. These basic guidelines are sure to keep your cast iron in great shape, for many, many years. Enjoy:

    If you enjoyed this, you might also like….

    Do You Have What You Need to Hold Down the Fort?

    Natural Healing Secrets You Need to Know…

    Effective Primal Diet Hacks…

  • The Simplest Way to Peel Garlic. Period. (Video)

    The Simplest Way to Peel Garlic. Period. (Video)

    Garlic is a homestead kitchen staple, but let’s face it; it’s more than a little tedious to fidget with the papery skin of each individual clove.

    Sure, you could smash your garlic with a knife or a mallet and make a big mess. If you have half an hour or more to spare, you could soften the skins in hot water. If you need to peel enough garlic to season food for an army, or make a hefty portion of a natural remedy like honey-infused garlic, you can shake them into oblivion between two bowls, but that’s more trouble than you really need to go through. And let’s not even get started with the weird, artificial flavor of pre-processed garlic available in the store.

    So what’s the homestead cook to do? I shared a video about the bowl method last year, but this video shows an even easier, ridiculously simple kitchen hack for the home chef in a hurry who won’t settle for less than fresh, pungent garlic. It’s as easy as tossing the head of garlic into a jar, closing it, and shaking the living daylights out of it for less than half a minute. After 20 seconds, tip the jar to pour out your fresh peeled garlic cloves.

    Wasn’t that easy?


    If you enjoyed this, you might also like….

    Are We In The End Times?

    Complete Health Transformation Without Drugs or Surgery…

    Having Trouble Sticking With Paleo?

  • How to Make Almond Milk (and Almond Flour!)

    How to Make Almond Milk (and Almond Flour!)

    I love recipes that kill two birds with one stone (come to think of it, if you know a recipe that does this literally, let me know!), and making almond flour out of the leftovers from almond milk couldn’t be easier, or healthier!

    It’s very simple, and all you need is almonds and clean drinking water.

    Almond milk is a great alternative to dairy whether you are on the paleo or whole 30 diets, are lactose intolerant, or just enjoy a delicious and wholesome nut milk!

    Homemade almond milk is not only cheaper than store bought kinds, it’s actually way healthier. Even the most seemingly healthy almond milk that is organic and non-GMO, still have gross preservatives in them that pretty much cancel out any other health benefit of delicious almond milk, not to mention half the time they’re also packed with flavoring and unnecessary sugar.

    Almonds are sweet enough on their own, so homemade almond milk is both delicious and require very little to make. Here’s how, and how to make almond flour with the discards!

    Ingredients:

    • almonds (2 cups is a good starting point)
    • filtered water
    • salt (optional)
    • vanilla extract (optional)

    Directions: 

    1. Fill a glass container with your almonds and cover with clean filtered water. A 3:5 ratio of almonds to water is fine, but you mostly just need to make sure the almonds are fully submerged.
    2. Let soak overnight.
    3. In the morning, drain off the water and rinse your almonds thoroughly under clean water, until the water runs clear.
    4. Place in a blender with the salt and vanilla extract, if you’re using them, and fill the rest of the blender with clean filtered water.
    5. Blend on high for a minute or two.
    6. Strain the almonds out with cheesecloth or a fine mesh strainer. I do this over a large pitcher so I can pour the fresh almond milk into a bottle easily.
    7. That’s it! Bottle your almond milk and store in the fridge; it will keep for 4-6 days.

    How to make almond flour

    So, you may ask, what do I do with all this crushed up almond I just strained out of my milk? That’s right: this is how we make the flour!

    1. First, try to squeeze out as much moisture as you can from the discarded almonds. Then, spread out on a baking pan or dehydrator tray in a thin layer.
    2. Set your oven to the lowest setting, place your pan in the oven, and crack the door. If you’re using an oven, leave it this way for about 4-6 hours. OR if you’re using a dehydrator, set it on the nut setting, if it has one, or around 115. Leave for 12 hours.
    3. Once your almond meal is crispy and completely dry, take out of the oven or dehydrator.
    4. Run the almond meal through the blender again, until it is like a fine meal. This will vary based on your blender’s strength if you have a grain mill, even better! You can also use a coffee grinder, but this will take awhile if it has a small capacity.
    5. And there’s your super frugal almond flour! Store in an airtight container in a cool, dry place, and use in any recipe that calls for almond flour.

    There you are, two awesome, healthy food products with one batch of almonds. Cool huh?

    If you enjoyed this, you might also like….

    Effective Primal Diet Hacks…


  • How to Make Healthy Gummy Candy

    How to Make Healthy Gummy Candy

    Gummy candy is a great treat, but unfortunately, it’s usually loaded with dyes, preservatives and chemicals.

    Like many junk foods, there are healthy versions you can make at home, but DIY gummy candy has a unique quality among healthy alternatives to candy: it’s actually really good for you. 

    The base of homemade gummy candy is gelatin, which is an excellent source of protein, minerals, and vitamins that help improve skin, hair, nail, dental, and bone heath, ease the symptoms of arthritis, relieve tendonitis and other muscle and joint-related health issues.

    It’s amazingly good for you, but make sure you buy gelatin from grass-fed cows. Gelatin from feedlot cows is not anywhere near as healthy, as those animals are often unhealthy themselves and pumped full of antibiotics and hormones.

    Also, make sure you buy a gelatin that says it will dissolve in hot water and clump in cold water. If it says it will dissolve in cold water, it won’t work for gummies. Gummies have gotten very popular, so these days, most brands will probably indicate what you can use the gelatin for on the container.

    There are many different options for flavoring gummy candy, the sky is pretty much the limit! Just do a quick search on Pinterest and you’re bound to be overwhelmed by all the creative combinations foodie bloggers come up with.

    Here’s a very basic recipe to get you started:

    Ingredients and tools:

    • 3/4 cup fruit juice
    • 3 tbs raw honey or maple syrup
    • 3 tbs grassfed gelatin powder
    • Small saucepan
    • Candy molds or shallow glass pan

    Directions: 

    1. Get all your ingredients and your candy molds or glass pan together. If you are using a glass pan, gently grease it. Make sure you have everything measured and ready to go before you get started, as some steps are time-sensitive.
    2. Next, make sure you have room in your refrigerator for the gummies to cool once they’re in the molds or the pan. They will need to sit flat on a surface. I usually line my candy molds up on a baking sheet and make space for them before getting started. If your fridge is too full, you can also use the freezer.
    3. Gently heat the juice over low heat in a small saucepan on the stove.
    4. Stir in the honey or syrup until fully dissolved.
    5. Sprinkle in the gelatin, whisking to combine as you go. Continue to whisk until completely dissolved. You might have a few clumps, try to nudge these or press with a fork until they are broken up and dissolved, as best you can (a few small lumps won’t ruin it, if the rest of the gelatin is fully dissolved.
    6. Once your gelatin is fully dissolved, remove the liquid from heat and pour right away into your candy molds or pan.
    7. Refrigerate for 1-2 hours, or freeze for 10-20 minutes. Once they’re fully solid, either pop out of the candy molds or cut up into squares.
    8. Store in an airtight container in the refrigerator, and enjoy!

    If you enjoyed this, you might also like….

    Can You Defend Your Family When SHTF?

    Natural Healing Secrets You Need to Know…

    Effective Primal Diet Hacks…

  • 3 Reasons to Keep Raw Honey Around

    3 Reasons to Keep Raw Honey Around

    Honey is a staple of any well-stocked pantry, but most people just think of it as a condiment to be added to tea or perhaps to top sweets or desert.

    The majority of conventional, store-bought honey, however, is actually pasteurized. Pasteurized honey sounds like a good idea, like any pasteurizing process, as it supposedly eliminates the possibilities of harmful bacteria growing in the honey.

    However, when you pasteurize honey, it actually eliminates the vast majority of beneficial qualities of the honey, and it is also largely unnecessary, as honey rarely contains any harmful bacteria.

    Here are three reasons you should always have raw honey as a staple in your pantry:

    1. It lasts forever

    No, seriously. If honey doesn’t come into contact with water or other external factors, it can last virtually forever. They found honey in ancient Egyptian tombs that was still perfectly edible (not sure if anyone ate it, but they deemed it edible at least). You can keep a jar of it in your pantry and it will virtually always be fresh. This makes it a great survival food, as well as reliable pantry staple.

    2. It can replace refined sugar

    You can use honey in place of white, refined sugar in pretty much any recipe, and it is way, way healthier. Surprisingly, for something so sweet, it has a comparably low glycemic index, making it a great alternative to sugar for those dieting or with health-related issues who want to watch their GI.

    3. It is a medicine as well as a food

    Along with all the wonderful ways you can use honey in cooking, there’s also a multitude of health benefits to raw honey. It contains prebiotics which help aid digestion and replenish beneficial gut bacteria, and it also is a natural antibiotic that can keep wounds clean and protected from infection. It can also help reduce allergies or ease cold and flu symptoms, especially if you consume local raw honey. You can even wash your hair and your face with it, or add it to healing facial masques.


    Raw honey is truly a miracle of nature, and it’s increasingly easy to find at local grocery stores. My Walmart, for example, carries several varieties of local raw honey that are very reasonably priced. Add this crucial pantry staple to your home cooking today.

    If you enjoyed this, you might also like….

    Are We In The End Times?

    Complete Health Transformation Without Drugs or Surgery…

    Having Trouble Sticking With Paleo?

  • Easiest Indoor Herbs to Grow

    Easiest Indoor Herbs to Grow

    Herbs are a wonderful way to start gardening, either in a starter garden, on your patio, or even your windowsill. They don’t usually require a whole lot of work, are fine in containers, and are wonderful for adding fresh, healthy flavor to all kinds of dishes!

    Of course, if you want to use herbs primarily for cooking, or simply want a house plant that provides more than just decor, indoor herbs are perfect. Here is a list of some of the easiest herbs to grow indoor:

    Basil

    Basil is so easy to grow anywhere, and that includes indoors. You can start them from seed right in the pot, and simply place in a southward facing window so it gets lots of warm sun, which it loves, and you’ll have one happy plant!

    Lemongrass

    Lemongrass is incredibly easy and hands-off to grow. All you need is one small stock to get started, and it will take off! You can use the stocks and leaves for all kinds of delicious dishes.

    Chives

    Chives produce quickly and easily and require little light, so they’re a breeze to grow indoors. Like lemongrass, you can start them from already established plants by digging part of it up, including the roots, and placing in its own pot with potting soil. Cutting the leaves off stimulates more growth, so it’s also perfect for regular use in the kitchen!

    Parsley

    Parsley is a staple of many cooks, and it doesn’t require very much light or maintenance to grow indoors at all. It does take a little longer than other herbs to get established, but once it does, you’ll have regular access to fresh sprigs to finish off any delicious meal.

    Peppermint

    Peppermint thrives in the shade, making it a great choice for indoor gardens. It’s a crawler and grows fast, so if you plan on using it regularly, it’s ideal for cooking. You can throw in cold summer drinks, brew your own delicious (and healthy!) mint tea, or add to desserts and many Asian dishes. Yum!

    If you enjoyed this, you might also like….

    Can You Defend Your Family When SHTF?

    Natural Healing Secrets You Need to Know…

    Effective Primal Diet Hacks…

  • Genius Ways to Use Lard

    Genius Ways to Use Lard

    Lard is something many of us have considered unhealthy for years, but it’s making a comeback as nutritionists reveal the healthy, complex fats in  lard are actually pretty good for you! It’s way better for you than vegetable or seed oils, and definitely better than margarine or imitation butter.

    If you fry bacon at all, you definitely want to collect the fat that builds up in the pan and keep it for cooking! I keep a small jar in my fridge and use it as I would oil or butter all the time.

    But did you know you can render it on your stove just like you would tallow? It can be used in so many different ways and, if you’re lucky enough to find a butcher that will give pork fat away, you can do it entirely for free!

    Here are just a few examples of the many ways in which you can use lard:

    Seasoning cast iron skillet

    This is my personal favorite. Nothing seasons my cast iron like lard, and it makes them truly non-stick. I don’t even have to use water to clean them out when they’re regularly seasoned with lard! Simply rub on the warm, dry pan after washing and the next time you use it, you’ll probably just have to wipe them out with a cloth and a little  more lard!

    Cooking

    Use lard as a base to fry in, as you would any other cooking oil. With enough lard, you can deep fry, and nothing is quite as crisp or perfectly fried as when it’s fried in lard, trust me.

    Baking

    Lard makes a great fat for things like biscuits, breads, or tortillas. Simply use in the place of butter or oil for a smooth, buttery texture that is to die for!

    Candle making

    Lard actually makes a great base for candles! There are many different recipes out there, and while they definitely don’t have a fatty smell like you’d expect, you can still scent them however you want using essential oils. These make a great gift or emergency candle stockpile.

    Soap making

    If you’ve seen ‘Fight Club’, you’ll remember that animal fat is used as a base for soap, and lard makes a great one. It’s wonderfully moisturizing, and again, if you can get your pork fat for free and render your own lard, it serves as a very frugal base for soaps.

    If you enjoyed this, you might also like….

    Can You Defend Your Family When SHTF?

    Natural Healing Secrets You Need to Know…

    Effective Primal Diet Hacks…