Page 10 of 15
1 8 9 10 11 12 15
diy – Page 10 – Homesteader Depot

Tag: diy

  • DIY Starter Log

    DIY Starter Log

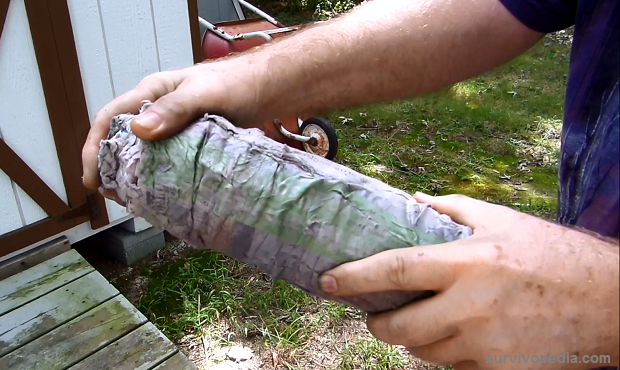
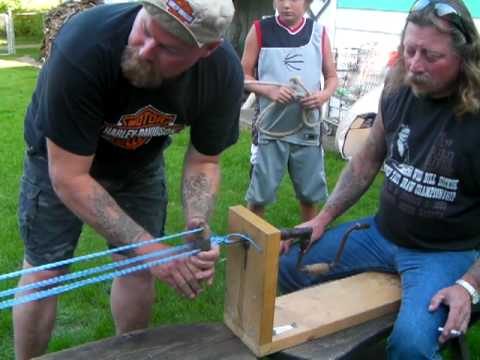
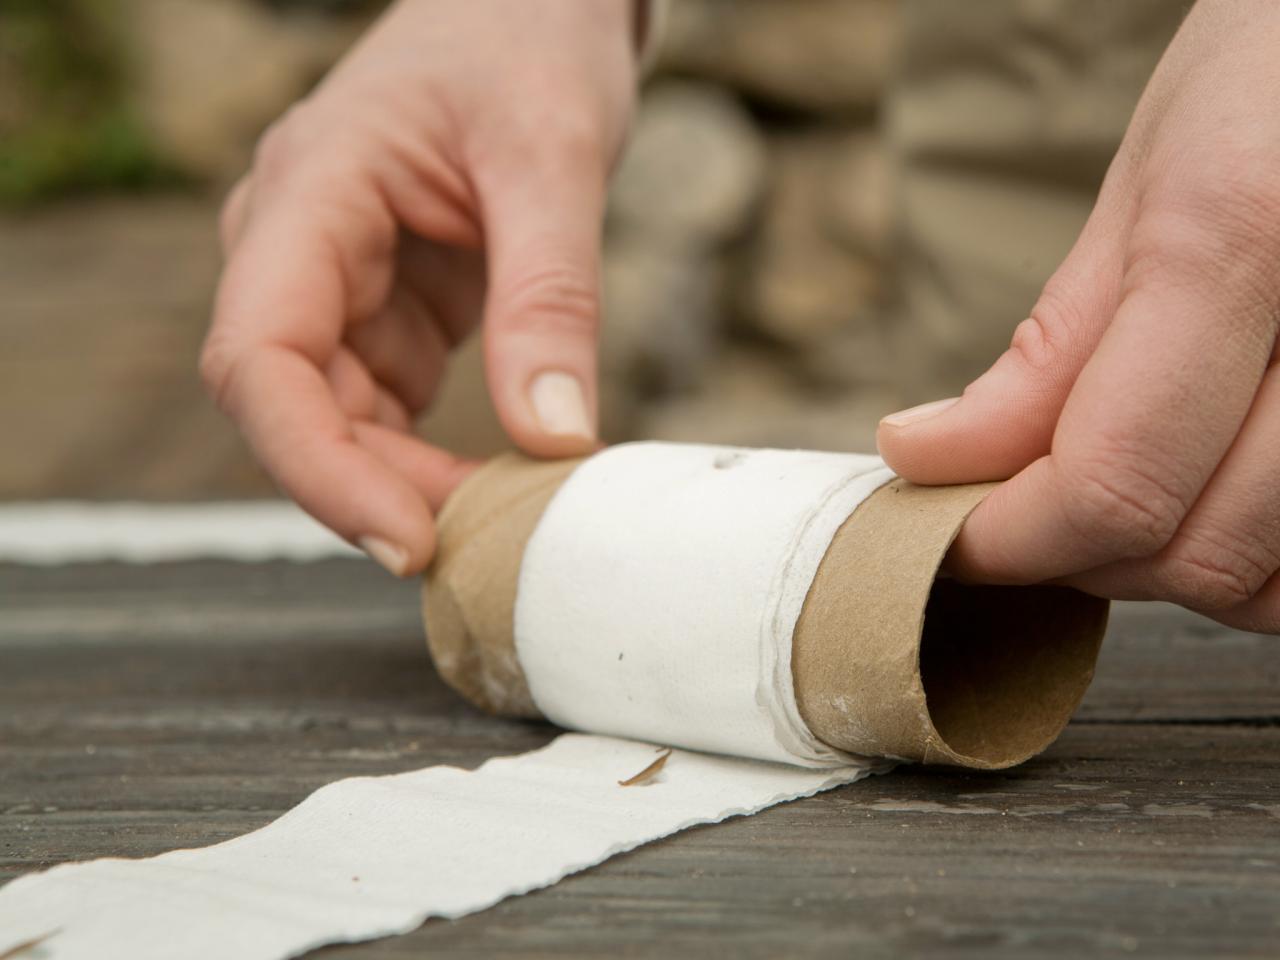
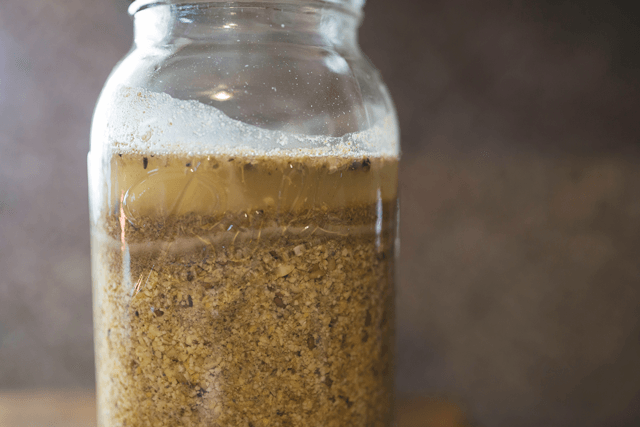
    Starting a fire, even in a fireplace or a wood burning stove takes time, time and kindling.  It’s much more convenient to use a starter log.  But starter logs cost about $5 a piece, and that quickly adds up in the winter.  This video demonstrates how to make starter logs yourself, from material and tools that you likely have on hand already.  So don’t spend your cold mornings in front of a stubborn fire blowing on kindling that doesn’t want to start.  Make your own DIY starter logs and get your house warm quickly and easily.


    If you enjoyed this, you might also like….

    Home Defense in the End Times…

    Natural Healing Secrets You Need to Know…

    Eat Like Your Ancestors…

  • Dollar Store First Aid Supplies

    Dollar Store First Aid Supplies

    It’s really important to keep a well-stocked first aid kit on the homestead. Scrapes, scratches, and bruises are common, and you also might live far away from a medical clinic or hospital and will need to tend to more serious wounds or illnesses yourself at times.

    There are a multitude of pre-made first aid kits out there, of course, but sometimes these are value-added products that are not worth your money. It’s better to build one yourself, for a few reasons. It’s more affordable, it’s easier to replace items as they diminish, and you can tailor it for the injuries and conditions you most anticipate in your area.

    Dollar stores are a great place to get your first aid kit going. You might want to invest a bit more money in a sturdy box for your first aid kit at Walmart or from Amazon, just so you can get something durable that will last, and then fill it with supplies from a dollar store.

    Here are some items to keep an eye out for, to stock your first aid kit and also to hoard for emergencies or disasters:

    Bandaids & Bandages 

    Usually the #1 item you run to your first aid kit for, you can almost never have too many. You can stuff them into Ziplock or vacuum-seal bags to have a backup for your first aid kit so you don’t fill it up with bandages and bandaids.

    Hydrogen Peroxide 

    This is another great item to get from the dollar store, as it’s cheap and also great to have a good supply of. You can use it to sanitize wounds and surfaces.

    Isopropol Alcohol 

    Isopropol, or rubbing alcohol, is another great item to have that you can get dirt cheap at a dollar store. It can be used to clean wounds and keep equipment like tweezers or needles (if you need them) sanitary.

    Vinyl Gloves

    Continuing in the trend of keeping things sanitary, vinyl gloves are also very important for treating wounds, and especially if you anticipate needing to do your own minor medical procedures like delivering a baby or sewing up a wound. Vinyl gloves have all kinds of general uses on the homestead, too!

    Painkillers

    You can usually find cheap, generic painkillers like ibuprofen and aspirin at dollar stores, and these are always great to have in your first aid kit.


    Other items you could stock up on would be things like q-tips, medical tape, antibacterial soap, etc. Just check your local dollar store out and see what they have!

    If you liked this, you might also enjoy…

    Holistic Medicine Basics

    Ever Considered Taking Yoga? Read this

    The Ultimate Woodworking Course..


  • DIY Scrap Mouse Trap

    DIY Scrap Mouse Trap

    Mice can be a real problem, this time of year they aren’t satisfied with staying outside.  This means that they will bring all of their diseases with them, if you let them.  Exterminators can be expensive, and traps can too.  My favorite store bought trap is the igloo-like electric trap, and that can cost as much as $50 depending on where you get it.  Poisons can be dangerous to children and pets, and might leave a dead animal trapped in your walls rotting.  Like always, it’s better if you can just do it yourself.  Here is a video demonstrating and explaining the building of an inventive DIY mouse trap made from material that you might already have laying around your house.  It is a live trap, which not everyone prefers, but if you want it dead you can always kill it after catching it.  Good luck.

    If you liked this, you might also enjoy…

    A Simple System for Natural Health…

    Is Yoga for Everyone?

    Carpentry Skills for the Average Person..


  • DIY Calamine Lotion

    DIY Calamine Lotion

    If you’ve ever had poison ivy, poison oak, hives, or any other kind of severe skin irritation that causes itching, you’ll know just how soothing calamine lotion can be. I always thought it was something specific, but it turns out the ingredients will probably be pretty familiar to you if you have a basic natural first aid arsenal.

    Even if you’ve never made your own home remedy, this is still an easy remedy with simple ingredients that aren’t too hard to find if you know where to look. Kaolin or bentonite clay are normally available at a health food store, while glycerin and zinc oxide can be found at a soap making supplier, or simply online. They’re not too expensive, and they’re a great staple to have for DIY lotion, home remedies and beauty treatments.

    Essential oils can also commonly be found at a health food store, or from a local supplier. A lot of essential oil companies have network marketers, like Young Living or DoTerra, so if you know anyone who posts constantly about essential oils, odds are they’ll happily sell you some. These also make great additions to your natural health arsenal and most essential oils have a variety of uses, particular lavender and tea tree.

    Here’s what you need: 

    1/4 cup zinc oxide
    4 teaspoons pink Kaolin clay or bentonite clay
    4 teaspoons baking soda
    1/4 cup water
    1/2 teaspoon glycerin
    3-4 drops lavender, peppermint, camphor, tea tree, or other antibacterial essential oil (optional)

    Instructions

    1. Combine all the ingredients in a bowl. Make sure to be very careful not to inhale the zinc oxide; its safest to use a mask.
    2. Whisk everything together, blending until smooth.
    3. Store in the refrigerator for 1-2 weeks, or, to have on hand, blend the dry ingredients and keep together in the cupboard (out of reach of children), and when someone gets itchy skin, blend together with the water, glycerin, and essential oils to make the lotion.

    If you enjoyed this, you might also like….

    Home Defense in the End Times…

    Natural Healing Secrets You Need to Know…

    Eat Like Your Ancestors…


  • Natural Antibiotics That Are Better Than a Perscription

    Natural Antibiotics That Are Better Than a Perscription

    This time of year there are all kinds of bugs in the air, and you’re bound to get sick sooner or later. A lot of people will rush right to the doctor to get antibiotics if they suspect an infection, and antibiotics certainly are amazing miracles of modern medicine.

    But they can also be harmful to your immune system and will wreak havoc on your gut bacteria, which are necessary for a healthy body. Rather than resort to antibiotics right away, why not try some natural antibiotics first? These are some great options for natural remedies of all kind, and you’ll recognize most of them from other posts on natural remedies and healing.

    They are better than prescriptions for infections because they’re cheaper, they’re natural, whole, you can find them at your local grocery store, and they do not have the harmful side effects of anitbiotics. Stock up on some of these this winter to stay healthy and get over sickness fast!

    1. Apple cider vinegar

    Apple cider vinegar is good for almost everything. Most people don’t like the taste, and it is quite intense for sure. But this fermented superfood is amazing for killing bacteria and balancing the immune system. You can put in water, juice, or tea, or simply incorporate with your food over salad or in sauces, as you would vinegar.

    2. Raw Honey

    Raw honey is a powerful antibiotic, with natural properties that fight bacteria and illness. It also has beneficial prebiotics that regular gut flora, so even if you are taking prescription antibiotics, you could take raw honey in addition to support your digestive system.

    3. Coconut Oil 

    Coconut oil has been very popular in recent years, for good reason! It contains powerful acids that can kill bacteria and regulate the immune system and gut flora (noticing a pattern here? Gut flora health matters!). The healthy fat found in coconut oil is also great for you, and together with the natural antibiotic properties of coconut oil can help fight infection, both inside the body and externally!

    If you liked this, you might also enjoy…

    Holistic Medicine Basics

    Ever Considered Taking Yoga? Read this

    The Ultimate Woodworking Course..

  • Rope Making (Video)

    Rope Making (Video)

    When it comes to homesteading, I love plotting and planning for as much self-reliance as possible. And a huge part of that includes supplies. I love to see how other people make their own supplies, and this rope-making video is pretty cool.

    They have a pretty cool little contraption that wouldn’t be to difficult to make, and it’s really awesome to see the way they suspend the pieces of twine out on it and carefully twist the rope together. Check it out!

    If you liked this, you might also enjoy…

    Become A Master Healer With This Revolutionary Course…

    Traditional Hindu Yoga for Weight Loss

    Improve Your Carpentry Skills Quickly and Easily..

  • Seed Tape   

    Seed Tape  


    At $3 or more per packet, seeds can be one of the primary costs of gardening, especially if you are starting a new garden or expanding the crops you are growing.  To some extent, it is an unavoidable cost, but all too often seeds are wasted and the cost of your garden grows needlessly.  One of the most common causes for this is not properly spacing the seeds when they are planted.  Seed tape is a great way to prevent this from happening and save you a lot of money on your garden budget.  Here’s what you need and now to get started.


    Materials

    • Seeds, you really only need to make seed tape for seeds that are so small they are difficult to handle individually with your fingers.
    • 2-ply toilet paper
    • All purpose flour
    • Water

    How to Make it

    1. Measure out a length of toilet paper to the length of your raised beds, or the shortest length if your beds are not the same size.
    2. Split the toilet paper. Separating the 2 plies from each other.  This will give you more paper to work with and make it easier on your seeds to sprout.  You don’t want to leave it intact.
    3. Spread the toilet paper out on a surface large enough to work on.
    4. Mix the flour and water together until you have a paste. This paste will be used to hold the seeds in place on the toilet paper.  It should be a little thinner than toothpaste.
    5. Spoon out a small amount, about the size of your thumbnail, of the flour paste on to the separated toilet paper. Place a dab of paste every 3 to 4 inches down the paper, about one per square on most toilet papers.  Do not place the dab directly in the center of the paper, but rather about 1/3 of the way up from the bottom.  This is to allow for the top to be folded down on top of it later when you are done.
    6. Now, place a seed, or two seeds if you are using seeds with a low germination rate, on each dab of flour paste. When you reach the end of the toilet paper, fold the top over.
    7. Carefully roll the tape back up, and then just unroll the tape in your garden bed and cover with a light layer or soil or fine compost and water in.

    In only a few minutes you can make several feet of seed tape, and at the price of seeds, and of pre-made seed tape it is well worth the time and effort.

    Natural Healing Techniques Doctors Don’t Want You to Know…

    The Weight-Reducing Magic of Yoga…

    The Ultimate Woodworking Course..

  • How to Make Fermented Chicken Feed

    How to Make Fermented Chicken Feed

    Us humans love fermented food. It’s not just kombucha and sauerkraut for hippies, most of us eat fermented food in the form of beer, wine, cheese, yogurt, vinegar, pickles and sourdough and levain-style artisan breads, which are all fermented when traditionally made.

    I’m a big fan of fermentation because not only are most fermented foods delicious, they’re also packed with beneficial bacteria that can heal your gut and improve overall health tremendously.

    So when I first heard about fermented chicken feed, I was instantly intrigued. If you’re rolling your eyes, I understand, it definitely sounds like a pretty hippie thing to do. But plenty of happy chicken owners report that their chickens go crazy for fermented feed and lay more eggs when they’re fed it regularly!

    It’s also very simple to make.Here’s how you do it it:


    1. Starting with the feed you already give your chickens on a daily basis, take the amount of feed you normally give to your chickens in one day, and put it in a jar with a lid (a quart or half-gallon mason jar will probably be perfect)
    2. Cover with filtered water so that the feed is completely submerged, with at least an inch of water covering it
    3. Put the lid on and let sit for three days (at this point, you could start a new batch on the second day, and again on the third day, and so on as you use the first day’s batch up, so that you have a new one every day to use. But you also might want to try out just one batch at first so that you can make sure your chickens will like it before using up that much chicken feed!)
    4. After three days, drain, and feed to your chickens!

    I hope your chickens enjoy this and repay you with lots of eggs. Enjoy!

    If you liked this, you might also enjoy…

    Become A Master Healer With This Revolutionary Course…

    Traditional Hindu Yoga for Weight Loss

    Improve Your Carpentry Skills Quickly and Easily..