Page 13 of 15
1 11 12 13 14 15
diy – Page 13 – Homesteader Depot

Tag: diy

  • DIY PVC Hoop House (Video Instructions)

    DIY PVC Hoop House (Video Instructions)


    It’s getting cold, and your crops are certainly feeling it when they are left exposed.  A greenhouse is a great thing to have, but they are also expensive.  A cheaper alternative is a hoop house.  There are lots of videos that people have put online of their hoop houses and how they built them, but they all seem to still involve framing out the back and front with lumber and putting a swinging door on.  These luxuries can double the cost and difficulty of constructing it for those that aren’t carpenters or don’t have the tools necessary.  Here is a video of step by step instructions showing how to make a PVC hoop house using only PVC conduit, rebar, rope, wooden stakes, and the plastic sheeting that covers it.  The hoop house in the video is for large row crops, but the basic design could easily be sized down to cover raised beds in your garden.  One detail that he does leave out that might help you is to leave the PVC out in the sun to heat up to make it more flexible.  And remember, even if your garden has already stopped production, having a hoop house can also add to your growing season by allowing you to start your crops earlier in the spring.  Hope this helps!


    If you liked this, you might also enjoy…

    Learn to Heal and Treat Illnesses Naturally…

    An Ancient Secret to Slimmer Waists…

    Learn to be a Master Carpenter at Home...

  • Fire Cider Recipe

    Fire Cider Recipe

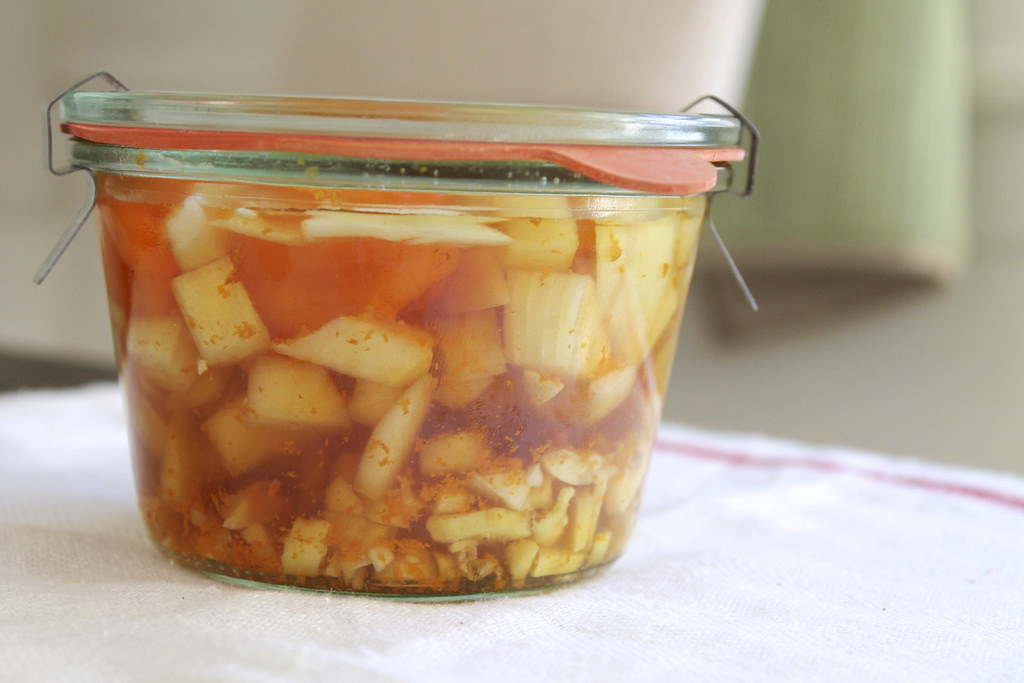
    Fire cider is a great recipe for health through the winter and warding off colds and flus. You can take regularly or whenever you are sick, as a remedy. It’s an old folk recipe that has many variations, this is just one of course. If you know anyone who makes it, ask them how they do it!

    It takes a month to properly ferment, but once it is complete you can take it by the spoonful as needed or add to juice or even as a flavoring to chicken or rice dishes. It lasts a long time so make a big batch once or twice a year and see how many different ways you can incorporate it into your cooking or health routine. Those who make it generally rave about it so give it a try and see how you like it.

    Ingredients: 

    • 1/2 cup grated ginger root
    • 1/2 cup grated horseradish
    • 3 tbs grated turmeric root or 1 tbs powdered turmeric
    • zest and juice from 1 lemon
    • 1 onion, chopped
    • 2 large hot peppers, chopped
    • 10 cloves of garlic, chopped
    • 2-3 sprigs of fresh rosemary or 2 tbs dried rosemary
    • 2-3 cayenne peppers or 1 tbs cayenne powder
    • apple cider vinegar
    • raw honey

    Recipe:

    Note: you will probably want to wear gloves while preparing this, and have your kitchen well-ventilated! If you are sensitive to onions and peppers, you might even want to consider covering your face and breathing carefully while you chop the onion and peppers.

    1. Prepare all your ingredients, carefully, and place them in a quart-sized jar.
    2. Cover with the apple cider vinegar. Stir all the ingredients vigorously.
    3. Place a piece of thin cloth over the top, and secure the lid over it.
    4. After a month, strain out the pulp and pour into a bottle or jar. Make sure to arefully squeeze all the juice out of the pulp.
    5. Once in your bottle or jar, stir in the honey. Add as much or as little as you like to get the desired sweetness
    6. Keep in  your cupboard and use as desired!

    If you liked this, you might also enjoy…

    Natural Healing Techniques Doctors Don’t Want You to Know…

    The Weight-Reducing Magic of Yoga…

    The Ultimate Woodworking Course..

  • Making Non-Toxic Paint

    Making Non-Toxic Paint

    Buckets of paint don’t come with severe warnings about the dangers of the near inevitable contact with skin or inhalation of the vapors coming off the paint for no reason.  Many people think that there is just no alternative to using these toxic substances in their homes.  But what did people use prior to toxic commercially produced modern paints?  One old time paint recipe that some still use today, especially in baby rooms, is made from milk and a few other ingredients.  So before you coat your baby’s crib or the walls of his room with carcinogenic substances consider this non-toxic alternative.


    Ingredients

    For approximately 1 gallon of paint you will need 1 gallon of skim milk, 2 cups white vinegar or lemon juice, ¾ cup of hydrated lime, and 8 ounces of dry pigment.

    Making the Paint

    Pour 1 gallon of milk into a container that holds 1 gallon and allows for more room.  Let the milk sit out until it reaches room temperature.

    Pour in the vinegar or lemon juice and stir.  Curdling should begin immediately, stop stirring and allow this mixture to sit over night at room temperature.

    Now get all your other ingredients ready so that you can mix them with the milk and use the paint quickly since milk paint will spoil.

    Mix your pigment with equal an equal amount of water until it becomes a homogeneous paste.

    Mix the lime with 1 ½ cups of water until it is evenly moist.

    Pour the milk that has now separated into a colander that is lined with cheese cloth so that can collect the solids, this is the portion that you will be using in the paint.

    Transfer the curd solids into your paint bucket, then add in the wet lime paste and stir until it becomes the consistency of paint.  You may need to break down some of the larger pieces.  Then add in your wet pigment and thoroughly mix.

    You will need to continue to stir regularly while you applying the paint.

    Unused paint can be stored in your refrigerator for a few days, but it works best when fresh and should be thrown away when separation occurs.


    Even paints that are marketed for being “green” have warnings on the containers about toxic fumes and other dangers.  Instead of paying more for a slightly different mixture of toxins, why not make your own food based paint so you don’t have to worry about it?


    If you enjoyed this, you might also like….

    Last Resort Home Defense and More…

    Natural Healing Secrets You Need to Know…

    The Healthy Primal Diet Everyone Should Try…


  • DIY Vapor Rub Recipe

    DIY Vapor Rub Recipe

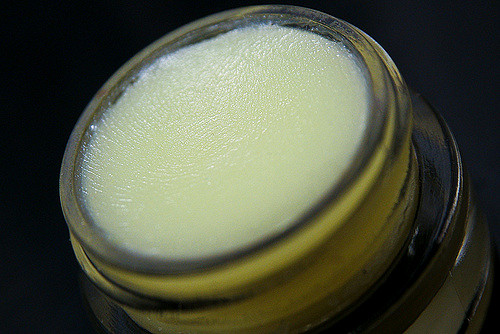
    Cold and flu season are no fun, especially if you are experiencing bad congestion that makes it difficult to sleep, breathe and go about your daily business. Vick’s is the classic remedy for terrible congestion, but it’s actually petrolium-based, which is pretty much as bad as it sounds. Who wants to add carcongens to an over-the-counter cold remedy?

    This natrual and homemade alternative is not only much safer and healtier, it also smells even better and is more effecive. Also, if you make the initial purchase of these basic ingredients, the essential oils will probably last for years of many recipes. A little bit of this healing rub goes a long way, too!

    Here’s how you make it:

    Ingredients: 

    1/2 cup olive, coconut or almond oil

    2 tablespoons beeswax (pellets are easiest to measure and use)

    20 drops eucalyptus essential oil

    20 drops peppermint essential oil

    30 drops camphor essential oil

    Small jar with lid (an old baby food container or something similar works really well)


    How to Make It: 

    1. Fill a shallow, small skillet with about half an inch of water and place on the stove.
    2. Measure out your oil and beeswax into your jar. Put the lid aside for now
    3. Place the jar in the skillet and put your stove to low
    4. Keep an eye on it as the water heats up; the beeswax will begin to melt
    5. Once the oil-beeswax mixture is totally melted, carefully remove the jar from the skillet
    6. Add all of your essential oils to the jar and blend, using a popsickle stick or some other disposable utensile, as beeswax can be very hard to clean off regular metal spoons or forks
    7. Place the lid on the container and set the jar aside to cool
    8. Once it has cooled, it’s ready to use!

    How to Use:

    You can keep your jar of vapor rub in the cabinet just as you would any other balm or ointment. It will last virtually indefinitately. When you are sick, apply a modest amount to chest, back and feet. It can cause a bit of a hot/cold sensation though, so you might want to try just a little bit at first to see how much you can handle and then apply more accordingly.

    If you liked this, you might also enjoy…

    Natural Healing Techniques Doctors Don’t Want You to Know…

    The Weight-Reducing Magic of Yoga…

    The Ultimate Woodworking Course..

  • How to Make a Double-Sided Draft Stop

    As winter rolls in and temperatures drop, you don’t need to freeze in your own home to keep your heating bill from climbing.  Drafts can be a major source of heat loss, even inside your home from unheated portions that are not in use.  Here is a great instructional video with simple to follow instructions on how to make a double-sided draft stop for doors.

    This is only a basic demonstration, you can substitute materials to fit what you have available, like using dried pop-corn instead of the pool noodle, or an old pair of jeans instead of new fabric.  You can even make a one-side, version with custom dimensions for a drafty widow.  Hope this helps keep you warm this winter.


    If you liked this, you might also enjoy…

    Natural Healing Techniques Doctors Don’t Want You to Know…

    The Weight-Reducing Magic of Yoga…

    The Ultimate Woodworking Course..

  • Homemade Root Cellar

    Freezing your food is a great way to preserve it.  But if your freezer breaks, there’s no reason to take it to the dump.  You can still use it to preserve your food by converting it to a mini-root-cellar.  You will be able to store potatoes, carrots, onions, and other crops through winter and into spring without the need for electricity.  Here’s how…

    The first step is to remove the mechanical components.  This could include Freon, which involves using more care and disposing of it properly so you don’t contaminate your area.

    After you have stripped the freezer you are going to cut two circular holes in the sides.  The holes will be used to install PVC pipes for ventilation, so cut them to the size of the pipes that you will be using.  Ventilation is important to prevent spoiling so don’t go too small, the larger the freezer the more ventilation you will need.  The holes should be directly above each other, one neat the top of the freezer, the other near the bottom.

    Next, assemble your PVC pipes.  Place short pieces in the holes in the freezer, then hold a longer piece (it needs to extend at least 1 inch below the bottom hole, and about 12 inches about the top of the freezer (more in places with harsh winters).  Mark on the longer vertical pipe where you will need to cut it to attach it to both shorter pieces that enter the holes on your freezer.

    Once you have assembled the PVC pipes, they should look like upside-down “F”s.  Next, carefully drill some holes near the end of the vertical pipe.  These will be your root cellars only ventilation so you want to drill plenty of holes.  Then cap the top and bottom of the vertical pipe.

    Next, attach the assembled PVC “F”s to your freezer, caulk them in place to secure them, seal the gap, and insulate.  Next, wrap some wire mesh over the ends of the pipes and attach this to the pipes with hose clamps.  This is to keep out bugs and rodents.

    At this point, your freezer is ready to be buried.  If you live in a place with a harsh winter you will want to bury your freezer so that the top is at least 12 inches from the ground level, this is why you needed to make your vertical pipes longer than those with mild winters.  If you live in a place with a mild winter you can make the top of your freezer nearly flush with ground and cover it with plywood and a tarp or whatever you have available, you are done.  If you have your freezer deeper to avoid freezing, you will need to fill in the gap with something light enough to remove when you want to access your root cellar, but that will insulate well enough to prevent freezing.

    Don’t waste time and energy growing crops that end up spoiling because you don’t have room to properly store them.  Make yourself a root cellar this year so you can enjoy all the fruits of your labor.

    If you liked this, you might also enjoy…

    Learn to Heal and Treat Illnesses Naturally…

    An Ancient Secret to Slimmer Waists…

    Learn to be a Master Carpenter at Home...

  • Dandelion Balm for Aches and Pains

    Dandelion Balm for Aches and Pains

    Keeping your homestead in working order is bound to give you sore muscles, joint pain, and irritated skin from time to time.  Luckily you probably have the cure outside in your lawn.  Dandelions can be used in a balm to help treat soreness and skin irritation.  All you need other than dandelions are some oil (olive, coconut, almond, or sunflower will work), bee’s wax, and some canning jars.


    How to Make Dandelion Balm

    1. Gather up all the dandelions that you have available.
    2. Next, you want to dry them out so that your balm isn’t watered down.  Spread them out in a single layer on some cardboard, lay some paper towels over them, and put them somewhere they won’t be disturbed.  Preferably where they can get some light from a window to speed the drying.
    3. Once they have dried out (this could take a day or even two depending on the moisture in your environment) you can infuse the oil.
    4. Fill a canning jar no more than ¾ of the way up with your dry dandelions.  Then pour your oil over them until it is an inch or two higher, or near the top.
    5. Place the filled jar in a pot with a few inches of water in it, and bring it to a low heat.  You will need to continue to heat the oil for several hours.  The color of the dandelions should bleed out and change the color of the oil.  If you want your balm to be stronger, you can let the infused oil sit for a few days in the dark, or if you have more dandelions you can strain out the used ones and redo the process with new dried dandelions.
    6. Now you need your wax, you will need about 1 part wax for every 7 parts infused oil.
    7. Put the oil and the wax in a container(s) that can hold both of them and be heated, like a canning jar, and put these into a few inches of water to heat just as before.  This time, you only need to heat it until all of the mixture has melted together.  Then while it is still liquid, pour it into smaller jars.  If you leave it in a quart jar you will have a hard time getting it out with your fingers to apply when it gets lower than 20 ounces since it will be out of reach.

    Don’t let aches and pains keep you from getting work on your homestead done when the cure is right outside.

    If you liked this, you might also enjoy…

    Natural Healing Techniques Doctors Don’t Want You to Know…

    The Weight-Reducing Magic of Yoga…

    The Ultimate Woodworking Course..


  • How to Make a Fly Trap

    How to Make a Fly Trap

    Not only are flies annoying, but they are disgusting too.  They can spread diseases just by landing on your food, without your even noticing.  They can ruin the time you spend outside trying to relax, and they can sneak inside every time you open the door.  And while raising animals and having a compost pile may increase their numbers, even if you have no animals and a near sterile yard, they can fly on over from your neighbor’s.  What can you do about it?  Trap them with a few things you probably already have laying around the house, and here’s how.

    How to make a fly trap:

    1. First gather up some materials, a symmetrical smooth plastic bottle (it can’t be a milk bottle or any type of bottle with a handle or ridges), some string or wire, some sugar, and some yeast or bread crumbs.
    2. Next, cut the bottle in two about 1/3 of the way down.  Remove the lid.
    3. Turn the upper portion of the bottle upside down and slide it into the lower portion until the two cut ends meet.
    4. This should leave the bottle top a few inches from the bottle of the bottle.
    5. Now, make a couple of holes through both pieces on opposite sides of the bottle just below the cut line that is now the top.  Thread the string or wire through the holes in whatever manner you like so as to allow you to use the string to hang the bottle by later.
    6. Finally, put a few spoons full of sugar and yeast or bread crumbs into the bottle, then carefully add water so that it comes about ½ inches or so from touching the upside down bottle top.  The trap will not work if the water line is too far below, or if it touches the bottle top.

    The trap functions by attracting the flies in, they have to land on the narrow opening and crawl in, but they will tend want to fly away instead of crawl around searching for an exit.  This will have them either up in the corners where they can’t get out, or drowning in the yeasty water that attracted them.

    Once your bottle trap is ready, hang it up in a tree or on a fence near your place.  Since it’s pretty easy and inexpensive to make, you might want to put one at each corner of your yard and one near your garbage can.  If you don’t see flies in your trap, adjust the water line or change your bait.  When the trap is full of dead flies you can wash it out if you like, but since it’s made out of trash anyway you can just throw it away and save yourself from a nasty task. Happy fly hunting!

    If you liked this, you might also enjoy…

    Learn to Heal and Treat Illnesses Naturally…

    An Ancient Secret to Slimmer Waists…

    Learn to be a Master Carpenter at Home...