Page 4 of 15
1 2 3 4 5 6 15
diy – Page 4 – Homesteader Depot

Tag: diy

  • How to Make a Silkworm Habitat (Video)

    How to Make a Silkworm Habitat (Video)

    One of the more obscure “animals” you can raise on your homestead, especially if you’d like to think about making a profit in the long-term, is silkworms. These little critters are where pure silk comes from, and, like bees, it’s common for them to be raised in indoor or artificial habitats so that their silk can be harvested.

    Silkworms love mulberry trees, and this video shows you how to make an artificial mulberry habitat to raise silkworms in. It was actually made by a 2nd grade teacher, so she could show her students how silkworms lived in their “natural” habitat, but I think it would translate very nicely to a starter silkworm operation for anyone who wanted to give it a try. This would be a really fun project if you’ve got kids, especially homeschooled children, so they could observe the lifecycle of the silkworms up close and personal.

    If you enjoyed this, you might also like….

    Long-Term Survival for Homesteaders…

    Natural Healing Secrets You Need to Know…

    Effective Primal Diet Hacks…

  • 13 Useful Ways to Reuse Eggshells

    13 Useful Ways to Reuse Eggshells

    If you raise chickens or simply eat a lot of eggs, you probably produce a lot of egg shells! And simply throwing them in the trash is a huge waste. Egg shells are loaded with beneficial nutrients and properties, and there are lots of ways to reuse them and make the most out of your chickens or grocery budget!

    First off, you need to make sure you store them properly. You might be able to get away with tossing them all in a 5-gallon bucket on your back porch, or, if that attracts pests or mold, you might want to take more precaution. Depending on how you reuse them, you also might want to sanitize them before storing.

    The easiest way to sanitize the egg shells is to rinse them off, the spread them out on a cookie sheet and bake at 350 degrees for about 15 minutes. This will kill any harmful bacteria that might otherwise fester in your eggshell stash.

    Then, simply store in any container of choice, and use as needed!

    Here are some of the many ways you can reuse eggshells around the house:

    Compost

    The easiest way to put your egg shells to good use is to add them to your compost pile! They’re a great addition to any compost operation, and one of the most highly recommended organic materials to start a pile. You can save up a lot to get your pile started, and just toss freshly used shells on your pile as time goes on. If you’ve got a compost pile, you’ve always got something to do with leftover egg shells!

    Garden Fertilizer

    Eggshells are a fantastic garden fertilizer, as they contain up to 97% calcium carbonite, as well as phosphoric acid, nitrogen, and calcium. You can grind them up in a food processor and sprinkle around your plants, or work into the soil of a new garden bed.

    Pest Control

    Eggshells also work as an excellent pest control! Use ground eggshells and sprinkle in a circle around any plants that have been attracting slugs or snails. The sharp fragments of eggshells will be very uninviting to these little pests, and have the added bonus of fertilizing your plants too!

    You can also deter cats (of all things) from using your garden as their own personal litter box by spreading roughly broken up egg shells around the edges. They won’t want to step on those with their delicate paws, trust me!

    Dietary Supplement

    You’ll want to make sure to use properly sanitized egg shells for this, and grind them up very finely. You can use a powerful food processor or a coffee grinder, and then add to gel caps or simply mix into food. This is an excellent source of calcium and other nutrients, and about as whole as it gets.

    Chicken Dietary Supplement

    Your chickens can benefit from those healthy nutrients too! Simply add to their feed for an added calcium boost. Their eggs will be very healthy, because they’ll be supplemented by, well, the exact nutrients they need for healthy shells!

    Seed Starts

    A very fun and clever way to use egg shells is to start seeds in them! Simply fill the shells with potting soil and plant seeds. Once they’re sprouted, all you’ll need to do is to gently crush the egg shell and plant directly in the ground! It will slowly break down as the plant grows, and fertilize the soil as it goes!

    Bird Seed

    Chickens aren’t the only birds who will enjoy your egg shells! If you crush them up and sprinkle them on the ground, you just might attract a few wild birds who will enjoy the nutritious treat.

    Household abrasive

    You can actually use finely ground eggshells as a handy, and totally natural, household abrasive. Add 1 cup finely ground egg shells to baking soda and use as you would Bon Ami for stubborn stains or grime. It’s excellent for cooked on grease and grime.

    Smoother Coffee

    You can actually add egg shells directly to your coffee to help reduce the acidity. Since egg shells are basic, they counteract the otherwise highly acidic coffee. Add a few egg shells in the machine with the ground coffee, or simply toss into your freshly brewed cup (although the former is probably preferable, I’m sure gritty coffee isn’t too appetizing to many people!)

    Natural Remedy

    Ground up eggshells can actually make a wonderful natural remedy for skin irritants. Let soak in some apple cider vinegar for a few days, and apply to minor rashes, hives, or bug bites.

    Face Mask

    You can even use eggshells in an all-natural, skin-firming face mask! Wisk up finely ground eggshells with 1 egg white, and spread on your face. Let dry, and rinse, following with toner and moisturizer.

    Suggested Article: “Apple Cider Vinegar for Beautiful Skin”

    Laundry Whitener

    This might be in the realm of old wives’ tale, but some say that if you toss some egg shells in with your whites, they’ll come out brighter!

    Candle Craft

    You can make adorable votive candles by pouring wax into an eggshell. Get creative with egg dying or colored wax! Very fun and frugal gift.

    Eggs are a fantastic food, and their shells are almost as versatile! Have you tried any of these eggshell hacks before? Let us know in the comments below.

    If you enjoyed this, you might also like….

    Long-Term Survival for Homesteaders…

    Natural Healing Secrets You Need to Know…

    Effective Primal Diet Hacks…


  • Homemade Non-Toxic Daily Shower Spray

    Homemade Non-Toxic Daily Shower Spray


    When it comes to the products you clean your shower with, it’s just as important to consider possible environmental toxins. While you might only think of dish soap or laundry detergent as coming into direct contact with your skin, hot showers can expose you to plenty of toxins if you’re cleaning with conventional products.

    Your epidermis, or skin, is the largest organ in your body, and in hot showers, your pores open up. If you’ve been cleaning with harsh toxins, they could be dissipating through the air and being absorbed directly into your skin. And you thought you were getting clean in the shower!

    The downside of not using toxic products is that mold, mildew, and soap scum can build up in your shower or bath fast. Harmful bleach and other chemicals can certainly keep this grime under control, but that doesn’t mean you can’t have the same ease and cleanliness with natural, homemade solutions!

    This incredibly simple and totally non-toxic daily shower spray is ideal for keeping your shower fresh, clean, and totally green.

    Ingredients:

    • 1 cup water
    • 1/2 cup hydrogen peroxide
    • 1/2 cup vinegar
    • 1 teaspoon dish soap
    • 20 drops essential oil of choice (optional)

    Directions: 

    1. Combine the water and dish soap in a large, non-metal bowl, until the soap is completely dissolved.
    2. Add the remaining ingredients and stir until completely blended.
    3. Pour into a clean spray bottle, and keep in your shower.

    To use, simply spray down your shower after each use. Try to coat all the walls and the corners evenly.

    That’s it! This will prevent soap scum build-up, mold, and mildew, and make weekly shower scrubbing a breeze.

    The world is full of harmful, toxic solutions to everyday problems, and it can be so easy to get enticed by products with promises like never having to clean your shower! Fortunately, there’s always a natural solution, and this easy, painless shower spray works just as well as the commercial alternatives. Enjoy!

    If you enjoyed this, you might also like….

    Long-Term Survival for Homesteaders…

    Natural Healing Secrets You Need to Know…

    Effective Primal Diet Hacks…


  • Homemade Cottage Cheese (Video)

    Homemade Cottage Cheese (Video)

    I love all things homemade, especially if it’s easy! This recipe for healthy homemade cottage cheese looks totally amazing, and I can’t wait to try it myself.

    The cool thing about recipes like this is that they are really simple and easy, and most of the time it takes to make them is spent straining the cheese. This cottage cheese is also very nutritious and an excellent source of healthy fat and protein.

    Check it out:

    If you enjoyed this, you might also like….

    Long-Term Survival for Homesteaders…

    Natural Healing Secrets You Need to Know…

    Effective Primal Diet Hacks…

  • How to Get Your Kids Outside With a Natural, DIY Playhouse

    How to Get Your Kids Outside With a Natural, DIY Playhouse

    When I was a kid, to play out in nature for hours on end wasn’t just a privilege–it was my natural inclination! Over just a few short decades, we’ve domesticated our kids and planted them firmly in front of glowing screens and in school desks, and we wonder why so many problems crop up. For the cooped-up kid, a day outside is the best medicine. Here’s a great little project to turn a small patch of land into a seasonal, living, and edible playhouse, and it’s even easy enough for your children to help you build it!


    The Runner Bean Teepee

    What You Need:

    1) 8 – 10 long bamboo canes (6 to 7 feet minimum, all the same length).

    2) Gardening twine or zip ties.

    3) A packet or two of runner bean seeds.

    4) A large spool of gardening twine or a roll of chicken wire (optional).


    How to Build It:

    1) Choose a spare area of garden, either on a border, or on the lawn. Choose a spot where you’ll be okay with the kids playing.

    2) To create the circular frame of your teepee, push the bamboo canes into the ground, starting with four equidistant canes and filling in the spaces between. Leave a large gap between two of the canes for an entrance. Secure the tops of the canes together using the twine or zip ties. At this point, it should look like the frame to a teepee.

    3) For best results, reinforce the teepee frame with either chicken wire, or a network of gardening string.

    4) Dig one square foot (12″ by 12″ and 12″ deep) around the base of each bamboo cane.

    5) Add compost, aged manure, or seed-starting soil.

    5) Sow two runner bean seeds approximately 1 to 2″ deep at the base of each cane.

    6) As you sow each seed, fill the hole with water. Once the water has drained, gently cover the hole with soil and water once more. Depending on your climate, you may also start your runner beans early in 3″ pots and transplant when they reach about 6″ tall.

    7) The bean plants should find and cling to the bamboo naturally. If they don’t, you can carefully wrap the main shoots around the first part of the bamboo canes or chicken wire until they start to climb on their own.

    8) Keep weeds down and moisture in using grass clippings or bark chips around the young runner bean plants. Water frequently. You may start to see slugs preying on your seedlings–no matter! Remove the slugs every evening until the bean plants are about 6″ tall. Once the plants start producing, harvest the beans regularly to encourage growth!


    Now you and your children can watch as the beans quickly grow and cover the frame to create a living playhouse! Your kids will love the “job” of harvesting their own beans, and the satisfaction of having built something so fun! Start growing early in spring, and this playhouse will last ‘til the end of summer.

    If you enjoyed this, you might also like….

    How to Lock Down Your Homestead…

    The Ultimate Guide to Natural Health…

    Effective Primal Diet Hacks…


  • How to Make Natural, Raw Sour Cream

    How to Make Natural, Raw Sour Cream

    Sour cream is a delicious staple condiment of American cooking, that can greatly enhance the taste of many delicious dishes, from potato pancakes, to baked potatoes, to nachos.

    Most people will be familiar with the store-bought version, a thick, gooey cream that comes in a plastic container and often with additives and even artificial flavoring. But did you know you can very easily make your own at home?

    Like pickles, homemade sodas, yogurt, and sourdough, sour cream is one of the many delicious, healthy, and easy home fermentation products that anyone can try themselves. And it just so happens to be one of the easiest! You don’t need anything at all but raw milk. However, that the milk you use be raw is essential. Pasteurized milk, that has been heated to very high temperatures to kill the bacteria that naturally occurs in the milk, simply won’t sour the way cream from raw milk will, and it is also homogenized, meaning the cream won’t naturally separate for you to harvest.

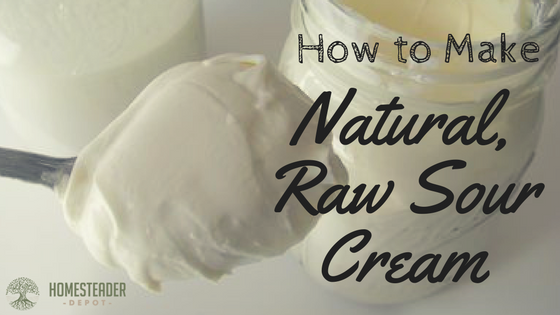
    When you buy fresh, raw milk, if you let it sit for awhile, cream will naturally separate on the top, and this is what you can use to make sour cream. Here’s what it looks like:

    As you can see there is a distinct line between the cream on top, and the milk. That cream is what you use to make sourcream. Also, if you have milk that has naturally soured before you were able to use it up, you can use the cream on top for sour cream. This is a great way to use up soured milk!

    Here’s what you do: 

    Skim the cream off the top of your raw milk, and place in a small jar. I find a metal measuring cup works best for this, but you can use anything you can dip into the cream and extract it, without mixing the milk in with the cream.

    If you get a small amount of milk in with the cream you’re skimming, don’t worry, it will naturally separate later.

    Once you’ve collected all your cream and put in a separate jar, cover loosely with the lid, and leave on your countertop for 24 hours. After 24 hours, taste and smell it, to see if it has soured. It should have thickened in this time, although it won’t be as thick as store-bought sour cream. Depending on the weather, it might need another 24 hours, just use your own judgment and preference.

    When soured, tighten the lid, and put in the refrigerator, will it will thicken even more. Use as you would regular sour cream, and enjoy!

    If you enjoyed this, you might also like….

    Do You Have What You Need to Hold Down the Fort?

    Natural Healing Secrets You Need to Know…

    Effective Primal Diet Hacks…


  • How to Make Pickles at Home

    How to Make Pickles at Home

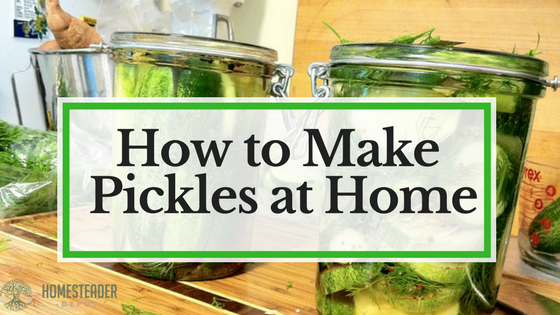
    Pickles are one of the most classic and widely recognized forms of brine preservation. While the term “pickled” can apply to various forms of preserving various kinds of vegetables, what most of us think of when we think of “pickles” is the classic, brine-preserved cucumber that has become a staple of delis and diners across America. It most famously made its way into the American diet through Jewish delis in New York City, and, like any classic food, it can be made easily at home.

    While the formula is simple, however, there can be a bit of trial and error involved, and anyone who’s successfully made pickles can probably attest to this. There have probably been hoards of gray-haired European grandmothers throughout the ages who have perfected the art of delicious, crunchy, perfectly-pickled cucumbers, but for those who didn’t grow up learning at their Bubbie’s knee, it take a bit of practice.

    Fortunately, we can still learn from the masters, even if they’re not in our own family. Sandor Ellix Katz, author of Wild Fermentation: The Flavor, Nutrition, and Craft of Live-Culture Foods is not only an expert in the field of home fermentation, he also grew up in a Jewish community in Brooklyn, so he knows a good pickle when he, well, makes one.

    One of the most common mistakes made by first-time pickle makers is by only using a brine. This will result in mushy, soft pickles. What Katz discovered the hard way is that by adding fresh grape leaves, you can naturally preserve the crunchiness of the cucumber, as it absorbs the brine and takes on the delicious, salty sweetness that can only be acheived through pickling.

    To find fresh grape leaves is another story, however, and you might have some trouble, depending on where you live. Of course, if you grow grapes, you won’t even be worrying about this, but if you don’t, you can see if any homestead neighbors do. You can also check or ask at Middle Eastern restaurants or markets, or simply order dried ones online, which are a good substitute. You can also use black tea leaves. While grape leaves are the classic, black tea will perform the same function.

    This Odd Therapy Will Revolutionize Your Well-Being…

    The other crucial component is your equipment. We’ve included Katz’ suggestions, but there’s still room for improvisation. The important thing is to have a cyllindrical container and some way of weighing down the pickles so they remain submerged in the brine. See what you can come up with!

    So without further ado, here is Sandor Ellix Katz’ recipe for classic kosher deli pickles!

    Ingredients 

    Yields 1 gallon 

    • Approximately 4 lbs cucumbers, pickling variety preferable
    • 3/4 cup salt (kosher or sea salt is best)
    • Dill, either fresh and flowering, or the dried leaves and/or seeds (whatever you can find)
    • Several cloves of garlic
    • Grape leaves (these help the pickles retain their crunchiness)
    • Black peppercorns

    Equipment

    • Ceramic fermentation crock, or food-grade bucket, both cylindrical
    • Fermenting weight or large plate that fits inside the bucket
    • Either: 1-gallon bottle filled with water OR a large rock that has been boiled
    • Clean cheesecloth or dish towel for covering

    Directions 

    1. Rinse the cucumbers carefully, to avoid bruising. If you are using cucumbers that haven’t been picked fresh that day, soak them for a few hours in chilled water.
    2. Bring half a gallon of water to a boil on the stove, then remove from heat and stir in the salt, making sure it dissolves completely. This creates the 5% brine solution.
    3. Let the brine mixture cool until you can leave your finger in it for at least 10 seconds without it burning.
    4. As you are waiting for the brine to cool, clean your crock or bucket thoroughly using hot water and non-antibacterial soap, as well as your weight or plate.
    5. Peel and crush your garlic cloves, and place those along with the dill, peppercorns, and grape leaves at the bottom of your crock or bucket.
    6. Next, place your cucumbers in the crock or bucket, and then follow with the brine.
    7. Place your weight or plate on top, and weigh that down with the jug filled with water or the boiled rock. If the brine doesn’t cover the plate or weight, add more brine with the ratio of 1 tbs salt to each additional cup of water.
    8. Cover your crock or bucket with the cheesecloth or dish towel. This will keep dust, bugs, and any other small debris out of the pickels.
    9. Store in a cool, dark place.
    10. Check daily. Scum may start to appear on the surface, so remove this.
    11. After a few days, taste your pickles to see if they’re ready. This part is largely up to your own taste, once they taste good to you, they’re done! There’s no rule here; as long as they’re fermenting well and you like the taste, you can remove them when you please.
    12. You can let them continue to sit for one to four weeks, taking some out to enjoy as you go. At some point they will become fully sour, at which point you’ll want to move them to the fridge to slow the fermentation process.
    13. To safely move them to the fridge, transfer to a jar if you don’t have room for your whole crock or bucket in the fridge, but DO NOT COVER for a few days, leaving the cheesecloth, dish towel, or a paper towel secured with a rubber band on the jar. After a few days, you can cover with the jar lid.
    14. These will keep for a long time in the fridge, so you’ll probably eat them all up before they ever go bad! Such is the beauty of fermented foods.

    Enjoy!

    The ONLY Reason You’re Failing the Paleo Diet...

  • Composting: Good Materials, Bad Materials, and Special Materials (Infographic)

    Composting: Good Materials, Bad Materials, and Special Materials (Infographic)

    Composting. So simple, at yet so complicated. On the one hand, I feel like it’s really easy to just throw together some biodegradable, nutrient-rich material, wet it, and let nature do it’s thing. On the other hand, there are a lot of important considerations to keep in mind when adding to compost piles, and there are items that are not great to have in your compost pile, for many reasons.

    While for the most part, it’s not too complicated to start your own compost pile, there are are few “what not to do” considerations to keep in mind, and I thought this infographic from MarcLanders.com was a great little guide. It’s got some items that are great to add to compost piles, some items to avoid, and some items that you can add, but require special preparation, and the instructions on how to do that.

    If you want to grow your own compost to naturally amend and fertilize your soil, it’s not too tricky to do it right, just follow these simple guidelines and you’re sure to have success. Enjoy!

    If you enjoyed this, you might also like….

    Can You Defend Your Family When SHTF?

    Natural Healing Secrets You Need to Know…

    Effective Primal Diet Hacks…