Page 1 of 3
1 2 3
food storage – Homesteader Depot

Tag: food storage

  • 9 Practical Emergency Foods And How to Store Them

    9 Practical Emergency Foods And How to Store Them


    Long term food storage is a good idea in many, many circumstances.  There are several basic food types that you should consider stocking up on that will last for years if needed.


    Beans

    Dried beans of every variety are super cheap and even easier to store.  Store them in a dark, dry and cool place for best results.


    Coffee and Tea

    Most of us consider ourselves in an emergency situation if we run out of coffee.  So, try to imagine going through an actual emergency without it…OH…THE HORROR!!!

    Just make sure you keep it in the right forms so it can last the longest.  Whole bean coffee stored in an air-tight container will last the longest.  This means you will also want to invest in a manual coffee grinder, in case the power goes out.  Of course, if all else fails, stick the beans you want to grind into a paper or plastic bag and start hammering.

    Tea is usually sold in sealed containers, so they store nicely until opened.  Then keep them in a cool, dark and dry place to avoid them becoming stale before you have the chance to brew them up.


    Fats

    The human body requires a certain level of fat intake to function properly.  We also use it to cook and bake, making it a staple of any person’s pantry.

    Butter, lard, olive oil, coconut oil and more can be stored for extended periods of time.  Butter can also be frozen if you have some in surplus.

    Additionally, coconut oil can also be used as a moisturizer and for a whole bunch of other functions including:

    • Body Moisturizer
    • Cuticle Softener
    • Face and Eye night cream
    • Facial Cleanser
    • Hair Conditioner
    • Lice Treatments
    • Shaving Cream
    • And soooooo much more.

    Store your all your non-animal fat sources at room temperature and away from heat and excessive light. Butter can also be stored at room temperature for easy spreading.

    Honey

    Honey never goes bad and is one of nature’s miracle foods.  Store honey out of direct sunlight.  Sometimes older honey may crystallize or harden.  If this happens, you just need to place the container its stored in, into hot water until it “melts” back into its thick syrup-like consistency.


    Oatmeal

    Oatmeal is inexpensive and can be used a number of ways including ground up to use as a flour substitute. Just keep it in a dry place.
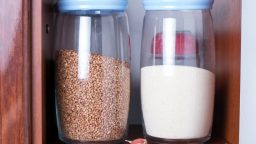
     

    Rice

    When it comes to really long-term storage, white rice is the best option.  While not as nutritionally packed as brown rice, it contains less oil so it won’t become rancid.  Rice is a good item to have to make meals stretch a little further and then when paired with other foods, can add a variety of flavor and texture to your meal planning. Keep rice in an airtight container for freshness and to keep out the bugs.

    Suggested Article: 5 Simple Methods to Preserve Food


    Salt

    Salt can be used as a seasoning and a way to preserve food.  It’s also difficult to come by if the stores run out and it can’t exactly be grown in your garden. To keep salt safely stored and prevent its clumping together into one giant mass, store it in a sealed container, in a dry area.


    Sugar

    Essential for canning and baking, sugar is another one of those products that is hard to get if the stores run out.  Make sure it is stored in an airtight container to keep out pests, and placed in a cool, dry place.


    Wheat Berries

    Contrary to many other long-term storage food lists, flour isn’t the most idea.  While it can last for many months or even a year if stored perfectly, it can go rancid before you use it all, plus it can attract pests.

    Alternatively, wheat berries and other types of grain can be stored for several years.  Then, you can either grind them into flour or soak them to use as hot cereal. Two types to consider are hard white wheat and spelt. They should be stored in a cool, dry location.

    The Medicine Chest — how to deal with a disaster using alternative medicine. Check it out here>>>

  • 4 Nifty Alternatives to the Standard Root Cellar

    4 Nifty Alternatives to the Standard Root Cellar

    If you have your own garden and:

    • You’ve used all your canning supplies
    • Your freezer is full
    • Your friends refuse to take any fresher produce off your hands

    Chances are you may need to consider an alternative method of storing your crops rather than just letting them all rot in their earthy homes.

    In cases like these, a good root cellar is an excellent alternative to mass vegetable homicide.

    However, unless you already have a handy hole dug in the ground complete with a door to keep out foraging animals.  You may need a viable alternative.  Fear not!  Alternatives do live among us and for your convenience, we’ve compiled a list just for you.

    So, without further ado, here are 4 alternatives to a traditional root cellar.


    Metal Can Root Cellar

    What you’ll need:

    • A Metal Trash Can and lid
    • Waterproof tarp or other covers
    • Straw
    • Shovel

    How to Do It:

    This couldn’t be simpler.  Dig a hole deep and wide enough to fit the can into with 3-4 inches left above the ground level.  Set the can into the hole and backfill the dirt around the can.  Fill the can with your root produce and put on the lid.  Pile several inches of straw on top of the lid and cover with the tarp to keep out rain and hold the straw in place.


    5 Gallon Root Cellar

    What you’ll need:

    • 5-gallon bucket with lid
    • Drill
    • Shovel
    • Straw (optional)

    How to Do It:

    Similarly, to the metal can version, dig a hole to fit all but the top 3-4 inches of the bucket. Drill several holes in the bottom of the bucket to provide drainage for any moisture that may get in.

    Fill the bucket with the veggies, place the lid, cover with straw.

    Upcycle a Fridge or Freezer

    What you’ll need:

    • Old Chest freezer/fridge
    • 15-20’ of 3-4” diameter PVC pipe
    • 2 PVC elbow connectors
    • 2 PVC T connectors
    • Tarp
    • Shovel

    How to Do It:

    Remove all the working parts.  If your unit still has Freon, you’ll need to have a pro remove and dispose of it properly.

    Once everything not needed is gone, cut two holes centered vertically on each side the diameter of your PVC pipe.  Measure and cut your PVC pipe to fit into the connectors when they are attached to the holes you cut into each side.  Attach the piping combos to the holes cut into the sides.  These provide air circulation to avoid mold and mildew from developing and spoiling what’s being stored.

    Once the “plumbing” is in place, bury the unit up to the bottom of the lid.

    Suggested Article: “5 Simple Methods to Preserve Food”


    The Zeer Pot

    What you’ll need:

    • One small unglazed clay pot with a lid
    • One large unglazed clay pot
    • Sand
    • Duct Tape

    How to Do It:

    This idea is based on an ancient way of keeping water cool in the desert or other hot regions.  The general mechanics involve taking advantage of the cooling process that takes place when an object sweats.

    Like our bodies also do when we sweat, a vessel made of porous material, like terracotta clay, will cool as the small amount of moisture that seeps through the pores evaporates.  This evaporation creates a cool enough environment inside the vessel that would rival any crisper drawer GE or Maytag can develop.

    Depending on the size of the pots you are using, you will probably want to put together your Zeer pot in the location you are going to keep it. Otherwise, you may be stuck with lugging a very heavy contraption across your patio. You’ll want to keep it in a shaded location that provides good air circulation around the pot.

    Begin by using the duct tape to seal the premade hole at the bottom of each pot. Next, add an even layer of sand to the bottom of the larger pot, just deep enough so that when you place the smaller pot on top of it, the rims of both pots are even with each other.

    How to Store Food All Winter Long…

    While keeping the smaller pot centered inside the big pot, fill the area in between with the sand and pack down. Once you’ve filled that area between the two pots with sand and evened it out on top, start adding water.  Continue to carefully add water until the sand is completely soaked.

    Clean out any sand and water that may have splashed or fallen into the inner pot.

    Cover the inner pot with a lid, then cover the whole Zeer with a damp cloth.  This will expedite the initial cooling process so you can start storing items more quickly. If you weren’t able to find a lid the right size, the damp cloth would work well on its own. Once the inside has had the chance to cool, fill it with your produce and replace the lid.

    [Must Watch Video] Build Your Own Root Cellar in Your Backyard For $400 <<<Watch Here>>>

  • Canned Corn: What’s the Trick?

    Canned Corn: What’s the Trick?

    A fond childhood memory is sitting on the back porch with my brother as we pulled husks off the bushels of corn on the cob. Somehow, we would always end up falling to the floor in a pile of husks with corn silk stuck in our hair laughing our heads off. You’d think our mom would have been upset, but all she could do is laugh with us.

    Since then I have assumed my mother’s role, canned many a cob of corn, and want to share with you how to process ‘doing it yourself’ canning corn. If you have never canned corn before, it may seem like a lot of work, but it’s the raw pack method, which is easier than other ways. If you follow these easy steps, you will accomplish some of the most significant things about homesteading—being self-reliant, saving money, and feeding your family the best kind of food.

    Gather Equipment and Ingredients

    1. Pressure Cooker – necessary to kill bacteria like botulism that can kill you if not cooked at 240 degrees in a pressure cooker since using stovetop doesn’t get hot enough.
    2. Mason canning jars with lids and rings to match
    3. Kernel stripper or sharp knife
    4. Jar lifter, tongs, and canning funnel
    5. Large pot of water at boiling temperature
    6. Shallow pan or cookie sheet
    7. Towels and hot pads
    8. Labels for jars and a thin tip marker
    9. Canning salt for flavor – the amount is optional
    10. A bushel of freshly picked corn on the cob – follow directions on the pressure cooker for exact amounts for the quantity desired.

    [Video] This strange method will make your food last for 2 years without refrigeration…Try it Here>>>

    Preparation

    • To begin you can either shuck the husks or just bend back each husk and use it to hold the cob as I slice off the kernels.
    • Remove the silk with a kitchen brush and rinse corn cobs in cold water.
    • Cut the kernels off each cob with a cookie sheet placed underneath to catch the kernels.
    • Slide the kernels from the cookie sheet into a large bowl.
    • Sterilize the jars, lids, and rings in the pot of hot water, remove right before filling.
    • Using the funnel, fill each jar with corn up to an inch from the top.
    • Add salt if desired – but no more than ½ tsp. for each pint or 1 tsp. for each quart.
    • Fill each jar with hot water up to an inch from the top.
    • Giggle the jars to remove any bubbles.
    • Wipe the edge of each jar making sure they are not cracked, place lids on, and tighten rings securely.

    Cooking

    • Using jar lifter, place jars in a pressure canner/cooker according to the user manual (if at high elevation, check instructions for the proper setting).
    • Close lid and cook pints for 55 minutes or quarts for 1 hour and 25 minutes.
    • Once done, turn off the cooker and wait for the pressure gauge to return to zero before opening.
    • Remove jars with the lifter placing on a towel to drain out of the way.
    • Let jars cool and check lids to make sure they are sealed. If the covers pop when touched, they are sealed.
    • Write the contents and date on labels with a marker and apply to jars.
    • Place jars in a cool, dry place until you are ready to

    Conclusion

    You can use the corn for all kinds of recipes from salads to enchiladas, and you will love how much better it tastes than the store-bought can or frozen versions. By the way, do not throw away the corn husks or cobs—use for composting. If you have children that can help with shucking the husks, let them have fun with it and send us some pictures.

    [Discover] The ONLY battery reconditioning resource that lets you easily bring nearly any type of dead battery back to life…<<<Learn How Here>>>

  • Tips to Stockpile Food for the Winter Months

    Tips to Stockpile Food for the Winter Months

    Growing up, one of my favorite things to read were the Laura Ingles Wilder books.  Not only were they entertaining, but she also went into great detail on how their food was grown or raised, butchered or harvested and then processed to keep all winter long.

    Thanks to modern conveniences, most of us don’t really need to take these steps to ensure a comfortable winter, even on a homestead with electricity and appliances.  However, it doesn’t hurt to prepare for a worst-case scenario to ensure you won’t get caught during a bad winter storm or power outage.

    Fortunately, when proper measures are taken, many foods can be kept all winter long.

    Fruits and Veggies

    For fruits and vegetables, storage areas should be cool and dark with moderate humidity and a consistent temperature of 40o.  When planning a homestead or other remote living location, a root cellar is a good addition for long-term storage.  In other homes, a cooler area of a basement or an attached garage can work.

    Stock a cellar as late in the fall as possible. Cure vegetables like potatoes, winter squash, and onions in warmer areas before moving them to the cold storage areas. For other items, chill in the fridge before moving to the cellar areas.

    Many root cellar veggies store better when some dirt is still on them. If you’ve harvested your own or stocked up from a local farmer’s market, shake or rub the excess dirt off instead of washing them.

    Know What Your Food Needs to Last

    Squash should be stored in shallow containers or left on shelves as they are.  Items like garlic and onions are best kept in mesh bags or open boxes so they can breathe. Potatoes must be kept in complete darkness to prevent the skin from going green.

    Avoid piling vegetables together, this generates heat and can lead to them spoiling. Try to spread them out as much as possible and rotate them for even exposure.

    Apples can be stored for months in a box and can be piled more than others.  This will actually assist them by maintaining humidity to keep them crispy.

    Avoid Spoilage

    It’s true that one bad apple can spoil the whole barrel, and that doesn’t just apply to apples.  Handle your fruits and vegetables carefully as even the slightest bump can create an invisible bruise and begin the decomposition process.

    In any storage areas that don’t have built-in climate control, the driest, warmest air will be near the ceiling while more-humid air is nearer the floor and farthest from the door. Keep this in mind as you plan where you will store your produce.

    Inspect your stores regularly and immediately remove any soft or rotten items before they can affect the rest.

    Keeping Meat

    If you are really into the store and save idea, consider smoking and storing your own meats.

    Whether you’ve gone hunting, or gone in with a friend and purchased a whole cow, being able to have a portion of that ready to go without relying on the use of a freezer can be a great idea.

    Used for millennia by some of the oldest civilizations for long-term storage, smoking creates an acidic coating on the meat that prevents bacteria from cultivating. It also dehydrates the meat, making it less hospitable for bacteria to breed.

    So, come late summer and early fall, start planning on what you can stock up on for winter storage.  Not only will this provide you with an emergency supply of food when needed, it is also a great way to keep eating local organic food all year round whether it comes from your own garden or the local farmers market.


  • 7 Steps for Easy Canning

    7 Steps for Easy Canning

    If you decide to get into the wonderful world of canning, be prepared to experience some of the more flavorful food you’ve ever experienced at a fraction of the cost. Canning allows you to pick or buy produce when it’s at its peak maturity and preserve that flavor year-round. The simplest canning process is Water Bath Canning.

    To get started you’ll need a few inexpensive basics, many of which you may already have, or be able to find at your local thrift store or flea market. The absolute essential musts are:

    • A pot that holds enough water to cover any sized jar.
    • A Jar Lifter or Canning Rack, or at least something to help you remove the jars from boiling hot water.
    • A set of jars with the seals and rings intact.

    I found this inexpensive, complete set on Amazon “9 piece canning set”

    Getting to Work

    Step 1

    Fill your canning pot about one-third full of water and a secondary pot completely full.  Heat water until hot, not boiling.

    Step 2

    Wash your jars seals and lids, then keep warm until ready to be filled.

    Step 3

    Prepare food and fill jars according to the recipe you are using. Remove air bubbles by running a non-metallic utensil around the inside of the jar. Wipe the rim of the jar with a clean, damp dish towel or paper towel.

    Step 4

    Place the seal and ring on the jar and gently finger tighten.

    Canning is a great way to “stockpile food”, check out this “Complete System for Building a Delicious Food Stockpile”

    Step 5

    Place a small board or hand towel in the bottom of your canning pot to keep the jars from making contact with the bottom.  Place jars in your canning pot making sure the water can flow freely around the jars. Add hot water as needed until the jars are covered at least halfway up.

    Step 6

    Cover and bring to a full boil. Start timing according to your recipe.

    Step 7

    When your time is up, turn off the heat, carefully remove the jars and set upright to cool. As the jars cool, the seals pull down into the vacuum that is created and compress with a small pop.

    When They’re Cool

    After jars have cooled, press on the lid to check the seal.  It should be sucked down, not popped up.

    If you find a jar didn’t seal, just put it in the fridge and use the food within 2-3 days like you would leftovers.

    Caps will sometimes rust if left on during storage so it’s a good idea to remove the screw caps then wash the jars.  If one gets stuck, just leave it one and try to use that jar of food first.

    Label the jar with the food type and date and store them in a dark, dry and relatively cool area like a kitchen pantry.  Avoid storing them in direct sunlight, or in utility rooms with where they will be exposed to heat or high humidity.

    A Note on Jelly, Jam, and Preserves – What’s the Difference?

    They may all look the same in their jars, but there are differences, mostly in what form the fruit is in when it’s prepared for canning.

    Preserves

    Once upon a time, preserved fruit was just that. Whole or large chunks of fruit preserved in sugar for use out of season. Not designed to spread on toast, they were more often opened and served as a side dish in the absence of fresh produce.

    Jams

    These still contain pieces of fruit but they have been pulverized into pulp.  Lately, Jams and preserves have become almost interchangeable but at one time there was a considered difference between the two.

    Jelly

    Jellies are made using only the juice of the fruit that is then thickened so it can stand on its own.  Usually with pectin, sometimes with gelatin.

    Tip: How to Properly Store Your Food and Increase its Shelf Life

  • Keeping Your Harvest Year-Round (Infographic)

    Keeping Your Harvest Year-Round (Infographic)

    Whether you’re gardening or carefully shopping local and in season, the healthiest way to consume what you reap is to preserve it well so you can make the most of it!

    Produce turns quickly, but you can prolong the benefits of a fresh harvest with some smart planning and thinking ahead. There are so many great ways to preserve food, and this amazing infographic from Fix.com shows you how.

    We write a lot about food preservation here on Homestead Depot, but this infographic is a great guide to the overall concept of food preservation, and it gave me some great ideas! Hope you enjoy:

    If you enjoyed this, you might also like….

    Long-Term Survival for Homesteaders…

    Natural Healing Secrets You Need to Know…

    Effective Primal Diet Hacks…

  • Most Caloric Foods for Long-Term Storage

    Most Caloric Foods for Long-Term Storage

    Whether you’re a homesteader or not, it is always prudent to have a good supply of emergency food for when disaster strikes. And while stocking up on your own canned peaches and tomatoes is definitely great, you want to make sure to have high-calorie foods stored up as well. Fat and protein can be more difficult to store than other foods, but they’re what you need the most to keep your strength up. High-calorie foods are also more efficient, as it takes less food to fill you up, which means more sustenance for less storage space.

    Here are a few ideas for high-calorie foods, rich in protein and/or fat, for your survival stash:

    Nuts

    Nuts are rich in fat, protein, vitamins and minerals, and are a great addition to your long-term food storage. While they can go rancid easily, there are many ways to store them to preserve them for long periods of time, including vacuum canning, which is quick, easy, and mess-free.

    Pemmican 

    Native American staple pemmican is a classic homesteader survival food, made out of dehydrated meat and fruit. Preserving meat for long periods of time can be difficult, even homemade jerky will only last a few months on the shelf, but pemmican can last much longer. It was used by Native Americans to keep their meat through the winter, and early settlers in North America adapted it quickly. It is highly nutritious, often referred to as a “survival superfood”, and you can easily make your own at home.

    Quinoa 

    Quinoa is a great source of both protein and carbohydrates, and keeps very well on the shelf. One serving of quinoa has 16% protein content, so even a small portion will sustain you for a long time. Coupled with the carbohydrates, the protein content of quinoa makes for a great survival food.

    Dried Fruit

    Dried fruit deserves an honorary mention, because while it is not very high in fat or protein, it still has a high amount of concentrated calories in carbohydrates, which are still important macronutrients for long-term survival. Dried fruit like cherries and raisins have about 150 calories per 1/4 cup, which is pretty whopping, and makes them highly efficient to store.

    If you enjoyed this, you might also like….

    Can You Defend Your Family When SHTF?

    Natural Healing Secrets You Need to Know…

    Effective Primal Diet Hacks…

  • Dehydrating Food: A Beginner’s Guide

    Dehydrating Food: A Beginner’s Guide

    Dehydrating is a great option for preserving food for the long term, especially for gardeners or homesteaders. But even if you’re just an urban homesteader, it might be an excellent way to get started with food preservation. If you like to shop sales, frequent farmer’s markets, or grow veggies or herbs in your own little urban homestead, dehydrating is a great way to maximize your finds and easily store food for the long term.

    Here are some of the benefits to dehydrating vs. other food preservation methods:

    • it preserves the nutritional content of food
    • it condenses food and also makes it very lightweight, which is great for storage
    • it requires very little work to do
    • you can preserve a wide variety of foods with the same process

    Getting started 

    To get started, you will most likely want to purchase a dehydrator, but you can also dehydrate food using your oven. You simply put your oven on its lowest setting, crack the door, and let your food dehydrate for 6-24 hours, depending on what you are dehydrating.

    Effective Primal Diet Hacks…

    There are many dehydrators on the market, that range in size and efficiency. You will want to consider how much food you want to dehydrate at once, the storage space you have for it in your kitchen, how well-reviewed the model you’re looking at is, etc.

    What to dehydrate

    Once you have purchased a dehydrator, the sky is the limit on what you can dehydrate! You’d be surprised how much you can do with a dehydrator, from making jerky and pemmican to quickly rising dough and, of course, drying fruits, vegetables, and herbs. While there are many foods you can dry, here are some of the most popular and efficient foods to store by dehydration.

    • Apples
    • Oranges
    • Bananas
    • Berries
    • Fruit leather
    • Tomato sauce
    • Herbs
    • Peppers
    • Meat (for jerky)
    • Eggs (for powdered eggs)

    Most dehydrators will have a guide for what temperature to set for which type of food product you are drying, but you might need to adjust accordingly since not every food product will have the same level of moisture. Typically, you will dry stuff for a long period of time, from 6-24 and maybe even 48 hours.

    This long drying time doesn’t require much at all, all you need to do is process what you’re drying and lay it out in an even, thin layer on the trays of your dehydrator. You’ll want to check occasionally to see what kind of progress is being made. Most commonly, people will set their dehydrator up in the evening and dry overnight.

    Dehydrating is an age-old method of drying food that you might find becomes a staple method of food production and food preservation in your home. Just give it a try and see how you like it!

    Natural Healing Secrets You Need to Know…