Page 2 of 3
1 2 3
food storage – Page 2 – Homesteader Depot

Tag: food storage

  • A Simple Guide to Dehydrating Mushrooms

    A Simple Guide to Dehydrating Mushrooms

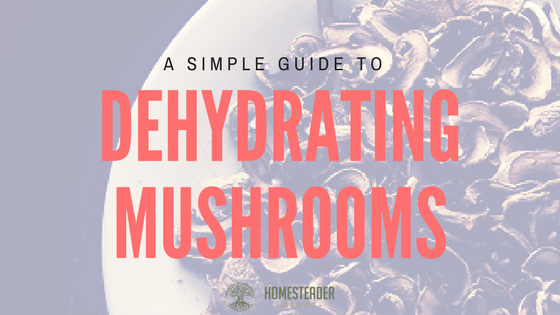
    We posted recently about foraging for wild mushrooms and how to identify them.

    One great reason to forage for wild mushrooms is to stock up on them and keep them around for cooking or even as part of your survival food cache.

    But how do you store them?

    Dehydrating is the best method for mushrooms, and often, when you find them in the grocery store, this is how they have been processed.

    It’s very simple and easy to dehydrate mushrooms, here’s how:

    1. Collect the mushrooms you’d like to process. Literally any variety will do, but of course, you’ll probably want to do this with large batches of whatever you’ve collected from foraging.
    2. Wash the mushrooms thoroughly; you might need to use a mushroom or vegetable brush to gently scrub the dirt off.
    3. Pat dry with a paper towel and spread out to dry on a dish towel.
    4. Once most of the excess moisture has dried off, slice your mushrooms into whatever size you’d like to preserve them. Thin slices will dehydrate quickest.
    5. Once they’re cut the way you’d like, spread them out on your dehydrator sheets.
    6. Set your dehydrator to 125 degrees (which is probably the “vegetable” setting) and leave for 4-6 hours. After 4 hours, check to see the progress.
    7. They’re done when they are completely crisp and will snap and break when you bend them, rather than flex.
    8. Store in an airtight container in your pantry or wherever you keep long-term storage. If stored in mylar or vacuum-sealed pouches, they can keep for up to 20 years on a cool, dry shelf!

    Mushrooms are a great source of nutrients that can be foraged in many areas. Not only is it important to learn to identify them, but preserve them also! The next time you go out hunting for mushrooms, bring a load home and store some up in your food cache.

    If you enjoyed this, you might also like….

    Can You Defend Your Family When SHTF?

    Natural Healing Secrets You Need to Know…

    Effective Primal Diet Hacks…

  • The Off-Grid Winter Pantry (Video)

    The Off-Grid Winter Pantry (Video)

    When most people think of living off-grid, there are usually two major challenges that come to mind: winter, and food storage. Well, this video shows us that with the right amount of supplies and planning, you don’t have to worry much about either!

    It is seriously one of my life goals to have a pantry like this one day. YouTubers and off-grid homesteaders An American Homestead shares their well-stocked winter pantry, with preserves made from their harvest for the year. Their viewers kept asking to see what they had, so they give us a tour of their impressive pantry, ready for winter. Enjoy!

    If you enjoyed this, you might also like….

    Can You Defend Your Family When SHTF?

    Natural Healing Secrets You Need to Know…

    Effective Primal Diet Hacks…

  • How (And Why) To Cure Potatoes Before Storing Them

    How (And Why) To Cure Potatoes Before Storing Them

    Potatoes are such a great garden crop, if you can manage to grow them. They can keep for months throughout the winter, and are a great source of nutrients and calories. While they keep well in a dark, cool area like a root cellar or even a garage, there is a very important step you must take before storage: curing. 

    What is curing? 

    Curing potatoes is essentially letting them dry out before storing away. There are several advantages to curing:

    • All wet spots dry out that might otherwise contribute to rot
    • The skins will harden, allowing the potatoes to keep for much longer
    • Damaged spots of the potatoes can heal
    • You get a chance to inspect all of your potatoes and sort out the bad ones
    • You can sort by size and type, if desired

    How to cure potatoes

    It’s really very simple to cure potatoes, if you follow a few easy guidelines. The process is pretty simple, to start, you want to spread all your potatoes out on a surface, ideally covered with newspaper or torn up paper bags, and let sit for about 10 days or so.

    Air flow is the number one factor when choosing where and how to cure your potatoes. You want the potatoes to get plenty of air flow between each of them so spread them out, and you also want to be doing this in a well-ventilated area. In a well-ventilated garage or basement with a small fan, for example, might be ideal, but of course, since this might take up a lot of room you might have to improvise.

    Keep it dark: the darker this area, the better. You will of course have to turn on the light to check your potatoes from time to time and this won’t hurt, but don’t set up in an area that has a lot of windows and regular, 12-hour daylight. Light will ruin your potatoes.

    Keep it cold, as cooler temperatures, below 60 degrees, will keep the potatoes fresh and move along the curing process.

    Once your potatoes are all dried out, and this might involve inspecting them pretty carefully, they’re ready to store! There are multiple ways to store potatoes (which we might have to cover at some point in the future!) but the same rules for curing apply: somewhere dark, cool, and with decent airflow. If your curing was successful, they’ll keep for months!

    If you enjoyed this, you might also like….

    Home Defense in the End Times…

    Natural Healing Secrets You Need to Know…

    Eat Like Your Ancestors…

  • Tips for Living Without a Fridge

    Tips for Living Without a Fridge

    Refrigerators are one of the great wonders of modern science, and can greatly improve your quality of life. However, we’ve also grown so dependent on them, we don’t even know how to live without them anymore. Many people in the world still live without modern refrigeration, and it’s certainly not impossible.

    There are many reasons you might find yourself living without a refrigerator. If you are a new homesteader, just getting set up, you might be completely off-grid or not have the infrastructure yet on your homestead to power a full-sized refrigerator. You also might find yourself stuck in a long-term power outage, in which case some of the following tips might be useful to know.

    DIY Refrigeration

    There are a few different options for DIY refrigeration. Obviously, this isn’t the same as modern refrigeration, but there are some things you can create that will help keep foods cool. A root cellar is a great option if you can build one; you could even use a basement or simply bury a large cooler or even an old refrigerator or deep freezer. You could also build what’s called a zeer pot, which is essentially a pot inside of another pot, with sand in between and covered with a damp cloth.

    Change Your Thinking

    There are so many foods that we simply assume need to be kept in the refrigerator because that’s how we’ve always done it, but many foods can keep quite well at room temperature. Raw eggs that have never been refrigerated, for instance, can keep for up to a month. Butter can also be kept at room temperature, especially in an earthen or porcelain crock. Many kids of cheese will keep for at least a few days at room temperature, and almost all breads and baked goods will as well.

    Invest in Good Containers 

    The manner of storage will greatly improve the shelf life of your perishable foods. Airtight tins, mason jars, earthen crocks, cheesecloth, linen, are all great options for proper storage. For example, some produce like leafy greens can be stored in a jar with water like a bouquet of flowers, or wrapped in a linen napkin and kept in a cooler or large crock.

    Location, Location, Location

    Where you keep your food is just as important as how. Try to keep your perishables in a cool, dry, and dark place. Know the coolest, driest places in your kitchen or cellar, and organize your food accordingly.

    Preserve Using Other Methods

    Canning, drying, pickling and fermenting, and curing (as in meat) are all age-old methods of preserving food that are still used to this day around the world and are great alternatives to refrigeration.

    If you enjoyed this, you might also like….

    Home Defense in the End Times…

    Natural Healing Secrets You Need to Know…

    Eat Like Your Ancestors…

  • Easy Pickled Garlic

    Easy Pickled Garlic

    Pickling garlic is a great way to preserve it for the winter, or if you don’t grow garlic, to ensure that you always have it on hand. You may have seen minced garlic or even whole garlic cloves in the store, but those typically have lots of preservatives in them or take on the flavor of whatever they’re preserved in. This recipe isn’t like them.

    This method will keep your garlic tasting fresh, and just like garlic. Since it is preserved in vinegar, when you’re ready to use it, you can simply rinse off the vinegar and use as you would fresh cloves of garlic.

    Before we dive into the recipe, I wanted to share this awesome video for a super quick and easy way to peel an entire head of garlic that will make this recipe go a lot faster:

    Ingredients: 

    4 head of garlic, peeled using method from video above

    2 half-pint mason jar

    1-2 cups vinegar

    *Note: these are rough estimates, since heads of garlic can vary. The idea is to have enough garlic to fill your jar of choice, and enough vinegar to fully immerse the garlic once in the jar. 

    Directions: 

    1. Once your garlic is all peeled, trim any brown spots off and put in a large bowl with a little soap to get them clean.
    2. Rinse thoroughly in a strainer
    3. Bring your vinegar to a boil on the stove
    4. Dispense your garlic out into the jars
    5. Pour the hot vinegar over the jars, and screw the lid on tight
    6. Let the jars sit out on the counter overnight, until they are room temperature
    7. Once they have fully cooled, transfer to the refrigerator for long-term storage

    This garlic will keep in the fridge for up to a year. Use as you would regular garlic, simply rinsing off the vinegar with cold water if you want to avoid the taste of vinegar in the dish you are preparing. Enjoy!

    If you liked this, you might also enjoy…

    Become a Master Healer at Home

    Anaerobic Weight Loss Fitness…

    The Ultimate Woodworking Course..


  • How to Freeze Raw Potatoes

    How to Freeze Raw Potatoes

    Keeping potatoes in a root cellar is a common way to store these essential root veggies through the winter, but plenty of people don’t have root cellars! Canning is another option, but that usually takes a pressure canner.

    If you find yourself with a lot of potatoes you’d like to store for a long time but don’t have a cellar or a pressure canner, freezing them is a great option-if you do it right. It can be kind of tricky, so here are some tips to ensure they remain fresh in the freezer.

    Use Fresh Potatoes

    Don’t use potatoes that have started to turn. If you want them to keep fresh in the freezer, use the freshest potatoes you can find that haven’t yet started to sprout or get black spots.

    Vinegar

    Before preparing them for freezing, cut them up and rinse them in cold water with a little vinegar. This will help preserve them.

    Related Article:  Creative Ways to Freeze Eggs

    Blanch

    Before freezing, blanch your potatoes in boiling water for 3-5 minutes, then cool and let dry completely.

    Banish oxygen

    Potatoes usually turn brown or black after exposure to oxygen, so if you can, vacuum-seal your potatoes before freezing. This will keep them in a completely oxygen-free environment and as fresh as possible in the freezer. But if you do not have a vacuum sealer, you can put them in a zip-lock bag with a paper towel and try to squeeze out as much as the air as possible.

    Thaw at room temperature

    For some reason, if you thaw in a bowl of water in the sink rather than in the refrigerator, frozen potatoes are less likely to turn black. For instance if you are planning on cooking with them in the evening, take them out of the freezer and put them in a bowl of room-temperature water in the sink to thaw throughout the day.

    To use your thawed potatoes, just throw in any dish as you would fresh potatoes. They work best in longer-cooking recipes like stews, soups and chowders. You can even use them for mashed potatoes! Enjoy!


    If you liked this, you might also enjoy…

    Natural Healing Techniques Doctors Don’t Want You to Know…

    The Weight-Reducing Magic of Yoga…

    The Ultimate Woodworking Course..


  • A 1870s Root Cellar (Video)

    A 1870s Root Cellar (Video)

    I absolutely love seeing how people back in the day lived, before modern conveniences and when people still worked with their hands, tended their animals, and used traditional technology to produce and preserve food. You know, like homesteading!

    I got such a kick out of this video. The channel, Appalachia’s Homestead, is great, and I highly recommend following YouTube channels like theirs if you’d like to get an inside peek into how established homesteads function on a day-to-day basis.

    It was really clever of them to share a video of their root cellar, which they estimate to have been built in the 1870’s. Root cellars are a great, low-energy way to store food on a homestead, and if you’re considering building one, take a note from the architects of yesteryear. Enjoy!


  • Preserving Meat with Salt

    Preserving Meat with Salt

    Whether your homestead is off-grid, you don’t have enough room in your freezer, or you want meat that could last when power is interrupted, salting is a great time-tested option.  In this article, we will discuss dry salting.  The process works by using the salt to draw out the moisture from the meat and any potentially harmful bacteria until microbial growth is prohibited.  It is basically chemically induced dehydration.  There is always a risk of food poisoning when one is consuming meat that is moths, or even a year old, get properly prepared and use caution when salting your meat so that you can benefit from a method of food preservation that has helped keep people alive for thousands of years.


    Getting Started

    To get started you will need containers, preferably ceramic or glass, that will be able to hold all the meat that you want to preserve and have room left to accommodate the salt.  You will also need to locate a place to store the meat while it is curing.  Ideally, you are looking for an area that is dry and that will remain above 32 degrees Fahrenheit and below 40 degrees Fahrenheit.

    Prepping the Meat

    Cut the meat into pieces, the smaller the pieces are the more surface area of meat will be exposed to the salt, and therefore the quicker the curing.  Most sources will tell you that 1 ounce of salt will cure up to 25 pounds of meat.  But salt is not expensive and food poisoning is deadly so I would error on the side of caution.  Put a thin layer of salt on the bottom of your container, start adding meat that you have rubbed with salt to the container leaving a thin gap on the sides of the container and in between each piece of meat, fill in the gaps with more salt, put a thin layer of salt on top and cover with a cheese cloth.  Store this in a cool dry location.  The curing should be done in a month.

    Checking on the Meat

    Check on the meat periodically.  If the meat still contained a lot of blood, or if moisture got in the area you are storing the meat, the salt may become so moist that it cannot sufficiently dehydrate the meat.  If this occurs, simply remove the meat, clean the container, and repack it with fresh salt.  After the curing is successfully completed you can remove the meat and wrap it in moisture-proof paper or plastic and can store at room temperature.


    Dry salting can keep meat for months, this could be what you need to get you through the winter or a disaster that leaves you without power.


    If you liked this, you might also enjoy…

    Natural Healing Techniques Doctors Don’t Want You to Know…

    The Weight-Reducing Magic of Yoga…

    The Ultimate Woodworking Course..