Page 4 of 10
1 2 3 4 5 6 10
food – Page 4 – Homesteader Depot

Tag: food

  • 5 Simple Methods to Preserve Food

    5 Simple Methods to Preserve Food

    As a homesteader, you know that it’s important to know how to preserve food. Very few of us live in a climate where we can grow food year-round. During the colder months, true self-sufficiency requires a working knowledge of food preservation methods.

    That’s why we’ve put together a list of methods you can use to preserve food. Whether you’re looking for methods to preserve fruits and vegetables from your garden, items you’ve foraged, or animals that you’ve caught while hunting or fishing, we’ve got you covered.

    Method #1: Canning

    Canning is probably the most popular form of preserving food. It’s also one of the more expensive methods, but the initial investment can pay for itself rather quickly.

    To can food, you’ll need a canner. You’ll also need to invest in a collection of glass jars, canning rings, and lids.

    The benefit of canning food is that you can preserve it at its peak. Canning can be used to make jam, jelly, salsa, and other condiments.

    Method #2: Fermentation

    The next preservation method you may want to consider is fermentation. Fermentation involves preparing vegetables, placing them in brine, weighing them down, and allowing them time to ferment in an anaerobic environment.

    The brine may contain salt, whey, or a fermentation starter. Some popular fermented recipes include sauerkraut, kimchi, and pickled vegetables.

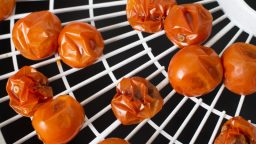
    Method #3: Dehydration

    One method we really like is dehydration. It’s a favorite because it can be used to dry fruit, vegetables, meat, and fish – and you don’t need any special equipment to do it.

    Of course, you can invest in a food dehydrator if you want. However, you don’t need to. Most foods can be dehydrated in a low oven. Simply marinate or season the food how you like. Then place it in a 150-degree oven for the specified time. For example, jerky takes eight to ten hours in the oven.

    Drying foods in a food dehydrator may take less time than doing it in an oven. If you think you’ll be doing a lot of dehydration, it may make sense to buy a dehydrator. This is a time-consuming process, but dehydrated foods are shelf-stable – a big plus if you have limited refrigerator and freezer space.

    Dehydrated foods can be stored in airtight bags, jars, or in the refrigerator to extend their shelf life. Some popular dehydrated foods include dried fruit, dried vegetables, and jerky.

    Method #4: Freezing

    Freezing food is a classic method of preserving it, but it has its limitations. If you’ve got a reliable source of power and a big freezer, all you’ll need is some plastic wrap and plastic bags and a permanent marker to label your food.

    There are some downsides to consider. If you lose power for an extended period, you run the risk of losing any food that you have frozen. You shouldn’t have to worry about freezer burn if your food is properly wrapped before you freeze it, but it can be time-consuming to portion out food, wrap it, label it, and freeze it.

    We like freezing for meat and fish. It can also be a great way to preserve delicate herbs from your garden. For example, we’ve made pesto with fresh basil and garlic and then frozen it in ice cube trays. That way, we have fresh pesto even in the middle of winter.

    Method #5: Root Cellaring

    In the days before refrigeration, storing hardy vegetables in a root cellar was the best way to keep them fresh over the winter.

    Not all vegetables are suited to this preservation method. Some that are include potatoes, sweet potatoes, squash, cabbages, and apples.

    If your home already has a cellar, you may be able to use it for storing produce over the winter. If not, consider digging a small cellar to ensure you have food to eat all year round.

    Do you have a favorite food preservation tip that we haven’t mentioned? Share it in the comments!

    >> This lost food has just recently been unearthed by NASA scientists. How to make NASA’s superfood at home.

  • [DIY] Simple Venison Jerky Recipe

    [DIY] Simple Venison Jerky Recipe

    When you’re stockpiling for an emergency, some foods are easier to preserve than others. Vegetables and fruits can be canned or dried.

    But what do you do to preserve meat? Freezing is effective for regular use, but it won’t help you if there’s no power. One of the best and most effective ways to preserve meat is by making jerky.

    Jerky is easy to make, healthy to eat and has a long shelf life. Making it can extend the life of venison and provide you with a healthy, protein-packed snack to get you through hard times.


    Preparing to Make Jerky

    Let’s talk first about what you need to make deer jerky. There are a few basic non-food requirements that you need to have in place.

    1. A freezer to freeze the meat before slicing it
    2. A food dehydrator or an oven with a low setting (150 degrees Fahrenheit)
    3. A very sharp chef’s knife or a meat slicer

    That’s it. Some people like to smoke their jerky, so if you have a smoker, you may want to consider that since it can add a nice depth of flavor to the finished product. However, you don’t need to smoke it. Our recipe, as you’ll see, includes a dash of liquid smoke to add a smoky finish.


    Our Favorite Deer Jerky Recipe

    Now we’re ready to share our favorite deer jerky recipe with you. We’ll walk you through it. Once you’ve made your first batch, you won’t want to go back to store-bought jerky.

    Here’s what you’ll need:

    • 1 pound of venison with the fat and skin removed
    • ½ c. soy sauce or tamari
    • 1 tablespoon Worcestershire sauce
    • 1 tablespoon steak sauce
    • 1 teaspoon liquid smoke
    • ½ teaspoon garlic powder
    • ½ teaspoon onion powder
    • ½ teaspoon sea salt
    • ½ teaspoon ground white or black pepper

    Here are the steps to follow to make the jerky.

    1. Put the venison in the freezer. Partially frozen meat is easier to slice thin than raw meat.
    2. When the venison is ready, use a very sharp knife or meat slicer to cut it into ¼-inch thick slices.
    3. In a large bowl, put the soy sauce, Worcestershire sauce, steak sauce, liquid smoke, and spices, and whisk to combine.
    4. Add the venison slices and stir to make sure all slices are coated with the marinade.
    5. Place the bowl in the refrigerator and allow it to marinate a minimum of four hours. You can leave it overnight for a stronger flavor.

    When the slices have finished marinating, it’s time to cook them. The method and time will vary depending on whether you’re using a dehydrator or your oven.

    If you’re using a dehydrator, fill the trays making sure to lay the meat down in a single layer with no overlap. The usual setting is about 155 degrees, and it should take four or five hours.

    To make jerky in an oven, lay the venison in a single layer on cookie sheets. Preheat the oven to 150 degrees Fahrenheit and put the jerky in. It will take eight to ten hours.

    In either case, you’ll know that the jerky is done when you can pick up a slice of meat and bend it without breaking it. Store the jerky in plastic bags or jars at room temperature or in the refrigerator to extend its shelf life.


    Flavor Variations

    Once you’ve made your first batch, you can experiment with new flavor combinations. Adding some fresh ginger to the marinade will give your jerky a spicy kick. If you want a little sweetness, try adding some brown sugar. Venison and apples are a classic combination, so you can try substituting ¼ cup of organic apple cider vinegar for the soy sauce.

    Store-bought jerky simply can’t compare to homemade. We hope this recipe inspires you to give it a try.

    Do you have a favorite jerky recipe or ingredient? Tell us in the comments!


    With over 1000 easy-to-prepare Paleo recipes and 10 week meal plan, you can stop stressing about your food, and start enjoying the healthy energetic body, weight loss, mental sharpness, and positive attitude you gain from eating only wholesome, natural ingredients that truly nourish.  <<<Check out the Recipes HERE>>>

  • Simple 5 Step Homemade Salsa Recipe

    Simple 5 Step Homemade Salsa Recipe

    One of our favorite things about homesteading is that it has allowed us to reconnect with food in a new way. Let’s face it, a lot of the fruits and vegetables we buy at the supermarket are grown using chemicals and harsh fertilizers. They’re harvested before they’re ready, as a result, they don’t have the rich, delicious flavors as they do when fresh.

    By contrast, home-grown produce is bursting with flavor. Once you’ve tried growing vegetables and cooking with them, you’ll never want to go back to boring supermarket produce again.

    Are you looking for ways to use the vegetables you’ve grown? Making homemade, homestead salsa is a good way to use some of the vegetables you’ve grown and create a tasty condiment for your food at the same time.

    Homestead Salsa Recipe

    Making fresh salsa is easy. All you need to do is chop the ingredients and combine them with some seasonings. It usually tastes better if you let it sit for a little while before serving it, but the salsa will be ready in just minutes.

    Of course, you also have the option of cooking and preserving salsa. This recipe is for fresh salsa, but you could just as easily preserve it, so you’ll have fresh salsa year-round.

    Here are the ingredients for our fresh salsa:

    • 10 small tomatoes (not cherry tomatoes, just small regular tomatoes from your garden)
    • 1 red onion
    • 4 sweet bell peppers
    • 3-6 spicy peppers of your choice (we like jalapeños, habaneros, and serranos)
    • 1 bunch of fresh cilantro
    • 3 cloves garlic, minced
    • ¼ c. white vinegar
    • ¼ c. brown sugar
    • 2 tablespoons lime or lemon juice
    • Salt and pepper to taste

    To prepare:

    1. Chop the vegetables. Some people like to peel and seed the tomatoes, which you can do by slicing into the skins, immersing them in boiling water for a minute or two, then shocking them in cold water. The skins should peel write off. However, we think this salsa tastes great if all you do is dice the tomatoes.
    2. Dice the red onion and bell peppers. For the hot peppers, the method you use to prepare them depends on your tolerance for heat. If you want some spice but don’t like it too hot, halve the peppers and – while wearing gloves – remove the ribs and seeds and discard them. If you like it very hot, simply chop the whole pepper and add it.
    3. Chop the cilantro leaves. If you don’t like cilantro (to some people, it tastes like soap) you can eliminate it entirely.
    4. Combine the chopped vegetables, herbs, vinegar, sugar, citrus juice, salt, and pepper in a bowl. Stir to combine the ingredients.
    5. Now, give your salsa a taste. This is the time to adjust the salsa, so the flavor will be exactly to your taste. Here are some suggestions:
    • If your salsa is too spicy, add a couple of additional tomatoes, another sweet bell pepper, or a spoon of brown sugar.
    • If your salsa isn’t spicy enough, add another hot pepper (or half – you don’t want to go overboard!)
    • If your salsa lacks acidity, add an additional tablespoon of lime or lemon juice.
    • If it lacks flavor, add a pinch of additional salt and black pepper.

    You get the idea. It may take some trial and error to get it right. The final step is to let the salsa sit overnight in the refrigerator. This final step gives the flavors a chance to blend together.

    Once you’ve mastered this basic recipe, you can experiment with other flavors. For example, you might want to add peaches for a sweeter salsa. Combining salsa with black beans and corn can make it into a hearty side dish.

    What’s your favorite salsa recipe? Tell us in the comments!

    [Picture This]

    Sh*t just hit the fan, it’s been 3 days and hunger is sweeping through town like the plague, you’re starving.  WHAT DO YOU DO?  <<<Try This Now>>>

  • 5 Ways Pigs Are Valuable Beyond Just Meat

    5 Ways Pigs Are Valuable Beyond Just Meat


    When you are living off the land, owning animals that can provide you with food can be extremely beneficial. You may grow plenty of crops and fill your pantry with canned vegetables, but if you aren’t getting enough protein, you won’t have the energy to tend to your farm and home.

    While there are some homesteaders who don’t want to commit to raising a large farm or a herd of cattle, there are plenty of other animals such as chickens or turkeys that can ensure you have meat and eggs throughout the year. They are also low-maintenance so that you don’t have to waste a lot of your time caring for them.

    Pigs are another option that will provide you and your family with plenty of meat. While they do require plenty of food, they aren’t as difficult to raise as you may think.

    Here are a few good reasons why you should consider adding pigs to your homestead.

    1. They Will Eat Anything

    Yes, pigs eat a lot, which can be a disadvantage, but they will eat a lot of anything. Many homesteaders make their own dairy products such as cheese or butter. If you have excess whey left over from making cheese, you can feed it to the pigs. They will also eat excess milk from dairy animals, extra eggs from chickens, or any cooked leftovers that you have lying around. That means no more food thrown out the back door and nothing goes to waste.

    1. They are Excellent Tillers

    Pigs will till any area that you place them in. Many people think that the rooting that pigs do naturally is a bad habit and it should be stopped. But it’s only a terrible thing if you have them in an area where you don’t want to disturb the soil. The tilled land where pigs once lived is a suitable place to grow vegetables. That is because along with loosening up the soil, it is also well-fertilized.


    3. They Help Eliminate Parasites 

    Pigs are a dead-end for parasites that often become an issue with other farm animals such as cattle, goats, or sheep. Since pigs have internal parasites that are different from other animals, they help clean up the land when they follow other grazing animals. If you place your pigs in a field with grazing animals such as sheep or goats, the pigs will consume the eggs and larvae of the parasites on those animals. Their bodies are capable of digesting the parasites without harm. Goat parasites will not survive inside of pigs.


    1. You Receive an Abundance of Meat

    The best thing about raising pigs is the amount of meat that you can get from them. You can add more variety to your diet and create a wide range of meals for your family all while homesteading. And the best thing about it is that you know where the meat came from. You raised the pigs humanely and know exactly what type of diet they consumed.

    Suggested Article: “5 Keys to Choosing the Perfect Livestock”

    1. Extra Income

    If you end up with more meat than you need, you can always sell the additional meat for profit. Many people will raise pigs just to sell the meat and not keep it for themselves, while others may raise additional pigs to sell. You can choose to sell the pig itself or the meat after it is butchered. Either way, you end up with a substantial profit that can help with supplies during the winter.

    If you want to have enough pork for your entire family, you should get two to three piglets in the spring. Raise them throughout the summer and then butcher them that fall. Then you can do the same the following year. Raising a pig for that period of time will usually produce around 170 to 200 pounds of meat, which should be more than enough meat to keep any homesteader happy.

  • 3 Keys to Choosing the Perfect Livestock

    3 Keys to Choosing the Perfect Livestock

    A farm or homestead without livestock seems unusual, to say the least.  Whether you see yourself with a flock of cheerful chickens, a herd of graceful goats or a few calming cows, livestock are a valuable food source that should be planned for carefully, then cared for consistently.

    Are You Ready to Be Available Every Minute of Every Day?

    Are you prepared to be “on-call” for your animals 24 hours a day, 7 days a week, 365 days a year? When you enter the world of livestock, a few things to be aware of are:

    • Newborns usually come in the middle of the night.
    • Orphaned or abandoned babies will need you to feed them around the clock.
    • Escaped animals and flattened fencing will need attending to immediately, even in 110o F heat.

    Just like having kids, keeping livestock can tie you down in ways you can’t even imagine.  And, they won’t eventually grow up and learn how to take care of themselves like kids will.

    Basic Ownership Preparation and Considerations

    Before you add animals to your homestead, evaluate your situation and skills to see if you have what you need to support the new lives coming in. The following points will help you in your evaluation.

    Research, research, research-Knowledge is power!  Educate yourself on each of your options before you make any purchases.

    Talk to the Local Vet-Find out what animals the veterinarians in your area are qualified to treat.  This info alone can go a long way in helping you decide what livestock to get.

    Similar Article: “Are You Ready for Livestock?”

    Look for a Soul Mate-If you have a loud and abrupt personality, and so does your livestock, you could easily run into more issues than you want to deal with. Assess yourself and research compatible animals. In the same breath, many species require brute strength to safely interact with them, make sure you don’t take on more than you can handle.

    Enjoy the Animals-You must honestly take pleasure working with the kind of livestock you choose.

    Have Their New Home Ready and Waiting-Make sure you have ample land, structures, and resources before you finally bring them home.

    So, What Are Your Options?

    Here is some basic info on the most common livestock homesteaders consider when adding to their property.

    Beef Cattle

    Beef cattle are low maintenance and don’t need complex facilities. Most people are able to handle cattle with minimum issues and local vets can usually treat them. If you decide to go the milk cattle route, you will need to make sure you have the proper equipment to handle the milking process and storage.

    Goats

    According to a publication by Florida A&M University, 70% percent of the world population eats goat regularly. If that’s not to your fancy, dairy products like goat milk and cheese are another good protein source. Additionally, known to eat just about anything, you can picket them or corral them in a different area each day and never have to mow your lawn again.

    Rabbits

    Whether for meat, fiber, or just to have as a pet, rabbits can bring a lot to a homestead.  Just don’t go too far too fast.  Proceed carefully and know your limits.  And, keep the males away from the females unless you want your “herd” to expand exponentially.

    Related Article: “Beginners Guide to Buying Rabbits”

    So, whether you go small, medium, or large, make sure you are thoroughly prepared to take on the challenges adding livestock to your way of life can produce.

    Chickens

    Chickens need very little besides food, water, a safe place to sleep, and a few hours from you each week to gather eggs and clean the roosts.  For that relatively little amount of effort, you will be rewarded with fresh eggs and roast chicken on Sundays (or Mondays, or Tuesdays….)

    If chickens are your choice, I suggest taking a look at this guide to building the perfect chicken coops to protect your new friends and future food source <<<Click Here>>>

    Pigs

    Pigs are one of the easiest animals for your homestead because they will eat literally anything, they will be your living compost.  No need to throw away and waste anything edible, your pigs will take care of that.

    They are also great at killing parasites that may harm you other livestock, they have different internal parasites that can digest other animal parasites.  Let them graze with your other animals to help clean up the pasture and keep everyone healthy.

    The obvious reason would be the delicious meat such as ham, sausage, and bacon.

    In conclusion, livestock is a great source for food if a self-sustaining homestead is what you are looking for.  Even though it may take some time, research and hard work, the end result will be worth it.

    Here are some other food options for your “Survival Farm”


  • Healthy Sweet Tea (Video)

    Healthy Sweet Tea (Video)

    Well, Memorial Day has come and gone, and while it’s not officially summer until June 21st, the bar-b-ques have started, the pools are open, and you’ve probably already done some tanning in your front lawn.

    With summer often comes delicious sweet tea, which is a staple summer drink in the South (apparently, this is what “tea” means in the Southern states. There is no other kind of tea but sweet tea, so don’t ask, or at least this is what I’ve been told).

    The downside of many sweet teas, especially those purchased at the store as opposed to homemade, is they’ve got lots of sweeteners and even sometimes artificial coloring. It’s very easy to make sweet tea at home, and you can even make it healthy. While unrefined organic cane sugar is better than nothing, you can step it up a notch by using stevia instead, as used in this video. Enjoy, and happy summer!

    If you enjoyed this, you might also like….

    Long-Term Survival for Homesteaders…

    Natural Healing Secrets You Need to Know…

    Effective Primal Diet Hacks…

  • How to Flavor Milk Kefir

    How to Flavor Milk Kefir

    A few months ago, we shared an article on how to make milk kefir, a cultured dairy product that’s packed with nutrition and beneficial probiotic bacteria.

    If you’ve ever bought kefir in the store and enjoyed it, that could be due to the fact that it tends to be flavored when packaged and sold. So, if you make your own milk kefir and dislike it compared to something you’ve bought from the store, this could easily be why.

    Flavored kefir is delicious and just as healthy, and relies entirely on the sweetness of the cultured dairy and the fruit added to it for its sweetness, as opposed to other sugary flavored drinks or yogurts that are full of artificial coloring or way too much refined sugar.

    Fortunately for you, it’s easy to flavor your milk kefir at home! Cultures for Health is a fantastic resource for all things relating to cultured food, and this video shows some very simple and easy-to-follow instructions for how to flavor your milk kefir at home. Enjoy!

    If you enjoyed this, you might also like….

    Long-Term Survival for Homesteaders…

    Natural Healing Secrets You Need to Know…

    Effective Primal Diet Hacks…

  • How to Read Antique Cookbooks

    How to Read Antique Cookbooks

    Antique cookbooks are a wonderful relic of the past, and yet, if you’ve ever tried to make any of the recipes contained within, you might find yourself scratching your head.

    Just as lifestyles have changed drastically in the last half, even quarter century, so have the way we cook, talk about, and interact with food, and the cookbooks of yesteryear might be a bit cryptic to today’s modern cook.

    However, if you are a homesteader, these antique cookbooks might be very appealing to you. They are written for people who had access to the kinds of things homesteads produce, and deal with ingredients like whole animals, natural leavening agents, and tools wood fire stoves or ovens.

    To help you decipher the archaic language of antique cookbooks, we’ve put together a little guide.

    Leavening 

    The way we leaven our baked goods these days is very different from the way people did a century ago. While there is a big movement to return to natural leavening agents, you either might not be familiar with this technique yet, or simply don’t understand what the cookbook is calling for.

    You might find yeast being called for by the cup or “teacup” in your antique cookbook, and this means an active starter like sourdough or a homemade yeast. You can also use dry yeast here (a relatively recent invention), but use 1 tbs for less than 6 cups flour, 2 tbs for 6-11 cups, or 3 tbs for 11-26 cups.

    There have also been many changes in agents like baking soda and baking powder. If baking soda is called for, you’ll want to reduce the amount you use, as the baking soda we have today is double-acting, meaning it rises twice as fast. If the recipe calls for soda, 1/2 a tsp per cup of milk, sour milk, buttermilk, etc., or every teaspoon of vinegar or lemon juice.

    Temperature 

    Most old cookbooks assumed that the reader already knew how to operate their oven and range, so most of the time, ingredients, and steps for preparing the dish are given, but with only a few vague instructions for baking at best. Since gas ranges and ovens weren’t common until well into the 20th Century, anything written before that wouldn’t assume you were using one.

    In many cases, you’re simply going to have to use common sense. Odds are if you’re brave enough to dive into an antique cookbook, you are probably pretty comfortable in the kitchen, and know that, for the most part, certain baked goods tend to be baked around the same temperature. If you’re confident baking on a regular basis, you should be fine. If you’re confused, reference the temperature used in a contemporary version of a similar recipe, and just watch your dish carefully as it bakes.

    Measurements 

    Old-fashioned cookbooks have some odd standards of measurements. For instance, “teaspoons” are the same word, but the measurement has changed. It used to be 4 tsp per 1 tbs, while our present measurement is 3 tsp per 1 tbs. Also, when teaspoons or tablespoons are indicated in old cookbooks, they might have meant rounded, while today we typically refer to these measurements as the flattened-off version. These rounded, or “heaping” measurements, means that there could be nearly double the amount in one measurement!

    You also might find some unusual words you don’t recognize. A “dessertspoon” is half a tablespoon, meaning that, when a tsp equaled 1 tbs, a dessertspoon would be 2 tsp (today you might simply have a half-tablespoon measuring spoon on your personal set, I do).

    Other measurements that might be unfamiliar are a  “salt-spoon”, which is is 1/8 of a tsp, a “dash” (still used today in many cookbooks) is one shake of a shaker.

    A “cup” in an old-fashioned cookbook might mean about 1/5 less than our modern 8 oz cup. “Teacup”, a phrase you won’t see anymore, is simply half a cup. “Wineglass” is the equivalent of our current 1/4 a cup. Sometimes, you might see a recipe call for a “bowl”, use your best judgment using one of your own bowls, based on the other proportions in the recipe.


    While some old-fashioned recipes from antique cookbooks might be a bit daunting at first, never fear. While cooking language and techniques have changed, for the most part, it’s all still food. If you’re confident cooking on a daily basis, you can probably use your best judgment to make the recipe work for you. These old cookbooks can contain timeless wisdom when it comes to food, and since homesteading is all about getting back to our roots, its important to take advantage of these antique resources.


    If you enjoyed this, you might also like….

    Long-Term Survival for Homesteaders…

    Natural Healing Secrets You Need to Know…

    Effective Primal Diet Hacks…