Page 9 of 10
1 7 8 9 10
food – Page 9 – Homesteader Depot

Tag: food

  • Benefits to Cooking with Cast Iron

    Benefits to Cooking with Cast Iron

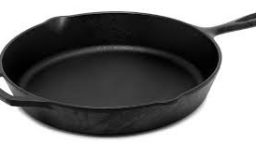
    Cast Iron pans may seem like a relic of the past, but they are still in use today in modern kitchens across the world because these pans have stood the test of time.  So with more options than ever, why should you choose cast iron over alternatives like aluminum, stainless steel, or non-stick cookware?  Here are just a few of the benefits to be had from cooking on cast iron.


    Avoid The “Teflon Flu”

    Non-stick cookware is coated with a synthetic polymer called polytetrafluorethylene, or PTFE.  This coating can degrade in high temperatures (something kinda common in cooking) and release toxic gases.  These gasses can kill pet birds that are in the kitchen while you are cooking, like the canary in the coal mine.  They also cause flu-like symptoms sometimes referred to as the “Teflon flu”, long-term exposure can lead to further health problems.  If the surfaces are scratched they can flake off particles of PTFE into your food that you will eat.  It is said that these particles are inert and won’t harm you, but I’d error on the side of safety on this one.

    Iron Intake

    While aluminum isn’t as toxic as Teflon and stainless steel doesn’t release any harmful fumes, cooking with cast iron could actually improve your health.  Cooking with cast iron can increase your iron intake.  Healthy iron levels can boost your immune system and your energy level.

    The Price is Right

    Cast iron pans of similar size and quality to their stainless steel counterparts save you as much as 60% on initial costs and they wear well over time.

    Versatility

    Cast iron cookware can be used in the oven, and in an emergency can be used over any heat source including an open wood fire.


    Cast iron cookware isn’t still in use today because of a lack of options, but because it is better than other options.  If you haven’t cooked on cast iron yet then you don’t know what you are missing, and you might be making yourself sick while you’re at it.


    If you enjoyed this, you might also like….

    Last Resort Home Defense and More…

    Natural Healing Secrets You Need to Know…

    The Healthy Primal Diet Everyone Should Try…

  • Tips for Making Your Own Crispy Pickles

    Tips for Making Your Own Crispy Pickles

    Do you and your family love the taste of fresh crunchy pickles? If you do, and you are a homesteader, you have probably been trying to make your own pickles. It is not a difficult process, but you might’ve found that pickles you’ve made don’t quite have the same snap and crunch that you really like. Fortunately, you don’t have to live with soggy, bendy pickles for much longer. Just use the tips that follow and you will find that your pickles will have a much more significant crunch.

    One of the first things you want to do is make sure you’re using the freshest cucumbers possible. When you go to the grocery store to buy cucumbers or, even better since you are a homesteader, go out to the garden and pick the cucumbers, you want to use them right away. The fresher the better, as this will typically mean the texture is going to be crisper.

    Another good tip is to cut off the blossom end of the cucumbers. This is one of the best ways to make sure the cucumbers are nice and crisp. The reason for this is because this area of the cucumber has microbes that can cause the pickles to become soft. Also, make sure that you do not keep the pickles in the canning pot for too long. Be aware of what the timer says when you are making the pickles and take them off right away. Otherwise, the additional heat has the potential to soften the texture. Just make sure they have enough heat to kill any bacteria that may be on the vegetables.

    Now that you have a few more tips on your belt for making pickles, get out there grab some cucumbers so you can start making the best pickles of your pickling career!


    If you liked this, you might also enjoy…

    Natural Healing Techniques Doctors Don’t Want You to Know…

    The Weight-Reducing Magic of Yoga…

    The Ultimate Woodworking Course..


  • Best Perennial Vegetables to Grow

    Best Perennial Vegetables to Grow

    If you are a new homesteader, one of the first things you want to think about when creating your plan is what vegetables you will be growing. You want to be as self-sufficient as possible, and that means growing and raising as much of your own food as possible. Of course, those who are new might not know what some of the best perennial vegetables are to plant.

    Asparagus

    One of the nice things about asparagus is that it is extremely durable as a crop. It also happens to be one of the first vegetables that you can harvest during springtime. They are easy to plant. You want to plant them in moist but well-drained soil that gets full sun, and you will want to plant in the early spring after the last frost. The best way to grow them is from rooted crowns. You can find these online or at local nurseries.

    Rhubarb

    You will actually plant rhubarb in a similar manner to asparagus. You want to have it in a location where it will not be disturbed and can grow year after year. Plant this the same time as you plant your asparagus. Something important to keep in mind about rhubarb is that you are only supposed to eat the stems. The leaves are poisonous.

    Sorrel

    This is another perennial plant that works very well in many gardens. It has a tart flavor that is similar to rhubarb. In fact, they are related plants. You will plant these so they get full sun and in soil about six eight inches apart, and rows that are two feet apart. The sorrel can be used in salads, as well as a number of other dishes.

    Garlic

    This can be a perennial as well. All you need to do is leave some of them to go to seed, and they will grow again the next year. One of the nice things about garlic is that it is very easy to grow. In fact, you could even go in for a store-bought garlic if you had to. They need to be planted in a sunny location with well-drained soil, and the root side needs to be down. Only the top of the cloves should stick out above the ground, and then only just barely. They should be spaced about 8 inches apart. As long as you want them, they will sprout relatively quickly.

    Garlic works well to flavor many different types of food from soups to sauces to meat and more. It also has some nice health benefits, as it is good for the heart.

    These are just some of the many different types of perennial plants you can start growing. Take some time to consider different types of fruits and vegetables that you enjoy, and see which ones will work best as perennials. They will likely become a staple of your diet, so make sure it is food that you and the family actually enjoy.

    If you liked this, you’d also like…

    The Secret to Sticking With the Paleo Diet…

    The Ultimate Natural Medicine Course…

    The Little-Known Benefit of Doing Yoga…


  • Easy Perennial Greens

    Often we think of taking the easy way out as a bad thing, but in gardening it can be best way to do things.  One example is perennial greens.  After getting a perennial green started and established, your yield is going to increase for years.  You will also not have down time in your garden while you wait for seeds to sprout, then to mature, and then go to seed again so you can get the next generation.  Perennial greens also give you a chance to nurse an injured or sick plant back that you couldn’t do if it’s life expectancy is only a few months.  These are a few easy to grow super producers you should have in your garden.

    Okinawa Spinach

    Okinawa spinach is a hardy bush with leaves that are either green with purple on the bottom, or green on both sides.  Its benefits are still under investigation but it is said to help lower cholesterol and fight cancer.  It will flower and go to seed but like many other perennial it is better grown from cuttings made from the younger stems.  When harvesting it is better to remove whole branches than to pluck leaves, the plant quickly recovers.  It is best eaten raw or juiced.

    Sorrel

    Sorrel is a low growing plant that resembles leaf varieties of lettuce when it is young.  As it matures the plant will grow in diameter but remain low.  You can buy seeds, but once you get a good clump established, you can propagate it easily by using root divisions.  Sorrel has a tangy taste that is a great addition to a salad, but can be overpowering if it is the base, and it is a great addition to otherwise bitter green juice.

    Tree Kale

    Tree Kale (sometimes called tree collards) is the king of perineal greens.  It can reach massive proportions compared to other greens growing taller than 6 feet, and in full sun will also grow wide.  Its leaves are thick dark green, but have a light taste.  They can be eaten in salads as a base, added to sandwiches, are since an established plant can easily give you more than a pound of leaves each harvest and can be harvested regularly, even daily, it is great to juice.  It may occasionally go to seed, but the seedlings are unpredictable and most plants are grown cuttings of smaller branches.


    Instead of only planting and then replanting, make some room in your garden for the plants that only get better with age.

    If you liked this, you might also enjoy…

    Natural Healing Techniques Doctors Don’t Want You to Know…

    The Weight-Reducing Magic of Yoga…

    The Ultimate Woodworking Course..

  • DIY Mint and Vanilla Extracts

    DIY Mint and Vanilla Extracts

    Vanilla and mint extracts are great to have on hand for baking and cooking, especially with the holidays coming up. And what might be especially good news to gardeners with lots of mint to spare, you can actually  make your own extracts very easily at home!

    For mint extract, either peppermint or spearmint, all it takes is lots of mint to harvest and some high-quality vodka. Vanilla, on the other hand, is probably not something you have growing in abundance in your backyard, and you might have to look for good-quality vanilla bean at your health food store or even online. But a little bit goes a long way, as you only need a few beans to make the extract and it will last for many recipes.

    Speaking of the holidays, these homemade extracts also make really great gifts! They unique and special, and also very affordable to make. They’d make great stocking stuffers or additions to gift baskets for relatives far away.

    What you need:

    Mint:

    1 Cup mint, washed and thoroughly dried

    12 oz. vodka

    Vanilla:

    3-4 vanilla beans, split completely open

    8 oz. vodka

    Jars, preferably dark

    Bottles, preferably dark. (You can use old vanilla or mint extract bottles)

    What you do:

    1. For the mint extract, stuff the mint in your container and cover with vodka. Lightly crush the leaves to release the flavor of the mint into the vodka. Seal the container.
    2. For the vanilla, simply put the beans into your container with the vodka and seal.
    3. Leave your extract in a cool, dark place for about 4 weeks. Shake occasionally.
    4. When your extracts are ready to use, strain out the vanilla or mint and pour them into your bottles, if desired. Keep in your pantry or on your shelf and use as you would store-bought extracts!

    Click Here To Get The Best Survival Medical Course…

    Check Out These Mind Blowing Survival Skills…

    See what is happening in this country and what you can do to protect yourself…


  • DIY Pumpkin Spice-From Your Own Garden!

    DIY Pumpkin Spice-From Your Own Garden!

    Everyone goes nuts this time of year for Starbucks’ famous pumpkin spice lattes, and pumpkin spice products in general are very popular.

    If you’re a homesteader, however, you’re probably more preoccupied with what to do with all your pumpkin! Pumpkin vines can be very productive and you end up with more pumpkin than you know what to do with.

    One great way to use up spare pumpkin is by making your own pumpkin spice syrup, which is the base for pumpkin spice lattes and other yummy pumpkin spice goodies (here’s the recipe for the latte itself if you’re interested)

    What you need:

    • Raw pumpkin, cut in half
    • 1 tbs pumpkin pie spice (how to make your own)
    • 2/3 cup brown sugar
    • 1/2 tsp vanilla extract

    Recipe:

    1. Scrape the seeds out of the halved pumpkin and put on a cookie sheet in a preheated 350 degree oven for 30 minutes.
    2. Remove from the oven, let cool slightly, and scrape the pumpkin out of the skin and into a blender. Puree.
    3. Set aside all but 1/3 cup pumpkin puree for other pumpkin recipes. You can let cool completely and refrigerate or freeze for soups, pie, muffins, etc.
    4. Put the 1/3 cup of puree in a medium saucepan with the sugar, water and spices. Bring to a boil, stirring occasionally, and reduce heat to medium low and simmer for 3 minutes until slightly thickened. Remove from heat, let cool.
    5. Keep in a sealed, refrigerated container for up to a week.

    You can use this syrup as you would regular syrup, over pancakes, in muffins or cookies, or raw vegan deserts. And of course, you can use as the base for your own pumpkin spice latte. You can even play around and make a pumpkin spice tea latte or iced pumpkin spice latte!

    Have fun and happy fall!

    If you like this, you might also like:

    Advanced Gardening Course To Accelerate Your Food Production…

    Survival Medicine & Wilderness Survival…

    Survival Techniques From Long Ago, Re-purposed For The Modern Era…

  • Homemade Apple Cider

    Homemade Apple Cider

    Fall is right around the corner! And while pumpkin spice has gotten very popular in recent years, a timeless fall classic is apple cider. Hot apple cider has long been a staple of fall and the delicious combination of apples and warm spices couldn’t be more classic for the season.

    And it’s very easy to make at home for yourself! Not only is it a very simple process, but the smell of apple cider mulling on the stove will fill your house with the delightful aroma of fall. It’s great to prepare a big batch for a gathering or holiday dinner, there’s nothing quite as classic as a warm pot of apple cider to warm your guests up after their journey.

    What you need:

    • 10-12 apples, washed and quartered
    • 2 oranges, washed and quartered
    • 4 cinnamon sticks
    • 2 tsp ground nutmeg
    • 1 tbs whole cloves or 1 tsp ground cloves
    • 1 gallon of filtered water
    • 1/2 cup sugar, brown sugar, or sweetener of choice

    Instructions: 

    1. Put all the ingredients in a large stock pot, stir to get the spices evenly distributed, and bring to a simmer, stirring occasionally.
    2. Reduce the heat to low, cover, and let simmer for 2 hours
    3. Once the apples have started to soften, gently break apart with a fork and mash gently
    4. After three hours, remove from heat and allow to cool slightly. Then strain through cheesecloth or a fine-mesh strainer into the container you would like to serve from. This can be another pot, a punch bowl, or a pitcher. To get the most flavor out of the fruit, you can try to squeeze the apples and oranges in the strainer or cheesecloth.
    5. Once strained, stir in your sweetener until combined, to taste.
    6. Serve hot and enjoy!

    If you like this, you might also like:

    Advanced Gardening Course To Accelerate Your Food Production…

    Survival Medicine & Wilderness Survival…

    Survival Techniques From Long Ago, Re-purposed For The Modern Era…


  • Cheap Superfoods for the Frugal Health Nut

    Cheap Superfoods for the Frugal Health Nut

    The term “superfood” is very popular these days, and it’s often assigned to exotic, ridiculously priced food oddities like açaí berry or spirulina. But superfoods are not just for rich people, there’s plenty of everyday foods that are rich in nutrients and worthy of being called super. Every day foods like oats, eggs, butter, milk, and the rest of the items on this list may be conventional, but they’re packed with amazing and beneficial nutrients and minerals to make the most of your dollar.

    Grains/Starch:

    • Oats
    • Brown rice
    • Quinoa
    • Millet
    • Sweet potatoes
    • Red potatoes

    Fruits and Veggies:

    • Cabbage
    • Apples
    • Carrots
    • Bananas
    • Blueberries
    • Strawberries
    • Kale
    • Cauliflower

    Protein/Fat:

    • Lentils
    • Beans
    • Tuna
    • Peanut butter
    • Eggs
    • Butter
    • Whole milk
    • Anchovies

    Misc:

    • Coffee
    • Green tea
    • Cinnamon
    • Sauerkraut
    • Parsley

    Healthy food doesn’t need to be fancy, it can be as common as apples, high in fiber and vitamin C, or lentils and beans, some of the cheapest foods around and yet packed with crucial vitamin B, magnesium, folate, iron and zinc. Green tea is a powerful antioxidant and can be found dirt-cheap at many grocery stores and even corner stores, and while superfood kombucha can be pretty pricey at the store, sauerkraut is just as nutritious and costs a fraction of the price. Kale is crazy popular right now for a reason: it’s full of fiber, protein, thiamin, riboflavin, folate, magnesium, calcium and vitamins A, C, K and B, and can cost as little as $1.50 a bunch. You don’t have to break the bank to find healthy, nutritious and delicious food-odds are, you’re probably already eating and enjoying many of these staple foods!

    If you liked that, you might also like:

    Advanced Gardening Course To Accelerate Your Food Production…

    Click Here To Get The Best Survival Medical Course…

    Survival Techniques From Long Ago, Re-purposed For The Modern Era…