Page 1 of 3
1 2 3
herbs – Homesteader Depot

Tag: herbs

  • 5 Step DIY Soap

    5 Step DIY Soap

    Making your own soap can be a fun and creative experience. You have the advantage to create a product that is safer than those available in stores and something that is free of perfumes or chemicals. You can also save money over time by making your own soap when compared to products in stores that contain the same natural ingredients. Need another good reason? You can sell it and make a reasonable profit to help you buy the things you need.

    If you are creative with making soap, you can use molds to make natural skin care products into tiny works of art. Or you can make basic soap that is just as nourishing for your skin. There are various recipes and methods that you can try for soap-making so that each batch you make can be different and unique.

    You can use milk or water to create your homemade soap, but using milk can sometimes be tricky, and the recipes that you may find in books or online may not mention that you can substitute milk for water. If you decide to use milk, keep in mind that it will cause the mixture to heat up faster, so you may want to wait until you are more experience with soap-making before you start using milk. However, once you do, the milk will give your soap a creamier color. Natural goat’s milk is a good source if you want to try it.

    Using colors in homemade soap is a fun way to make the process more creative. You can use natural colorants such as spirulina, cocoa, or paprika to create a rainbow of colors. A mixture of Spirulina and nettle creates green soap while paprika crates a nice orange tone. Cocoa can turn out either brown or purple, and annatto creates a bright yellow soap.

    How to Make Homemade Natural Soap

    The equipment that you will need for soap-making shouldn’t be used for anything else, and it should be very clean. For mixing bowls, you should use glass, stainless steel, tempered glass, or enamel. Do not use copper or aluminum since they can react to the lye. Use styrene plastic or silicone spoons for mixing. You can use silicone baking pans or purchase special molds designed especially for soap-making. You will also need a quart and a pint-sized canning jar, newspaper, stainless steel thermometer, and an old towel.

    Additives

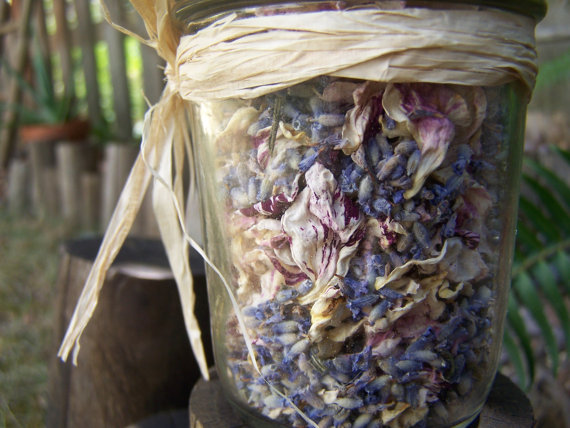
    There are several additives that you can use when making soap including herbs like lavender and chamomile, essential oils, natural colors, oatmeal, ground coffee, salt, or aloe vera gel.

    Ingredients:

    • 2/3 cup coconut oil
    • 2/3 cup olive oil
    • 2/3 cup almond or grapeseed oil
    • ¼ cup of lye
    • ¾ cup of cool water

    Directions

    Cover your work area and put on protective gloves. Measure water into a quart jar. Measure lye, making sure you have the exact amount. Slowly pour lye into the water, stirring as you pour. Stand back to avoid any fumes. When the water clears, set aside.

    Add all three oils together in the pint jar. Heat up in microwave or place in a pan of water to heat up to 120 degrees. The lye should have come down to around 120 degrees by then. Wait for both to cool to between 105 and 95 degrees. You don’t want it to get any cooler than that or it will ruin the soap.

    Related Article:  “Homemade Citrus Cleaner”

    Once everything is at the right temperature, pour oils into a mixing bowl. Slowly add the lye, stirring until it’s mixed. You need to get the lye in contact with the soap as much as you can. After around 5 minutes of stirring, the soap mixture should lighten in color and thicken. Once it has a pudding texture, it is at “trace”.

    Add in herbs, essential oils, and any other additives. Stir thoroughly and pour the mixture into molds. Cover with plastic wrap. Set it in the old towel and wrap up. This will keep the heat inside and start the soap making process

    After 24 hours has passed, it’s time to check the soap. If it is still soft, allow it to sit for 12-24 more hours. Once it’s cold, place on parchment paper. Allow the soap to cure for 4 weeks and turn it once a week to expose all sides to air. Once it is fully cured, wrap the soap in wax paper or place in an airtight container.

  • 5 Natural Medicines You Need to Know

    5 Natural Medicines You Need to Know

    More and more people are turning to natural remedies, especially for day-to-day injuries and ailments.  The concept of antibiotics goes back well before the discovery of penicillin.  In fact, some of the natural medications used most have good antibiotic properties.

    Whether you are suffering from a cut or scrape, or a classic cold, flu, earache, or UTI there are remedies that can assist your body in getting rid of it and getting you back on your feet.

    Natural Aspirin

    The most commonly talked about Salicylic Acid, or natural aspirin, is Willow Bark.  Used for thousands of years, modern-day aspirin was originally produced using the herbs Meadowsweet and Willow Bark, then synthesized later. The problem is, when natural ingredients are copied and created in a lab then sold as a drug, they often create side-effects that natural sources won’t.

    But, before you start a collection of Willow Bark or Meadowsweet to use during your next headache, check out this surprising list of foods and other sources that naturally contain this amazing compound:

    Apples

    Avocados

    Blueberries

    Broccoli

    Cauliflower

    Cherries

    Chili peppers

    Cucumbers

    Eggplant

    Grapefruit

    Grapes

    Kiwi

    Licorice, the herb (Not the Twizzler)

    Paprika

    Peaches

    Plums

    Radishes

    Raspberries

    Spinach

    Strawberries

    Turmeric

    Zucchini

    Can I just say, WOW!

    Honey

    Every version of pure honey has natural antibiotics as well as a number of other healing benefits. Honey has also been used for several millennia worldwide to fight infections. We now know it is effective against over 200 strains of bacteria. You can use it internally to fight off many of these or use it topically in the place of store-bought antiseptic for small wounds and skin infections.

    Also, Read This:  “Honey Vinegar Cough Medicine”

    The best source of honey is raw, local honey, like the kind sold at your local farmer’s market.  Local honey will also aid in building up a resistance to local hay fever allergens as well.

    Ginger

    Fresh ginger has antibiotic properties.  It’s especially good against foodborne pathogens like Salmonella and Listeria, used as a tea with lemon and honey, it’s great for fighting again a cold or even the flu. Ginger is also an excellent anti-inflammatory that can aid in the relief of inflammation issues like arthritis and asthma.

    Raw Garlic

    Also a good defender and fighter against colds and the flu, garlic has been used for ages to remedy fungal infections, UTI’s, and intestinal parasites. The Allicin in garlic even has the ability to kill viruses that are prone to becoming immune to prescription antibiotics.

    Unfortunately, cooking garlic will kill Allicin, negating these healing properties, so you’ll have to use it raw.  Whether you choose to peel it and cut it into small pieces to swallow pill style or mash it up with some honey, raw garlic is a great way to stay healthy during cold and flu season.  Just keep some breath mints, or fresh mint, on hand.

    Related Article: Home Remedies Only Mother Nature Could Come Up With

    Turmeric

    Turmeric is not only tasty but it is good medicine. It will strengthen your immune system and destroys bacteria that leads to disease.  This spice is also great for the stomach in a number of ways that will cleanse and balance our systems. Turmeric is another multi-talented herb that is a good antibiotic as well as an antiseptic and anti-inflammatory agent.

    Buy it or Grow it

    Thanks to the rise of urban and suburban organic farms, these items are becoming more and more easily obtained.  If you’re into DIY, try growing some of these options your own in a garden or on your kitchen window sill in decorative pots.  You can even start your own Bee Colony for the “most local” honey possible.  This will almost guarantee you’ll have what you need when you need it.

  • 5 Creative Ways to Reuse Old Cans

    5 Creative Ways to Reuse Old Cans

    When faced with a number of empty cans in the kitchen, most of us choose to toss them into the recycling bin and call it a day.  Instead, why not turn this common resource into some interesting, fun and creative ways to organize and decorate your home and garden?

    Whether you use some leftover paint, glue, and fabric, go crazy with a tin punch or drill, or just leave them in their natural metallic finish, there are a number of ways these little cylinders can occupy your time and beautify your life.

    Option 1 – Indoor Herb Garden

    Standard vegetable cans are the perfect size for planting a variety of herbs to keep in a window sill or your kitchen counters, giving you easy access for watering and harvesting them as you need them.  As a bonus, having a collection of Basil, Mint, Cilantro, and others will help make your kitchen smell wonderful all day long.

    Option 2 – Starter Planters

    If you are interested in starting a new series of plantings from cuttings or seeds but don’t want to invest in a whole bunch of tiny pots to get them going, use your empty cans instead.  Just fill with potting soil and plant your cuttings or seeds.  Once they’ve started to sprout and take hold, you can easily carry them out to your garden and replant.

    Tip:  if you want to make it easier to remove them from the can when you’re ready to transfer, line the can with a coffee filter before you add the potting soil.

    Related Article: “A Good Choice for Self Reliant Food”

    Option 3 – Candle Holders

    There are a couple of ways you can go about this one.  Each option gives you the chance to let your creative juices run wild.

    If you have a number of big pillar candles, elevate them with some decorated pedestals made from an inverted can.  If you’re more into votives or tealights, punching holes in a decorative design on the sides of your cans will create a beautiful light display in your room at night.  You can even customize sets for different holidays.


    Option 4 – Organizers

    Most of us have a junk drawer full of tiny items we know we may need someday or just can’t bear to part with yet.  Be it rubber bands or paper clips, or a host of charging cords for all our new-fangled technology, keeping them organized and easy to see will help a lot when you actually come across a situation where you actually need something.

    For a more visual storage solution, decorate the cans and use them as pencil and pen cups.  Larger cans can be used as cooking utensil holders next to the stove or sewing supply keepers in your family room.

    Learn More: “Wood Working Tips from Ted”

    Option 5 – Mini Cake Pans

    This is a fun idea to do with the kids.  Let everyone make their own little cake by coating the inside of the pan with oil and flour. Then fill the cans just over half-full with cake batter and bake for approximately 25 minutes at 325oF

    Just use the age-old toothpick in the center method to check if they are done.  Wait for them to cool, and then tip them upside-down so that the cakes fall out. Now everyone has a tiny cake they can decorate just the way they want it.

    No matter what your artistic level is, empty cans are a wonderful way to add to the aesthetic of your home and provide some very practical solutions at the same time without costing you any extra money.

  • How to Make Aromatic Potpourri

    How to Make Aromatic Potpourri

    If you are a flower gardener or simply love the smell of fragrant potpourri, you should definitely learn to make your own. You can harvest and process your own flower petals or buy your own and make several sachets to give to friends and family. There are few more thoughtful, easy homemade gifts than an aromatic sachet of potpourri!

    The most common bases for potpourri are rose petals and sweet geranium leaves. If you grow roses, this is a wonderful way to use the petals once the flowers begin to die. You can add to these whatever you like, and we’ve got some great ideas for you.

    There are two main types of potpourri: dry and moist. Dry potpourri is very easy, as long as you are sure you have very dry ingredients. You simply dry out whatever fragrant flowers and herbs you’d like to use in a dehydrator or oven, and pack into sachets. Moist potpourri can be a little trickier.

    Moist potpourri can be a little trickier. You need to have the right balance between moisture and dryness, so it might take a little trial and error. What you want is to get your ingredients to a sort of leathery consistency, so that they are not too wet to store but not so dry that they lose fragrance. Once you have achieved this consistency, however, if you pack them into jars with some salt to absorb any excess moisture, they are delightfully aromatic. You might wonder why they’re worth the effort, well, while dry potpourri is certainly easier, moist potpourri is far more fragrant.

    Dry potpourri is ideal for putting in drawers or storage boxes to keep things smelling good when they are put away, or tossing in bedding. You can also leave it sitting in a bowl in your living room or bedroom for a pleasant aroma. Wet potpourri, however, is best suited for this latter purpose.

    Long-Term Survival for Homesteaders…

    How to Make Potpourri

    Since moist potpourri can be a bit tricky, we will focus on how to make dry potpourri to get you started.

    First, you will want to gather together your ingredients and make sure they have properly dried. Depending on what you are using, this might be very easy, or it might take a bit more patience. Many flowers and herbs can simply be hung upside down for a few days, left to dry in a paper bag, of spread out on some cloth or butcher paper in a cool, dry place for a few days. Or, if you have a dehydrator, this can speed things up, just be careful not to dry them so much that they become impossible to handle.

    Factors such as the thickness and moisture content of your ingredients, your given environment, and the method you choose to dry your ingredients with, will all have an impact on just how effectively they dry. So use your best judgment.

    Once you have your ingredients properly dried and gathered together, place them all in a large bowl or on a large tray. Mix together. Then, distribute into bags and tie. A small scoop helps a lot here, but you can just use your hands as well.

    For bags, you can buy some specially made, or simply sew very simple ones out of muslin and secure with a pretty ribbon. You can get creative though, lace is really nice-looking and linen is a classic.

    You can also reserve some to keep in bowls around the house. This is a lovely way to add scent and a touch of vintage decor to your home. Adding some potpourri to an antique crystal bowl is particularly chic, and an incredibly easy way to dress up your home decor. You can, of course, use any bowl, even a small mason jar with a ribbon tied around it would be very farmhouse chic and incredibly cheap and easy to do.

    Speaking of mason jars, if you don’t feel like fussing with bags or bowls, simply filling some small mason jars with potpourri and covering with a piece of fabric and a ribbon, or even a mason jar ring, is a very quick and easy way to store and use your potpourri. With a small enough jar, you can keep this in a dresser drawer to keep your clothes smelling fresh, or place around your home for fragrance and style. This is also a great way to store damp potpourri if you are bold enough to try your hand at making it.

    Here are some great ideas for ingredients to use for both wet and dry potpourri:

    • rose petals
    • sweet geranium
    • cloves
    • rosemary
    • lemon peels 
    • bay leaf
    • thyme
    • lavender
    • verbena
    • rosemary
    • violet
    • mint
    • cinnamon cloves
    • orange peels
    • allspice 

    Potpourri makes a wonderful gift for friends and family, or simply a great natural way to improve the fragrance in your home. If you have lots of fragrant flowers and herbs around your homestead, see what you can come up with! You’ll be happy you did.

    Natural Healing Secrets You Need to Know…

  • 10 Powerful Plants That Repel Mosquitoes

    10 Powerful Plants That Repel Mosquitoes

    While I’m thrilled for warm weather to finally return, I’m not as excited about the flying pests that come with it. As spring marches on and the land is replenished with rainfall, potential hotspots for mosquitoes are developing. In addition to checking your property for areas where water is allowed to pool (your mosquitoes will use these as their own personal birthing centers), you can take safe steps to prevent infestation with these naturally-repellent plants!

    • Citronella Grass/Lemongrass is the source of citronella oil that is used in many commercial insect repellent products like citronella candles and tiki torches. It can be grown just about anywhere in North America, but expect it to die off during the winter unless you live in USDA climate zones 10-12. Citronella grass grows best in full sun, requires lots of water and can grow 5-6 ft tall. 
    • African or French Marigolds have a very strong aroma that is pleasing to people but off-putting to bothersome bugs! They’re great for repelling garden pests, but you can also plant or pot them around your home or patio to keep mosquitoes at bay. The African marigold is the bigger of the two and can reach heights of 30 to 40 inches. Their gorgeous blooms feature different shades of yellow and orange. The French marigold only gets to be 6 to 24 inches tall but is much more colorful with the added shades of deep brown and crimson. All marigolds need full sun and do best in well-drained, moderately fertile soil. 
    • Basil, a member of the mint family, is a popular culinary herb in Italian cuisine. One small basil plant may not have the repellent power of an African Marigold, but planting several basil stalks for culinary use will have the added benefit of driving away mosquitoes. Basil’s many hardy varieties prefer full sun and can be grown in containers or in the ground. 
    • Lemon Thyme is quite promising in terms of its repellant potency. In a study done by the University of Guelph in Ontario, they found that the crushed leaves of lemon thyme had 62% of the repellency of DEET. Lemon thyme is very easy to grow, needing only partial or full sun, occasional pruning, and enough water to keep from dehydration in climate zones 5 and up. 
    • Catnip is a perennial herb and feline favorite. While it may attract your cats (or your neighbor’s!) researchers have found that it has the opposite effect on not one but two nasty little bugs: the mosquito and the cockroach. In fact, they found that one of catnip’s essential oil constituents, Nepetalactone, has roughly ten times more mosquito repellency than DEET. Catnip is a hardy herb, but it requires plenty of water, sun, and a bit of pruning to thrive.
    • Sage is yet another herb that offers its services as a multi-insect repellant. Mosquitoes, flies, cabbage moths, and black flea beetles all keep their distance from sage plants. This perennial likes full sun with well-drained soil does well in pots or gardens and grows to be about 18 inches tall. 
    • Pennyroyal is known mostly as an ancient culinary herb and herbal remedy, but it has a bit of a bad reputation because its essential oil is highly toxic. Consider whether you have pets or small children that may pick a leaf to nibble on while exploring outside. Pennyroyal really packs a punch when it comes to repelling insects–fleas, ticks, and mosquitoes, the terrors of outdoor living, all stay away from Pennyroyal. The plant grows to about 12 inches tall and is best grown in partial-to-full sun in zones 5-9. 
    • Rosemary is an aromatic evergreen sub-shrub that is used in culinary seasonings and herbal remedies. It is commonly known to repel fleas and mosquitoes. Rosemary grows best in hardiness zones 7 to 10 and prefers full sun and dry, rocky, well-drained soil. Rosemary starts off small, but can spread and grow to 6 feet tall or more over time! 
    • Geraniums (sometimes called citronella or mosquito plants) are often sold in garden centers as natural repellants. While lemongrass is the true source of citronella oil, geraniums still do a great job keeping mosquitoes, cabbage worms, and Japanese beetles out of your space. Geraniums thrive in climate zones 9 to 11 but can be grown in pots and moved inside in colder climates. Like pennyroyal, the geranium plant is poisonous, so exercise caution with pets and small children. 
    • Lavender is a beautiful plant with many uses in aromatherapy, herbal remedies and repelling spiders and unwanted insects such as ants and moths. As a herbal remedy, it can alleviate the pain and itching associated with all types of insect bites including mosquitoes. Lavender is typically used as an essential oil but can be used as fresh or dried cuttings. Lavender grows happily in climate zones 4 to 9 but can be kept indoors in extreme north or south locations.

    This year, be prepared! Don’t become a slave to sticky, toxic bug sprays and calamine lotion. Plant any (or all) of these natural repellants around your home, patio, and garden to enjoy your outdoor space freely all summer long.

    [Suggested Video] Discover almost all the edible and medicinal plants in North America <<< Watch Here >>>

  • The Best Essential Oils to Start a Collection

    The Best Essential Oils to Start a Collection

    There’s a lot of hype about essential oils out there, and it really is for good reason. Essential oils are a wonderful addition to any natural medicine cabinet.

    But it can be overwhelming trying to get yourself set up with some essential oils, and you can easily get sucked into some of the network marketing companies that sell essential oils for a very high price. or a bundle of several oils at once. You can easily spend up to a few hundred dollars on small bottles of oil that you won’t even use!

    There are literally dozens of types of essential oils out there to get, so how do you know which ones you will actually use? You might have one oil recommended to you for a certain remedy, but if you invest in a bottle, will you use it again?

    Here are some of the most common essential oils, that have the most versatile uses, and are also the easiest to find. There’s a lot of obscure oils out there that have a great place in natural medicine, of course, and can offer great help to certain remedies. But these oils are the best, all-purpose oils, that you will most likely find yourself reaching to time and time again, who have a long list of uses.

    When you are purchasing essential oils for the first time, make sure to pick something you’ll actually use. Good quality essential oils will work wonderfully well, and a little bit goes a long way, so one small bottle actually might last you years. Consider one of these for your starter oil, and you definitely won’t run out of ways to use it.

    A quick note on the term “carrier oil” which I use in this guide. A carrier oil is a non-essential oil that you use to apply essential oils topically. Since essential oils are highly concentrated, you usually only need 1-3 drops for topical use, and if you don’t have the resources to make your own balm, adding the oil to a carrier oil can help to quickly apply an essential oil directly to you skin. Some great carrier oils are olive, almond, or coconut oil, but you can use whatever you have on hand in a pinch.

    Some great carrier oils are olive, almond, or coconut oil, but you can use whatever you have on hand in a pinch. Simply pour some of the carrier oil into your hand, and add 1-3 drops of the essential. Mix it around with your finger, and apply.

    If you are considering starting your essential oil collection, I highly recommend investing in a good carrier oil as well. My personal favorite is almond oil, since it’s great for your skin and generally affordable.

    Now, on to our essential oils!

    Lavender

    I wrote a whole post about lavender alone, so you can refer to that for more detail. But lavender always tops my list for useful essential oils. It smells amazing, has been used for centuries, and has a list of uses as long as your arm. You really can’t go wrong with lavender oil as a staple in your medicine chest.

    Tea tree

    Tea tree oil is another great starter essential oil. It is naturally antibacterial and antifungal, so it’s great for everything from DIY all-purpose cleaner to treating athlete’s foot or dandruff. As a cleaning product, it works amazing well to sanitize and deodorize every room in your house, and it smells really clean and lovely too. Way better than Pine-Sol, and healthier too!

    Peppermint 

    Peppermint is another favorite of mine for many reasons. It is great for diffusing, especially if you’re battling a cold, and can be added to a carrier oil for a natural alternative to Vick’s vapor rub, or to sooth sore muscles and other aches and pains. You can dab a little on a sore tooth or add a few drops to some water for a very effective homemade mouthwash. It is also a great addition to homemade toothpaste if you miss the minty-freshness of conventional toothpaste. It is also great as a natural spider repellent around the house.

    Cinnamon

    Cinnamon is another great essential oil for dental issues, it can numb an aching tooth or flavor mouthwash and toothpaste. If you’re a fan of air fresheners or scented candles, cinnamon is a much safer and chemical-free alternative to these toxic, synthetic scents. It is another great oil to diffuse when you are suffering from a cold, it will deodorize the air and also help break up phlegm or congestion.

    There is also one amazing,  near-miraculous use for cinnamon oil: ant repellant. Nothing banishes ants from your kitchen like a few regular sprays of water with a bit of cinnamon essential oil in it. You’ll be amazed; the ants will never come back. It is on this list for that reason alone, although it’s still a very effective oil in other ways as well! Read more about this in my latest post on banishing ants for good.

    Eucalyptus 

    Eucalyptus, like tea tree oil, is a great antifungal and antibacterial oil that has a lot of medicinal uses. It’s ideal for diffusing when sick, or adding to your chest in a carrier oil if you have a cough, congestion, or to ease asthmatic symptoms. Many people love the fresh, earthy scent of eucalyptus, so it’s not only medicinal when diffused, but a wonderful air freshener. You can also use it topically in a carrier oil to relieve sore muscles or tension.


    Essential oils have so many uses around the house, and these are some of the best to start with. You might not even want to buy any more after getting any one of these staples, or you might find yourself hooked! Let us know if you’d like to know more about less common essential oils and their uses, and we’ll be sure to get that posted for you as well.

    If you enjoyed this, you might also like….

    Can You Defend Your Family When SHTF?

    Natural Healing Secrets You Need to Know…

    Effective Primal Diet Hacks…


  • How to Make Infused Vinegar for Cleaning

    How to Make Infused Vinegar for Cleaning

    If you want to clean using natural, green cleaning products, but miss the fragrant smells of conventional, store-bought cleaners, then this is a great idea for you.

    Scent-infused vinegar is a really great, and cheap way, to make your own fragrant cleaners that actually work. We’re definitely fans of essential oils here, but we understand a lot of people aren’t ready to make the dive into buying them, or aren’t sure how to use them properly.

    This recipe is cheap, easy, involves no essential oils, and cleans amazingly well. You even can most likely make your own custom cleaner with a scent that you love using leftover scraps from your kitchen! Let’s begin.

    How to Make Scent-Infused Cleaners

    The basic formula for these cleaners involves soaking your fruit, herbs, or flowers in in vinegar for a few weeks, then using that vinegar as the base for a simple homemade cleaner. Here are some ideas for infusions you can use:

    • pine needles
    • citrus peels
    • fresh lavender sprigs
    • fresh rosemary sprigs
    • cinnamon sticks
    • eucalyptus leaves
    • rose petals
    • gardenia blossoms

    What you need to get started is one of the above, some other fragrant plant of fruit, (or any creative combo you can come up with!), a jar with a lid, and some regular white distilled vinegar. Keep in mind, the vinegar should be able to fill roughly 1/3 of a spray bottle when you’re done, but it doesn’t have to be perfect.

    For the following cleaner, you will need that spray bottle, some distilled water, and if you want a little extra cleaning oomph, a dash of dish soap. 


    Directions: 

    1. Take the scent of your choice, and, if they’re large like sprigs, roughly chop them. You don’t have to worry too much though, you just need to be able to stuff them in a jar.
    2. Put your herbs, leaves, peels, etc. in the jar, and cover with vinegar.
    3. Put the lid on the jar securely.
    4. Place in a cool, dark place, for 2-3 weeks. You can even do 1 if you’re in a hurry, it will still be lightly infused.
    5. When you’re ready to make your cleaner, strain whatever you have been infusing out of the vinegar, and pour your vinegar into your spray bottle.
    6. Fill the rest of the spray bottle with the distilled water (really, you can use tap, but distilled is just more sanitary) and a dash of dish soap if you like.

    And that’s it! Use this as you would your regular cleaner, and you’ll be amazed at how good it cleans and how delightful it smells.

    If you enjoyed this, you might also like….

    Can You Defend Your Family When SHTF?

    Natural Healing Secrets You Need to Know…

    Effective Primal Diet Hacks…

  • Easiest Indoor Herbs to Grow

    Easiest Indoor Herbs to Grow

    Herbs are a wonderful way to start gardening, either in a starter garden, on your patio, or even your windowsill. They don’t usually require a whole lot of work, are fine in containers, and are wonderful for adding fresh, healthy flavor to all kinds of dishes!

    Of course, if you want to use herbs primarily for cooking, or simply want a house plant that provides more than just decor, indoor herbs are perfect. Here is a list of some of the easiest herbs to grow indoor:

    Basil

    Basil is so easy to grow anywhere, and that includes indoors. You can start them from seed right in the pot, and simply place in a southward facing window so it gets lots of warm sun, which it loves, and you’ll have one happy plant!

    Lemongrass

    Lemongrass is incredibly easy and hands-off to grow. All you need is one small stock to get started, and it will take off! You can use the stocks and leaves for all kinds of delicious dishes.

    Chives

    Chives produce quickly and easily and require little light, so they’re a breeze to grow indoors. Like lemongrass, you can start them from already established plants by digging part of it up, including the roots, and placing in its own pot with potting soil. Cutting the leaves off stimulates more growth, so it’s also perfect for regular use in the kitchen!

    Parsley

    Parsley is a staple of many cooks, and it doesn’t require very much light or maintenance to grow indoors at all. It does take a little longer than other herbs to get established, but once it does, you’ll have regular access to fresh sprigs to finish off any delicious meal.

    Peppermint

    Peppermint thrives in the shade, making it a great choice for indoor gardens. It’s a crawler and grows fast, so if you plan on using it regularly, it’s ideal for cooking. You can throw in cold summer drinks, brew your own delicious (and healthy!) mint tea, or add to desserts and many Asian dishes. Yum!

    If you enjoyed this, you might also like….

    Can You Defend Your Family When SHTF?

    Natural Healing Secrets You Need to Know…

    Effective Primal Diet Hacks…