Page 3 of 13
1 2 3 4 5 13
homesteading – Page 3 – Homesteader Depot

Tag: homesteading

  • 5 Wonderfully Natural Remedies to Fight Dry Skin

    5 Wonderfully Natural Remedies to Fight Dry Skin

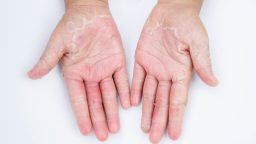
    Dry skin can be extremely uncomfortable to those who suffer from it chronically.  From cold weather to medications that bring about this most inconvenient side effect, it can sometimes feel daunting while trying to find a solution and get relief.

    Fortunately, there are some natural remedies that may be the answer you’ve been looking for.


    Avocados

    This wonderful fruit (yep, it’s in the pear family) is packed with Vitamin E plus Omega-3 fatty acids.  It’s a very popular ingredient for people who suffer from chronic dry skin.


    How to Use Avocados

    Cut the avocado in half and scoop out the pulp. Using a fork, mash the pulp into a paste.  Mix in 2 Tbsp of raw honey. Apply to all the areas you want to treat and let it sit for 20 minutes.

    Wipe the paste off with a clean and damp cloth and then rinse with lukewarm water.


    Coconut Oil

    This substance is amazing.  You can cook with it, use it as a make-up remover and nighttime face cream.  You can also use it as a dry skin treatment.


    How to Use Coconut Oil

    Just before you shower, rub a small amount of oil between your hands to warm and soften it. Massage the coconut oil into your skin, applying more as needed.

    Let it sit for at least 10 minutes, then shower as normal.


    Honey

    Honey isn’t just a great tasting ingredient to add to food, its antioxidant, humectant, and antimicrobial features also make it a very effective moisturizer.  Not only will it help you rehydrate your skin, those same antimicrobial agents will help soothe skin that has become irritated from scratching.


    How to Use Honey

    Immediately before you shower, massage raw honey over your body using circular motions.  Let it sit on your skin for at least ten minutes then shower as usual.

    Do this every time you shower, and you should experience relief quickly.

    Olive Oil

    This main staple of many a chef’s kitchen is packed with antioxidant properties.  These properties make it an excellent choice to fight off dry skin.


    How to Use It Olive Oil

    Rub a few tablespoons of oil between your hands to warm it up.  Apply it to the areas you want to treat, massaging it in circular motions. Let it sit for at least 30 minutes. Shower as usual then pat dry and apply a light moisturizer.

    Suggested Article: 8 Amazing Uses for Tea Tree Oil

    Yogurt

    Yogurt not only hydrates your skin, it soothes the itchiness often accompanying it.  Additionally, the lactic acid helps remove dead skin cells to improve your skin’s tone and texture.


    How to Use Yogurt

    Just before you shower, apply plain yogurt directly to the area you want to treat.

    Massage it into your skin and let it sit for at least 10 minutes.

    Shower as usual.


    One More Technique for the Road

    If you like the idea of doing a “deep conditioning” treatment on your body once a week and don’t mind being really oily for the night, consider this. Using one of the oils listed above, I prefer coconut, right before bed take a shower or bath.

    Then, WITHOUT DRYING OFF, apply a generous layer of oil to your entire body.  Let it soak in for 20-30 minutes as you air dry slightly, then “wrap” yourself up in a pair of full coverage pajamas or long-sleeved nightgown.  Add socks to keep the oil on your feet then head to bed.

    As you sleep the oil will not only hold in more of the water that soaked in as you showered, it will soak in itself leaving you super soft to the touch the next day.

    Now go raid your pantry and fridge!

    The Medicine Chest — how to deal with a disaster using alternative medicine. Check it out here>>>

  • Identifying and Understanding Poison Ivy

    Identifying and Understanding Poison Ivy

    The bane of every campers’ weekend getaway, poison ivy, interestingly enough is not actually in the ivy family.  It’s a relative of the almond family.  Who knew?

    Most of the time, you only have to worry about avoiding it when you are in the great outdoors and away from urban areas.  However, occasionally it will pop up in your yard.  If this happens, you’ll want to make sure you wear protective clothing and accessories like gloves and even a mask to avoid the worst itching you can ever imagine.

    Also, you’ll want to be very cautious about how you dispose of it, so no one else accidentally comes in contact with it either.  And, whatever you do, do NOT burn it!

    The smoke produced by burning poison ivy takes all of its poison airborne.


    Identifying Poison Ivy

    If you grew up in a more rural community, you might already know some of the rhymes used to recognize the plant and its different features.  If you didn’t learn any of these, take note, they could come in handy someday.


    1. If Butterflies Land There, Don’t Put Your Hand There

    Butterflies can safely land on poison ivy.  They do it to protect themselves from predators.

    1. Berries White – Run in Fright or Danger in Sight

    Describes the light gray to white colored berries seen in the fall.

    1. Hairy Vine – No Friend of Mine. Ragged Rope – Don’t be a Dope

    Refers to the shaggy appearance its vine exhibits.

    1. Leaves of Three Let It Be
    2. Longer Middle Stem – Stay Away from Them

    The middle leaf of a cluster of three is typically longer than the side leaves.

    1. Red Leaflets in the Spring, it’s a Dangerous Thing

    The leaf color changes with the seasons.  Red in spring, Green in summer, Reddish-orange in fall.

    1. Side Leaves like Mittens Will Itch Like the Dickens

    A few varieties have side leaves that resemble a mitten with a thumb sticking out.

    What to do if You are Exposed to Poison Ivy

    If you discover you’ve been exposed, there are actions you can take to reduce the severity.

    • First, carefully remove your clothing and put them directly into the washer so they can’t spread the oil to other surfaces.
    • If it has been less than 10 minutes since exposure, wash your hands with soap and water and any other areas that have come in contact with the plant.
    • If it has been over 10 minutes, you still want to wash up, but you’ll also be needing a remedy for the rash that is headed your way.


    Poison Ivy Remedies

    There are several effective over the counter treatments for Poison Ivy.  There are also a few home remedies that work.


    Apple Cider Vinegar

    ACV gets rid of the itch almost immediately and helps neutralize the poison.  Apply with cotton balls or with a spray bottle several times a day to relieve itching and help the skin start to heal.

    Just be prepared to smell like a salad for a while.


    Baking Soda and Oatmeal Paste

    1. You’ll have to do a little cooking for this one, but it’s worth it. This “recipe” can be made in bulk and stored to apply several times over the course of your recovery.
    2. Start by bringing 1 part rolled oats to 2 parts water to a boil.  Remove from the heat and cover until all the water is absorbed by the oats.
    3. Stir in 1 Tbsp Baking Soda for every ¼ Cup oats and mix well.
    4. If the paste is still very hot, you can add some cold water or an ice cube to bring it down to warm.
    5. Apply the paste thoroughly to the affected areas.  Relax while you let it dry out, then carefully brush off the dried paste.
    6. Repeat 2 times a day as needed.
    7. For an all over treatment, mix the paste into a lukewarm back and soak for a while.

    Conclusion

    If possible, just stay away from poison ivy.

  • 8 Amazing Uses for Tea Tree Oil

    8 Amazing Uses for Tea Tree Oil


    Contrary to its name, tea tree oil is not remotely related to the tea plant.  It is actually native to and only grown in Australia.  Which is probably why its benefits have gone largely unspoken of until recently.

    It is important to note that tea tree oil is very toxic if swallowed.  However, it can be used topically, and its ability to disinfect naturally makes it a viable alternative to harsher synthetic products.


    Antiseptic and Antifungal

    One of the most popular uses of tea tree oil is as an antiseptic and antifungal treatment.  Its antibacterial properties make it an excellent treatment for wound care and skin irritations.


    Cough Relief

    Bring a pot of water to a simmer then remove from the heat.  For convenience, consider pouring the water into a bowl.  Add two drops of tea tree oil to the hot water. Using a towel draped over your head to act as a tent, inhale and exhale the vapor for several minutes.

    If you aren’t comfortable inhaling the oil vapor, an alternative method is to massage a few drops directly onto the chest.


    Insect and Pest Repellant

    Tea tree oil is known to not only repel certain pests but also have pesticide properties.

    A few recipes to keep in mind include:

    Tick and Head Lice Repellent Spray

    • 1 Cup Witch Hazel
    • 2 Tsp Tea Tree Oil
    • Mix and spray on your feet, shoes, your pets and where ever else you want to create a tick barrier. Did you already pick one up?  Apply two drops of tea tree oil directly on the tick to eliminate it.
    • Spray directly onto hair and massage into scalp to keep your child coming home with this unwanted guest.

    Insect Repellent

    • 1 Quart Water
    • 15 drops of Tea Tree Oil
    • Mix and spray anywhere you want to repel insects.


    Parasitic Infection Treatment

    Apply tea tree oil to insect and parasite bites to soothe any itching and ward off infection.


    Personal Care

    Make your own antibacterial soap by adding it to basic liquid soap and mixing well.

    Problems with itching and irritation in the more personal areas of your body? Add 15 drops of the oil to a lukewarm bath and soak for 20-30 minutes.


    Psoriasis Free For Life….Get rid of Psoriasis Quickly and Permanently – GUARANTEED

    Pain Reliever

    Tea tree oil’s natural properties let it penetrate the skin and muscle underneath quite easily.

    Massage a few drops into affected areas to soothe pain from inflammation.

    Sunburnt?  Mix a drop of tea tree oil with a drop of lavender oil, and a Tsp of coconut oil for a soothing topical ointment after a day in the sun.


    Disinfectant Spray

    Mix with water to use as a disinfectant spray throughout the house.  Mix a Tsp of oil with a cup of white vinegar to clean taps, light switches, doorknobs and more to kill off cold and flu viruses that may be lurking.

    Suggested Article: The Best Essential Oils to Start a Collection

    Air Freshener

    Tea tree oil is also a popular aromatherapy scent.  Just soak cotton balls in the oil and place them discreetly around the home to ban odors and freshen the air.  Make sure they are out of reach of children and pets since the oil is toxic if eaten or swallowed.

    And the List Goes on and On

    We have touched on many of the most popular uses for tea tree oil, but truthfully, the list could continue for days.

    Regular users of tea tree oil will tell you how versatile and effective it can be around the home.  From the medicine cabinet to the cleaning supply shelf, this amazing oil is your one-stop shop to stay healthier and happier.

  • Never Waste Water Again

    Never Waste Water Again


    Picture this, for every inch of rain that falls on a 500 square feet area of your roof; you can collect up to 300 gallons of it to use around your property.

    If you live in an area that doesn’t restrict the use of rain barrels, you could be saving money every month on water. Rainwater can be used for a variety of tasks including:

    • Rinsing off your garage floor
    • Watering your indoor plants
    • Watering your outdoor plants
    • Flushing your toilet
    • Creating an outdoor shower
    • And more

    I know a potter who has a studio in her garage.  If you are at all familiar with pottery making, it required quite a bit of water to keep the clay at a usable moisture level, to rinse and clean after working, and to recycle the clay itself.

    Thanks to her ability to collect water every time it rains, she can exclusively use rainwater for everything she does in her clay studio.  Can we say WOW!

    Here’s what you need to do to make your own DIY Rain Barrel and tap into the otherwise free natural resource.


    Supplies Needed

    • Bulkhead Fittings:
      • ¾ inch Ball Valve Faucet
      • ¾ inch Fitting
      • 1 ½ inch Fitting
      • Downspout Attachment
      • Mosquito Screening (8 inches by 8 inches)
      • Overflow Hose with Valve and Fittings
      • Teflon Tape
    • Drill
    • Flathead Screwdriver
    • Felt Pen or Marker
    • Tape Measure
    • Rasp or Round File
    • Hole Saws:
      • 1 ½ inch Hole Saw
      • 3 inch Hole Saw
      • 5 ¼ inch Hole Saw or a Jig Saw
    • One 55-gallon Food Barrel
    • Two 6-inch plastic flower pots

    Here We Go!

    1. Clean and dry your food barrel inside and out.
    2. Measure 4 inches up from the bottom of the barrel and mark with your felt pen. This is where your ¾ inch bulkhead fitting and faucet will go.
    3. Cut a hole using the 1 ½ inch hole saw. You may want to place the barrel on its side for easier access to the drill site and better stability.
    4. Measure 4 ½ inches from the top of the barrel and mark.
    5. Switch to your 3-inch hole saw and make the hole for the overflow.
    6. Clean loose pieces of barrel material from around the holes’ cuts using the rasp or sandpaper.
    7. Use a 5 ¼ inch hole saw, or a jigsaw to cut out a circular hole out of the top of the barrel. This opening is where your DIY filter will fit inside and where the water will enter the barrel.
    8. Depending on the flexibility your downspout, you’ll probably want to place this hole toward the opposite side of the barrel from the location of your faucet hole.
    9. Install the ¾ inch Faucet Fitting.
    10. Install the ¾ inch Ball Valve Faucet using the Teflon tape to prevent leaks.
    11. Install the 1 ½ inch Bulkhead Fitting Into The Overflow hole (the second hole cut).
    12. Create the filtration system, using the 6-inch flower pots and the mosquito screen.
    13. Attach the screen to the bottom of one flower pot then put that pot inside the second one. Basically, you are sandwiching the screen between the 2 flower pot when they are stacked together.
    14. Place your new “filter” into the hole on the top of the barrel.
    15. Place your new rain barrel on the site you want to use it and insert the downspout into the filter.
    16. Attach the overflow hose to the upper side hole. This hose can either be placed away from the barrel to disperse excess water when the barrel fills or can be used as a link to another barrel, where it becomes the supply line instead of a downspout.

    Voila!  You are now able to save water (and money) with your new supply line that comes straight from nature.

  • Don’t Make These Common EDC Mistakes

    Don’t Make These Common EDC Mistakes

    When putting together an EDC kit, it can sometimes be difficult to tell the difference between selecting an item because it could really be useful, and selecting an item because it’s really, really cool.

    To start, ask yourself some questions as you contemplate each possible item.


    Will this tool be helpful in the region I live in?

    Example, an ice pick is probably going to be of less use in a tropical or desert region.


    How many functions are included with this tool?

    Double check to see how many different uses you can get from a single item.


    Is the tool tried and tested?

    Check on an item’s return policy, this way you’ll be able to test a tool out and determine if its durable enough.  Preferably you’ll want to do this before you find yourself in a survival situation.


    How does the cost compare to the quality?

    Most of the time you get what you pay for.  But it is also possible to find a good deal on a quality item.  Do your research and compare reviews for differently priced items to see how they stack up to cheaper versions.  Then, wait for a sale or other promotion to get the best possible item for your budget.


    Is there anything comparable that would be lighter or easier to carry?

    Remember, when it comes to EDC set-ups, smaller and lighter is the goal, not bigger and bulkier.  Shop around and compare sizes versus weight.


    Will the tools included give me a better chance of survival?

    While it may be convenient in day to day like to have a set of nail clippers, a bottle opener, and a spoon handle, when you are stuck in the middle of nowhere and need to cut some vines for cordage or drive a stake in for shelter support, these aren’t going to be as handy.

    The Most Common Everyday Carry Build Mistakes

    To help ensure you don’t make some of the common mistakes a novice EDC builder often does, here are some things you need to avoid doing to yourself.


    Taking on Too Much

    You would think at this point it would be obvious to avoid weighing yourself down with extras but, like a kid packing his toys for a vacation trip, it all may seem like something you can’t live without, but most of it probably it.


    Being a Cheapskate

    A good deal in the store may end up being a deal breaker in an emergency situation.  Invest in quality products that you know you can count on.


    Relying Completely on Battery Operated Items

    Yes, a cell phone, flashlight, and GPS can be handy, but what if they stop working?  Or, what if they don’t work at all because you forgot to check the batteries before you left and didn’t grab spares?

    Good substitutes for these are an emergency whistle, a compass, and a hand-crankable light.


    Forgetting to Take Care of Your Supplies

    Good knives and other items need consistent care to keep them usable.  Over time, some items, especially metal ones, can corrode from air exposure.  Additionally, batteries can get old and wear out so bring your stuff out regularly to make sure its still in tip-top shape.


    Not Knowing How to Use a Tool

    This particular subject reminds me of the book Wild that was later made into a movie.  I haven’t actually seen the movie but I have read the book.  During the advent of her hike, she runs into problems such as not realizing the type of fuel her stove takes and having no real idea how to use an ice ax.

    She was fortunate enough to be in a situation where she could seek help and information as she progressed.

    In a true survival emergency, you are not going to have that luxury.

    For some tools, especially ones that have a specific purpose, the technique to successfully use them may be more complicated than you realize.

    Make sure you take the time to learn exactly how everything works before you find yourself needing to.

    [Don’t Miss This]  Tripple your accuracy with this simple shooting tip…ex sniper used it to increase his precision shooting.

  • 10 Loans and Grants to Help Your Homestead

    10 Loans and Grants to Help Your Homestead

    Dreaming of a homestead but don’t have the cash?  If money is the only thing stopping you, there are options that can get you the money you need to start or improve your homestead.

    These grants are low or no money down loans are specifically designated to rehab older farms or build new ones. From agricultural to livestock funding you can get the money you need to update or get started your homestead.

    10 Grants and Zero or Low Money Down Loans Available for Homesteading


    Agricultural Reinvestment Fund Grants

    If you are an existing farmer in North Carolina, you can request $8,000 annually to invest in the agricultural development of your existing operation.


    Farmers Market Promotion

    This promotion program was created to give an affordable way for farmers to market their produce and support regional and local agricultural sources. The funds may be used to create new or improve existing products’ sales opportunities.


    FSA Operating Loan

    The FSA low or no money down loans provides up to $35,000 to farmers for startup expenses.  These expenses can be utilized for the purchase of supplies like livestock, seeds, crops, fencing and machinery and fertilizer.


    USDA Beginning Farms Loan

    Farm loans and grants may be awarded for the purpose of converting wild acreage into pasture land and repair roads for better access and to lower stormwater run-off.


    USDA Rural Development Loan

    The Rural Development loans program are awarded for the purpose of agricultural land purchases.


    Fannie Mae Home Ready Loan

    This loan allows a borrower to have a debt to income ration higher than 45%, making it easier to receive a loan even if your credit record isn’t the best. The loan requires a 3% down payment and features reasonable interest rates.  It also allows the borrower to use funds from other government programs to pay the down-payment.

    Minority and Women Farmers and Ranchers Grants and Loans

    As the title implies, these homesteading grants and loans are focused on assisting Women and Minority residents.  The grants can be used for property clearing for residential use by the borrower or commercial farming.

    Applicants for the loans must meet the 640+ credit score required for all farm loans.


    Missouri Beef Grants

    If you are an existing farmer or rancher in the state of Missouri, you can apply for a $20,000 grant.  The funds must be used for enhancements to existing agriculture endeavors for the purpose of expanding the business or modernizing the current operation.


    National Sustainable Agriculture Commission Down Payment Assistance

    This Commission program provides funds specifically for the purpose of making down payments.  Qualifying applicants must be beginning and socially disadvantaged farmers and ranchers.

    Socially disadvantaged loan applicants are categorized as at least one of the following demographics:

    • African Americans
    • Alaskan Natives
    • Asian Americans
    • Native Americans
    • Native Hawaiians
    • Hispanics
    • Pacific Islanders
    • Women

    Applicants must show at least three years of farming or similar experience as well as other requirements to receive this down payment assistance.


    Organic Farming Research Foundation Grants and Loans

    If you are experimenting with non-traditional crops or growing operations, there are funding opportunities to help you along.

    These small grants to help organic farmers to improve their operation and property are available in all 50 states.  The size of your homestead or your income is not a factor in awarding funds.


    You CAN Become a Homestead Owner

    Homesteading is a lifestyle that can be very rewarding.  If you are already working a property or are seriously interested in doing so, raising money to help you move forward is possible.  You don’t have to do it alone.

  • Building Your Very Own Smokehouse

    Building Your Very Own Smokehouse


    There are a number of DIY smoker methods, ranging all sizes and prices.  If you only need to smoke small items or one medium item at a time, like a Christmas turkey, all you need is a large terracotta pot or unused metal trash can.

    But, if you need a good-sized smokehouse to help you prepare for winter on a homestead or other rural area, this design based on pallet wood should provide what you need without breaking the bank.  Its also designed so that you only need the most basic of woodworking skills to complete it.

    An important note about using pallets, most are treated with industrial chemicals. You’ll need to make sure that any pallets you use for this project are food grade wood.

    If you can get your hands on enough leftover wood from friends or other projects you’ve done, you can still use this plan; you’ll just need to adjust a little when the word “pallet” is mentioned.

    Materials List

    • 20-30 Deconstructed Food Grade Pallets or other Food Grade Wood
    • 4’ x 3’ Raw Corrugated Tin (this metal must be raw, do not use galvanized)
    • 3 Hinges
    • Aluminum Flashing
    • Aluminum Screening
    • Handle (for the door)
    • Heavy Duty Tin Foil
    • Screws – 2 1/2 inch stainless steel or other weather resistant screws
    • Screws 1 1/4 inch stainless steel or other weather resistant screws


    Select Your Materials

    Whether you are using actual pallets or sourcing your wood another way, there can be some challenges if you are working with low-cost or free materials.

    The wood you get will probably have some issues such as warping and splitting. But, if its free (especially if its free) it can be worth the hunting and sorting to keep expenses down.  Just consider that time spent as sweat equity.  If you are using pallets, you will need at least 20-30 for this plan.

    If you are using pallets, you’ll want to get your length from the middle of the panels, so the ends are trimmed off.  Doing this will help avoid splitting and remove most of the nail pieces you’ve just cut through. If you are using other wood sources, use the wood cut list below to create your pieces.


    Wood Cut List

    Make the following Cuts from 2x4s unless otherwise noted.

    1. 2 each 33”
    2. 2 each 70”
    3. 2 each 29”
    4. 2 each 6’ (Front End of Side Wall)
    5. 2 each 5’ 6” (Back End of Side Wall)
    6. 8 each 33” 2 x 2 (Used 2x2s or cut 2x4s in half lengthwise
    7. 8 each 32 ¾”
    8. 8 each 30 ½“

    Cut this from a 1×1 sized piece

    1. 2 each 5’4” (part 6)

    Cut these from Pallet Panels:

    1. 36 ¼“ pieces, enough to cover the left and right sides (part 10 and 11)
    2. 35 ¾” pieces, enough to cover the front and back (part 12 and 13)
    3. 38” pieces for the roof (part 14)
    4. 2 each 18” to 24” vent (part 15)
    5. 1 each 36” (Part 16)

    As a precaution against your wood splitting as you work, it’s a good idea to pre-drill and countersink each screw.

    Smoking your food is a great way to preserve your meat.  Check out this other method that will allow your food to last for up to 2 years.  Learn More Here>>>

    Getting Started

    Begin by putting together the 2 sides wall frames of the house that include the rack supports.

    Take one piece from the cut pieces listed above for the first side unless otherwise noted:

    #4 – 6’ Wall frame front

    #5 – 5’6” Wall back

    #6 – 4 pieces of 33”

    Make sure the bottom of your #4 and #5 pieces are squared at the bottom then attach the 33” pieces across at 24” from the bottom, 36” from the bottom, 44” from the bottom, and 52” from the bottom.

    NOTE:  Secure the cross pieces to the 6’ upright flush to the end, BUT secure the cross pieces on the 5’6” upright 1.5” in from the end.  This is to leave room for the #9 pieces later.

    Create the first side with the 6’ (front) board on the right and the 5’6” (back) board on the left.

    Create the other side with the 6’ (front) board on the left and the 5’6” (back) board on the right.

    When you’ve completed the 2 sides, you’ll have mirror image sections that resemble ladders with one side higher than the other.  The Difference in heights from front to back provides support for a slatted roof.

    The cross pieces become the rack (shelf) supports on the inside of the smokehouse.


    Making the Door Frame

    Next, you’ll need the two pieces each from #2 – 70” and #3 – 29”.  Simply connect them to make a 37” x 70” rectangle.


    Attach the 3 Sides Together

    To make the next steps easier, screw the door frame to the face of the walls for better stability. There will be a 2-inch difference at the top between the highest point of the side walls and the top of the door frame

    Related Article:  “Cooking Skills Every Homesteader Should Cultivate”

    Cut the Roof Angle

    Using a spare panel or another straight edge, draw a line from the back of the side panel to the front to create the slat line for the roof and cut off the excess.  Do this on both sides.

    Use the pieces from #1 to (33”) to span the width of the smokehouse at the front and back ends of each wall.


    Add the Rear Support Frames

    Attached both #9 pieces 5’4” to the backs of the side walls, under the roof supports.


    Adding the Paneling

    Starting with the Back, fill in your walls with paneling from the ground up, then move on to the left and right sides.


    Finishing the Door

    1. Unscrew the door from the smokehouse after the side and back paneling is in place.
    2. Add the hinges to one side
    3. Install the door frame to the house.
    4. Add paneling to the door in such a way that the door has clearance to swing open.
    5. Add the handle to the side opposite the hinges.


    Put on the Roof

    Attach paneling from the front to the back of the house, across the pieces that span the width.

    Screw on the corrugated tin.


    Building Your Smoke Rack Shelves

    Create wooden frames that fit inside your smokehouse and can slide on and off the supports constructed on the interior.

    Stretch your metal screening across and around the wooden frame to complete your “shelf.”


    In Conclusion

    With the most basic woodworking skills, scrap pallets and some determination, you could have your own smokehouse build by none other than yourself.

  • 4 Nifty Alternatives to the Standard Root Cellar

    4 Nifty Alternatives to the Standard Root Cellar

    If you have your own garden and:

    • You’ve used all your canning supplies
    • Your freezer is full
    • Your friends refuse to take any fresher produce off your hands

    Chances are you may need to consider an alternative method of storing your crops rather than just letting them all rot in their earthy homes.

    In cases like these, a good root cellar is an excellent alternative to mass vegetable homicide.

    However, unless you already have a handy hole dug in the ground complete with a door to keep out foraging animals.  You may need a viable alternative.  Fear not!  Alternatives do live among us and for your convenience, we’ve compiled a list just for you.

    So, without further ado, here are 4 alternatives to a traditional root cellar.


    Metal Can Root Cellar

    What you’ll need:

    • A Metal Trash Can and lid
    • Waterproof tarp or other covers
    • Straw
    • Shovel

    How to Do It:

    This couldn’t be simpler.  Dig a hole deep and wide enough to fit the can into with 3-4 inches left above the ground level.  Set the can into the hole and backfill the dirt around the can.  Fill the can with your root produce and put on the lid.  Pile several inches of straw on top of the lid and cover with the tarp to keep out rain and hold the straw in place.


    5 Gallon Root Cellar

    What you’ll need:

    • 5-gallon bucket with lid
    • Drill
    • Shovel
    • Straw (optional)

    How to Do It:

    Similarly, to the metal can version, dig a hole to fit all but the top 3-4 inches of the bucket. Drill several holes in the bottom of the bucket to provide drainage for any moisture that may get in.

    Fill the bucket with the veggies, place the lid, cover with straw.

    Upcycle a Fridge or Freezer

    What you’ll need:

    • Old Chest freezer/fridge
    • 15-20’ of 3-4” diameter PVC pipe
    • 2 PVC elbow connectors
    • 2 PVC T connectors
    • Tarp
    • Shovel

    How to Do It:

    Remove all the working parts.  If your unit still has Freon, you’ll need to have a pro remove and dispose of it properly.

    Once everything not needed is gone, cut two holes centered vertically on each side the diameter of your PVC pipe.  Measure and cut your PVC pipe to fit into the connectors when they are attached to the holes you cut into each side.  Attach the piping combos to the holes cut into the sides.  These provide air circulation to avoid mold and mildew from developing and spoiling what’s being stored.

    Once the “plumbing” is in place, bury the unit up to the bottom of the lid.

    Suggested Article: “5 Simple Methods to Preserve Food”


    The Zeer Pot

    What you’ll need:

    • One small unglazed clay pot with a lid
    • One large unglazed clay pot
    • Sand
    • Duct Tape

    How to Do It:

    This idea is based on an ancient way of keeping water cool in the desert or other hot regions.  The general mechanics involve taking advantage of the cooling process that takes place when an object sweats.

    Like our bodies also do when we sweat, a vessel made of porous material, like terracotta clay, will cool as the small amount of moisture that seeps through the pores evaporates.  This evaporation creates a cool enough environment inside the vessel that would rival any crisper drawer GE or Maytag can develop.

    Depending on the size of the pots you are using, you will probably want to put together your Zeer pot in the location you are going to keep it. Otherwise, you may be stuck with lugging a very heavy contraption across your patio. You’ll want to keep it in a shaded location that provides good air circulation around the pot.

    Begin by using the duct tape to seal the premade hole at the bottom of each pot. Next, add an even layer of sand to the bottom of the larger pot, just deep enough so that when you place the smaller pot on top of it, the rims of both pots are even with each other.

    How to Store Food All Winter Long…

    While keeping the smaller pot centered inside the big pot, fill the area in between with the sand and pack down. Once you’ve filled that area between the two pots with sand and evened it out on top, start adding water.  Continue to carefully add water until the sand is completely soaked.

    Clean out any sand and water that may have splashed or fallen into the inner pot.

    Cover the inner pot with a lid, then cover the whole Zeer with a damp cloth.  This will expedite the initial cooling process so you can start storing items more quickly. If you weren’t able to find a lid the right size, the damp cloth would work well on its own. Once the inside has had the chance to cool, fill it with your produce and replace the lid.

    [Must Watch Video] Build Your Own Root Cellar in Your Backyard For $400 <<<Watch Here>>>