Page 4 of 13
1 2 3 4 5 6 13
homesteading – Page 4 – Homesteader Depot

Tag: homesteading

  • Benefits of Protein in Your Pantry

    Benefits of Protein in Your Pantry


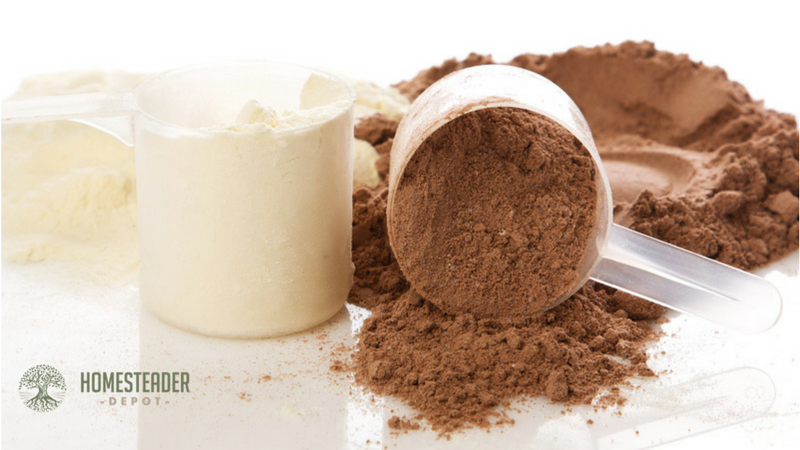
    Protein powder is usually known as the substance that bodybuilders use to bulk up. It’s more than that, however! There are protein powders out there that go into shakes, can be mixed with water and drank on their own, and that serve as meal supplements.

    Having supplemental protein powder can prove very necessary for those bad years when livestock doesn’t produce or you’ve come up empty-handed while hunting.  Your body needs a source of protein and when you can’t get it from meat, a supplemental powder is a great option.  It’s definitely something to consider in your emergency pantry.

    In fact, there are so many different types of protein powder that you might find yourself overwhelmed with options. We’ll help with that here.

    What Exactly Is Protein Powder?

    Protein powder is exactly what it sounds like – it’s a supplemental powder that contains protein and a number of other vitamins and minerals. There are versions with more protein than others (these are what bodybuilders use to bulk up) and some that are very well-rounded. If you’re looking for a good type to keep in your preparedness pantry, choose the well-rounded versions. They’ll serve your needs better and act as a meal replacement.

    Types of Protein Powder

    We’ve already covered one type of protein powder – the one used by bodybuilders. However, the types that serve as meal replacements come in a variety of types and flavors. Some use coconut to provide the protein, while others have some animal by-products in them. Make sure to read the labels carefully if you’re a vegetarian or vegan to avoid ending up with the wrong kind. On top of this, there are a number of different flavors, from strawberry to chocolate. In fact, some types are available in more than one flavor, making the decision even tougher. What it comes down to is finding the meal replacement kind in a flavor that you enjoy.

    How Long Will It Last?

    Protein powder is just that, a powder so that it will have quite a long shelf life. The standard types expire within four to five years, and, like with most canned and jarred items, if they are stored properly, they’ll last even longer than that. As long as the container isn’t opened, you can probably get a few extra years of storage time. However, if it’s opened, make sure to use it up as soon as possible. You don’t want to risk contaminating anything!

    Is Protein Powder Good For Kids?

    The answer here is yes. Protein powder is indeed good for children. There are even kid’s versions available on the market. Compare it to baby formula, only formulated differently and tastier. It contains the same number of nutritious elements as the adult versions; only it is made for children’s needs. In short, if you have kids in your house, you should have some protein powder for them store with your other emergency goods.

    Can I Do Anything Else With Protein Powder?

    While the most popular method of using protein powder is by mixing it with water and drinking it, you can always use it in a smoothie. In fact, if you mix some of your canned fruit in with the protein powder and maybe some powdered milk and water, you have the makings of a quite tasty drink. You’ll need some variety in your diet – you can’t keep eating and drinking the same things all of the time – and this is a great way to expanding things.

    Protein powder is a useful vitamin and mineral supplement that can provide some of the things that your average diet is lacking. Make sure to keep some containers of it in your emergency pantry alongside your other goods. You might want to pull it out when you tire of eating the same old things all of the time. The benefits are worth it, especially if you chose a tasty flavor.

    [Discover] The ONLY battery reconditioning resource that lets you easily bring nearly any type of dead battery back to life…<<<Learn How Here>>>

  • 7 Interesting Ways to Use Excess Cucumbers

    7 Interesting Ways to Use Excess Cucumbers

    Congratulations on producing a successful homesteading garden this year! Now all you need to do is find ways to use your excess cucumbers. You’ve come to the right place. There is nothing as refreshing and crispy as a cucumber straight out of the garden. Even better are cucumbers in a salad or other yummy cold recipe made just for hot summer days and nights. We can suggest seven ways to use those lovely crunchy cucumbers. There are three recipes and four are for non-food uses that will surprise you.


    Food Uses


    1. Cucumber Tomato Salad

    This salad could be the centerpiece of an enormous veggie tray all from your garden. It is a straightforward recipe that can be made to serve with a meal or as a snack.

    Ingredients are three cucumbers, three diced tomatoes or a cup of cherry tomatoes, half (or more) of a sweet onion cut in small slices, a teaspoon of dill, and your favorite dressing. I like to use the cucumber dressing below. Just mix them all up and chill for an hour and serve.


    2. Cucumber Yogurt Dressing

    This dressing is so creamy and smooth that it melts in your mouth. It’s very healthy, especially if you make your own yogurt. It only has about two grams of fat per tablespoon. It is simple to make by just adding the ingredients into a blender and run it until smooth.


    Quick Trick: THIS grows 10 times more plants in half the time


    Ingredients are 1 cup of cucumbers, seeded, peeled and chopped; 3 tablespoons of plain or vanilla low-fat yogurt; 2 tablespoons of olive oil, 1 teaspoon of apple cider vinegar, ¼ teaspoon of dill, along with salt and pepper to taste. Let all blend for a few minutes and then test it for taste. Chill and enjoy!


    3. Strawberry & Cucumber Smoothie

    Just the sound of this drink sends a cool smoothness through me that makes me feel like I’m doing something special for my body because there’s lots of potassium and Vitamin B in this smoothie that will give you a spurt of energy. What makes it so good is the sweet strawberry taste.

    Ingredients are 1-1/2 cups of frozen or fresh strawberries, 1 large cucumber, with seeds removed and chopped, 1 cup of almond milk (cold), 1-1/2 tablespoons of honey, and a teaspoon of lemon juice. Blend on high, add more milk if desired,


    Non-food Uses


    4. Control Garden Pests

    Cucumbers are one of the most fascinating vegetables. Did you know they can get rid of garden pests? All you need to do is put 4-5 slices in a few small open containers and place them around your garden. They will repel all sorts of insects. You just need to replace them when they dry out.


    5. Breath Freshener

    Forget using mints to freshen your breath. Place a slice of cucumber on the roof of your mouth and hold for about 30 seconds. The chemicals in the cucumber will kill bacteria and bad breath.


    Suggested Article: “How to Use Extra Cucumbers”


    6. Hangover Relief

    This non-food use is one you will probably wish you knew about on New Year’s Eve. If you eat half a cucumber before going to bed after drinking, it will help relieve a hangover because they are high in nutrients and electrolytes.


    7. Mirror Defogger

    If you want to defog your mirror, rub a cucumber slice over the mirror before getting in the shower, and when you get out, the mirror will be clear of fog and your bathroom will have a fresh smell.


    [Holy Cow]  NEVER Use Laundry Detergent Again!!!  Discover How You Can Get Your Clothes Cleaned Without A Single Drop of Toxic Laundry Detergent…Don’t believe me? <<<See for yourself here>>>

  • Canned Corn: What’s the Trick?

    Canned Corn: What’s the Trick?

    A fond childhood memory is sitting on the back porch with my brother as we pulled husks off the bushels of corn on the cob. Somehow, we would always end up falling to the floor in a pile of husks with corn silk stuck in our hair laughing our heads off. You’d think our mom would have been upset, but all she could do is laugh with us.

    Since then I have assumed my mother’s role, canned many a cob of corn, and want to share with you how to process ‘doing it yourself’ canning corn. If you have never canned corn before, it may seem like a lot of work, but it’s the raw pack method, which is easier than other ways. If you follow these easy steps, you will accomplish some of the most significant things about homesteading—being self-reliant, saving money, and feeding your family the best kind of food.

    Gather Equipment and Ingredients

    1. Pressure Cooker – necessary to kill bacteria like botulism that can kill you if not cooked at 240 degrees in a pressure cooker since using stovetop doesn’t get hot enough.
    2. Mason canning jars with lids and rings to match
    3. Kernel stripper or sharp knife
    4. Jar lifter, tongs, and canning funnel
    5. Large pot of water at boiling temperature
    6. Shallow pan or cookie sheet
    7. Towels and hot pads
    8. Labels for jars and a thin tip marker
    9. Canning salt for flavor – the amount is optional
    10. A bushel of freshly picked corn on the cob – follow directions on the pressure cooker for exact amounts for the quantity desired.

    [Video] This strange method will make your food last for 2 years without refrigeration…Try it Here>>>

    Preparation

    • To begin you can either shuck the husks or just bend back each husk and use it to hold the cob as I slice off the kernels.
    • Remove the silk with a kitchen brush and rinse corn cobs in cold water.
    • Cut the kernels off each cob with a cookie sheet placed underneath to catch the kernels.
    • Slide the kernels from the cookie sheet into a large bowl.
    • Sterilize the jars, lids, and rings in the pot of hot water, remove right before filling.
    • Using the funnel, fill each jar with corn up to an inch from the top.
    • Add salt if desired – but no more than ½ tsp. for each pint or 1 tsp. for each quart.
    • Fill each jar with hot water up to an inch from the top.
    • Giggle the jars to remove any bubbles.
    • Wipe the edge of each jar making sure they are not cracked, place lids on, and tighten rings securely.

    Cooking

    • Using jar lifter, place jars in a pressure canner/cooker according to the user manual (if at high elevation, check instructions for the proper setting).
    • Close lid and cook pints for 55 minutes or quarts for 1 hour and 25 minutes.
    • Once done, turn off the cooker and wait for the pressure gauge to return to zero before opening.
    • Remove jars with the lifter placing on a towel to drain out of the way.
    • Let jars cool and check lids to make sure they are sealed. If the covers pop when touched, they are sealed.
    • Write the contents and date on labels with a marker and apply to jars.
    • Place jars in a cool, dry place until you are ready to

    Conclusion

    You can use the corn for all kinds of recipes from salads to enchiladas, and you will love how much better it tastes than the store-bought can or frozen versions. By the way, do not throw away the corn husks or cobs—use for composting. If you have children that can help with shucking the husks, let them have fun with it and send us some pictures.

    [Discover] The ONLY battery reconditioning resource that lets you easily bring nearly any type of dead battery back to life…<<<Learn How Here>>>

  • Harvesting Your Own Maple in Just a Few Simple Steps

    Harvesting Your Own Maple in Just a Few Simple Steps

    Tapping maple trees for sap may seem like a daunting task. However, it really is not hard to do. In fact, this outside activity can be fun as the days get warmer in anticipation of springtime.

    But what if you are not sure which trees are maple? Or which maple trees are the best to tap? Be assured that being self-sufficient doesn’t mean you need to be a pro at tapping. Why not start out with tapping just a few trees? You could join in with neighbors or homesteading friends to see if it is something you want to do every year.

    The time of year to do the tapping depends on when the temperature warms up over 32 degrees in the day but still freezes at night, generally from February through late March or early April. With the following tips, you’ll be serving homemade pancakes with maple syrup in a matter of a few weeks.

    Preparing to Tap

    The tools needed are a hammer, a bucket with a cover (or buy a maple pail at the local home improvement store), a drill of some sort, 5/16 or 7/16 drill bit, and a few spiles (or taps). To cook the sap, having two crockpots (a large and a medium size) works best but you can also use large and medium-size pots. You need a colander, some coffee filters, jars for the syrup, and something like a giant pitcher to store the sap.

    Finding the Best Maples

    If you didn’t get the chance last fall to mark the trees you want to tap, identifying the right type of maple trees by other means is possible with a few tips from us. The best kind of sap to tap comes from the sugar (aka hard, black, or rock) maple and you can tell a sugar maple by the type of branches they have. Their branches are what is called “opposite” as opposed to “alternate” branching. Opposite means the branches shoot out from the stem directly across from each other in opposite directions in a uniform manner, whereas alternate branching means that the branches shoot out from the stem alternating without being directly across from each other. If there are any leaves left on the tree or on the ground to examine, sugar maples are usually big with a smooth outline of the leaf, not real jagged or tooth-like. Don’t worry if you get the wrong kind of maple; you will still get some sap.

    Tapping

    Look for older large size sugar maples so you can put two or three taps in one tree. You should drill the hole for the spiles on the south side of the tree about at chest height at a slightly upward angle so when you hang the bucket, it won’t slide off the spile. Pound the spile into the hole with the hammer and place the bucket with the cover on it to keep pieces of wood or leaves from getting blown into the sap. To get the sap to start flowing, you may need to blow your hot breath into the spile. Once it starts, you should check the buckets every day and remove sap to store in the fridge until you have enough to start cooking a batch in a large crockpot.

    Making Maple Syrup

    You should cook the sap within seven days of harvesting it. The best way to prepare sap is in a large crockpot. To strain the sap, place a colander with several coffee filters spread out and flattened to pour the sap through into the crockpot. Fill the crockpot almost full with sap. Bring it to a simmer on high setting and then turn down to low until it has reduced down to half, which will take about eight hours or overnight. If you have more sap to cook, pour the melted amount into another smaller crockpot. Keep on warm until it gets darker and the consistency of syrup. Keep filling the large crockpot with more until you are finished with the season’s amount.

    Conclusion

    Now, that wasn’t so hard, was it? You may have surprised everyone with more than you expected. If so, you can always have pancakes for breakfast, lunch, and dinner, plus give some away as gifts!

    [Discover] The ONLY battery reconditioning resource that lets you easily bring nearly any type of dead battery back to life…<<<Learn How Here>>>

  • How to Make Delicious Homemade Butter

    How to Make Delicious Homemade Butter


    Imagine the smell of freshly made homemade bread. Now imagine spreading your own homemade butter on a slice of steaming hot bread. Is your mouth watering yet? Mine is! One of the things about my mom that I miss the most is her homestead cooking and one of my favorites was that creamy homemade butter that melted on my tongue.

    Butter Basics

    Homemade butter does not have an oily taste like margarine. The cream and butter that comes from grass-fed cows are high in vitamin E, beta-carotene, and it can lower cholesterol. Even though butter has saturated fat, it is better for you than margarine as long as it is raw organic butter made from organic cream.

    You can make butter with just a few steps. You do not need one of those old-fashioned butter churns or a cow to milk. Although having a cow or two that eat green grass may be a good idea when homesteading, this recipe uses an electric mixer instead of a butter churn. You can even use a mason jar with cover and shake the cream instead of using a mixer. Shaking it will take more time but would be a fun thing for your kids or grandkids to do. If you don’t have cows, you can make butter from organic heavy whipping cream (butterfat content of at a minimum of 35 percent) from your local grocery store.

    Making the Butter

    The amount of cream needed depends on how much butter you want. It should be kept at room temperature for about 12 hours before mixing. About 15-20 minutes (or amount of time that water can be kept in the freezer before freezing) before mixing you need to place 2 cups of water in the freezer so you will have ice water for the recipe. You can make butter with any amount of cream and here is the typical breakdown for a pound or half a pound:

    • 1 quart of cream = 16 ounces (1 pound) butter and two cups of buttermilk.
    • 1 cup of cream = 8 ounces (1/2 pound) butter and about 1/2 cup of buttermilk.

    If this is the first time making butter, you may want to start out with the smaller amount of 1 cup of cream. Pour the cream into a mixer bowl and blend with an electric mixer at medium speed for 10 to 15 minutes. When the cream turns into curd-like lumps, keep blending until it starts to thicken and a watery/milky liquid forms at the bottom of the bowl.

    Stop the mixer and pour off the liquid into a sealable container that will hold about 1-2 cups. The buttermilk will not look like the kind you buy at the store. It is thinner but still can be used in place of water for cooking and baking.

    Suggested Article:  “Canned Corn: Whats the Trick”

    Use a stiff spatula to press the butter up against the walls of the bowl to squeeze out as much liquid as possible. Add about 1/2 cup of ice water and press up against the walls of the bowl to release the buttermilk liquid. Repeat two more times or until water loses its cloudiness.

    Continue to pour the liquid into a container and when finished, seal and refrigerate. Once all the buttermilk is collected, you can add a pinch of sea salt (per pound) to the butter unless you want to keep it unsalted. This process will give you buttermilk to cook with and keep the butter from spoiling.

    Storing the Butter

    Pack the butter you plan to use for the next week into a container with a cover and refrigerate. To store the remainder, wrap in parchment paper and then in foil or plastic wrap. You can store in the freezer for up to six months. Enjoy!

    [You May Also Like] –  DIY Underground Root Cellar

  • Treating Your Homestead Wounds the EASY Way

    Treating Your Homestead Wounds the EASY Way

    As the name suggests, an open wound is an injury that has resulted in an opening in the skin. Minor versions are commonplace and can be treated at home with over the counter first aid products. Fundamental wound care is a useful skill to have in any situation.  Keeping a First Aid Kit handy can go a long way to ensuring they don’t develop complications.

    In this post, we’re going to take a quick look at the different types of open wounds that can happen as well as basic instructions on how to care for them.

    TYPES

    There are four different types of open wounds.  Knowing their classification can be very helpful in an emergency situation.  Often when calling 911, the operator will ask you the nature of the injury.  The ability to accurately describe the different types of open wounds will help EMT’s prepare for what they will be dealing with on arrival.

    Abrasion

    Probably the most common, an abrasion is essentially a scrape.  Most of us probably had scraped knees (and elbows, and ankles, etc.) more than once growing up. If you were one of us, you probably remember there isn’t a lot of bleeding.

    Avulsion

    This type is probably the least common since they usually happen as a result of violent incidents such as explosions, gunshots, or severe traffic accidents.  Avulsions involve a partial or complete tearing away of the skin as well as the tissue underneath. They bleed heavily. These injuries should definitely be treated by a professional.

    Laceration

    Deep cuts or tearing of the skin are referred to as lacerations.  They usually involve sharp tools, knives or broken glass.  Shallow versions will have mild to moderate bleeding, while deep cuts can bleed much more quickly and at a faster rate, especially if an artery is severe in the process.

    Puncture

    Just like in a tire, punctures are small holes through the skin into the underlying tissue.  They can be a result of nails, needles, or any other thin sharp objects.

    Punctures may not bleed excessively.  You should determine if the wound is deep enough to damage any internal tissue or organs.  If it is, or you’re not sure, seek medical help immediately.

    TREATMENT

    For minor wounds, such as shallow scrapes, cuts, and tiny punctures, home treatment is usually standard. The primary concern is generally to make sure its cleaned thoroughly to get rid of all dirt and other debris.

    To control bleeding, just apply light pressure until it stops. Smaller scrapes can be covered with an antibiotic ointment and finished with an adhesive bandage.  If the area of the scrape is more extensive, an antibiotic ointment can still be used.  After application, a sterile dressing created from gauze, and medical tape can protect the whole area.

    Any pain management can be accomplished by taking over the counter non-aspirin products like acetaminophen or ibuprofen.

    Just avoid aspirin since it is also a blood thinner that can make bleeding more challenging to keep under control.

    If bruising or swelling also occurs, treat with an ice pack.

    When to see a doctor (If Possible)

    If any of the following can be answered with a “Yes” about the wound in question, seek medical care instead of trying to address it yourself.

    • Is the open wound deeper than 1/2 inch?
    • Does the bleeding continue despite applying direct pressure?
    • Has the bleeding lasted longer than 20 minutes?
    • Is the bleeding a result of a severe accident?

    If any of the above applies to your situation, or if you aren’t sure, its best to let a professional assess and treat the injuries to help avoid any complications in the future.

  • How to Ferment Vegetables

    How to Ferment Vegetables

    Fermenting vegetables grown in your garden accomplishes two things at once. First, it enhances the nutritional value of the vegetables by preserving them at their peak. Second, it preserves the vegetables, so you can enjoy them all winter long.

    The process used for fermenting vegetables is simple. You need the right equipment and the right ingredients – and before you know it, you’ll have a pantry full of delicious, fermented vegetables for your family to eat.

    Fermentation Equipment

    The equipment you need to ferment vegetables is minimal and inexpensive. Here are the basic things you’ll need to have on hand:

    • Jars or containers to put the vegetables and pickling brine in
    • A sharp knife and cutting board for preparing the vegetables
    • Airlock tops (we like ones that are compatible with Mason jars) to keep oxygen out of the jars
    • A pickle packer (usually a wooden stick used to pack the prepared vegetables into the jar)
    • Weights to weigh down the vegetables

    You can buy these items individually or in fermentation packages.  Here is an easy, complete Fermentation Kit from Amazon you can try.

    Fermentation Ingredients

    The ingredients you need to ferment vegetables depend on the method you plan to use. However, there are only a few variations you need to know about. Here’s what you’ll need:

    1. Fresh vegetables from your garden
    2. Salt, whey, or a starter culture
    3. Water

    There are many types of salt, but some are better suited to fermentation than others. Two of our favorites are sea salt and Himalayan pink salt. Both add a nice flavor. You can also buy pickling salt although it’s not the best choice if you want a natural, minimally-processed salt.

    The water you choose for pickling can make a big difference in the final product. If you use tap water, you should boil it or run it through a reverse-osmosis filter for the best results. Well water often has a high mineral content. That can be good for some kinds of fermentation but it’s not particularly good for some fermented products like kombucha.

    How to Prepare the Vegetables

    The method you use to prepare your vegetables for fermentation depends on what you’ll be preserving. Some vegetables, such as cabbage, ferment most effectively when they are shredded. Others, like cherry tomatoes, can be fermented whole.

    It may take some trial and error to arrive at the proper preparation. You may want to start by fermenting just one type of vegetable. Later, you can mix vegetables to create pickled salads that are ready to eat out of the jar.

    The Pickling Process

    The next step is after you have prepared the vegetables is to place them in the jars, cover them with brine, and weight them so they can ferment properly.

    You want to use weights on top of the vegetables, so they stay submerged in the brine. That’s a very important step that some first-time fermenters skip.

    There’s an art to knowing when vegetables are done with fermentation. You’ll have to rely on the specific recipes you use to be sure when they’re done. They need to be kept in an anaerobic environment (air free) while they ferment.

    When they are ready, you’ll be able to remove the weights, seal the jars, and put them in cold storage. Prepared properly, fermented vegetables will keep for months.

    Wondering What to Make?

    If you’re wondering where to start, here are some suggestions for easy fermentation:

    • White or red cabbage (sauerkraut)
    • Kimchi (spicy Korean cabbage)
    • Pickled green beans
    • Pickled tomatoes
    • Fermented carrot sticks or slices

    Do you have a favorite recipe for fermented vegetables? Tell us about it in the comments!

  • 5 Gardening Budget Hacks

    5 Gardening Budget Hacks

    For people who are homesteading, managing expenses is a challenge. You want to be self-sufficient and yet some of the things that you need to do don’t happen overnight. They require an investment of both time and money.

    These things are true of gardening. It’s natural to want your garden to yield enough food for you and your family. However, you must strike a balance between pushing toward self-reliance and not blowing through your gardening budget.

    That’s why we’ve put together this list of 5 cheap gardening tricks to help you achieve self-reliance.

    #1: Pre-sprout Your Seeds

    This first trick is one we like because it saves a lot of guesswork if you have old seeds in storage. (And let’s face it, most avid gardeners do.)

    Instead of buying new seeds or risking a disappointing harvest if the old seeds don’t sprout, try pre-sprouting them in a little water. That way, you can clear out the duds and plant only those seeds that have germinated.

    Larger seeds like peas and beans can be soaked overnight and then left to sprout. Smaller ones will germinate on a damp paper towel.

    #2: Till Coffee Grounds into Your Soil

    Is your soil low in nitrogen? If so, try saving your used coffee grounds and tilling them into the soil to add nitrogen.

    One of the best things about this method is that you don’t need to compost coffee grounds before you use them. Simply collect them and till them into the soil.

    Not a coffee drinker? Go to your local coffee shop and see if they’d be willing to share. Most coffee shops simply throw away used grounds. If yours participates in a green initiative and donates them, find out how to become part of the program.

    Related Article:  The Undeniable Benefits of Coffee Grounds in Your Garden

    #3: Use Mulch

    Mulch serves three purposes in a garden:

    1. It protects the soil, holding in moisture and reducing your water use
    2. It breaks down and enriches the soil
    3. It prevents weeds from growing in your garden

    When you look at it that way, it seems clear that every gardener should use mulch.

    Keep in mind that different types of mulch serve different purposes. Plastic mulch is ideal for heating up cold soil in the Spring. Carbon-based mulches like wood chips cool down the soil and should be reserved for use later in the season.

    #4: Make Compost Tea

    Do you want an inexpensive way to fertilize your plants? Try making compost tea from manure and garden clippings.

    If you keep rabbits or other animals, simply mix some manure in a bucket with weeds from the garden and some comfrey leaves. Fill the bucket about one-third of the way, then top it off with water.

    After two weeks, you’ll have a nutrient-rich “tea” to use in your garden. Because this mixture contains manure, be careful not to get it on the leaves of plants that you’ll be eating. Pour it around the roots and make sure to wash everything thoroughly before you consume it.

    Related Articles: Do-It-Yourself Worm Casting Methods for Compost

    #5: Catch and Kill Slugs without Chemicals

    Slugs will destroy your garden if you let them. One of the best ways to get rid of them involves using metal pie plates and beer.

    Place a disposable pie plate in a depression in the ground of your garden. Pour a small amount of beer into the dish. (You may want to place plates at regular intervals if you have a large garden or a big slug problem.)

    Leave the dishes overnight. When you come out in the morning, you should find a collection of tipsy slugs in the dishes. Remove them and either drown them in soapy water or if you have chickens or ducks, feed them to the birds.

    These five tricks can help you make the most of your garden even if you have a small budget.

    Do you have a cheap gardening trick you’d like to share with us? Tell us in the comments!

    “Break-Through Organic Gardening Secret Grows You Up To 10 Times The Plants, In Half The Time” Find out more here>>>