Tag: milk

  • Super Easy Homemade Buttermilk

    Super Easy Homemade Buttermilk

    Buttermilk isn’t something that you only need to buy at the store. Instead, you can make it yourself. The results will be much tastier and better for you. The buttermilk that you find in the dairy section (if your grocery store even carries it) is cultured. This type takes at least 24 hours to make, and you need to start with cultured buttermilk, making it a bit redundant, or active buttermilk culture. This process is fairly labor intensive. However, if you have a recipe that requires buttermilk and you don’t have any on hand, these quick methods will work nicely. You’ll have your own buttermilk within minutes. Are you ready?

    Option Number One

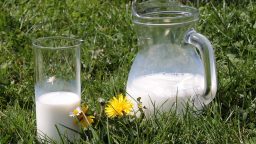
    This method produces buttermilk quickly and easily. It all starts with either lemon juice and vinegar, as well as some milk. For every cup of milk, add one tablespoon of lemon juice or vinegar to it. Place them in the same glass and let it sit on your counter for ten minutes. While the results aren’t properly cultured buttermilk (this is actually an acidified version), you’ll end up with a type that will work nicely in recipes. The acid in the milk will work to activate the baking soda or baking powder in the batter, just like it’s supposed to.

    Option Number Two

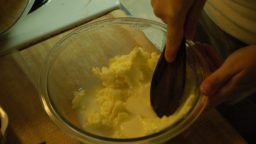
    You’ll need a few more ingredients for this buttermilk. It all starts with yogurt or sour cream and some milk. Heck, even the milk is optional – you can use water instead. The ratios are 3/4 of a cup of yogurt or sour cream to a ¼ cup of milk or water. As with the previous recipe, combine the liquid and the semi-solid in a cup and let it sit on your counter for ten minutes. You may have to stir them a bit to make everything smooth, but in the end, you’ll end up with enough buttermilk for any recipe.

    Now For Something Different

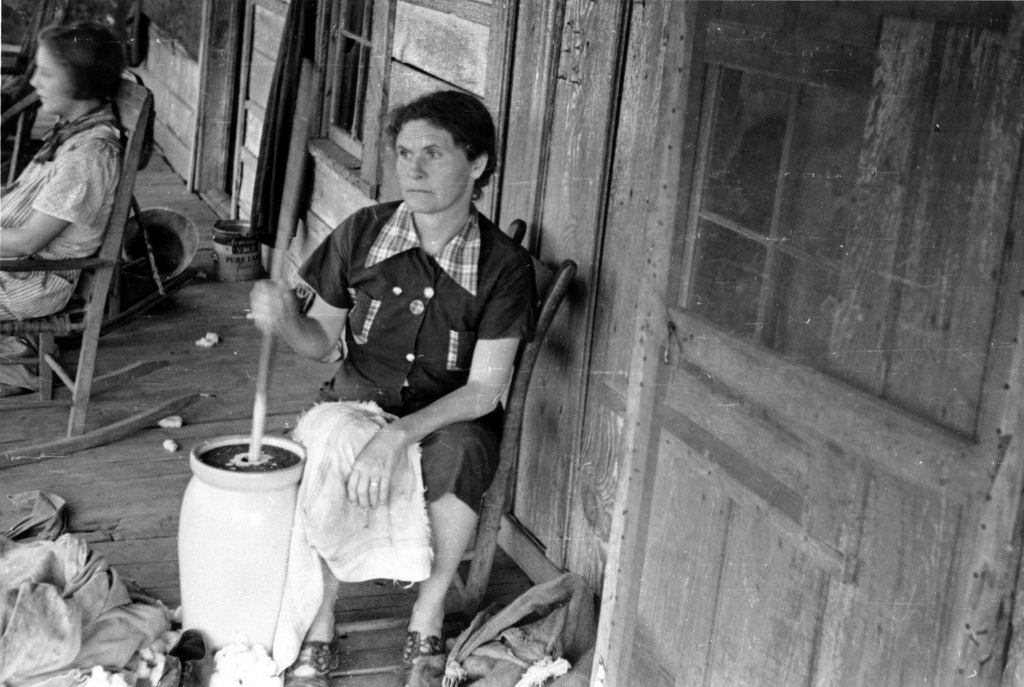
    The two previous methods described how you could make buttermilk just by letting your dairy products curdle for a few minutes. The next two are more complicated, as you’ll be making actual cultured buttermilk, just like the kind that you see in the grocery store.

    Option Number Three

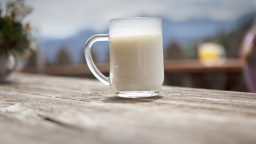
    This recipe starts with cultured buttermilk. Yes, this is the same thing that you’ll be making, only you’ll end up with much more it. Think of it as a good way to never run out of buttermilk. Pour six ounces of cultured buttermilk into a glass jar. A quart jar will work perfectly. Then add in three cups of whole milk. The fresher the buttermilk, the better, since the cultures will be more effective and the process will work properly. Once you have the buttermilk and the milk in the jar, put the lid on and shake it well. Then, find a safe spot to place it. The mixture needs to sit out for 24 hours at room temperature.

    At the end of that time period, check your buttermilk. It should be thick enough to coat the walls of glass and taste just like typically cultured buttermilk. If you don’t need to use it right away, place it in the refrigerator. It should last for several weeks in there.

    Option Number Four

    This method is very similar to the previous one; only you use active buttermilk cultures instead of the buttermilk itself. The mixture needs to sit out for between 12 and 24 hours, and you need to get the ratio of cultures to milk correct. This usually is written on the packaging.

    Ideally, you’ll never run out of buttermilk thanks to these helpful methods.

    HOW TO START A HIGH-PERFORMANCEHOMESTEAD FROM THE GROUND UPLearn More Here>>>

    Here is a great video showing how simple and easy making your own buttermilk really is…

    https://youtu.be/zJbw9rXQjYI

  • 4 Things to Know About Goats Before You Get Them

    4 Things to Know About Goats Before You Get Them

    Goats are fantastic homestead animals, and we write about that all the time on this site. They can produce excellent milk, help you clear brush, grass, and shrubs, and can even been great companions.

    But you might have some misconceptions about goats you’re not aware of, so we thought we’d share four things you might not realize about goats. Before you purchase any, you should definitely be aware of these things, so you are not surprised when it’s not exactly like you thought!

    1. Cream doesn’t separate

    While the cream in cow’s milk naturally separates, providing you with more than enough rich cream to use and to make butter and buttermilk with, goat’s milk does not separate. You can still use it for lots of things, but it’s just not naturally separated. It takes quite a bit of effort to extract the cream, so you’re better off using it for something else.

    2. You will be up to your knees in milk

    Once goats start producing milk, you’ll have quite a lot. Definitely have a plan for how to use it, or you might find your fridge full of milk and yogurt! You can certainly make milk kefir, yogurt, and even ice cream with your goat’s milk, but that’s a lot of work and either way you might want to consider buying a second fridge or a mini-fridge to store the milk. You can always sell it too, but make sure you consider this first…

    3. It’s not always legal to sell

    Not every state allows the sale of raw milk for human consumption, so before you count on this, make sure to check local regulations regarding goat’s milk. It’s a great way to make some extra money, but just be sure it’s legal!

    4. They are stinky

    There are many ways to reduce their smell, of course, like lots of fresh bedding, well-ventilated shelter, and cleaning out their enclosure regularly. But in general, goats do just naturally smell rather strongly. Consider this when you’re planning out where to keep your goats!


    Consider these four points before buying goats so you can be well-prepared to care for and utilize them properly.

    If you enjoyed this, you might also like….

    Is Your Family Secure?

    Natural Healing Secrets You Need to Know…

    Effective Primal Diet Hacks…

  • More Ways to Profit Off Your Land

    More Ways to Profit Off Your Land

    A few weeks ago, we wrote an article on ways to profit off your land as a homesteader, and we promised there’d be more, so here it is!

    This week’s post on how to profit off your land is all about livestock, dairy, and meat. Being able to raise, consume, and sell your own animal byproducts is one of the biggest appeals of homesteading, and, with the right set-up, experience, and a bit of time, you can conceivably pull quite a profit.

    We already covered eggs, which is a really good start and has relatively low overhead. It’s a great small-scale farming operation, that can bring at least some nice pocket change that will more than offset the cost of feeding and housing your chickens. Here are five ideas for ways to profit off your land by raising and selling animals and/or their byproducts.

    1. Sell Milk

    Raw milk from farm-raised cows is all the rage these days, if you are legally allowed to sell it. A lot of farmers all over the country pull a very nice profit selling fresh raw milk, and it doesn’t take a whole lot to get set up to do it. You can milk by hand or get a commercial milker, just make sure you handle it safely. While in many states it is entirely up to the customer’s discretion if they want to take the “risk” of consuming raw milk, you’ll still want to ensure it is safe, healthy, and clean.

    2. Sell Chickens

    If you have a nice-sized flock of chickens, sell your chicks or extra hens for another source of side cash. A lot of people will be eager to buy hens who have already matured to egg-laying age, or large fryers to eat.

    3. Sell pigs

    Pigs are a very efficient way to raise meat, as they are cheap as piglets, don’t require a lot of space to live, and also mature very quickly. Due to these factors, they’re actually far more cost efficient to raise for meat than cows. You can sell piglets when your sow gives birth, but you’ll make far more money selling fully grown hogs for meat. You can get about $250-300 dollars for one mature hog!

    4. Sell goat cheese

    Goat cheese is a coveted artisan food product, and it’s not too complicated to make. Goats are easy to keep and feed, and can be pretty cost-effective. You can make delicious, fresh, homemade cheese to sell at farmer’s markets and charge a very decent price.

    5. Sell cows

    As opposed to piglets, calves can actually be sold at a very high price. Of course, you typically only get one per cow, you can sell them for $70-$150, and, if you want to keep your cow’s milk all to yourself, this might be a desirable option for you once the calf is big enough to leave her mother.


    These are a few more ideas for ways to profit off your homestead land. Let us know if you’ve got ideas and we’ll feature them on an upcoming post.

    If you enjoyed this, you might also like….

    Are We In The End Times?

    Complete Health Transformation Without Drugs or Surgery…

    Having Trouble Sticking With Paleo?

  • How to Safely Handle Raw Milk

    How to Safely Handle Raw Milk

    Probably the primary appeal of having a family cow is the delicious, nutritious and plentiful milk you can get from her. Raw milk, meaning fresh, unpasteurized milk, has many more beneficial enzymes and bacteria than store-bought milk.

    But it is important to handle it safely to maintain optimum freshness and sanitation. This is particularly important if you plan on selling your raw milk. If you want to sell your milk, make sure to check your local laws. In some states, it is highly illegal to sell raw milk. In other places, there may be certain restrictions. But even if you just want to share with friends and family or just keep it yourself, it’s always best to use safe, clean practices to maintain the quality, nutritional content, and longevity of the milk.

    Here is a simple guide to safe raw milk practices:

    1. Prepare your milking area

    You will want to have a proper set-up for milking. It doesn’t need to be anything fancy, but a dry, covered area, with a place to tie up your cow and feed her as well as space to comfortably sit by her, is probably all you need. You will also want a place that will either have a sink or be in close proximity to the area where you will clean your milking equipment.

    2. Have the right Equipment

    Again you won’t need anything fancy, but a good, stainless steel bucket for milking is ideal, especially with a top to keep the milk protected. Stainless steel is easier to clean than plastic and will withstand possible kicks from a grumpy or restless cow. You may also want some soft, cotton rags to wipe the teat while milking.

    3. Sanitize

    Before milking, you will want to make sure you have properly washed your bucket, hands, and cow’s teat thoroughly. Some people use a small amount of bleach, but hot water and soap should be sufficient.

    4. Practice

    When you first start milking, it might take some practice to keep the milk clean. You are ultimately trying to keep the milk from getting any debris like manure or dirt in it, so if that happens, you won’t want to drink that milk. You can give it to your other animals.

    5. Strain the milk

    You can use a coffee filter, fine mesh strainer, or strainer made specifically for milk, but the idea is to get out as much debris as you can.

    6. Cool the milk

    As soon as you are done milking, you will want to cool your milk as quickly as possible. Some people even keep reusable ice packs at the bottom of their bucket. When your milk is strained into the bottles or jars you want to use (which should be properly cleaned and sanitized first as well), put them in the freezer for an hour-set the timer so you don’t forget about them! And then transfer to the fridge. You can now use as you would any other milk, although because it is raw it might not last as long, but it’s so delicious that might not be a problem for your family!


    If you liked this, you might also enjoy…

    Natural Healing Techniques Doctors Don’t Want You to Know…

    The Ultimate Woodworking Course..


  • How to Make Your Own Butter

    How to Make Your Own Butter

    You don’t have to have your own cow to make butter at home, although of course it helps. There’s nothing like fresh, homemade butter from your own dairy cow to make you feel like the ultimate self-reliant homesteader. But even urban homesteaders can easily whip (literally) up their own batch of delicious homemade butter with raw milk from a farmer or even cream from the store.

    The ingredients and process are simple: cream + agitation + time = butter. The process of making butter basically involves agitating the cream long enough to separate the fat from what will become buttermilk (so you’re really getting two dairy products out of this) into delicious creamy butter. You mostly just need patience and maybe a little practice, but with today’s modern kitchen gadgets, it’s pretty simple compared to spending hours in the barn with an old-fashioned butter churner!

    She doesn't look too happy!
    She doesn’t look too happy!

    What you need

    • Cream, either from the top of fresh, raw cow’s milk or purchased at the store. If it is store-bought, make sure it is organic, preferably grass-fed and never ultra-pasteurized
    • 1 tbs buttermilk, either from the store or left over from a previous batch of butter
    • A stand mixer, food processor or blender

    What you do

    1. If using fresh milk separate the cream from the milk. It will usually be right on the top if the milk has been resting and you can spoon it off. You’d ideally like to have a cup or so, but use what you can get!
    2. Combine the buttermilk with and cream in a container you can seal and leave on the counter for eight hours. This will culture the cream, which allows the bacteria to convert the sugars in the milk into lactic acid.
    3. After 8 hours, you’re ready to churn! Put the mixture in your blender, stand mixer or food processor, and mix on low.
    4. This will take some time, but the cream will slowly start to get lumpier until eventually, it’s completely separated from the buttermilk until it looks distinctly like clumps of butter floating in milk. You should be able to take the butter out and loosely pack into a form (which might not happen until after the next step). Strain the buttermilk off the butter and continue to try to gather it into a ball.
    5. Finally, rinse the butter in water, kneading and forming as you go. After a few minutes, you should have a nice, smooth ball of butter. You can now salt as desired or even add herbs or garlic!
    6. Keep the butter and buttermilk in the fridge for up to a week, or if you plan to keep either for longer, in the freezer.

    This is the most popular sous vide cooker on amazon

    Build ANY Shed with no woodworking experience!

    Check Out These Competition BBQ Secrets