Page 1 of 2
1 2
plants – Homesteader Depot

Tag: plants

  • Preventing Tomato Worms

    Preventing Tomato Worms

    Is your garden plagued with hornworms or tobacco worms? Also known as tomato worms, these pests can destroy your plants, as they’ll eat the leaves, stems, and even the fruit, leaving pretty much nothing behind. If you enjoy fresh tomatoes – as well as the pleasant experience of growing them – this is a problem. You need to take care of these pests as soon as possible.

    Till Your Soil Well

    Since tomato worms are the progeny of moths (and they turn into moths over the course of a few months), they appear at the same time every single year. Moths lay their eggs on the ground, those eggs hatch in the spring, and before you know it, you have tomato worms eating your crops. The best thing to do is to till your soil up extremely well before planting season begins. This kills the eggs, either burying them deep underground or destroying them before they ever have a chance to hatch. Plus, well-tilled soil leads to some great tomato plants, as it brings all of the nutrients up to the surface. Your plants will thank you.

    Know the Signs

    If you’ve tilled your soil, but are still worried about a tomato worm infestation, then you need to keep an eye on your plants. The main signs to look for include giant holes in the leaves, as well as plants that have leaves one day and very few the next. These worms grow to be about four inches long, and have small horns on their heads (hence their official name – hornworms.) They are the same green shade as the leaves, making them tough to see. With that said, they do become active at night, so you’ll see them crawling around.

    Pick Them Off of Your Plants

    Although it’s not ideal, you can pick hornworms off of your plants. Just put on some gloves, head out to your garden at dusk, nighttime, or during the waking hours, and individually remove them from the plant. You might want to put on some magnifying glasses to help you see them, and you’ll need some sort of portable light. Although it will take some time to remove all of these little guys off of your plants, doing so doesn’t really harm the worms – that is, unless you squish them. Feel free to rehome them to the other side of your house, away from your tomato plants.

    Spray Them with a Hose

    If picking the hornworms off doesn’t sound like your idea of a good time, then spray them off with a hose. Many of them cling to the undersides of the leaves or on the stems. Although they are somewhat stubborn and will hang on tight, you can indeed remove them by spraying their hiding spots with a hose. Just don’t use too strong a spray, or your plants may become damaged. If you do this right, then you won’t have to go with the non-organic “nuclear” option: a non-systemic insecticide.

    Use Insecticide

    Although this should be your last resort, insecticides do work well. There are types made to deal with hornworms that won’t harm any other insects. Make sure to read the label to ensure that you’re purchasing the right kind. In addition, choose a non-systemic insecticide. This type stays on the leaves of the plants and doesn’t soak into the fruit or stems. It only harms the insects that it intends to. Everything else stays safe. Insecticides aren’t ideal, but if you don’t want to spend hours upon hours picking tomato worms off of your plants, you may not have much of a choice. Sometimes you have to make do.

    Electric Companies Have Already Gathered An Army of Lawyers To Take This Down — Take Advantage Before it’s Gone>>>

  • How to Grow the Perfect Cucumbers

    How to Grow the Perfect Cucumbers

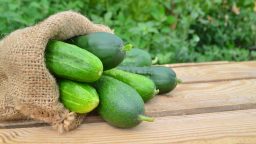
    Cucumbers are the perfect vegetable even though scientifically, they’re considered to be a fruit. No matter what you classify them as what matters is that they are extremely tasty and rather versatile. They taste great on salad, can be eaten alone, and are used in dozens of recipes. In addition, there’s nothing quite like a cucumber that you grew yourself, in your backyard garden. Although the kind grown outdoors tend to have spines and bumps on them, making them not-so-pretty to look at, they taste good. In order to produce a garden full of tasty cucumbers, you need to know what to do.

    Start Them as Seeds

    Cucumbers survive the act of transplantation well, so they can be started as seeds in small pots or in larger seedling containers. You can either put them outdoors or in a greenhouse, depending on the overall air temperatures. If it’s too cold, the seeds won’t sprout. It has to be a consistent 68 degrees Fahrenheit in order for them to grow properly. If you have the luxury of growing your seedlings indoors, under a grow light, then this won’t be an issue. The best thing is that cucumber plants grow fairly quickly, so if you have a shorter growing season, they will still bear fruit.

    Related Article:  7 Tips to Grow the Perfect Tomatoes

    Thin Your Seedlings

    Once your seedlings start to grow, you’ll need to thin them. There should be only one per small pot or section of your seedling container. Choose whichever one looks the strongest and remove the others to give it plenty of space to grow.

    This Crazy 56-Year-Old Geography Teacher in Memphis, Tennessee Believed He Could Change the Energy World… And Somehow He Did It.  Don’t believe me, check it out here>>>

    Plant Them Outside

    Once the weather warms up for good, it’s time to move your cucumber plants outdoors. They do grow well in containers and grow bags, as long as those pots are large enough. Choose ones that hold at least seven gallons of soil, and note that you’ll need one of them for each plant. Fill the pots with potting soil (which has properties that promote drainage and prevent root rot) and then plant your cucumber seedlings in them. If you’re placing your cucumbers in the ground, choose a location that gets plenty of sunlight.

    Since cucumber plants turn into vines, they’ll need room to grow. Now is the time to put a trellis or cucumber frame behind them. As the plants start to vine out, encourage them to grow up the trellis or frame. However, if you’re growing them in pots on a porch, you won’t need these extra accessories, as the cucumbers can be “coerced” into growing over the porch rails.

    Suggested Article:  Why are my Vegetables Not Growing?

    Watering and Care

    Cucumber plants are prone to powdery leaf mildew, so keep an eye on those leaves. Make sure that the soil is kept moist, particularly once they start to grow fruit. Fertilize your cucumber plants at least once per season, or more often if you’re growing them in a pot or grow bag. The nutrients in that soil will vanish fairly quickly, so you’ll need to fertilize them at least once a month. If you see signs of powdery leaf mildew or other problems, make sure to deal with them quickly, as you don’t want your plants to get damaged. Other than this, cucumbers are fairly easy to care for. They’ll produce plenty of slightly spiny fruits throughout the growing season.

    Picking Your Cucumbers

    Remember to keep an eye on your cucumber plants. Once your cucumbers have reached a length of around five to six inches (or larger or smaller depending on the variety) and are nice and green, a clip from the plant. This will encourage the plant to keep growing, producing even more cucumbers for you to enjoy.

    “Earth’s Largest Database of Woodworking Projects”

  • How to Correct Nitrogen Deficiency in Your Soil

    How to Correct Nitrogen Deficiency in Your Soil

    Did you know that your plants need nitrogen? Obviously, they need four other things as well: soil, air, sunlight, and water, but they also need plenty of nitrogen. This element is found in the air, as well as the soil. The nitrogen in the air doesn’t really help plants at all. In order for them to absorb it, the element must be in their soil. It occurs there naturally, but over time, especially if you use containers or grow bags for your plants, the nitrogen will begin to get used up. The end results are plants that don’t really thrive. They’ll begin to turn yellow and wilt. Thankfully, you can correct this deficiency.

    Know The Signs

    When your plants need more nitrogen, they’ll let you know. They’ll stop growing. Their leaves will begin to wilt and turn yellow. They just won’t look healthy anymore. Although all of those could be signs of other problems, such as not watering, overwatering, or keeping them in containers that are too small, if the plant is otherwise healthy and being taken care of properly, then the main problem is a lack of nitrogen. The sooner you add this element to the soil, the faster your plant will spring back to health.

    Test Your Soil

    Another thing that you can – and should – do is test your soil. There are soil testing kits that are commercially available. Some just involve scooping some soil into a tester and following the instructions. They’ll tell you the results right away. However, if you want something a bit a more accurate, you can purchase a kit, scoop up some soil from around your plants, and then send it out to be tested. There’s usually a self-addressed stamped envelope in those kits. It will take a few weeks, but you’ll get the results either emailed to mailed to you. These types of tests are best done early in the growing season. If you wait until your plants are in danger to do them, then it might be too late by the time the results come in.

    This Backyard Miracle Farm Will Change Our World Forever>>>

    Add More Nitrogen Naturally

    There are several ways to add nitrogen to your soil without having to resort to the use of chemical fertilizers. For example, you could add some old coffee grounds to the soil. They contain plenty of nitrogen. Although it will take some time for them to produce as much nitrogen as your plants need, it will work. You just have to be patient. In some cases, these slow-release methods are preferred to the quick ones.

    Adding compost to the soil is another option. Compost contains plenty of nitrogen. Like coffee grounds, its effects take time, but it does work, especially if it contains manure. (Yes, it’s a bit smelly, but your plants will really like it.) In addition to those two methods, you can also plant crops like peas and beans that will add nitrogen to the soil. They just naturally provide this element as they grow.

    Use Fertilizer

    Standard (read: chemical) fertilizers tend to have some sort of nitrogen in them. Look for initials NPK on the package, and pay close attention to that first number. It’s the one that tells you just how much nitrogen is present. Balanced fertilizers will help the health of your plants, but those with a large amount of nitrogen in them will provide the right kind of benefits much faster. With that said, the nitrogen will leach away quickly and you’ll end up having to use more sooner rather than later. No matter what, your plants will improve.

  • 7 More High Tech Tools and Tricks for Modern Homesteading

    7 More High Tech Tools and Tricks for Modern Homesteading

    Modern homesteaders can take advantage of a number of different high tech tricks and tools in order to make their lives easier. Technology has changed quite a bit since the original homesteaders claimed parcels of land back in the 1800s. Just because you’re trying to recreate that lifestyle, doesn’t mean that you need to utilize their old technology, like pot-bellied coal stoves and outdoor bathrooms. Instead, use these seven tools in order to make your modern homestead run much more smoothly. You’ll be glad that you did!

    1) 3D Printers

    When something breaks, it can be hard to run out and get a part, especially if you’re located hundreds of miles from the latest town or store. For example, if a crucial part of your tractor breaks, you could be stuck without one for quite some time. This is where a 3D printer comes into play. These printers make three-dimensional objects out of sturdy plastic. While the part that they make may not hold up for years, it should do the job well enough to keep the tractor running until a proper replacement can be procured.

    2) Grafting Plants and Other Gardening Techniques

    Did you know that you can graft plants together in order to create a kind of hybrid? For example, if you graft branches of one apple tree to another, you’ll end up with a tree that produces two different types of apples. This is quite a space saver! On top of this, you can also create your own plant hybrids by using cuttings and breeding them together. This is a less expensive option than purchasing new plants and seeds every year, plus you’ll end up with a plant that will thrive on your specific plot of land.

    3) Canners and Dehydrators

    Saving every last bit of the fruits and vegetables that you grow is a crucial part of homesteading. You don’t want to waste anything. Since you’ll inevitably grow more crops than you can eat fresh, you’ll need to rely on canning and dehydrating in order to save them for later. Modern canning devices are very easy to use and heat the jar’s contents to safe levels. Dehydrators are another simple tool that can help you waste less food.

    This guy shows us clear as day how anyone can power (with ZERO cost any) light bulb in their homes.

    4) The Internet

    This one seems obvious since you’re reading this article online. However, you need to keep in mind that the internet is a huge resource for things like recipes, instructions, and more. Everything that you need in order to be a great homesteader is right at your fingertips, through your WiFi connection.

    5) Electric Bikes

    These bikes have a power source, so they move faster than a standard bicycle. They charge themselves as well when you use them to travel from one spot on your land to another. Why do you want an electric bike on your homestead? They are cheaper to maintain, store and insure than a regular vehicle, and they have a smaller environmental footprint.

    6) Drones

    Drones are more than those tools that the military uses in order to shoot at and keep an eye on enemies. You can purchase a non-military drone and use it to watch everything that takes place on your land. This will save you time and energy since you won’t have to walk your land yourself.

    7) Micro-Electric Power

    Harnessing nature to create power for your homestead is always a great idea. You can use these micro-electric generators in order to gather power from a local stream or other water sources. While they won’t be able to generate enough electricity to run your entire home, they can be good for smaller things, like the electric pumps on your well or even the lights in your livestock barn.

  • Do Houseplants Need Different Care in the Winter?

    Do Houseplants Need Different Care in the Winter?

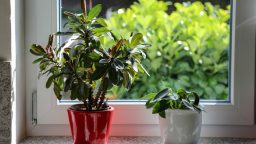
    Many people believe that their houseplants need the same type of care year-round. After all, they’re in an identical environment – the interior of your house – no matter what season it is. However, the opposite is true. These plants are also affected by the seasons, even though they’re not outdoors, so you need to change how you care for them.

    Watch Out for Low Humidity

    It’s perfectly normal for the air inside your house to become drier in the winter. Your furnace is to blame for this. You probably notice some signs of this, such as waking up to a dry throat that clears up after you eat breakfast. Some people are even prone to nosebleeds for this reason. Your plants are greatly affected by this dry air as well. They need some humidity in order to survive. Thankfully, there are some solutions. If you have an air humidifier or want to purchase one to run during this time of the year, then that will help quite a bit. Just place the humidifier near your plants (even being in the same room will suffice). Also, you can put a bit of water on a tray somewhere in the vicinity of your plants – no more than a foot away – and the water will seep into the atmosphere. Don’t place your plants in that water, as that could cause problems. You can also move those plants near rooms that tend to end up with a lot of air moisture, such as the bathroom or the kitchen. In fact, if you can place them in those rooms, that will help. With that said, you shouldn’t mist the plants with water. This actually doesn’t help them at all, as the water evaporates far too quickly. It doesn’t provide the moisture that they need.

    A Revolutionary Piece Of Fabric That Replaces Expensive Paper Towels And Toxic Chemical Cleaners>>>

    Water Your Plants Sparingly

    Speaking of water, you do need to give them less water in the winter than you do the rest of the year. This sounds counterintuitive to what we just wrote since you’d think that the lack of moisture in the air could be made up for by watering your plants a lot. This isn’t true. Water in the air is much different than moisture in the soil! A good way to test the moisture of the soil is by placing your finger in it. The top of the soil will dry out fast, so don’t just do a quick touch test. Instead, make sure that your finger goes down a few inches below the surface of the soil. If it feels dry there, then you need to water your plants. Why does this matter? Well, most of your houseplants will end up going into a dormant state during the winter. This means that they stop growing at the rate that they normally do. As a result, they need a lot less water.

    Place them in the Sun

    Even though we advocated for placing your houseplants in the same room so that the humidifier can reach them, you also need to move them around a bit in that space. Your plants need sunlight in order to thrive. Their photosynthesis processes depend on it. When they’re in shady areas of your house, then this doesn’t happen, and they could die.

    Essentially, you want to place your plants in an area where they get plenty of sunlight during the day, as well as humid air all winter long. When you combine this with proper watering (and be sure to test your soil), then your plants will be fine during this cold and snowy season.

    Wash Your Clothes Without Using A Single Drop Of Toxic Chemical Detergent With This>>>

  • 5 Great Benefits of Having Succulents in Your Home

    5 Great Benefits of Having Succulents in Your Home

    Plants help clean the air, add oxygen and any number of other benefits.  The problem?  Not everyone has a green enough thumb to keep their plants alive, let alone flourishing.

    Fortunately, you don’t have to have a degree in botany to enjoy having plants indoors; you have to pick the right ones.

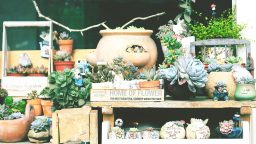
    Enter the succulent.  Succulent plants, or succulents, are a type of plant that displays parts that are especially thick and fleshy.  This characteristic lets the plant retain water in drying climates and soil types in a similar manner to cactus plants.

    These wonderful little plants have become even more popular recently and for good reason, besides the typical benefits of adding oxygen and purifying the air. Let’s look at some of the other great reasons to add succulents to your home.


    They Bring a Zen Quality to Your Environment

    Houseplants have been shown to aid in concentration as well as improve your overall mood.  The geometrical patterns of succulents have the effects of focusing your thoughts, helping you feel more relaxed and able to process information better.

    Additionally, the process of taking care of a plant and watching it develop and grow can help rid yourself of feelings like loneliness and even depression.


    They Provide Natural Medicinal Properties

    Some succulents are good for more than just decorating a space.  Plants like agave and aloe vera also have medicinal properties. Keep agave on hand as a natural antiseptic to treat scratches and cuts.

    Aloe vera is not only great for burns and sunburn but can be taken internally to help alleviate fevers, bowel issues and more.

    They Are Not Picky About Their Living Quarters

    It doesn’t take much to make a succulent happy.  Their shallow root systems make them ideal for planting in bowls, jars, teacups, or anything else you can conjure up.  Let them take up as much or as little room as you can spare.


    They Rank High on the Hardiness Scale

    What does this mean for you?  They don’t require as much water and attention as other houseplants, making them easy to care for.  Have you ever left for a week and forgot to get someone to take care of the plants?

    No problem, more than likely your succulents will be no more the worse for wear when you get back. They may be a little thirsty though.

    Also, they don’t need very much light to get by.  This means you can keep them in your bedroom, and as long as there is a little light peeking through the blinds during the day, they’ll be happy and waiting for your at bedtime to commune with and clear your head before lights out.


    Where to Find Succulents

    Thanks to there increasing popularity, you won’t have to hunt down a specialized garden store to get started.  Any local DIY center with a garden section will probably have a large variety to choose from.  From there you can pick out a great planter to add to the aesthetic or take them home and put them in your favorite coffee mug.

    New Powerful Laundry Magnets — Never buy detergent again>>>

  • Identifying and Understanding Poison Ivy

    Identifying and Understanding Poison Ivy

    The bane of every campers’ weekend getaway, poison ivy, interestingly enough is not actually in the ivy family.  It’s a relative of the almond family.  Who knew?

    Most of the time, you only have to worry about avoiding it when you are in the great outdoors and away from urban areas.  However, occasionally it will pop up in your yard.  If this happens, you’ll want to make sure you wear protective clothing and accessories like gloves and even a mask to avoid the worst itching you can ever imagine.

    Also, you’ll want to be very cautious about how you dispose of it, so no one else accidentally comes in contact with it either.  And, whatever you do, do NOT burn it!

    The smoke produced by burning poison ivy takes all of its poison airborne.


    Identifying Poison Ivy

    If you grew up in a more rural community, you might already know some of the rhymes used to recognize the plant and its different features.  If you didn’t learn any of these, take note, they could come in handy someday.


    1. If Butterflies Land There, Don’t Put Your Hand There

    Butterflies can safely land on poison ivy.  They do it to protect themselves from predators.

    1. Berries White – Run in Fright or Danger in Sight

    Describes the light gray to white colored berries seen in the fall.

    1. Hairy Vine – No Friend of Mine. Ragged Rope – Don’t be a Dope

    Refers to the shaggy appearance its vine exhibits.

    1. Leaves of Three Let It Be
    2. Longer Middle Stem – Stay Away from Them

    The middle leaf of a cluster of three is typically longer than the side leaves.

    1. Red Leaflets in the Spring, it’s a Dangerous Thing

    The leaf color changes with the seasons.  Red in spring, Green in summer, Reddish-orange in fall.

    1. Side Leaves like Mittens Will Itch Like the Dickens

    A few varieties have side leaves that resemble a mitten with a thumb sticking out.

    What to do if You are Exposed to Poison Ivy

    If you discover you’ve been exposed, there are actions you can take to reduce the severity.

    • First, carefully remove your clothing and put them directly into the washer so they can’t spread the oil to other surfaces.
    • If it has been less than 10 minutes since exposure, wash your hands with soap and water and any other areas that have come in contact with the plant.
    • If it has been over 10 minutes, you still want to wash up, but you’ll also be needing a remedy for the rash that is headed your way.


    Poison Ivy Remedies

    There are several effective over the counter treatments for Poison Ivy.  There are also a few home remedies that work.


    Apple Cider Vinegar

    ACV gets rid of the itch almost immediately and helps neutralize the poison.  Apply with cotton balls or with a spray bottle several times a day to relieve itching and help the skin start to heal.

    Just be prepared to smell like a salad for a while.


    Baking Soda and Oatmeal Paste

    1. You’ll have to do a little cooking for this one, but it’s worth it. This “recipe” can be made in bulk and stored to apply several times over the course of your recovery.
    2. Start by bringing 1 part rolled oats to 2 parts water to a boil.  Remove from the heat and cover until all the water is absorbed by the oats.
    3. Stir in 1 Tbsp Baking Soda for every ¼ Cup oats and mix well.
    4. If the paste is still very hot, you can add some cold water or an ice cube to bring it down to warm.
    5. Apply the paste thoroughly to the affected areas.  Relax while you let it dry out, then carefully brush off the dried paste.
    6. Repeat 2 times a day as needed.
    7. For an all over treatment, mix the paste into a lukewarm back and soak for a while.

    Conclusion

    If possible, just stay away from poison ivy.

  • DIY Recycled Planters

    DIY Recycled Planters


    When you are getting ready to start seeds for spring planting, you may find yourself with more seeds than starter containers.

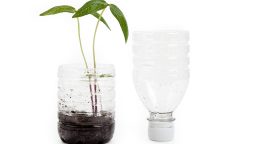
    Instead of running right out and buying some at your local garden center, try digging through your plastic recycling bin instead.  Empty plastic soda and water bottles are durable enough to handle taking on plants but easy to cut down, trim and otherwise alter to create a handy little planter to suit your needs. Here are two options to create plastic planters.


    Standard Planter

    Cut or punch drain holes around the bottom of the bottle. Any easy way to accomplish this is to turn the bottle upside down and use an awl, drill or screw and screwdriver to punch through the plastic.

    Most bottles have a built-in pattern you can follow.  Just place a hole in the center of each raised area of the bottom, so when its flipped back over, the holes will be evenly spaced at the very bottom of the bottle.

    If you need to make the initial holes wider, a large screw will force the holes open more.

    Remove the top of the bottle. In case you were wondering why we didn’t do this first, leaving the top on makes the bottle more stable and easier to work with when punching the holes in the bottom.

    A good guide to measure how far down to cut is to remove the part above the top of the label on the bottle.  If that has worn off or been removed already, your best guess will be fine.

    A sharp pair of utility scissors, or a utility knife or box cutter are good options to make a clean cut all the way around the bottle.

    And, there you have it, a basic round planter that will provide good drainage for your fledgling plants.

    Self-Watering Seed Starters

    This method not only lets you keep the moisture level of your soil easier to control, but it also uses the entire bottle, even the cap, so there is no waste material going back into the recycling bin.

    1. Cut your plastic bottle in half, separating the top from the bottom.
    2. Punch a hole into the middle of the bottle cap.
    3. Take 12-18 inches of yarn or string, fold it in half and tie a loop at the end of the folded side.
    4. Thread the loop through the hole in the cap so that the knotted loop will be located on the inside of the bottle cap with the two ends hanging out the other side.
    5. Screw the cap back onto the top of the bottle, making sure the loop sits loosely inside the top of the bottle.
    6. Fill the bottom part of the bottle with a few inches of water and the place the top upside down in the bottom so that the two ends hang from the cap and get submerged in the water.

    Once everything is in place, the string/yarn will draw water up into the soil that surrounds the loop in the top.  To add water, you’ll only need to lift the top part out, fill the bottom area and replace the top.

    You’ll be able to see exactly how much water is there and know precisely when its time to top it off.

    Suggested Article: DIY Plant Propagating

    Now You Can Get Planting

    Once completed, you can use these upcycled planters like you would any other to get your seeds started.  Place them all together on a shelf in your kitchen or back porch for a delightful display that is also practical and useful.


    Take a look at this “Medicine Chest” — how to deal with a disaster using alternative medicine.  Check it out here>>>