Tag: soil

  • Preventing Tomato Worms

    Preventing Tomato Worms

    Is your garden plagued with hornworms or tobacco worms? Also known as tomato worms, these pests can destroy your plants, as they’ll eat the leaves, stems, and even the fruit, leaving pretty much nothing behind. If you enjoy fresh tomatoes – as well as the pleasant experience of growing them – this is a problem. You need to take care of these pests as soon as possible.

    Till Your Soil Well

    Since tomato worms are the progeny of moths (and they turn into moths over the course of a few months), they appear at the same time every single year. Moths lay their eggs on the ground, those eggs hatch in the spring, and before you know it, you have tomato worms eating your crops. The best thing to do is to till your soil up extremely well before planting season begins. This kills the eggs, either burying them deep underground or destroying them before they ever have a chance to hatch. Plus, well-tilled soil leads to some great tomato plants, as it brings all of the nutrients up to the surface. Your plants will thank you.

    Know the Signs

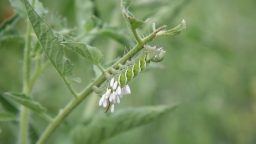
    If you’ve tilled your soil, but are still worried about a tomato worm infestation, then you need to keep an eye on your plants. The main signs to look for include giant holes in the leaves, as well as plants that have leaves one day and very few the next. These worms grow to be about four inches long, and have small horns on their heads (hence their official name – hornworms.) They are the same green shade as the leaves, making them tough to see. With that said, they do become active at night, so you’ll see them crawling around.

    Pick Them Off of Your Plants

    Although it’s not ideal, you can pick hornworms off of your plants. Just put on some gloves, head out to your garden at dusk, nighttime, or during the waking hours, and individually remove them from the plant. You might want to put on some magnifying glasses to help you see them, and you’ll need some sort of portable light. Although it will take some time to remove all of these little guys off of your plants, doing so doesn’t really harm the worms – that is, unless you squish them. Feel free to rehome them to the other side of your house, away from your tomato plants.

    Spray Them with a Hose

    If picking the hornworms off doesn’t sound like your idea of a good time, then spray them off with a hose. Many of them cling to the undersides of the leaves or on the stems. Although they are somewhat stubborn and will hang on tight, you can indeed remove them by spraying their hiding spots with a hose. Just don’t use too strong a spray, or your plants may become damaged. If you do this right, then you won’t have to go with the non-organic “nuclear” option: a non-systemic insecticide.

    Use Insecticide

    Although this should be your last resort, insecticides do work well. There are types made to deal with hornworms that won’t harm any other insects. Make sure to read the label to ensure that you’re purchasing the right kind. In addition, choose a non-systemic insecticide. This type stays on the leaves of the plants and doesn’t soak into the fruit or stems. It only harms the insects that it intends to. Everything else stays safe. Insecticides aren’t ideal, but if you don’t want to spend hours upon hours picking tomato worms off of your plants, you may not have much of a choice. Sometimes you have to make do.
    Electric Companies Have Already Gathered An Army of Lawyers To Take This Down — Take Advantage Before it’s Gone>>>

  • 5 Common Fertilization Mistakes

    5 Common Fertilization Mistakes

    How much do you know about plant fertilizer? While your level of knowledge depends on your gardening experience, as well as how much research you’ve done on the topic, this doesn’t mean that you don’t make mistakes when applying yours. It’s very easy to use the wrong type of fertilizer, not mix it correctly, or even apply too much (or too little) of it. Since fertilizer is an important part of the growing process, you need to know which mistakes your making so that you can avoid them in the future. Here are some of the most common ones.

    Using Too Much Fertilizer

    Too much of a good thing is definitely a problem. If you use too much fertilizer, you could actually be hurting your plants. As it turns out, over-fertilizing can cause certain compounds in the soil to build up, which will hurt your plants. For example, they need just enough nitrogen in order to survive and thrive, but too much can kill them. Never over fertilize. This is one of those things where the words “too much of a good thing” certainly come true. In fact, if you’ve just fertilized the soil and your plants look as if they need more fertilizer (look for droopy leaves, and so on) this might actually be a sign that you applied too much.

    Suggested Article: The Best All Natural Fertilizers for Your Garden

    Adding Too Much of One Nutrient

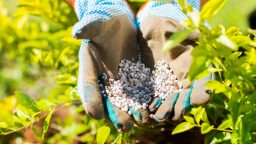
    It’s easy to add too much of one nutrient and not enough of the others. Many people focus on the trio of NPK, or Nitrogen, Phosphorus, and Potassium, while forgetting that their soil actually needs to be a perfect balance of these compounds and others. In order to balance things out properly, make sure to use more than one type of fertilizer. Look for ones that contain calcium, sulfur, or one of the other many micronutrients that your plants need.

    Related Article: 4 Simple Ways to Improve Your Garden Soil

    Your Fertilized Them at the Wrong Time

    This is where doing research on your plants comes in handy. There are numerous resources out there that tell you exactly when this type of tomato plant or that type of cucumber vine needs to be fertilized. You shouldn’t fertilize everything at once, or just “wing it.” Instead, look up your exact varietals and create a calendar or chart that shows when in their growth cycles that they need to be fertilized. Your plants will reward you growing plenty of vegetables if you do this correctly.

    Repeating the Same Patterns

    You need to remember that what worked great one year won’t necessarily provide the same results the next. It’s easy to fall into these habits and come up with a formula of sorts that spells out success. However, your plants might have different needs the next year, based on the air temperatures, amount of sunlight, soil conditions, and even how much water they’ve received. You need to plan everything to match – not just do the same thing over again because it worked that way in the past. Be open to change and everything will work out for the best.

    Suggested Article: Why You Should Keep a Homesteading Journal

    Not Testing Your Soil

    The soil that you plant your crops in needs to be tested every year because its condition can change. Since you want your soil to have that perfect balance of nutrients and micronutrients, it helps to know what it’s exactly chemical composition is. This way, you can add in the right type of fertilizer. Otherwise, you might be applying more phosphorus to soil that already has plenty of this nutrient. This isn’t good for the plants or your soil composition. The more that you know about your soil before you fertilize it, the better.

    Related Article: How to Test Soil Quality

  • 8 Items to NOT Include in Your Compost

    8 Items to NOT Include in Your Compost

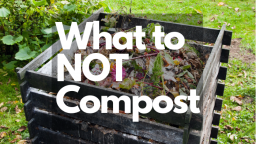
    Creating a compost pile is always a good idea. You’ll get to reuse food scraps that would otherwise end up in the trash, and then eventually in a landfill. On top of this, compost piles create new, fresh soil that contains plenty of nutrients. Your plants will love it. However, before it gets to that point, you need to understand the basics of composting, which involve knowing what you shouldn’t put into a compost bin. Many of these items are downright harmful to your compost and will cause a number of problems. Avoid adding them to the pile at all costs.

    Citrus Peels

    While fruit waste of all kinds can be added to a compost pile, you should avoid adding in those citrus peels. They take way too long to decompose and can affect the overall balance in your pile. Your goal is to make soil, and you won’t be able to use it for much when it contains whole chunks of orange, lemon, lime, and grapefruit peels in it.

    Animal Feces

    It’s understandable that you want to do something with your cat or dog feces besides putting it in the trash. However, if you add it to your compost pile, you risk contaminating it with parasites and microorganisms. You don’t want them getting anywhere near your plants, especially if you grow your own vegetables.

    Onion Peels

    A good compost pile contains a balanced combination of food scraps and other waste that break down slowly over time. In some cases, you might want to add some worms to your pile in order to help this process along. Onion peels will hurt, rather than help, here. Not only do they slow down the decomposition process, but they also hurt your worms.

    Save Money When Doing Laundry…Take a look at this new technology and never buy detergent again>>>

    Sticker Labels

    You’ve no doubt seen those annoying sticker labels that appear on fruits and vegetables. Yes, they serve a purpose – helping the cashier code in the right items during checkout – but they don’t do much else. You can’t even add them to your compost pile, because they won’t biodegrade. They’re actually made of plastic, not paper.

    Paper That’s Coated or Glossy

    When you’re adding items to your compost bin, you do need to balance out those fruit and vegetable scraps with some paper. However, it needs to be the right kind of paper. You can’t use glossy or coated paper. Those enhancements are made of plastic, which prevents the paper from breaking down properly.

    Tea Bags and Coffee Filters

    While used tea leaves and coffee grounds absolutely can be added to your compost, the items that you use to make that tea and coffee cannot. Your tea bags and coffee filters need to be placed in the trash unless you’ve determined that they’re made of natural materials. Many consist of synthetic polyester fibers that won’t break down properly, if at all.

    Meat Scraps of All Kinds

    The meat of any sort can’t be placed in a compost bin. This means that you can’t include any beef trimmings, leftover cooked chicken (or uncooked chicken), fish bones, or anything that came from an animal. The problem here lies not so much in getting those items to biodegrade (they will, along with everything else around them), but in the smell that they give off while doing so. All of the animals in your neighborhood will end up rooting through your compost bin looking for food.

    Used Charcoal

    It can be tempting to dump leftover charcoal in your compost bin, but you shouldn’t do it. This material actually contains a lot of sulfur, which can upset the overall balance of your compost. It’s even worse if your charcoal has been treated or soaked in fire starting liquid.

    The #1 problem with the “Plant-Based Diet”? (solved) — Learn More Here>>>

  • 4 Critical Methods to Improve Your Garden Soil

    4 Critical Methods to Improve Your Garden Soil

    You have the perfect spot picked out for your new garden.  It gets just the right amount of sun, its easy to access and there is plenty of room to plant whatever your heart desires.  Just one problem.  The ground in your perfect spot is less than optimal for growing anything more than plastic plants.

    What do you do when your potential garden’s soil is more akin to just plain dirt that the rich compost you dream of getting your hands into?  Pick another site?  Probably now very practical.

    Fortunately, there are several natural ways you can inject your ground with what it needs to support a flourishing garden.  Here are a few you might want to consider.


    Composting

    Composting your kitchen and yards waste gives you a tremendous source of organic material that will add nutrients and extra material to your garden plot.

    If you haven’t had a chance to get a good compost heap going, your local DIY or garden center will be able to provide you enough to get started.

    Not sure you want to take on the job of maintaining compost?  Consider at least saving all your used coffee grounds and egg shells.  Adding these directly to the soil around each plant will go a long way to building up much-desired nutrients.

    Related Article:  The Undeniable Benefits of Coffee Grounds in Your Garden


    Natural Fertilizer a.k.a Manure

    Adding animal dung to your soil will give it a much-needed boost in organic material, nutrients, and beneficial microbes. If you go this route, make sure you follow a few precautions.

    First, most fresh manure is too “hot” to add directly to plants.  There are high levels of several compounds that can burn your plants chemically.  For best result, let manure compost or at least age for a while before adding it to soil and around existing plants.  This gives those chemical compounds time to break down to safe levels for planting.

    If you are preparing a new site, you can use a tiller to mix in fresh manure in the fall, and then let it set over the winter to be ready for spring planting.

    Also, if you are sourcing your manure from an outside source, say the farmer down the road, make sure the manure you receive is from animals that have not been allowed to graze on food sources that have been exposed to herbicides.

    Some herbicides can survive the digestive process and will exist in the animals waste, which will have unwanted side-effects on your new planting.

    Plant Cover Crops

    This relatively easy option lets you build up your soil quality with much less work than some other methods. Cover crops provide nutrients to the soil as well as improve drainage, attract beneficial insects and other organisms, strangle out weeds, and act as a mulch.

    One thing to note, however, using this method will take longer than others.  You won’t be able to use the site for other planting until the following year.

    If you are someone who really plans ahead, though, this would be a good option for you.


    Let the Worms do the Work

    Vermicomposting is basically the process of introducing worms to the environment and letting them add important nutrients as well as increase aeration and drainage just by being themselves.

    There are a few ways to accomplish this:

    • Add the worms to your compost pile. They will speed up the decomposition process and add vital nutrients to the material.
    • Add the worms to your garden soil and pile on some compost and mulch to give them a new home.

    Related Article:  Do-It-Yourself Worm Casting


    Let the Gardening Begin

    We’ve discussed four fairly simple ways you can turn a patch of dirt into a flourishing garden plot ready to nurture whatever you want to plant.  With just a little planning, you can turn your backyard into a viable food source in no time.


    [Break-Through] Organic Gardening Secret Grows You Up To 10 Times The Plants, In Half The Time”. Learn More Here>>>


  • Soil Tests

    Soil Tests


    Soil test kits are one of the most under-used tools for backyard homesteaders in their gardens.  Most gardeners seem to prefer to treat all soil as equal, equally bad, or equally good.  Adding compost and fertilizer to every square inch of growing space, and treating soil for every crop that goes in.  But money and hours of hard work can be saved though testing your soil for pH and mineral content.


    pH

    Without knowing what the pH of their soil is, most people will add acidic soil amendments like elemental sulfur to their soil if they are planting crops like blueberries that thrive in acidic soils.  But what if your soil is already acidic?  Then you will waste your money on the soil amendments, and likely damage or even kill your blueberries that you spent time and energy planting.

    Mineral Content

    If you have a large garden, then more than likely you are composting more than just kitchen waste.  You probably go out of your way to gather material like leaves that require raking, or even going and getting bags of coffee grounds from your local coffee shop.  Then, if you don’t test your soil, you probably apply that compost to every area of your garden.  But time, energy, and resources can be saved if you test your soil.  Areas that are rich in minerals can be maintained simply by mulching with comfrey and wood chips.

    Guess Work

    Knowing the soil in each area of your garden will give you a better idea of where to plant what, and will help in determining why some crops might not be doing as well as you would like them to be doing.


    Soil tests don’t need to be performed regularly, they don’t take long, and don’t cost much.  But they can give you valuable knowledge about the soil in your garden.

  • Making Your Own Potting Soil

    Making Your Own Potting Soil

    Whether you are growing in raised beds, containers, or even in rows, you can benefit from starting your crops on tables and even under cover.  But starting your crops outside of their final location, or growing in containers will mean that you need potting soil, which is expensive.  Reducing this cost is a crucial step in lowering the overall cost of your garden.  Here are some tips on making your own potting soil to cut costs.


    Peat

    It’s unlikely that you will be able to build your potting soil without purchasing anything, but purchasing individual ingredients in bulk, and then stretching them will reduce costs dramatically.  One ingredient that you are not going to want to go without because of its ability to wick water up is peat, or coconut coir but generally, peat is cheaper.  This can be stretched by adding saw dust to it that you might be able to get for free if you look for a mill in your area.

    Compost

    Compost is, of course, something that you can produce for free.  When using it for potting soil you want to make sure that you are using the finest material you can.  Avoid material with large sticks and obviously, recognizable pieces of ingredients that have not decomposed.  Vermicompost or worm bin compost is great for this.

    Perlite

    Perlite is a volcanic rock that aids in drainage and preventing soil compaction.  These are important factors especially in potting soil.  Perlite can be expensive, but it is a difficult ingredient to replace because of it’s unique and highly beneficial characteristics.

    Separate

    Once you have mixed these ingredients thoroughly you have potting soil.  To avoid the need to purchase these ingredients again, simply segregate your spent potting soil and compost it in a separate pile or add it to your worm bins.  This will keep all of your perlite available for future use, the compost will be replaced, and it will reduce the need to purchase more peat.


    Making your own potting soil not only reduces the cost of purchasing it by the bag, but it also reduces the loss that you would suffer from unsuccessful direct sowing of valuable seeds.  Don’t let the cost of potting soil deter you from starting in a more controlled environment, make your own.

    If you enjoyed this, you might also like….

    Last Resort Home Defense and More…

    Natural Healing Secrets You Need to Know…

    The Healthy Primal Diet Everyone Should Try…