Page 12 of 16
1 10 11 12 13 14 16
Nick A – Page 12 – Homesteader Depot

Author: Nick A

  • Fascinating Ways to Reuse Old Sweaters

    Fascinating Ways to Reuse Old Sweaters

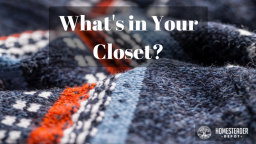
    If you are into crafting with felt pieces, it’s actually possible to create your own felt material just by cleaning out your closet. Then, for the low cost of a few washer/dryer cycles and detergent, you can have some large pieces to use that will let you “think big” for your next project.

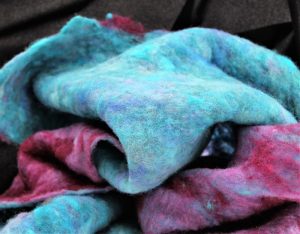
    Felt itself is a non-woven textile. It is normally created by matting and compressing the fibers together until they connect to become a very sturdy fabric. Known as the oldest form of cloth, it has an extremely long historical record.

    Felt has been used in numerous cultures as fabric for rugs, tents, clothes and even footwear.

    When converting sweaters, the felting results when the wool fibers become agitated enough to bind to each other. As this happens, the fibers become fuzzy and stick so that fraying won’t take place. There are only two things that are important to sweater felting success, the fiber blend, and the knit stitch.

    Suggested Video:  “Learn how to purchase old batteries, recondition them, and sell them for a nice profit”

    While 100% wool is optimal, it may be hard to find since wool blends have become more popular.  For felting purposes, check the sweater’s tag and stick to those with 65% wool or more.

    As far as the knit stitch, this can be difficult to establish sometimes.  The easiest way to check is to see how stretchy the sweater is.  As a rule, the stretchier the sweater, the less likely you’ll be able to felt it successfully. Of course, if you’re not sure but know you don’t want the sweater anymore, there’s nothing wrong with giving it a try.

    Let the Felting Begin

    Felting sweaters is one of the easiest processes you will ever do.  To get started, you’ll need your washing machine to be free.  Put the sweaters in with approximately half the usual amount of detergent, and an old pair of tennis shoes.  Set the cycle for the longest, hottest option available on the machine.

    When the wash cycle is complete, move the sweaters (but not the shoes) into your drier. For this, you’ll also want to select the longest and hottest option.  Usually, this is the “cotton” cycle, but double check to see if a different option will be better.

    Suggested Article:  “13 Useful Ways to Reuse Eggshells”

    The sweaters are fully felted when all the fibers have become completely matted.  When this happens, there won’t be any fraying or unraveling when you cut them. If after the first round of washing and drying it doesn’t look like the felting is completed, repeat the process as many times as you need to. If you didn’t add the shoes the first time, find a pair for the subsequent times.  They help agitate the fibers more in the washer and speed up the process.

    Once completed, you should also notice that quite a bit of shrinking has occurred.  This is normal (and why you don’t usually wash sweater this way).  If you’ve reached a point where there is no fraying when you cut into the final product, you’re almost done!

    To make the most of your “new” craft supplies, you’ll want to cut them apart in a way that will give you the largest, flattest pieces to work with.  This will provide more options for the sizes of projects you can create later.

    For best results, cut a line from the armpit area up to the end of the neck opening on each side.  Then cut open each sleeve and up one side of the body portion.  When you are finished, you will be left with three large pieces of homemade felt material.

    DIY Home Solar Energy System <<<Learn How Here>>>

  • What Does “Free Range” Really Mean?

    What Does “Free Range” Really Mean?


    With an increase in animal rights and animal cruelty awareness, the words “free range” has become a more common sight on packaging at the grocery store.  It labels animal products from animals that are farmed in a way that gives them access to outdoor spaces and free access to grazing for food.

    However, since there are no government regulations for the term “free range, ” the images you may have in your mind of wide open chicken yards and pastures dotted with happy cows communing with nature may not be exactly what is happening.

    So, what does the term “free range” actually mean for most animals?

    Free Range as defined by the U.S. Department of Agriculture (USDA) has only been applied to meat chickens.  It does not actually include egg sources or other livestock like cows, turkeys or pigs.

    For chickens, “free range” is defined as having access to the outdoors each day.  It does not stipulate a specific amount of time, however.  This lack of a more designated regulation means that chickens who spend all their lives in cramped pens with only a small hatch to the outdoors open for a few minutes daily are in the same category as chickens who roam free, only going inside at night to roost.

    Essentially, the current USDA regulations mean that the chicken only needs to have a glimpse of the outdoors every day to qualify as free range. And, since the USDA regulations don’t apply to other animals or egg sources, any company can add “free range” to their packaging without risk of breaking regulations.


    Look for the HFAC Certification

    Fortunately, there is a way to ensure you are buying a truly “free range” product without having to visit each provider yourself.  The Humane Farm Animal Care organization (HFAC) certifies farm with their own set of regulations to qualify as free range.

    If a farm has received the HFAC cert, it signifies that chickens have at least two square feet per bird inside their pens and must be allowed to spend a minimum of six hours a day outdoors as weather permits.

    The HFAC has even taken these principles a step further by including a “Pasture-raised” certification.  To qualify for pasture-raised status, the farms are required to provide over 100 square feet PER bird.  Additionally, the birds are allowed to live outdoors year-round in rotating field areas.  A shelter is provided specifically to protect them from bad weather and predators, not as a way to “store” them.


    Certified Organic Qualifications

    Another way to ensure you are buying actual free-range products is to stick to “certified organic” products.  These products are regulated by a much stricter set of regulations that includes a reasonable definition of free-range treatment.

    Look at it this way.  A farm claiming to have free-range eggs won’t suffer any penalties or fines if it isn’t true.  However, if a farm claims to have Certified Organic eggs and are caught not adhering to those standards, they will be hit with severe penalties and fines.


    Always Check the Packaging

    So, now you know that even if a product is labeled “free-range” it doesn’t always mean what it should.  Instead, check for the HFAC cert info or for the Certified Organic info if you want to make sure that what you are buying actually fits into the category of free range as it should.

    Taking a little time to double check will help ensure you are getting the healthiest possible product for you and your family.


    [Bonus] My Chicken Coop Plans have helped THOUSANDS of people…Use my proven tips for lasting results.  <<<Learn More Here>>>

  • Benefits of Protein in Your Pantry

    Benefits of Protein in Your Pantry


    Protein powder is usually known as the substance that bodybuilders use to bulk up. It’s more than that, however! There are protein powders out there that go into shakes, can be mixed with water and drank on their own, and that serve as meal supplements.

    Having supplemental protein powder can prove very necessary for those bad years when livestock doesn’t produce or you’ve come up empty-handed while hunting.  Your body needs a source of protein and when you can’t get it from meat, a supplemental powder is a great option.  It’s definitely something to consider in your emergency pantry.

    In fact, there are so many different types of protein powder that you might find yourself overwhelmed with options. We’ll help with that here.

    What Exactly Is Protein Powder?

    Protein powder is exactly what it sounds like – it’s a supplemental powder that contains protein and a number of other vitamins and minerals. There are versions with more protein than others (these are what bodybuilders use to bulk up) and some that are very well-rounded. If you’re looking for a good type to keep in your preparedness pantry, choose the well-rounded versions. They’ll serve your needs better and act as a meal replacement.

    Types of Protein Powder

    We’ve already covered one type of protein powder – the one used by bodybuilders. However, the types that serve as meal replacements come in a variety of types and flavors. Some use coconut to provide the protein, while others have some animal by-products in them. Make sure to read the labels carefully if you’re a vegetarian or vegan to avoid ending up with the wrong kind. On top of this, there are a number of different flavors, from strawberry to chocolate. In fact, some types are available in more than one flavor, making the decision even tougher. What it comes down to is finding the meal replacement kind in a flavor that you enjoy.

    How Long Will It Last?

    Protein powder is just that, a powder so that it will have quite a long shelf life. The standard types expire within four to five years, and, like with most canned and jarred items, if they are stored properly, they’ll last even longer than that. As long as the container isn’t opened, you can probably get a few extra years of storage time. However, if it’s opened, make sure to use it up as soon as possible. You don’t want to risk contaminating anything!

    Is Protein Powder Good For Kids?

    The answer here is yes. Protein powder is indeed good for children. There are even kid’s versions available on the market. Compare it to baby formula, only formulated differently and tastier. It contains the same number of nutritious elements as the adult versions; only it is made for children’s needs. In short, if you have kids in your house, you should have some protein powder for them store with your other emergency goods.

    Can I Do Anything Else With Protein Powder?

    While the most popular method of using protein powder is by mixing it with water and drinking it, you can always use it in a smoothie. In fact, if you mix some of your canned fruit in with the protein powder and maybe some powdered milk and water, you have the makings of a quite tasty drink. You’ll need some variety in your diet – you can’t keep eating and drinking the same things all of the time – and this is a great way to expanding things.

    Protein powder is a useful vitamin and mineral supplement that can provide some of the things that your average diet is lacking. Make sure to keep some containers of it in your emergency pantry alongside your other goods. You might want to pull it out when you tire of eating the same old things all of the time. The benefits are worth it, especially if you chose a tasty flavor.

    [Discover] The ONLY battery reconditioning resource that lets you easily bring nearly any type of dead battery back to life…<<<Learn How Here>>>

  • 5 Things to Consider When Building an Aquaponic System

    5 Things to Consider When Building an Aquaponic System


    Setting up an aquaponic system, although quite an easy task, requires some basic knowledge of aquaponics. If you have decided to install such a system in your house, then you probably know what this is and how it could help you. However, there may still be things which can interest or help you. Below you will find 5 essential things which you should know in order to obtain spectacular results.

    1. Location
    The place where you put your aquaponic system is highly important for the way in which the plants and the fish will develop. In order to obtain great results, you should make sure that the temperature from the room is not too high, nor too low, that there is enough light for the plants to prepare their food and that no wind or extreme weather conditions will reach them. Also, make sure that no harming chemical substances can get inside the water as this means death for both your fish and your plants.

    2. Oxygenizing the water
    The happier your fish are, the better your system will work! This is why you need to oxygenize the water on a daily basis and make sure your fish have all the “comfort” they need.

    Related Article: “Advantages of Aquaponic Farming”

    3. Choosing your fish accordingly
    The aquaponic system works well with almost all types of fish. Yet, there are states in which you are not allowed to grow whatever type of fish you want, so you will want to see what types of fish you are allowed to have before starting your aquaponic system as you do not want any problems with the law.

    4. Placing the pots
    In order to make the harvest much easier, you should place the pots or the entire system at your waist level. This way you will not have to bend over, making the daily care routine a much easier activity.

    5. Adding additives
    There are cases in which your fish may not provide all the nutrients needed for your plants. If the quantity is lower than what the plants need, then you will have to supply them with the respective substances. In most cases, you will need to add iron, calcium carbonate or potassium carbonate.

    Aquaponics is an easy activity which will provide you with the necessary vegetables and fish in a short amount of time. Just follow the tips mentioned above and you will have great success in your attempt to grow organic food in your home. 

  • Advantages of Aquaponic Farming

    Advantages of Aquaponic Farming

    Aquaponics is a new way of approaching farming. Unlike traditional agriculture where you needed plants to grow vegetables, with aquaponics you need water and fish in order to have healthy food on your table each and every day. Basically, aquaponics relies on the interdependence between fish and plants: the fish produces bio-nutrients for the plants, while the plants clean the water, creating a perfect environment for the fish to grow and develop. It is a blend of aquaculture and hydroponics that has plenty of advantages. If you need some reasons to get your own aquaponic system started, then here are some of the advantages you will get once you assemble it.

    First of all, you will have fresh organic food on your table each and every day, regardless of the hour when you decide to cook your meals. You simply take your tomato, cucumber of your basil from the aquaponic “field” and use it for your meals. It is as easy as it sounds.

    The second best thing about it is that you not only grow vegetables, but you also have plenty of fish. Whether you want them for cooking tasty meals or simply for your décor, they are a great addition to your home! They also have a practical purpose, as you will never have to use chemical fertilizers on your plants, thus obtaining real organic food.

    If you ask how difficult is this system to put in practice, the answer is extremely simple. Not only will you be able to assemble it all by yourself, without the help of your family or neighbors, but you can also put it wherever you want. If you move from one house to another, then you simply disassemble the system and take it with you! What can be easier than that?

    Another great advantage of the hydroponic farming is that it offers you financial independence and control over your money. You know exactly how much you need to spend on your food and you will no longer depend on the market for your veggies’ supplies.

    Related Article: “5 Things to Consider When Building an Aquaponic System”

    Last, but not least, it involves no dirty hands and clothes, no bending and digging, no land and little maintenance time, so it will be like your veggies and fish grow all by themselves! Quite an easy to put in practice system, suitable for all types of people, even for busy and impatient ones!

    There are plenty advantages that the aquaponic system can offer you! Your health and your comfort will be improved, while your savings will considerably grow with the constant use of the aquaponic type of farming! If this is what you want, then why not give it a try? 

    [Boost Your Plants Growth] Step by Step how to build your own Aquaponics System <<<Access Here>>>

  • 7 Interesting Ways to Use Excess Cucumbers

    7 Interesting Ways to Use Excess Cucumbers

    Congratulations on producing a successful homesteading garden this year! Now all you need to do is find ways to use your excess cucumbers. You’ve come to the right place. There is nothing as refreshing and crispy as a cucumber straight out of the garden. Even better are cucumbers in a salad or other yummy cold recipe made just for hot summer days and nights. We can suggest seven ways to use those lovely crunchy cucumbers. There are three recipes and four are for non-food uses that will surprise you.


    Food Uses


    1. Cucumber Tomato Salad

    This salad could be the centerpiece of an enormous veggie tray all from your garden. It is a straightforward recipe that can be made to serve with a meal or as a snack.

    Ingredients are three cucumbers, three diced tomatoes or a cup of cherry tomatoes, half (or more) of a sweet onion cut in small slices, a teaspoon of dill, and your favorite dressing. I like to use the cucumber dressing below. Just mix them all up and chill for an hour and serve.


    2. Cucumber Yogurt Dressing

    This dressing is so creamy and smooth that it melts in your mouth. It’s very healthy, especially if you make your own yogurt. It only has about two grams of fat per tablespoon. It is simple to make by just adding the ingredients into a blender and run it until smooth.


    Quick Trick: THIS grows 10 times more plants in half the time


    Ingredients are 1 cup of cucumbers, seeded, peeled and chopped; 3 tablespoons of plain or vanilla low-fat yogurt; 2 tablespoons of olive oil, 1 teaspoon of apple cider vinegar, ¼ teaspoon of dill, along with salt and pepper to taste. Let all blend for a few minutes and then test it for taste. Chill and enjoy!


    3. Strawberry & Cucumber Smoothie

    Just the sound of this drink sends a cool smoothness through me that makes me feel like I’m doing something special for my body because there’s lots of potassium and Vitamin B in this smoothie that will give you a spurt of energy. What makes it so good is the sweet strawberry taste.

    Ingredients are 1-1/2 cups of frozen or fresh strawberries, 1 large cucumber, with seeds removed and chopped, 1 cup of almond milk (cold), 1-1/2 tablespoons of honey, and a teaspoon of lemon juice. Blend on high, add more milk if desired,


    Non-food Uses


    4. Control Garden Pests

    Cucumbers are one of the most fascinating vegetables. Did you know they can get rid of garden pests? All you need to do is put 4-5 slices in a few small open containers and place them around your garden. They will repel all sorts of insects. You just need to replace them when they dry out.


    5. Breath Freshener

    Forget using mints to freshen your breath. Place a slice of cucumber on the roof of your mouth and hold for about 30 seconds. The chemicals in the cucumber will kill bacteria and bad breath.


    Suggested Article: “How to Use Extra Cucumbers”


    6. Hangover Relief

    This non-food use is one you will probably wish you knew about on New Year’s Eve. If you eat half a cucumber before going to bed after drinking, it will help relieve a hangover because they are high in nutrients and electrolytes.


    7. Mirror Defogger

    If you want to defog your mirror, rub a cucumber slice over the mirror before getting in the shower, and when you get out, the mirror will be clear of fog and your bathroom will have a fresh smell.


    [Holy Cow]  NEVER Use Laundry Detergent Again!!!  Discover How You Can Get Your Clothes Cleaned Without A Single Drop of Toxic Laundry Detergent…Don’t believe me? <<<See for yourself here>>>

  • Canned Corn: What’s the Trick?

    Canned Corn: What’s the Trick?

    A fond childhood memory is sitting on the back porch with my brother as we pulled husks off the bushels of corn on the cob. Somehow, we would always end up falling to the floor in a pile of husks with corn silk stuck in our hair laughing our heads off. You’d think our mom would have been upset, but all she could do is laugh with us.

    Since then I have assumed my mother’s role, canned many a cob of corn, and want to share with you how to process ‘doing it yourself’ canning corn. If you have never canned corn before, it may seem like a lot of work, but it’s the raw pack method, which is easier than other ways. If you follow these easy steps, you will accomplish some of the most significant things about homesteading—being self-reliant, saving money, and feeding your family the best kind of food.

    Gather Equipment and Ingredients

    1. Pressure Cooker – necessary to kill bacteria like botulism that can kill you if not cooked at 240 degrees in a pressure cooker since using stovetop doesn’t get hot enough.
    2. Mason canning jars with lids and rings to match
    3. Kernel stripper or sharp knife
    4. Jar lifter, tongs, and canning funnel
    5. Large pot of water at boiling temperature
    6. Shallow pan or cookie sheet
    7. Towels and hot pads
    8. Labels for jars and a thin tip marker
    9. Canning salt for flavor – the amount is optional
    10. A bushel of freshly picked corn on the cob – follow directions on the pressure cooker for exact amounts for the quantity desired.

    [Video] This strange method will make your food last for 2 years without refrigeration…Try it Here>>>

    Preparation

    • To begin you can either shuck the husks or just bend back each husk and use it to hold the cob as I slice off the kernels.
    • Remove the silk with a kitchen brush and rinse corn cobs in cold water.
    • Cut the kernels off each cob with a cookie sheet placed underneath to catch the kernels.
    • Slide the kernels from the cookie sheet into a large bowl.
    • Sterilize the jars, lids, and rings in the pot of hot water, remove right before filling.
    • Using the funnel, fill each jar with corn up to an inch from the top.
    • Add salt if desired – but no more than ½ tsp. for each pint or 1 tsp. for each quart.
    • Fill each jar with hot water up to an inch from the top.
    • Giggle the jars to remove any bubbles.
    • Wipe the edge of each jar making sure they are not cracked, place lids on, and tighten rings securely.

    Cooking

    • Using jar lifter, place jars in a pressure canner/cooker according to the user manual (if at high elevation, check instructions for the proper setting).
    • Close lid and cook pints for 55 minutes or quarts for 1 hour and 25 minutes.
    • Once done, turn off the cooker and wait for the pressure gauge to return to zero before opening.
    • Remove jars with the lifter placing on a towel to drain out of the way.
    • Let jars cool and check lids to make sure they are sealed. If the covers pop when touched, they are sealed.
    • Write the contents and date on labels with a marker and apply to jars.
    • Place jars in a cool, dry place until you are ready to

    Conclusion

    You can use the corn for all kinds of recipes from salads to enchiladas, and you will love how much better it tastes than the store-bought can or frozen versions. By the way, do not throw away the corn husks or cobs—use for composting. If you have children that can help with shucking the husks, let them have fun with it and send us some pictures.

    [Discover] The ONLY battery reconditioning resource that lets you easily bring nearly any type of dead battery back to life…<<<Learn How Here>>>

  • Harvesting Your Own Maple in Just a Few Simple Steps

    Harvesting Your Own Maple in Just a Few Simple Steps

    Tapping maple trees for sap may seem like a daunting task. However, it really is not hard to do. In fact, this outside activity can be fun as the days get warmer in anticipation of springtime.

    But what if you are not sure which trees are maple? Or which maple trees are the best to tap? Be assured that being self-sufficient doesn’t mean you need to be a pro at tapping. Why not start out with tapping just a few trees? You could join in with neighbors or homesteading friends to see if it is something you want to do every year.

    The time of year to do the tapping depends on when the temperature warms up over 32 degrees in the day but still freezes at night, generally from February through late March or early April. With the following tips, you’ll be serving homemade pancakes with maple syrup in a matter of a few weeks.

    Preparing to Tap

    The tools needed are a hammer, a bucket with a cover (or buy a maple pail at the local home improvement store), a drill of some sort, 5/16 or 7/16 drill bit, and a few spiles (or taps). To cook the sap, having two crockpots (a large and a medium size) works best but you can also use large and medium-size pots. You need a colander, some coffee filters, jars for the syrup, and something like a giant pitcher to store the sap.

    Finding the Best Maples

    If you didn’t get the chance last fall to mark the trees you want to tap, identifying the right type of maple trees by other means is possible with a few tips from us. The best kind of sap to tap comes from the sugar (aka hard, black, or rock) maple and you can tell a sugar maple by the type of branches they have. Their branches are what is called “opposite” as opposed to “alternate” branching. Opposite means the branches shoot out from the stem directly across from each other in opposite directions in a uniform manner, whereas alternate branching means that the branches shoot out from the stem alternating without being directly across from each other. If there are any leaves left on the tree or on the ground to examine, sugar maples are usually big with a smooth outline of the leaf, not real jagged or tooth-like. Don’t worry if you get the wrong kind of maple; you will still get some sap.

    Tapping

    Look for older large size sugar maples so you can put two or three taps in one tree. You should drill the hole for the spiles on the south side of the tree about at chest height at a slightly upward angle so when you hang the bucket, it won’t slide off the spile. Pound the spile into the hole with the hammer and place the bucket with the cover on it to keep pieces of wood or leaves from getting blown into the sap. To get the sap to start flowing, you may need to blow your hot breath into the spile. Once it starts, you should check the buckets every day and remove sap to store in the fridge until you have enough to start cooking a batch in a large crockpot.

    Making Maple Syrup

    You should cook the sap within seven days of harvesting it. The best way to prepare sap is in a large crockpot. To strain the sap, place a colander with several coffee filters spread out and flattened to pour the sap through into the crockpot. Fill the crockpot almost full with sap. Bring it to a simmer on high setting and then turn down to low until it has reduced down to half, which will take about eight hours or overnight. If you have more sap to cook, pour the melted amount into another smaller crockpot. Keep on warm until it gets darker and the consistency of syrup. Keep filling the large crockpot with more until you are finished with the season’s amount.

    Conclusion

    Now, that wasn’t so hard, was it? You may have surprised everyone with more than you expected. If so, you can always have pancakes for breakfast, lunch, and dinner, plus give some away as gifts!

    [Discover] The ONLY battery reconditioning resource that lets you easily bring nearly any type of dead battery back to life…<<<Learn How Here>>>