Page 16 of 16
1 14 15 16
Nick A – Page 16 – Homesteader Depot

Author: Nick A

  • Can Rabbits Contribute to a Homestead?

    Can Rabbits Contribute to a Homestead?

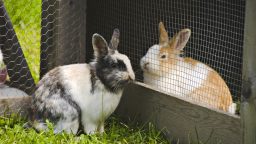
    Not just for pets, including rabbits on a homestead can be a great way to contribute to your food supplies, both as a food source and a natural fertilizer for your garden.  If you’re into fiber arts or want some extra money, angora rabbits give an additional benefit just by growing their fur.

    Rabbits for Manure

    A single rabbit can produce approximately a pound of dry manure each week.  That’s roughly 50 pounds a year. This high-quality soil conditioner is usually low in weed seeds thanks to the prepared foods typically used to feed them.  It also contains an excellent nutrient content that beats cows, horses and goats both when used fresh and when dried.

    The application can be done a few ways depending on what you need it for.  If you are feeding ornamental plants, top-dress them with fresh manure.  For produce gardens, mix it with your compost pile and let sit for at least 3 weeks before spreading on the garden areas.

    Need worms for your compost pile?  Start a worm farm under the rabbit hutch using red wigglers.  This will assist with odor control in the hutch, and provide you with a great source of worm castings, compost worms, and the manure.

    NOTE:  If your wigglers freeze to death during the winter, just replace them come spring. Learn more here: “Worm Farming”

    Rabbits for Meat

    Once you’ve gotten your “herd” started, rabbits are a really good way to add to your food sources with very little extra money.  We all know the old cliché “breeds like rabbits” and it’s true.  A well cared for trio will provide low-fat, low cholesterol, high-quality meat for years to come.

    Related Article:  “Simple Guide to Raising Meat Rabbits”

    Although some breeders consider some rabbit breeds too little to butcher, like the Mini Rex, any rabbit can provide meat when you need it.  If food is going to be your primary goal for adding rabbits to your property, some breeds developed especially to be a meat source include the Californian, the New Zealand and the Giant Chinchilla.

    Rabbits for Fiber

    Although not great for eating, angora wool rabbits will provide fertilizer and a little extra money for your trouble.  If you know someone into fiber art, this resource is amazing for fiber artists. It is excellent for spinning and weaving or can be sold raw.

    Of course, with added benefits comes added responsibility.  Angoras need regular grooming to keep them in immaculate condition, sometimes up to once a day.  Wool collections can be done quarterly by shearing.

    If fiber production sounds like a great idea, here are some breeds that will work.

    English Angora

    A smaller type of angora, English rabbits require more maintenance than other angoras.  But, at an average of 5-7 lbs., you can have a few more in the same space and still receive a good production of wool.

    French Angora

    A little larger at 7.5 to 9.5 lbs. the French rabbit’s wool is a litter rougher than the English but needs less maintenance.

    Giant Angora

    True to its name, the Giant Angora Rabbit averages about 10.5 lbs.  Giants are white with red eyes.

    Some Final Info that Could Become Veeery Helpful…

    To keep your rabbits healthy and reduce the possibility of stomach and tooth issues, avoid sweet foods like fruits and carrots and focus on grasses, and non-sweet veggies.  Sugary foods can lead to an imbalance of bacteria in their tummies and make them sick.

    And, finally, an important word on reproduction.  Rabbits are able to conceive again less than an hour after giving birth!  (Yikes!)

    So, if you’re long-term plans are to start slowly, keep a firm eye on the male at all times!  If they aren’t already, separate them and keep them separate before, during and immediately after the birthing.

    More Info:  “Comprehensive Guide Covering Everything You Need to Know About Raising Rabbits”

  • 7 Steps for Easy Canning

    7 Steps for Easy Canning

    If you decide to get into the wonderful world of canning, be prepared to experience some of the more flavorful food you’ve ever experienced at a fraction of the cost. Canning allows you to pick or buy produce when it’s at its peak maturity and preserve that flavor year-round. The simplest canning process is Water Bath Canning.

    To get started you’ll need a few inexpensive basics, many of which you may already have, or be able to find at your local thrift store or flea market. The absolute essential musts are:

    • A pot that holds enough water to cover any sized jar.
    • A Jar Lifter or Canning Rack, or at least something to help you remove the jars from boiling hot water.
    • A set of jars with the seals and rings intact.

    I found this inexpensive, complete set on Amazon “9 piece canning set”

    Getting to Work

    Step 1

    Fill your canning pot about one-third full of water and a secondary pot completely full.  Heat water until hot, not boiling.

    Step 2

    Wash your jars seals and lids, then keep warm until ready to be filled.

    Step 3

    Prepare food and fill jars according to the recipe you are using. Remove air bubbles by running a non-metallic utensil around the inside of the jar. Wipe the rim of the jar with a clean, damp dish towel or paper towel.

    Step 4

    Place the seal and ring on the jar and gently finger tighten.

    Canning is a great way to “stockpile food”, check out this “Complete System for Building a Delicious Food Stockpile”

    Step 5

    Place a small board or hand towel in the bottom of your canning pot to keep the jars from making contact with the bottom.  Place jars in your canning pot making sure the water can flow freely around the jars. Add hot water as needed until the jars are covered at least halfway up.

    Step 6

    Cover and bring to a full boil. Start timing according to your recipe.

    Step 7

    When your time is up, turn off the heat, carefully remove the jars and set upright to cool. As the jars cool, the seals pull down into the vacuum that is created and compress with a small pop.

    When They’re Cool

    After jars have cooled, press on the lid to check the seal.  It should be sucked down, not popped up.

    If you find a jar didn’t seal, just put it in the fridge and use the food within 2-3 days like you would leftovers.

    Caps will sometimes rust if left on during storage so it’s a good idea to remove the screw caps then wash the jars.  If one gets stuck, just leave it one and try to use that jar of food first.

    Label the jar with the food type and date and store them in a dark, dry and relatively cool area like a kitchen pantry.  Avoid storing them in direct sunlight, or in utility rooms with where they will be exposed to heat or high humidity.

    A Note on Jelly, Jam, and Preserves – What’s the Difference?

    They may all look the same in their jars, but there are differences, mostly in what form the fruit is in when it’s prepared for canning.

    Preserves

    Once upon a time, preserved fruit was just that. Whole or large chunks of fruit preserved in sugar for use out of season. Not designed to spread on toast, they were more often opened and served as a side dish in the absence of fresh produce.

    Jams

    These still contain pieces of fruit but they have been pulverized into pulp.  Lately, Jams and preserves have become almost interchangeable but at one time there was a considered difference between the two.

    Jelly

    Jellies are made using only the juice of the fruit that is then thickened so it can stand on its own.  Usually with pectin, sometimes with gelatin.

    Tip: How to Properly Store Your Food and Increase its Shelf Life

  • DIY Animal Shelter

    DIY Animal Shelter

    Many structures you see on larger farms will often rival a designer house in style and amenities. However, if design awards are not what you are looking for but only to keep your friends protected from the elements, this basic structure will do.  A simplified shelter with basic material will satisfy all of these requirements.

    What You’ll Need

    • 3 Posts = Eight-Foot (8’) Long Pressure Treated Four-Inch by Four-Inch (4”X4”)
    • 3 Posts = Ten-Foot (10’) Long Pressure Treated Four-Inch by Four-Inch (4”X4”)
    • 6 Roof Boards = Eight-Foot (8’) Long Pressure-Treated Two-inch by Six-inch (2”X6”)
    • 17 Roof Joists = Ten-Foot (10’) Long Pressure-Treated Two-inch by Six-inch (2”X6”)
    • 34 Joist Connectors
    • Framing Nails
    • 34 Metal Hurricane Straps
    • 160SF of Roofing Materials
    • Roofing Hardware
    • Siding (optional)
    • Basic Tool Kit
    • Circular Saw

    Laying Out the Grid

    To begin, plan the location of your shelter by laying out a 2 by 3 grid with the point 8’ apart.  This will be where the poles are positioned.  When you are finished you will have an 8’ x 16’ area with 2 rows of 3 posts each

    Dig the Post Holes

    The post holes should be a minimum of 2’ deep and 1’ wide. If you live in a consistent freeze thaw cycle area, increase your minimum depth to 4’.

    Set Your Posts

    Set your 4” x 4” posts into place, all the 8’ long post in one row of three and all the 10’ long posts in the other row of three.

    The 10’ posts will form the front of the barn, so make sure you place them on the side you plan to be the front.

    Pour enough pre mixed cement to fill the hole at least 1’ (12”).

    Wait at least 2 days for the fill to set.  Check the manufacturer’s directions for precise mixing and setting instructions.


    Once set, backfill the rest of the hole with the loose dirt removed when dug.

    Compress the dirt as you fill in the space, checking regularly to make sure your post remains square and straight.  You can use your string line to gauge if it’s straight.  Once each pole is backfilled they will probably be slightly different heights due to differences in the hole depths and settling.  Determine the height of the shortest pole in each row and trim the top of the other 2 to make each row even.  Remember, you want an angled roof, so keep the front row at least 1-2 feet higher than the back.

    Roof Support Beams

    Attach your six 8’ long 2”x6” boards around the top of the structure, connecting the posts and forming a large rectangle at the top.

    Roof Joists

    For this simplified angled roof, traditional trusses are not needed.  Use your roof joists to join the front and back sides of the structure across the top.  You can buy connectors to make this job easier and more secure.  Starting at one end of the stall, attach the roof joists 12” or 1’ apart from each other, with the 2 ends flush with the roof boards.  Connect the joists and roof boards with hurricane straps for added strength against high winds.

    Roofing Material

    Finish your roof with the roofing material of your choice.  Follow the manufacturer’s instructions for installation and additional accessories or tools needed for the process.

    Siding

    For basic siding that can be used as a wind break, use additional 8’ long 2x6s placed horizontally around at least 3 sides of the stall.  Start the bottom on the ground or a few inches above it.  Create “stripes” around the barn by spacing each level an inch or two above the previous one until you reach the top

    Once you have the basic plans down, you can easily utilize them for additional structures on your land for extra storage or workspace.

    Try this:  DIY Home Energy System

  • 3 Keys to Choosing the Perfect Livestock

    3 Keys to Choosing the Perfect Livestock

    A farm or homestead without livestock seems unusual, to say the least.  Whether you see yourself with a flock of cheerful chickens, a herd of graceful goats or a few calming cows, livestock are a valuable food source that should be planned for carefully, then cared for consistently.

    Are You Ready to Be Available Every Minute of Every Day?

    Are you prepared to be “on-call” for your animals 24 hours a day, 7 days a week, 365 days a year? When you enter the world of livestock, a few things to be aware of are:

    • Newborns usually come in the middle of the night.
    • Orphaned or abandoned babies will need you to feed them around the clock.
    • Escaped animals and flattened fencing will need attending to immediately, even in 110o F heat.

    Just like having kids, keeping livestock can tie you down in ways you can’t even imagine.  And, they won’t eventually grow up and learn how to take care of themselves like kids will.

    Basic Ownership Preparation and Considerations

    Before you add animals to your homestead, evaluate your situation and skills to see if you have what you need to support the new lives coming in. The following points will help you in your evaluation.

    Research, research, research-Knowledge is power!  Educate yourself on each of your options before you make any purchases.

    Talk to the Local Vet-Find out what animals the veterinarians in your area are qualified to treat.  This info alone can go a long way in helping you decide what livestock to get.

    Similar Article: “Are You Ready for Livestock?”

    Look for a Soul Mate-If you have a loud and abrupt personality, and so does your livestock, you could easily run into more issues than you want to deal with. Assess yourself and research compatible animals. In the same breath, many species require brute strength to safely interact with them, make sure you don’t take on more than you can handle.

    Enjoy the Animals-You must honestly take pleasure working with the kind of livestock you choose.

    Have Their New Home Ready and Waiting-Make sure you have ample land, structures, and resources before you finally bring them home.

    So, What Are Your Options?

    Here is some basic info on the most common livestock homesteaders consider when adding to their property.

    Beef Cattle

    Beef cattle are low maintenance and don’t need complex facilities. Most people are able to handle cattle with minimum issues and local vets can usually treat them. If you decide to go the milk cattle route, you will need to make sure you have the proper equipment to handle the milking process and storage.

    Goats

    According to a publication by Florida A&M University, 70% percent of the world population eats goat regularly. If that’s not to your fancy, dairy products like goat milk and cheese are another good protein source. Additionally, known to eat just about anything, you can picket them or corral them in a different area each day and never have to mow your lawn again.

    Rabbits

    Whether for meat, fiber, or just to have as a pet, rabbits can bring a lot to a homestead.  Just don’t go too far too fast.  Proceed carefully and know your limits.  And, keep the males away from the females unless you want your “herd” to expand exponentially.

    Related Article: “Beginners Guide to Buying Rabbits”

    So, whether you go small, medium, or large, make sure you are thoroughly prepared to take on the challenges adding livestock to your way of life can produce.

    Chickens

    Chickens need very little besides food, water, a safe place to sleep, and a few hours from you each week to gather eggs and clean the roosts.  For that relatively little amount of effort, you will be rewarded with fresh eggs and roast chicken on Sundays (or Mondays, or Tuesdays….)

    If chickens are your choice, I suggest taking a look at this guide to building the perfect chicken coops to protect your new friends and future food source <<<Click Here>>>

    Pigs

    Pigs are one of the easiest animals for your homestead because they will eat literally anything, they will be your living compost.  No need to throw away and waste anything edible, your pigs will take care of that.

    They are also great at killing parasites that may harm you other livestock, they have different internal parasites that can digest other animal parasites.  Let them graze with your other animals to help clean up the pasture and keep everyone healthy.

    The obvious reason would be the delicious meat such as ham, sausage, and bacon.

    In conclusion, livestock is a great source for food if a self-sustaining homestead is what you are looking for.  Even though it may take some time, research and hard work, the end result will be worth it.

    Here are some other food options for your “Survival Farm”


  • 5 Creative Ways to Reuse Old Cans

    5 Creative Ways to Reuse Old Cans

    When faced with a number of empty cans in the kitchen, most of us choose to toss them into the recycling bin and call it a day.  Instead, why not turn this common resource into some interesting, fun and creative ways to organize and decorate your home and garden?

    Whether you use some leftover paint, glue, and fabric, go crazy with a tin punch or drill, or just leave them in their natural metallic finish, there are a number of ways these little cylinders can occupy your time and beautify your life.

    Option 1 – Indoor Herb Garden

    Standard vegetable cans are the perfect size for planting a variety of herbs to keep in a window sill or your kitchen counters, giving you easy access for watering and harvesting them as you need them.  As a bonus, having a collection of Basil, Mint, Cilantro, and others will help make your kitchen smell wonderful all day long.

    Option 2 – Starter Planters

    If you are interested in starting a new series of plantings from cuttings or seeds but don’t want to invest in a whole bunch of tiny pots to get them going, use your empty cans instead.  Just fill with potting soil and plant your cuttings or seeds.  Once they’ve started to sprout and take hold, you can easily carry them out to your garden and replant.

    Tip:  if you want to make it easier to remove them from the can when you’re ready to transfer, line the can with a coffee filter before you add the potting soil.

    Related Article: “A Good Choice for Self Reliant Food”

    Option 3 – Candle Holders

    There are a couple of ways you can go about this one.  Each option gives you the chance to let your creative juices run wild.

    If you have a number of big pillar candles, elevate them with some decorated pedestals made from an inverted can.  If you’re more into votives or tealights, punching holes in a decorative design on the sides of your cans will create a beautiful light display in your room at night.  You can even customize sets for different holidays.


    Option 4 – Organizers

    Most of us have a junk drawer full of tiny items we know we may need someday or just can’t bear to part with yet.  Be it rubber bands or paper clips, or a host of charging cords for all our new-fangled technology, keeping them organized and easy to see will help a lot when you actually come across a situation where you actually need something.

    For a more visual storage solution, decorate the cans and use them as pencil and pen cups.  Larger cans can be used as cooking utensil holders next to the stove or sewing supply keepers in your family room.

    Learn More: “Wood Working Tips from Ted”

    Option 5 – Mini Cake Pans

    This is a fun idea to do with the kids.  Let everyone make their own little cake by coating the inside of the pan with oil and flour. Then fill the cans just over half-full with cake batter and bake for approximately 25 minutes at 325oF

    Just use the age-old toothpick in the center method to check if they are done.  Wait for them to cool, and then tip them upside-down so that the cakes fall out. Now everyone has a tiny cake they can decorate just the way they want it.

    No matter what your artistic level is, empty cans are a wonderful way to add to the aesthetic of your home and provide some very practical solutions at the same time without costing you any extra money.

  • 3 Creative Ways to Fish Without a Pole

    3 Creative Ways to Fish Without a Pole

    Fishing can be many things, from a food source to recreation, a type of meditation for some but to others a popular competitive sport.  Often a rite of passage full of tradition that is passed down from generation to generation.  Most of us are at least familiar with the concept of fishing, usually with a rod and reel, or if out on the high seas, with a really big net!

    But, are there other ways to get the job done, especially if you are looking to feed your family inexpensively?  You bet!

    Here are 3 ways to catch fish in any situation if you take the time to gather or bring the right supplies.

    Bucket Fishing

    This method has often been used by fishermen on Lake Bruin in Louisiana.  When catfish begin spawning, the locals use a technique they refer to as “bucket fishing.”

    To try it, you’ll need a lidded bucket and some strong line long enough to reach the fish.  Cut a semicircular hole in the lid of the bucket and add enough weight to sink it while still being able to pull it up when it’s full of water (and hopefully fish).  Depending on the size of the bucket you are using, it’s a good idea to tackle this type of fishing with a buddy.

    When you are ready, sink the buckets into the water deep enough to reach the fish.  During spawning, catfish enter the bucket to spawn and become trapped as the bucket is lifted up rapidly enough to keep them in.

    Once brought to the surface, either tie off the bucket to the side of the boat and transfer the fish one by one to a live well or stringer or lift the bucket fish, water and all into the boat and move on.  This technique has proven to be highly effective.

    Funny Video:  “This is not the bucket fishing I’m talking about”

    Bow and Arrow or Spear Fishing

    In a survival situation, this can be particularly effective if you have the skills and not a lot of supplies.  With a decent knife, you can create your own spear, smoothing it and sharpening the end then hardening the tip over the coals of a fire.

    Related Article:  “DIY Bow and Arrow”

    Once your spear or bow and arrows are created and ready, attach a line, if available, and go “hunting” under the surface of the nearest viable water source.  If you are fishing in a lake, an attached line will most likely be needed unless you are able to stay in very shallow water and have the fish come to you.

    Gap Netting

    Even with the barest of supplies you can build a net and use this method to get your next meal. All you need is a ball of twine and a knife or something sharp for cutting the twine. This method will work best in a shallow river or stream, but a natural viaduct between 2 larger bodies of water, like 2 lakes, will work if needed.

    If you already have a net, fantastic!  Here is what to do with it.

    Find an environment where water currents flow through a narrow area, like some rocks or fallen tree limbs, or a narrow crossing from one side to the other.  To create an area, fill in the space from either side with rocks or other debris.

    Learn More: Click here for MORE life-saving survival tips

    Position your net on the side of the gap that faces the current and secure it into place.  Run a stick through the top of the net to keep it from collapsing.  If possible, prop the stick upon the rocks you’ve used to create the gap.

    Now, you can encourage fish to swim in the direction of your net by beating the water or tossing rocks systematically further out and then closer to direct them toward you.

    After you’ve got through a systematic routine to herd the fish, stop and check your net.  Repeat the herding steps until you’ve caught something.

    Although some may feel these 3 methods aren’t very sporting, when you are fishing to feed yourself and your family and not merely as a form of recreation, that’s not what matters.  What matters is staying alive and healthy.


  • DIY Bow and Arrow

    DIY Bow and Arrow

    From Cavemen to Robin Hood and our own Native American neighbors, a well-crafted bow and arrow set has provided food and protection for humans for thousands of years.  And while the technology has certainly advanced, if you find yourself in need of a weapon for hunting or protection, the tried and true “primitive” design of old will give you what you need every time.


    First, some vocabulary:

    Belly:  the inside of the bend when a bow faces you while in use.

    Back:  the outside of the bend.

    Handhold:  the center area of the bow

    Upper limb:  the area above the handhold

    Lower limb: the area below the handhold

    Fletchings: the feathers or other material attached to the back of the arrows

    Tiller: tillering is the adjustment of tiller by removing material from a bow limb or limbs.


    Selecting Your Stick

    There are some things to be aware of when selecting raw wood for your bow.  The piece should be dead and dry but not so old that it’s cracking, brittle or fraying. Hardwoods work best, these include oak, hickory, yew, lemon tree, black locust or teak.

    Make sure the stick is free of knots, twists or protruding limbs and preferably be thicker at the center. Keep the length between 5-6 feet long

    Finally, the length must be flexible.

    Green wood pieces cut from a living tree can be used in a pinch, but don’t provide the same force and power that a dried piece will.  If you are doing this at home and can plan ahead, cutting several that meet all the criteria and letting them dry for a few months will ensure you have the best possible start for your project.

    If you are doing this in a survival scenario, then just do the best you can with the options you have available.

    Every stick has its own natural curve, to find this, put one end of your stick on the ground while lightly holding the top with a hand.  Next, use your other hand to lightly press into the sticks center. The stick will swivel as pressure is applied and the center bends.  To determine the handhold area.  Do this by marking 3 inches above and below the center point of the stick to create a 6-inch span.


    Shaping the Bow

    Always work only on the belly side.  Keeping the back area untouched will allow the natural strength of the wood to stay intact under the pressure it experiences during use.

    Begin to shave wood off the less flexible areas of the bow until both limbs curve in a similar manner to each other. As you work, you want your bow to be thickest in the handhold area.

    Tip: If you live off the grid, on a homestead or simply want to learn natural remedies and more “Lost Ways” of living <<<Click Here Now>>>

    You can check your progress regularly by flexing the wood. When both limbs are more flexible and symmetrical to each other in curve and diameter, you are ready for the next step.

    Cut notches 1-2 inches from each end to hold the bow string. They don’t have to be very deep, just enough to hold the string in place and not compromise the tips’ strength.


    Bow String

    Your string should be rigid, not stretchable.  Possible options include:

    • Rawhide
    • Nylon Cord
    • Hemp Cord
    • Fishing Line
    • Twine

    Cut your string a little shorter than the length of the bow stick. Then, tie a loose loop with a secure knot at each end of the string.  Slip it over the lower limb and then the upper limb.

    Finally, “Tiller” the bow to check for evenness as the limbs flex. To do this hang it upside down by the handhold from a tree branch or similar.  Pull downward on your string slowly to look for areas that are flexing unevenly. At this point, you can make final adjustments by carving out wood as required and re-checking. Once completed, your bow should tolerate being bent a distance equivalent to the length between your hand and your jaw.


    Constructing the Arrows

    Arrow wood should be in the same condition as bow wood, just half as long and thinner.

    First, shape your arrows. If you can’t find completely straight options, you can do it yourself by carefully heating the areas over hot coals, making sure you don’t burn or mar the wood.

    Next, you need to use a knife or other sharp tool to smooth the stick all the way around the length and carve a notch in the back to hold the bow string when aiming.

    The most readily available way to create an arrowhead is to sharpen the front of the arrow into a point.  This area can then be hardened by carefully heating it in the coals of a fire.

    Fletchings act similarly to rudders on a ship and can improve an arrow’s range of flight and accuracy. Depending on your needs at the time, the choice to add this feature is up to you.

    To include fletching, split the back of the arrow and slide the feathers in.  Then tightly wrap a thin thread around the fletching and arrow.

    Now, go out and test your new creation, taking precautions not to harm anything or anyone you aren’t intending to.  Remember, bows and arrows are weapons and should be treated as such.