Page 4 of 16
1 2 3 4 5 6 16
Nick A – Page 4 – Homesteader Depot

Author: Nick A

  • 7 Viable Solutions for off Grid Water Systems

    7 Viable Solutions for off Grid Water Systems

    Off-grid water systems tend to come with a few headaches. Yes, you have the option of not needing to pay for (or pay as much for, depending on your location) for city water. You also have more control over what the water contains. This last point is important to people who are concerned about added chemicals in their water. However, in order for your off-grid system to be successful, you need to find a few solutions. Seven good ones are listed here.

    1) Reclaim Your Rain

    Rain barrels are a very popular option. You just need the barrels, a good place to put them (usually around the perimeter of your house) and way to keep major contaminants out of the water. For example, what would happen if an animal were to fall in? While many of the people who collect and use rainwater give it to their livestock and other animals, you could drink it, as long as you filter it and treat it first, just to be on the safe side.

    DIY Rain Barrel System (Never Waste Water Again) Read Now >>

    2) Install a Back-up Hand Pump

    Although many wells these days have electric pumps installed, what happens when the power goes down or that pump breaks? You could be stuck without water for days. This is a very bad thing, especially if you don’t have any stored water that you can use for things like drinking, brushing your teeth, and cooking. This is where a backup hand pump comes into play. These pumps are just like the ones that you remember, although they might have a few modern touches, such as the fact that they’re easier to use. Having one installed on your well might literally save your life.

    3) Store Water in Jugs

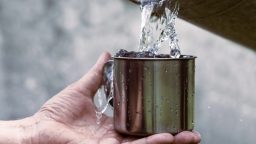
    If you’re worried about water shortages and have access to city water, then feel free to store some. You don’t need fancy (and expensive) pre-filled water bottles when you have empty plastic jugs. Fill those jugs up with water from your tap, add in some purifying tablets (if this is something that worries you), and then find a cool, dry place to store them. In addition to this, you could always fill a bathtub with water in a pinch, as well as any bowls that you have lying around. While neither of those will last for long, they are valid options.

    4) Use Solar Power

    We already mentioned just how useful a hand pump could be, but a solar-powered pump is another great option. These pumps will definitely keep working when the grid goes down, and they’ll work just like the electrical pumps, as they supply some power to them. This is slightly more expensive than a hand pump, but sometimes you need to have a solid back up option in place.

    Solar Industry Secrets with Dan (You Need To Watch This) >>>

    5) Dig a Well

    Many of the options discussed here are for wells, so it seems necessary to mention that you can always have a well dug unless you’re in the city. If you are worried about not having enough water in case of an emergency, then hire a professional company and have them dig a second well on your property.

    6) Choose Wind Power

    If you live in a windy area and don’t want to go with solar power, then wind power is a very valid option. These setups cost around the same amount as the solar powered ones, and you’re left with a great back up should something go wrong with the power grid.

    7) Fill a Tank with Water

    Although this is not the cheapest option, since you’ll have to fill a tank with water, bury it properly, and then find a method of accessing it, it will provide you with water in a pinch.

  • Why Do You Need a Greenhouse and Things to Look for

    Why Do You Need a Greenhouse and Things to Look for

    Many avid gardeners have considered putting a greenhouse in their yards. There’s just something about having the ability to grow tropical and warm-weather loving plants year-round that really appeals to them. If you’re one of these people, then you need to read this primer about greenhouses. It contains just about everything that you need to know about them.

    What Is A Greenhouse?

    Let’s start by defining exactly what a greenhouse is. These are structures of various sizes that have clear walls and roofs. Some of the fancier greenhouses have glass walls, although you can use clear, plastic polycarbonate sheeting as well. A greenhouse is designed to provide a respite from the outdoor weather. It’s warm year-round so that plants easily grow inside of them. The clear walls let in plenty of sunlight, although the greenhouse might be built with an electrical system and some grow lights as well. This really allows the owner to control the overall temperature indoors. Some have a hydration system built-in as well, but it really is easy to use a hose, if you want a simple do-it-yourself greenhouse that your custom made on your own.

    Greenhouse Sizes

    One of the best things about greenhouses is that they come in various sizes. This means that you really can have one that fits your yard perfectly. You aren’t limited to the large commercial sized ones. Some come as small as a basic coat closet and hold seedlings. They work well if all that you want to do is plant seeds and allow them to grow slightly before the soil warms up in the spring. If you want something that can handle multiple plants and allow them to grow year-round, then you’ll want one that’s larger than that. Again, it all depends on the plants your overall vision for your greenhouse.

    Click here for some other projects you can build TODAY>>>

    Pick a Good Location

    Location matters, even with greenhouses. Yours should be located in an area of your yard that receives plenty of sunlight. Otherwise, your plants won’t grow properly – even if you have a grow light installed inside. You never want to have your greenhouse placed in a shady area of your yard. In addition to this, you need to run electric lines to it and possibly even water lines. If you can, place your greenhouse within ten to twenty feet of your own house, in order to make these things easier to install.

    What about Amenities?

    You need to think about your greenhouse as if it’s actually a house. By this, we mean that you need to consider which amenities you want it to have. Your two main options include lighting that will give your plants a boost and promote growth, even when the weather isn’t very sunny outside and a filtration system that waters the plants. Yes, you could use a portable grow light and a hose, but you also have the option of running electric lines and setting up an irrigation system. It all depends on your budget and just what you want to use the greenhouse for. There’s nothing wrong with installing a simple one that lacks these amenities.

    Building Your Greenhouse

    Just like with the amenities, you have two options to choose from here. You can either build your greenhouse yourself, which includes developing plans and literally making it from scratch or purchasing a commercial greenhouse. This latter option might involve having the greenhouse trucked to your yard and installed, or having a kit arrive in the mail that you need to build yourself. Either way, you end up with the perfect greenhouse for your needs.

    Ted is offering over 16,000, step by step, woodworking plans…check them out here>>>

  • Protecting Your Plants from Frost and Freeze

    Protecting Your Plants from Frost and Freeze

    Cold temperatures are not good for the plants in your garden. Many of them need air temperatures that are above 32 degrees Fahrenheit in order to survive unprotected. While others, such as pine trees and evergreen bushes, might be fine, you’ll have to take some steps to ensure that everything else in your garden (except for your annuals, of course) will survive the winter.

    Types of Plants

    The first step involves determining which types of plants that you have. This way, you’ll know whether you need to protect them or just let them go. For example, if you have annuals, then they won’t survive the winter. These plants will last for one growing season. Many of them will leave some seeds behind at the end of their life cycles, so they might reappear next year. It all depends on the plant. There are also tropical plants. While many of them will grow in a number of different climates as long as the weather is hot and humid, they won’t last through the first frost. The cold weather is more than they can bear, so they’ll die.

    In addition to this, there are perennials. There are two main types of them: root-hardy perennials and full hardy perennials. The first type of these plants has leaves and branches that seem to die in the winter, although their roots are still good. The roots will enter a dormant state and won’t come out of it until the temperatures improve. The other type of perennials – the full hardy ones – go dormant as well. Trees, various plants, and even some types of shrubs fall into this category. These plants will also stay dormant until the weather warms up, although they’ll spring back to life much more quickly.

    How to Stockpile for Free: By Growing Your Own Groceries>>>

    Protecting Your Plants

    Now that you understand the plants that are in your garden, the next step involves protecting them from the cold temperatures. It all starts with keeping an eye on the weather. As soon as fall hits and the mercury in your thermometer starts to slide downwards, you should move as many of your warm weather-loving and tropical plants indoors as you can. This means that plants like geraniums and petunias should be moved inside. It helps if you already have them housed in small pots in your yard. You’ll also need to dig up any bulbs that won’t survive the winter. For example, dahlia bulbs need to be kept warm and then replanted in the spring.

    Next, you need to take the necessary steps to protect the perennials that you can’t move into your home. The night before the first cold snap, give them plenty of water. You want to really soak the ground, as this gives their roots something to insulate them from the cold. Once this is done, get some old bedsheets and wrap them around the roots of the plants. Burlap works just as well. (Just make sure to never use plastic.) This will provide some additional insulation for the roots of the plants. You want to remove them as soon as the temperatures rise above freezing.

    Ideally, all of your plants will survive the freezing temperatures that are a major part of winter. However, you need to be prepared to replace some that won’t make it. Sometimes things are out of your control. In addition, if you purchase plants for your garden that are designed for your climate, then you’ll have fewer issues. These plants can either survive the frost and freezing weather, or their seeds will. Either way, you’ll have fewer headaches in the spring when you take a look at your garden.

    [Food Stockpile] Another “food system”? It’s better than a food system, it’s a complete food strategy>>>


  • Do Houseplants Need Different Care in the Winter?

    Do Houseplants Need Different Care in the Winter?

    Many people believe that their houseplants need the same type of care year-round. After all, they’re in an identical environment – the interior of your house – no matter what season it is. However, the opposite is true. These plants are also affected by the seasons, even though they’re not outdoors, so you need to change how you care for them.

    Watch Out for Low Humidity

    It’s perfectly normal for the air inside your house to become drier in the winter. Your furnace is to blame for this. You probably notice some signs of this, such as waking up to a dry throat that clears up after you eat breakfast. Some people are even prone to nosebleeds for this reason. Your plants are greatly affected by this dry air as well. They need some humidity in order to survive. Thankfully, there are some solutions. If you have an air humidifier or want to purchase one to run during this time of the year, then that will help quite a bit. Just place the humidifier near your plants (even being in the same room will suffice). Also, you can put a bit of water on a tray somewhere in the vicinity of your plants – no more than a foot away – and the water will seep into the atmosphere. Don’t place your plants in that water, as that could cause problems. You can also move those plants near rooms that tend to end up with a lot of air moisture, such as the bathroom or the kitchen. In fact, if you can place them in those rooms, that will help. With that said, you shouldn’t mist the plants with water. This actually doesn’t help them at all, as the water evaporates far too quickly. It doesn’t provide the moisture that they need.

    A Revolutionary Piece Of Fabric That Replaces Expensive Paper Towels And Toxic Chemical Cleaners>>>

    Water Your Plants Sparingly

    Speaking of water, you do need to give them less water in the winter than you do the rest of the year. This sounds counterintuitive to what we just wrote since you’d think that the lack of moisture in the air could be made up for by watering your plants a lot. This isn’t true. Water in the air is much different than moisture in the soil! A good way to test the moisture of the soil is by placing your finger in it. The top of the soil will dry out fast, so don’t just do a quick touch test. Instead, make sure that your finger goes down a few inches below the surface of the soil. If it feels dry there, then you need to water your plants. Why does this matter? Well, most of your houseplants will end up going into a dormant state during the winter. This means that they stop growing at the rate that they normally do. As a result, they need a lot less water.

    Place them in the Sun

    Even though we advocated for placing your houseplants in the same room so that the humidifier can reach them, you also need to move them around a bit in that space. Your plants need sunlight in order to thrive. Their photosynthesis processes depend on it. When they’re in shady areas of your house, then this doesn’t happen, and they could die.

    Essentially, you want to place your plants in an area where they get plenty of sunlight during the day, as well as humid air all winter long. When you combine this with proper watering (and be sure to test your soil), then your plants will be fine during this cold and snowy season.

    Wash Your Clothes Without Using A Single Drop Of Toxic Chemical Detergent With This>>>

  • 7 Clever Uses for Cheesecloth

    7 Clever Uses for Cheesecloth

    How much do you know about cheesecloth? This porous cloth was initially designed to help cheesemakers squeeze the liquid out of cheese curds, hence its name. However, it has a number of other uses as well – many of which you probably never considered. Here are seven of these incredibly clever uses for cheesecloth. You’ll want to keep some in your home after reading them.


    1) Polishing Your Silver

    All that you need in order to make your silver shine is a little silver polish, some water, and a piece of cheesecloth. The steps are very easy. Start by moistening the cheesecloth by dipping it in the water. Squeeze out any excess water. Then dip the wet section of the cloth in the silver polish (or squeeze it on, depending on the type of polish). All that you have to do next is rub your silverware or your pots and pans until they shine, repeating the process as necessary.


    2) Making Herb Bundles

    Have you ever wondered how chefs manage to make their soups and stews taste so nice, even if there isn’t any evidence of herbs and seasonings in them? Cheesecloth is the answer to that question. Cut a small square of cheesecloth and wrap some herbs up in it. Tie the bundle tightly with a piece of clean string – butcher’s twine will work well. Place the bundle in the soup or stew and fish it out before serving. The flavor of the herbs will soak through the cheesecloth.


    3) Quick Bandages

    If you cut yourself in your kitchen (or anywhere else in your home, for that matter) and don’t have any gauze in your first aid kit, then grab a piece of cheesecloth. It won’t stick to your wound and will provide a clean cover until you can get some proper bandages. Just make sure to place some antibacterial ointment on the wound first. The cheesecloth will last until you can make it to the emergency room, if the cut it bad enough, or until the bleeding stops and you can place a proper bandage on it.

    Breakthrough in Electric Car Technology Powers An Entire Home>>>

    4) Dust Some Sugar on Your Baked Goods

    If you’ve ever made a mess of your baked goods when you sprinkled powder sugar on them, then we have a good solution. You can place the powdered sugar in a jar, top it with a tightly wrapped piece of cheesecloth, and then begin dusting the tops of them with it. The pores in the cheesecloth are just the right size, so you won’t make a mess.


    5) Food Drapes and Covers

    The next time you want to protect your food before it is served, rather than reach for plastic containers or glass lids, use a piece of cheesecloth. It will neatly cover everything, preventing your contaminants from touching your dishes. On top of this, cheesecloth is very sanitary.


    6) Straining Your Food

    Sometimes you need to strain things before you serve them. Since this is the original use for cheesecloth, it works perfectly. Just be careful when you’re straining the hot stock and other things, as you don’t want to burn yourself. Place the cheesecloth in a bowl and pour the contents of your pot into it. The cheesecloth will do its job, and once you lift it up, you’ll notice just how nicely contained everything is.


    7) Baste Your Thanksgiving Turkey

    There are several different ways to baste your Thanksgiving turkey, although cheesecloth is the most effective. Start by soaking your cheesecloth in a mix of melted butter, herbs, seasonings, and even some turkey stock. Then lay it over your turkey until everything has sunk in. You won’t regret it!

    Power Efficiency Guide Will Change the World Forever>>>

  • 5 Simple (Yet Crucial) Guidelines of Winter Survival

    5 Simple (Yet Crucial) Guidelines of Winter Survival

    Spending some time in the woods in the wintertime, either voluntarily or because you wound up getting stuck out there, is no joke. You need to be able to take care of yourself, which means meeting all of your basic needs, lest you end up starving or freezing to death. Before the cold weather sets in for good, take the time to review these five guidelines of winter survival. Are you prepared?

    1) Stay in One Place

    If you’re waiting for a rescue after being stranded out in the cold for days, then you need to stay in one place. The temptation to go out to see if you can find your own way home may be tempting. You probably also think that the more you move around, the less likely you are to freeze to death. However, this just makes it tougher for any searchers to find you. Your footsteps will vanish as the snow continues to fall, leaving you unable to see where you’ve been, and for anyone to track you. Instead, stay put and set up a proper (or as proper as you can get, depending on your supplies) camp. This will give you the protection that you need, and allow others to find you.

    Suggested Article: How to Find Your Way When Lost in the Wilderness

    2) Be Prepared to Stay Warm without a Fire

    Ideally, you’ll have a fire to keep you warm when you’re out in the snow. This isn’t always possible, however. It might be snowing too hard for the fire to stay lit, finding dry wood to use as kindling may be tricky, and so on. Instead of relying on that fire, you need to be prepared to survive without one. Make sure that you’re dressed warmly, carry some extra blankets, and find whatever shelter that you can. It’s all about mind over matter at that point.

    How US Special Forces Start a Fire With LIQUID>>>

    3) Remain Confident

    Speaking of “mind over matter” – confidence goes a long way towards surviving the winter in the woods. You need to be as mentally prepared as you are physically. What do we mean by this? Well, you can pack all of the possible provisions that you can and be in great physical shape, but those will only take you so far, especially if you’re not mentally prepared to survive. Even if you have to repeat the words “I can do this” over and over again in your head as a kind of mantra, you need to remember that you can do this.

    4) Trap Prey In Order to Feed Yourself

    Getting trapped in the woods in the middle of a snowstorm is bad, but this situation is made even worse when you don’t have any food. You’ll need to trap prey and understand how to properly prepare it. Otherwise, you’ll end up starving to death out there if your rescuers are days or weeks away. Plus, solid food gives you the energy that you need in order to keep your body functioning and warm. Remember that you’ll need to cook your game properly, lest you end up with food poisoning. This can make a bad situation even more dangerous.

    Related Article: What’s Edible in Your Area?

    5) Be Able To Start a Fire without Matches

    It’s very easy to start a fire when you have matches and dry wood. But what happens if you don’t have these things? You’ll end up in trouble. You need to know how to start a fire without matches. This could involve using a bullet, or anything else that you have on hand. All that matters is that you can get that fire started. This is definitely something that you should practice, just in case.

    Related Article: 4 Ways to Start a Fire You’ve Never Heard of

  • Mold is Growing in Your Home RIGHT NOW…But Where?

    Mold is Growing in Your Home RIGHT NOW…But Where?

    If you’re sitting in your house sneezing, coughing, and dealing with skin, eye, and throat irritations, there is most likely mold present somewhere. People that are suffering from asthma or allergies know precisely how damaging mold can be to their health. Those with a healthy system aren’t going to notice mold growing somewhere quite as quickly. While you can’t control the mold you come in contact with outside of your home, it is possible to contain and eliminate it from your house. Start by checking some of the most common places where it gets found.

    What is Mold and Why Do You Have It?

    Your home offers the perfect growing conditions for mold. There is darkness, oxygen, warmth, and a place for it to reproduce. As soon as humidity levels rise or stagnant water is present from a water leak, the growth of mold is almost impossible to stop.

    It’s a fungus by definition. Microscopic spores float through the air, and when small clusters start to form, you can see them growing. The spores can cause attacks and other health issues with those that have existing breathing conditions. Without a health issue, you might not be able to tell there is even mold in your home. You should still be checking these common areas regularly to be sure.

    Basement

    The basement is most likely the darkest and dampest section of your home. When you walk down there, if you smell a musty odor, there’s a good chance it is mold. Some of the areas to look at while you’re in the basement inspecting for mold are:

    • Around ducts and pipes
    • Around the sump pump area
    • Anywhere the foundation is leaking
    • Windows or vents

    Prevent mold growth by using a dehumidifier and fixing any leaks.

    Suggested Article: 15 Things That Will Help Conserve Your home Energy

    Bathroom

    The bathroom is another damp area that is ideal for mold growth. You have to be sure that there is proper ventilation through the use of fans and windows to prevent it. While the mold on the tile is apparent because you can see it, there are other places to check like:

    • On the floors and wall
    • Sink and toilet
    • In the shower or tub

    This guy shows us clear as day how anyone can power with ZERO cost>>>

    Kitchen

    Mold in the kitchen tends to multiply because of the use of the hot water for dishwashing and a warm oven increasing the temperature. Food in the sink or left in the fridge can be sources for mold growth. With all the great real estate, make sure you’re looking at these areas:

    • Microwave and stove
    • Refrigerator and pantry
    • On, in, and around the kitchen sink
    • Trash cans
    • Cutting boards
    • Behind the stove

    Living Room

    You might think that there aren’t favorable conditions in your comfortable living room for mold, but there are. Think about when you or your kids eat in there. Food undoubtedly falls off the plate which can start mold growth. Houseplants also have the potential of producing mold. Look in these spots:

    • On the couch or the curtains
    • The plants
    • Chimney or fireplace

    Keep everything clean and use a dehumidifier to keep the humidity down in your living room to prevent mold growth issues.

    Bedroom

    All of your rooms are susceptible to mold, including your bedroom. Keep your humidity levels down and regularly check these areas for growth:

    • Windows and window sills
    • Mattresses
    • Vents for air conditioning and heat

    A waterproof mattress cover or a mold resistant mattress can assist with keeping mold out of the area where you sleep. If you see any condensation forming, clean it up and see if there need to be repairs made.

    Related Article: Simple Bed Bug Check

    Get instant access to over *16,000* woodworking projects in the next 5 minutes or less>>>

  • 15 Things That Will Help Conserve Your Home Energy

    15 Things That Will Help Conserve Your Home Energy

    In America, each person produces around 40,000 pounds of C02 emission each year. Those emissions are what contribute to the Earth’s global warming issue. Those pollutants can be decreased easily with a plethora of simple energy saving switches you can make in your life.

    Along with reducing the amount of oil, natural gas, and fossil fuels you are using, you also have the potential to save some real money. Altering your methods for energy use doesn’t mean that you’ll be going without the existing conveniences you have either. It just says that you’re doing so with a little bit more awareness.

    A million dollars worth of energy is being burnt up with every minute of the day all year long. You have the option of lowering those numbers along with your energy bill just by implementing a few of these switches in your own home.

    Make a Small Investment

    1. Contact a utility company and have them come and do an energy audit of your home, air conditioner, and furnace. It may be done at a low cost or even free for some.
    2. Purchase an insulating jacket for your water heater for about $20 and wrap it up. You will save 1100 pounds of C02 from an electric water heater. A gas water heater’s C02 emissions will go down about 220 pounds.
    3. Compact fluorescent bulbs cost a bit more than a standard light bulb, but after you make the purchase and installation, they are going to last up to eight to twelve times longer and use only about a quarter of the energy. The light illumination is the same, and you can save up to 260 pounds of C02 emissions annually.
    4. Weather stripping and caulk installed in your home will weatherize around the windows and doors so that the cold or warm air that you’re creating stays put, and the outside temperatures remain outdoors. Your appliances don’t have to work as hard to stay up to your desired thermostat setting.

    Suggested:  This crazy 56-year-old geography teacher in Memphis, Tennessee believed he can change the energy world… and somehow he did.  Check it out here>>>

    Heating and Cooling

    1. You can reduce your heating emissions from your furnace by setting your thermostat two degrees lower in cold weather. It’s recommended to have it set at 68 in the day and 55 degrees at night. When it’s warm, keep your setting at 78.
    2. Keep your air conditioner and furnace air filters cleaned out. The dirtier they are, the harder your equipment has to work to achieve the desired temperature setting when they are operating through a clogged filter.

    Related Article:  Solar Energy Options for Homesteaders

    Home Appliances

    1. Make sure all of your gaskets in your fridge and freezer are sealed up correctly and working. Then, set your refrigerator to 37 degrees and your freezer to three degrees, or as close as you can get them to those numbers.
    2. Don’t put your washing machine setting on hot. You can use warm or cold water for doing laundry.
    3. You can save 20% of the energy used by your dishwasher by manually shutting off the drying cycle and letting your dishes air dry. Additionally, don’t run your machine until it is full.
    4. When replacing outdated appliances, check for the Energy Star label to ensure it’s an energy-efficient model. Don’t buy one that’s bigger than what you need.
    5. Check the setting on your water heater. In can generally be turned down about 20 degrees and still effectively produce water that’s warm enough for what you need.

    House Renovations

    1. Replace old windows with those that are double-glazed and argon filled for the best insulation.
    2. Shade trees planted near your home will reduce the amount of energy you use.
    3. If you live in a hot climate, paint your house a light color. In colder climates, dark-colored homes are more efficient.
    4. If your house isn’t properly insulated, now is the time to take care of that. It will reduce the CO2 emissions and lower your energy costs by 20% to 30% typically.