Page 7 of 16
1 5 6 7 8 9 16
Outdoors – Page 7 – Homesteader Depot

Category: Outdoors

  • 8 Extremely Natural Ways to Treat a Rash

    8 Extremely Natural Ways to Treat a Rash


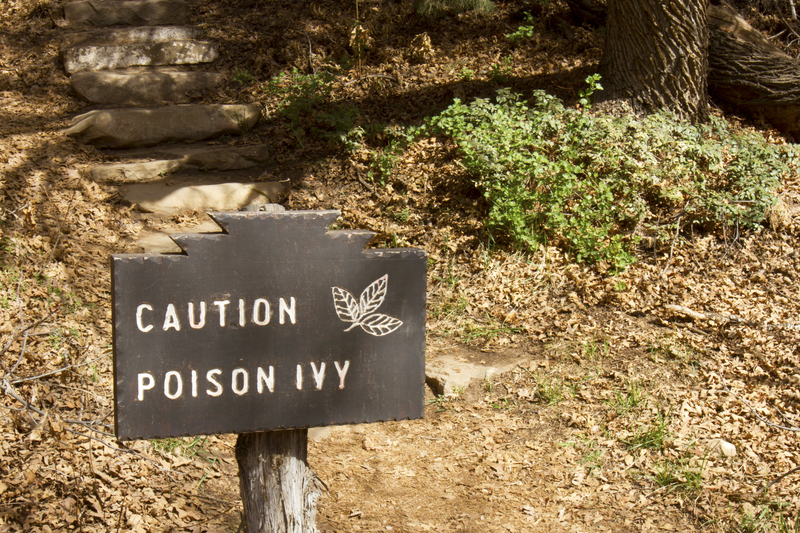
    Rashes can be at the least, inconvenient, and at the worst incredibly painful.  There is any number of reasons a rash may appear.  Allergies, toxic plants, and illnesses are the main categories, but within those, especially allergies, it can sometimes be impossible to figure out why the rash is happening.

    Please note, if a rash progresses rapidly, appear for no external reason, or it accompanied by other symptoms like sinus or chest congestion or trouble breathing this may be a sign of a severe allergy.  In these cases, you should seek medical treatment and work with your doctor to identify the catalyst.

    For temporary issues, like heat rash or mild poison ivy, natural remedies can be used to relieve symptoms and help the skin heal more quickly.

    Related Article:  Identifying and Understanding Poison Ivy

    Aloe Vera

    This plant in the succulent family contains anti-fungal, anti-bacterial, and anti-inflammatory compounds that make it a great all-purpose skin ointment.  Use for rashes, burns and other skin irritations to relieve symptoms and accelerate the healing process.


    Apple Cider Vinegar

    Raw, organic apple cider vinegar like Braggs is a common home remedy for lots of ailments, including rashes.  Dap the diluted vinegar over the affected area with cotton or a soft, clean cloth.


    Baking Soda

    Add 1 Tablespoon baking soda to 3 tablespoons water or coconut oil to use as an ointment to help dry out a skin rash and relieve itching and inflammation.  To use, apply daily and let sit for a few minutes and then rinse off.  Avoid leaving the soda on the rash for an extended period.  This could lead to over-drying or other irritation.


    Chamomile

    Chamomile relieves the itching rashes cause and soothes the skin.  It also has anti-inflammatory, antiviral and antifungal compounds that help ward off complications during the healing process.

    Soak a paper towel or soft, clean cloth cooled, steeped chamomile tea and applied to the areas 2-3 times a day.

    Coriander aka Cilantro

    Also a good source of anti-inflammatory and antiseptic compounds, Coriander can be an effective treatment for rashes and other skin irritations.

    Make a paste from fresh coriander (cilantro) leaves.  Mix in a little olive or coconut oil to make it easier to apply.  Apply the mixture to the rash areas 1-2 times a day.


    Oatmeal

    Oatmeal is a great go-to for any type of skin irritation including rashes and burns.  If you only have “Old Fashioned Oats” put a cup of dry oatmeal through the blend cycle of your food processor or blender to get a finely ground consistency.  Add the ground oatmeal to a warm (not hot) bath and soak for 15-20 minutes.  Rinse with cool water in the shower and pat dry.  Apply a layer of coconut or olive oil to moisturize your skin without causing more irritation to the rash.

    For rashes in the facial area, mix equal amounts of the ground oatmeal with olive oil, coconut oil or honey and apply.


    Oil and Honey

    The vitamin E and antioxidants in olive oil and coconut oil assists in the healing process and aids in skin renewal.  Used by itself topically or combined with honey for extra soothing and anti-bacterial benefits, apply several times a day until the skin has healed.

    Suggest Article: 5 Wonderfully Natural Remedies to Treat Dry Skin

    Oil and Turmeric

    Out of honey?  Add a pinch of turmeric from your spice rack into oil or coconut oil.  Similar to honey, turmeric has anti-bacterial and anti-inflammatory compounds that will help soothe the rash and reduce itching as it heals.


    Keep Your Pantry Stocked, and You’re Good to Go

    Try each method to see which ones work best for you, then make sure you have the preferred items in stock for easy and natural relief treatment of your next rash.


    Would you like to learn more alternative medicines?  Click here>>>


  • Can You Grow Miniature Fruit Trees and Non-Native Plants?

    Can You Grow Miniature Fruit Trees and Non-Native Plants?

    Can You Grow Miniature Fruit Trees and Non-Native Plants?

    Well, the short answer?  Yes.

    It is possible to grow just about anything on a homestead or even in an urban environment, with the right care and maintenance. And, if you are successful, you can provide yourself with your own rice, coffee, citrus fruit and more.

    The main trick?  Growing everything in planters and pots, essentially creating a mobile farm.  During the summer they can be kept outside.  When it turns cold you have a few options:

    • Cover the plants with clear plastic to create mini-greenhouses
    • Move them inside your home
    • Move them into a greenhouse structure

    If you have space, consider closing in a porch to create a sunroom/greenhouse.  This will make it easy to keep an eye on your “babies” and make it less obvious to passers-by that you have this food source.


    First, what is a Miniature Fruit Tree Anyway?

    Before you begin picturing a tidy row of little trees that Mr. Miyagi would be proud of, you need to understand whatever you choose to cultivate is still going to be fairly substantial.

    Depending on the variety, you are going to need space for anywhere from a 3-foot to a 10-foot tall tree.  The key thing to remember though is no matter how small the tree is; the fruit will still be a normal size.

    Before we get too far, you will probably be glad to know that NO genetic engineering is used to create mini fruit trees.  Instead, it uses an age-old grafting technique, allowing the new tree to develop in a natural way.  By grafting a branch from a fruit tree to a separate rootstock, the trees only grow as tall as the new root system lets them.

    While you are taking all this in, here’s a list of potential fruit trees you could add to your property.

    • Apple
    • Pear
    • Apricot
    • Peach
    • Nectarine
    • Lime
    • Lemon
    • Grapefruit
    • Orange
    • Grapes
    • Tangelos
    • Almond
    • Coffee
    • Banana
    • Cherry
    • Fig
    • Olive


    Or, you can get really adventurous and get one of those new-fangled “fruit salad” trees that have three types of citrus trees grafted into one.  While there is a part of me that considers this to just be so wrong, if it means you only have to care for one tree instead of three to get the variety you want, why not?

    Non-Native Plants

    Besides the standard lettuce, spinach, zucchini, carrots and other native veggies and grains we are accustomed to including in our gardens, have you considered others, such as rice, cotton, and peanuts, or beans? If you’ve done any research on long-term food storage options, you’ve probably seen rice come up on everyone’s list of suggestions.

    You can produce rice in multiple containers to provide yourself with an excellent source of this long-term storage food. As with the mini-trees, your mini “rice paddies” will need to be moved indoors in winter, whether that’s in your home, or into a greenhouse.

    If you live in a fairly temperate climate, you may not need to rely completely on containers to grown rice.  If you have an area you can “flood” and make marshy, you may be able to grow an entire crop between frost cycles.


    You CAN take it with You!

    Another great advantage of cultivating mini fruit trees and planter foods, if you decide to move, you can take it all with you. Granted this would have to be during a carefully planned move, not a bug out scenario.  But, if you find you are ready to try a new place, you can make arrangements for your “movable feast” instead of starting over from scratch.

    This hidden airline loophole lets you book $1,000 flights for $20 or less…don’t believe me?  Check it out>>>

  • Identifying and Understanding Poison Ivy

    Identifying and Understanding Poison Ivy

    The bane of every campers’ weekend getaway, poison ivy, interestingly enough is not actually in the ivy family.  It’s a relative of the almond family.  Who knew?

    Most of the time, you only have to worry about avoiding it when you are in the great outdoors and away from urban areas.  However, occasionally it will pop up in your yard.  If this happens, you’ll want to make sure you wear protective clothing and accessories like gloves and even a mask to avoid the worst itching you can ever imagine.

    Also, you’ll want to be very cautious about how you dispose of it, so no one else accidentally comes in contact with it either.  And, whatever you do, do NOT burn it!

    The smoke produced by burning poison ivy takes all of its poison airborne.


    Identifying Poison Ivy

    If you grew up in a more rural community, you might already know some of the rhymes used to recognize the plant and its different features.  If you didn’t learn any of these, take note, they could come in handy someday.


    1. If Butterflies Land There, Don’t Put Your Hand There

    Butterflies can safely land on poison ivy.  They do it to protect themselves from predators.

    1. Berries White – Run in Fright or Danger in Sight

    Describes the light gray to white colored berries seen in the fall.

    1. Hairy Vine – No Friend of Mine. Ragged Rope – Don’t be a Dope

    Refers to the shaggy appearance its vine exhibits.

    1. Leaves of Three Let It Be
    2. Longer Middle Stem – Stay Away from Them

    The middle leaf of a cluster of three is typically longer than the side leaves.

    1. Red Leaflets in the Spring, it’s a Dangerous Thing

    The leaf color changes with the seasons.  Red in spring, Green in summer, Reddish-orange in fall.

    1. Side Leaves like Mittens Will Itch Like the Dickens

    A few varieties have side leaves that resemble a mitten with a thumb sticking out.

    What to do if You are Exposed to Poison Ivy

    If you discover you’ve been exposed, there are actions you can take to reduce the severity.

    • First, carefully remove your clothing and put them directly into the washer so they can’t spread the oil to other surfaces.
    • If it has been less than 10 minutes since exposure, wash your hands with soap and water and any other areas that have come in contact with the plant.
    • If it has been over 10 minutes, you still want to wash up, but you’ll also be needing a remedy for the rash that is headed your way.


    Poison Ivy Remedies

    There are several effective over the counter treatments for Poison Ivy.  There are also a few home remedies that work.


    Apple Cider Vinegar

    ACV gets rid of the itch almost immediately and helps neutralize the poison.  Apply with cotton balls or with a spray bottle several times a day to relieve itching and help the skin start to heal.

    Just be prepared to smell like a salad for a while.


    Baking Soda and Oatmeal Paste

    1. You’ll have to do a little cooking for this one, but it’s worth it. This “recipe” can be made in bulk and stored to apply several times over the course of your recovery.
    2. Start by bringing 1 part rolled oats to 2 parts water to a boil.  Remove from the heat and cover until all the water is absorbed by the oats.
    3. Stir in 1 Tbsp Baking Soda for every ¼ Cup oats and mix well.
    4. If the paste is still very hot, you can add some cold water or an ice cube to bring it down to warm.
    5. Apply the paste thoroughly to the affected areas.  Relax while you let it dry out, then carefully brush off the dried paste.
    6. Repeat 2 times a day as needed.
    7. For an all over treatment, mix the paste into a lukewarm back and soak for a while.

    Conclusion

    If possible, just stay away from poison ivy.

  • DIY Recycled Planters

    DIY Recycled Planters


    When you are getting ready to start seeds for spring planting, you may find yourself with more seeds than starter containers.

    Instead of running right out and buying some at your local garden center, try digging through your plastic recycling bin instead.  Empty plastic soda and water bottles are durable enough to handle taking on plants but easy to cut down, trim and otherwise alter to create a handy little planter to suit your needs. Here are two options to create plastic planters.


    Standard Planter

    Cut or punch drain holes around the bottom of the bottle. Any easy way to accomplish this is to turn the bottle upside down and use an awl, drill or screw and screwdriver to punch through the plastic.

    Most bottles have a built-in pattern you can follow.  Just place a hole in the center of each raised area of the bottom, so when its flipped back over, the holes will be evenly spaced at the very bottom of the bottle.

    If you need to make the initial holes wider, a large screw will force the holes open more.

    Remove the top of the bottle. In case you were wondering why we didn’t do this first, leaving the top on makes the bottle more stable and easier to work with when punching the holes in the bottom.

    A good guide to measure how far down to cut is to remove the part above the top of the label on the bottle.  If that has worn off or been removed already, your best guess will be fine.

    A sharp pair of utility scissors, or a utility knife or box cutter are good options to make a clean cut all the way around the bottle.

    And, there you have it, a basic round planter that will provide good drainage for your fledgling plants.

    Self-Watering Seed Starters

    This method not only lets you keep the moisture level of your soil easier to control, but it also uses the entire bottle, even the cap, so there is no waste material going back into the recycling bin.

    1. Cut your plastic bottle in half, separating the top from the bottom.
    2. Punch a hole into the middle of the bottle cap.
    3. Take 12-18 inches of yarn or string, fold it in half and tie a loop at the end of the folded side.
    4. Thread the loop through the hole in the cap so that the knotted loop will be located on the inside of the bottle cap with the two ends hanging out the other side.
    5. Screw the cap back onto the top of the bottle, making sure the loop sits loosely inside the top of the bottle.
    6. Fill the bottom part of the bottle with a few inches of water and the place the top upside down in the bottom so that the two ends hang from the cap and get submerged in the water.

    Once everything is in place, the string/yarn will draw water up into the soil that surrounds the loop in the top.  To add water, you’ll only need to lift the top part out, fill the bottom area and replace the top.

    You’ll be able to see exactly how much water is there and know precisely when its time to top it off.

    Suggested Article: DIY Plant Propagating

    Now You Can Get Planting

    Once completed, you can use these upcycled planters like you would any other to get your seeds started.  Place them all together on a shelf in your kitchen or back porch for a delightful display that is also practical and useful.


    Take a look at this “Medicine Chest” — how to deal with a disaster using alternative medicine.  Check it out here>>>


  • Never Waste Water Again

    Never Waste Water Again


    Picture this, for every inch of rain that falls on a 500 square feet area of your roof; you can collect up to 300 gallons of it to use around your property.

    If you live in an area that doesn’t restrict the use of rain barrels, you could be saving money every month on water. Rainwater can be used for a variety of tasks including:

    • Rinsing off your garage floor
    • Watering your indoor plants
    • Watering your outdoor plants
    • Flushing your toilet
    • Creating an outdoor shower
    • And more

    I know a potter who has a studio in her garage.  If you are at all familiar with pottery making, it required quite a bit of water to keep the clay at a usable moisture level, to rinse and clean after working, and to recycle the clay itself.

    Thanks to her ability to collect water every time it rains, she can exclusively use rainwater for everything she does in her clay studio.  Can we say WOW!

    Here’s what you need to do to make your own DIY Rain Barrel and tap into the otherwise free natural resource.


    Supplies Needed

    • Bulkhead Fittings:
      • ¾ inch Ball Valve Faucet
      • ¾ inch Fitting
      • 1 ½ inch Fitting
      • Downspout Attachment
      • Mosquito Screening (8 inches by 8 inches)
      • Overflow Hose with Valve and Fittings
      • Teflon Tape
    • Drill
    • Flathead Screwdriver
    • Felt Pen or Marker
    • Tape Measure
    • Rasp or Round File
    • Hole Saws:
      • 1 ½ inch Hole Saw
      • 3 inch Hole Saw
      • 5 ¼ inch Hole Saw or a Jig Saw
    • One 55-gallon Food Barrel
    • Two 6-inch plastic flower pots

    Here We Go!

    1. Clean and dry your food barrel inside and out.
    2. Measure 4 inches up from the bottom of the barrel and mark with your felt pen. This is where your ¾ inch bulkhead fitting and faucet will go.
    3. Cut a hole using the 1 ½ inch hole saw. You may want to place the barrel on its side for easier access to the drill site and better stability.
    4. Measure 4 ½ inches from the top of the barrel and mark.
    5. Switch to your 3-inch hole saw and make the hole for the overflow.
    6. Clean loose pieces of barrel material from around the holes’ cuts using the rasp or sandpaper.
    7. Use a 5 ¼ inch hole saw, or a jigsaw to cut out a circular hole out of the top of the barrel. This opening is where your DIY filter will fit inside and where the water will enter the barrel.
    8. Depending on the flexibility your downspout, you’ll probably want to place this hole toward the opposite side of the barrel from the location of your faucet hole.
    9. Install the ¾ inch Faucet Fitting.
    10. Install the ¾ inch Ball Valve Faucet using the Teflon tape to prevent leaks.
    11. Install the 1 ½ inch Bulkhead Fitting Into The Overflow hole (the second hole cut).
    12. Create the filtration system, using the 6-inch flower pots and the mosquito screen.
    13. Attach the screen to the bottom of one flower pot then put that pot inside the second one. Basically, you are sandwiching the screen between the 2 flower pot when they are stacked together.
    14. Place your new “filter” into the hole on the top of the barrel.
    15. Place your new rain barrel on the site you want to use it and insert the downspout into the filter.
    16. Attach the overflow hose to the upper side hole. This hose can either be placed away from the barrel to disperse excess water when the barrel fills or can be used as a link to another barrel, where it becomes the supply line instead of a downspout.

    Voila!  You are now able to save water (and money) with your new supply line that comes straight from nature.

  • 13 Drought Tolerant Plants for Low Maintenance Landscapes

    13 Drought Tolerant Plants for Low Maintenance Landscapes

    Whether you live in a desert climate, or just don’t want to use a lot of water to have a beautiful landscape, drought tolerant plants are a great option.  There are a large variety of species available to choose from, from succulents to blooming plants.  To help you narrow down your options, here is a list for you to consider.

    Cactus

    Not just for the desert, cactus plants are an obvious choice for a drought tolerant garden. They can also serve a very practical purpose.  Plant the lower lying varieties under exterior windows, and you automatically have an extra layer of protection against unwanted peeping toms and potential burglars.

    Succulents

    These adorable decorative plants have definitely stepped into the limelight lately.  Their array of interesting colors and shape make them fun to just look at.

    Popular in indoor “meditation” gardens, they are also great to use outdoors as a low maintenance addition.

    Crown of Thorns

    While the thorns may be a little scary at first, the flowers will definitely give you a change of heart.  Crown of Thorns comes in a vast array of colors, forms, and sizes.  And, like a cactus, they can also be used as a deterrent to would-be robbers that like to test the locks on windows.

    Daylily

    Considered by many to be the perfect perennial. The stunning blooms and amazing colors Daylilies offer both drought and frost tolerant additions to your landscape.

    Lavender

    Lavender is an extraordinary plant that is popular for more than its good looks.  Not only is it a beautiful flower, but its also used as an essential herb.  And, while it may have a delicate look about it, it can handle dry spells and frost equally.

    Purslane

    While some varieties of this plant are considered weeds you will work hard to annihilate; they are, in fact, a very tolerant and easy to maintain plant.  The blooms are beautiful, but that’s not all.  Purslane is also extremely high in vitamins and OMEGA 3’s!

    Yes, you read that right.  It’s practically a superfood, and most of the time it ends up in a scrap heap when it should be in your salad. You can eat the leaves raw or cook them as a side veggie. It’s even said that Mahatma Gandhi considered them one of his favorite foods.

    Blazing Stars

    These are a great all-weather option.  They can handle just about everything from dry spells to the worst of winter and bounce back.

    Bougainvillea

    Rarely will you see any garden in the Mediterranean that doesn’t include these fabulous flowers.  The stunning colors will as a big pop of color to any landscape.

    Bugleweed

    If you are working in an especially dry region, Bugleweed may be an option to fulfill all your needs.  It has a habit of being invasive, but in a container or extremely arid region, you will probably be able to keep it under control.

    Suggested Article: DIY Plant Propagating 

    Coneflowers

    A member of the daisy family, Coneflowers aren’t just attractive but are dependable in poorer soil.

    Penstemon

    Don’t let the delicate look of their blooms make you discount Penstemon.  This plant thrives on neglect.

    Scarlet Sage and Wild Sage

    This option, especially if joined up with its drought-resistant partner purple wild sage, it living proof you can have an explosion of color even in the sandiest, driest landscape.

    Butterfly Weed

    If the Monarch is your favorite butterfly, this is the plant you should choose first.  Butterflies and hummingbirds are extremely attracted to this dainty plant.  So, you’re your garden into a Butterfly Garden to bring even more interest.

  • Don’t Make These Common EDC Mistakes

    Don’t Make These Common EDC Mistakes

    When putting together an EDC kit, it can sometimes be difficult to tell the difference between selecting an item because it could really be useful, and selecting an item because it’s really, really cool.

    To start, ask yourself some questions as you contemplate each possible item.


    Will this tool be helpful in the region I live in?

    Example, an ice pick is probably going to be of less use in a tropical or desert region.


    How many functions are included with this tool?

    Double check to see how many different uses you can get from a single item.


    Is the tool tried and tested?

    Check on an item’s return policy, this way you’ll be able to test a tool out and determine if its durable enough.  Preferably you’ll want to do this before you find yourself in a survival situation.


    How does the cost compare to the quality?

    Most of the time you get what you pay for.  But it is also possible to find a good deal on a quality item.  Do your research and compare reviews for differently priced items to see how they stack up to cheaper versions.  Then, wait for a sale or other promotion to get the best possible item for your budget.


    Is there anything comparable that would be lighter or easier to carry?

    Remember, when it comes to EDC set-ups, smaller and lighter is the goal, not bigger and bulkier.  Shop around and compare sizes versus weight.


    Will the tools included give me a better chance of survival?

    While it may be convenient in day to day like to have a set of nail clippers, a bottle opener, and a spoon handle, when you are stuck in the middle of nowhere and need to cut some vines for cordage or drive a stake in for shelter support, these aren’t going to be as handy.

    The Most Common Everyday Carry Build Mistakes

    To help ensure you don’t make some of the common mistakes a novice EDC builder often does, here are some things you need to avoid doing to yourself.


    Taking on Too Much

    You would think at this point it would be obvious to avoid weighing yourself down with extras but, like a kid packing his toys for a vacation trip, it all may seem like something you can’t live without, but most of it probably it.


    Being a Cheapskate

    A good deal in the store may end up being a deal breaker in an emergency situation.  Invest in quality products that you know you can count on.


    Relying Completely on Battery Operated Items

    Yes, a cell phone, flashlight, and GPS can be handy, but what if they stop working?  Or, what if they don’t work at all because you forgot to check the batteries before you left and didn’t grab spares?

    Good substitutes for these are an emergency whistle, a compass, and a hand-crankable light.


    Forgetting to Take Care of Your Supplies

    Good knives and other items need consistent care to keep them usable.  Over time, some items, especially metal ones, can corrode from air exposure.  Additionally, batteries can get old and wear out so bring your stuff out regularly to make sure its still in tip-top shape.


    Not Knowing How to Use a Tool

    This particular subject reminds me of the book Wild that was later made into a movie.  I haven’t actually seen the movie but I have read the book.  During the advent of her hike, she runs into problems such as not realizing the type of fuel her stove takes and having no real idea how to use an ice ax.

    She was fortunate enough to be in a situation where she could seek help and information as she progressed.

    In a true survival emergency, you are not going to have that luxury.

    For some tools, especially ones that have a specific purpose, the technique to successfully use them may be more complicated than you realize.

    Make sure you take the time to learn exactly how everything works before you find yourself needing to.

    [Don’t Miss This]  Tripple your accuracy with this simple shooting tip…ex sniper used it to increase his precision shooting.

  • The Undeniable Benefits of Coffee Grounds in Your Garden

    The Undeniable Benefits of Coffee Grounds in Your Garden


    Coffee grounds and gardening are naturally a good fit. Whether you are composting with them or applying them directly to your garden and around your yard, you’ll discover that coffee can affect your plants in much the same way it does you.

    If you think your garden is in need of a pick-me-up, get ready to be amazed at the effects it will produce.


    Used Coffee Grounds Make Great Fertilizer

    When added directly to the garden soil, the grounds add to the organic material makeup of the soil itself.  This addition aids in the retention of water, improves proper drainage and aerates the soil.

    The coffee also attracts earthworms and aids in the maintenance of microorganisms

    If you have acid-loving plants, fresh coffee grounds (not used) will help raise the acid levels of the soil.  Note: used grounds are a neutral PH and won’t affect either way.

    To get the full benefits of used coffee grounds as a fertilizer, work the grounds into the soil or your garden, versus just sprinkling them on top.


    General Benefits of Used Coffee Grounds

    In addition to a fertilizer, grounds can be used as a mulch for plants.  It can also be used to repel slugs and snails, thanks to the caffeine content.  In other words, don’t bother with decaf.

    If you are into vermicomposting, your grounds are an excellent worm food.  Apparently, worms are as addicted to coffee as we can be.

    Want to see what I call THE ULTIMATE SURVIVAL GARDEN?

    Composting with Used Coffee Grounds

    If you already have a compost pile, did you know your used coffee grounds would make a fantastic addition?  Tossing your used coffee grounds (along with the paper filter) is a great way to reduce your footprint in your local landfill and bring added benefits to your gardening at the same time.

    As used coffee grounds compost, they add nitrogen to your composting pile.  One thing to be aware of, however.  Used coffee grounds are classified as a green compost material so you will need to balance them with brown compost material to keep your levels optimal.


    Some Thoughts on Using Fresh Coffee Grounds in the Garden

    While fresh coffee grounds can sometimes cause more harm than good to your garden, there are a few circumstances where it could come in handy.

    As we mentioned earlier, fresh grounds can benefit acid-loving plant including:

    • Azaleas
    • Blueberries
    • Carrots
    • Hydrangeas
    • Lilies
    • Radishes

    Suggested Article:  5 Cheap Gardening Tricks to Help Your Budget

    In the case of root crops, like the carrots and radishes, you’ll get the best results if you mix in the fresh grounds at the time of planting. Tomatoes, however, don’t typically respond well, even though they like acid soil. Maybe they have a caffeine intolerance like some people I know?

    Some gardeners like to use fresh coffee grounds as an organic weed suppressor, keep in mind, though, that some beneficial fungal pathogens could be suppressed at the same time, creating a less than desirable environment for some plants.


    Time to Start Brewing – Well, Not Necessarily

    If you are a regular coffee drinker, you already have a supply readily on hand.  That doesn’t mean you need to take up the habit though.

    You don’t need to be a coffee lover, or even need to go out and buy a coffee pot just to brew it up for your plants.  Check around at your local coffee shops.  Many locations, both national chains, and local small businesses will save them to hand out to anyone who comes asking.  In fact, a lot of places hand it out for free just to avoid it being tossed in the trash at the end of the day.