Page 7 of 9
1 5 6 7 8 9
Survival – Page 7 – Homesteader Depot

Category: Survival

  • 3 Ways to Purify Water

    3 Ways to Purify Water

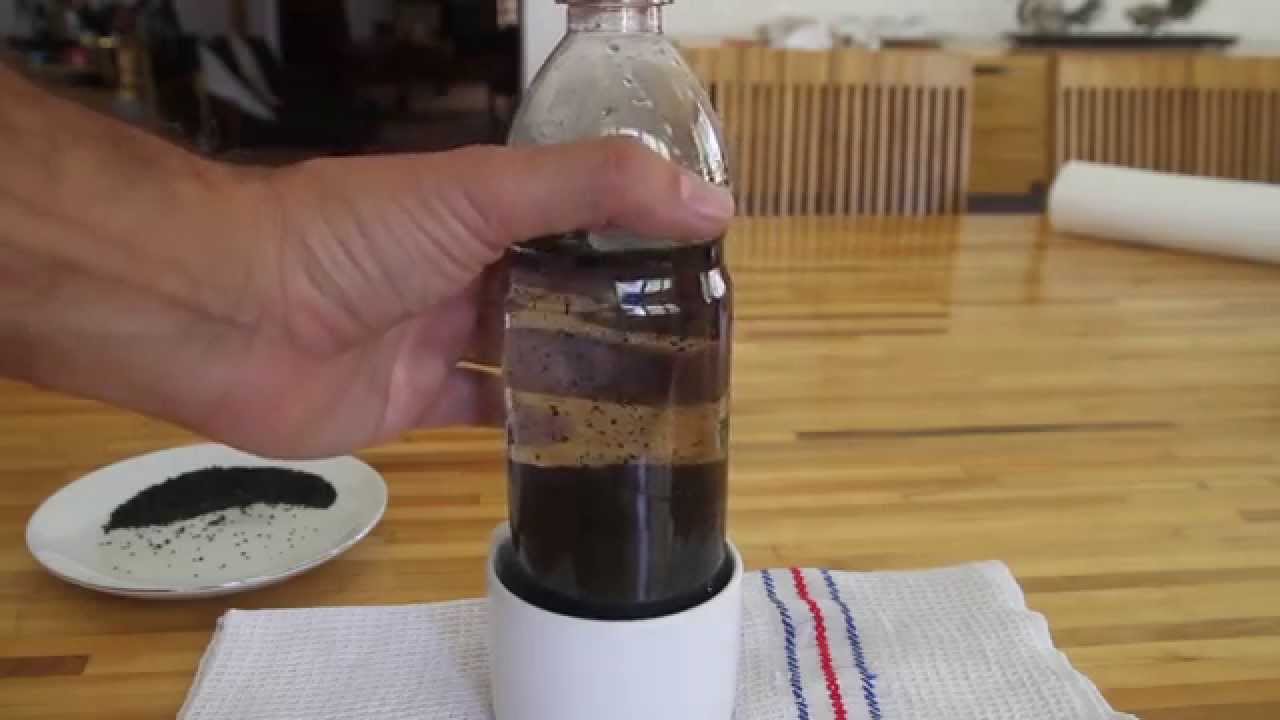
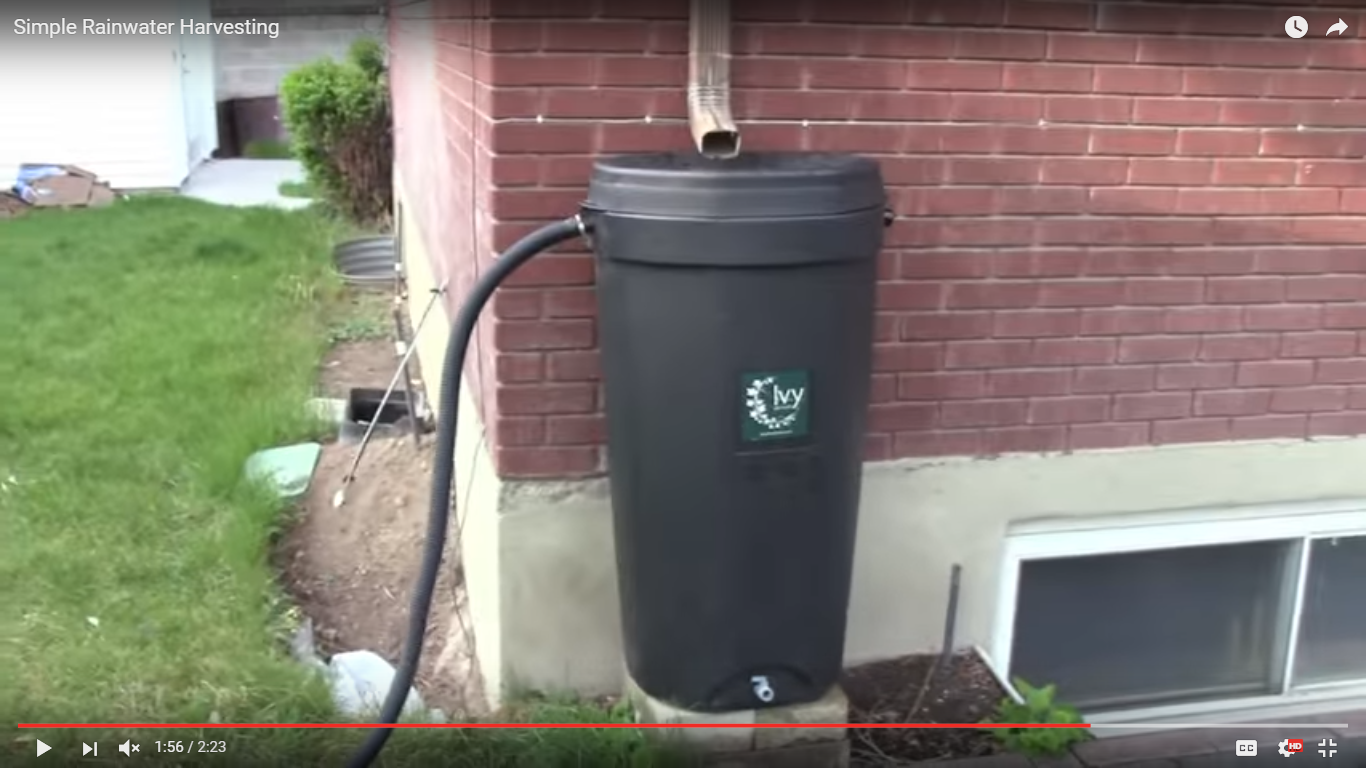
    If you are homesteading or in a survival situation, water will always be your primary need. If you have a source for fresh water on your homestead, that’s a huge advantage, but you also might need to purify the water.

    Whether you are collecting water from a stream, spring, rainwater, or what have you, it’s important to be able to make the water drinkable using one of many possible purification methods. Here are a few of the easiest and most popular purification methods for your consideration:

    Boiling

    By far the easiest way to purify water, it is not always the simplest, especially for large amounts of water. But in a pinch, this will be your go-to, given you have the energy and container to boil a large amount of water. By bringing the water to a boiling point and letting it simmer for five minutes, you will kill the vast majority of harmful bacteria and microorganisms.

    Chlorine treatment

    This is another common way to purify water, and typically what your municipal water provider will use. Chlorine isn’t ideal for many people, especially those who are health-minded, but when the choice is between contaminated water or no water at all, and drinking water with chlorine in it, having chlorine tablets or bleach around to purify water is prudent. It doesn’t take much, usually 2 drops of chlorine bleach per quart.

    Filtering 

    It’s not too complicated to make a DIY water filter that will remove the majority of water impurities, and this might be a possible long-term solution for regular water consumption. What you do is find a container that can funnel the water, upside down plastic pop bottles are the popular choice, and fill 1/3 of the way with sand, 1/3 of the way with charcoal, and 1/3 of the way with pebbles. Cover the spout with cloth or screen mesh, then pour your water through.


    These are a few basic ways to filter water, but there are other, more complicated options out there like purification tablets, distillation, and higher-dollar filters that might suit your needs long-term. But in a pinch, if you have no money or find yourself cut off from modern water supply, these are great methods to know.

    If you liked this, you might also enjoy…

    Holistic Medicine Basics

    Ever Considered Taking Yoga? Read this

    The Ultimate Woodworking Course..

  • Creative Ways to Freeze Eggs

    Creative Ways to Freeze Eggs

    If you are ever faced with an abundance of eggs and not enough time to make something with all of them, it can be overwhelming! Eggs, especially of the farm-fresh variety, are such awesome, healthy, cheap (or free, if you have your own chickens!), and versatile sources of nutrients that it is imperative to use them efficiently.

    One really great option for preserving eggs with any of the following freezer methods is not only having eggs through the winter as production slows, but also to make them quick, easy, and relatively mess-free to use!

    Baking in Muffin Tins

    A really simple way to preserve eggs is to bake them individually in muffin tins and then freeze. They can be reheated quickly and easily for egg muffin sandwiches in the morning! Way cheaper and healthier than the fast food alternative.

    What you do is lightly coat muffin tins with cooking spray or butter and crack an egg in each round. Bake at 350 degrees for about 30 minutes, then let cool, stick in Ziplock bags, and simply pop in the freezer! These will last up to a year frozen.

    Freezing Raw 

    This works surprisingly well for scrambled eggs or being added to any kind of batter.

    What you do is beat together the raw eggs and pour into ice cube trays. 2 cubes is about 1 egg. Once frozen, you can pop them out of the tray and put them in a Ziplock bag. Just thaw in the refrigerator overnight to use the next morning. These will keep up to 6 months.

    Related Article:  Why Are My Chickens Not Laying Eggs?

    Freeze Scrambled

    This is a very easy way to freeze and reuse, for things like breakfast burritos or easy morning scrambles. It’s about as simple as it sounds: scramble up the eggs you want to preserve, let cool to room temperature, wrap up in freezer parchment paper and stick in a zip-lock bag. They will last up to a year. Simply thaw in the fridge overnight; you can also store these in the fridge and they will last up to a month!

    If you enjoyed this, you might also like….

    Easy to Build Root Cellar in Your Own Back Yard

    Eat Like Your Ancestors…

  • Clove and Orange Christmas Decorations

    Clove and Orange Christmas Decorations

    As a kid I used to make clove and orange Christmas decorations but I hadn’t thought about them in years. I saw this video the other day and it reminded me of how sweet-smelling these decorations can be, and what a fun and simple craft for kids they are.

    In the winter time, indoor air can become stale really easily, especially since colder temperatures make it uninviting to open windows, but these cute and festive decorations also double as natural air fresheners.

    Chemical candles or Glade plug-in style air fresheners can pollute your home with toxic fumes and overwhelming, artificial scents, so this is a great alternative for fresh, sweet, holiday scents.

    If you liked this, you might also enjoy…

    Learn to Heal and Treat Illnesses Naturally…

    An Ancient Secret to Slimmer Waists…

    Learn to be a Master Carpenter at Home...

  • DIY Clones   

    DIY Clones  


    Downtime in the garden can really kill your productivity and efficiency.  Cloning plants, such as tomatoes, will greatly reduce the time, space, and resources like potting soil.  It will also give you a more predictable result, since you are not starting seeds with unknown traits, but cloning only the best plants in your garden.  Here’s how to get started cloning your own plants.


    First, you will need a few supplies:

    1. Razor blade
    2. Clone plugs
    3. Clone tray with plastic cover
    4. Root tone


    Directions

    1. Most important is the selection of mother plants. You want to not only look for the most productive plants, but also plants that show no signs of disease or susceptibility to pests.
    2. Once you have selected your mother, find a branch that is still tender and young to make a cutting from. Starting from the tip, count back three branches or points of growth.  This is usually only a few inches on the branch.  This is where you want to make your cut.
    3. Using a clean razor blade, make a split in the bottom of the new cutting, about ½ of an inch long. This is to increase the amount of surface area that will be exposed to the root tone.
    4. Dip the split cutting into your root tone.
    5. Insert the cutting into a plug, set the plug in it an empty hole in a tray and repeat the process until you have enough clones or until you run out potential cuttings or room in the tray.
    6. Put some water in the bottom of the tray so that the plugs can wick water to your cuttings and cover the tray with the clear plastic dome.
    7. Place the covered tray of new clones in a location where it will not receive direct sunlight. The clones will be vulnerable to heat and welting until they have produced roots.
    8. Check on your clones every day to make sure they are not getting too hot and have enough water. If you notice any that are not looking healthy, remove them so that they do not spread illness to other clones.
    9. After a week or so, lift the tray up and look underneath to check for roots. Once you see some roots your clones are ready for transplant.

    Once you have completed the process you will realize how easy it is and how much time and resources can be saved by making your own clones.

    If you enjoyed this, you might also like….

    Home Defense in the End Times…

    Natural Healing Secrets You Need to Know…

    Eat Like Your Ancestors…

  • Oil Pulling and Tongue Scraping (Infographic)

    Oil Pulling and Tongue Scraping (Infographic)

    Dental pain or troubling issues can sometimes be worse than anything else. And getting to the dentist, especially if you live out in the country, can be a pain, and expensive. Taking good care of your teeth and dental health is of the utmost importance, but you don’t need fancy electric toothbrushes and flouride mouthwash to do so.

    Oil pulling is an increasingly popular dental hygiene habit that may be good for you to consider, especially if you are having any dental issues like bleeding gums, cavities, or bad breath. And it can help with much more, too! It sounds pretty funny at first, but once you get going you might very well find yourself hooked!

    Tongue scraping is another great holistic dental practice that can greatly reduce any dental issues.

    I thought this was a great infographic that breaks down how to oil pulling and tongue scraping. You can check out the original article at Yoganonymous.com.


    74d2ef135c1f08149b5d193b8b5e2e3a

    If you liked this, you might also enjoy…

    Learn to Heal and Treat Illnesses Naturally…

    An Ancient Secret to Slimmer Waists…

    Learn to be a Master Carpenter at Home...

  • 8 Simple Ways to Earn Money From Homesteading

    8 Simple Ways to Earn Money From Homesteading

    Homesteading is sustainable, self-sufficient and rewarding. But it’s also not free! Unfortunately, in our modern economy, there’s so much more involved in running a homestead than simply working the land and feeding your family. Especially if you are a new homesteader, costs can pile up and it can really help to find a way to not just save money by homesteading, but earn money back on your hard work and labor.

    Even if you are an urban homesteader, there are still many creative ways you can earn money from homesteading! Here is a list of some of the easiest ways to bring prophet to your homestead project.

    1. Eggs: this is classic of course, but if you’ve got prolific layers, you can probably make a nice return on your investment into raising chickens by selling farm fresh eggs. You can sell to friends, at your farmer’s market or even through local buy/sell groups on Facebook

    2. Chickens: If you have quite a few chickens, you can sell them at various stages. As chicks, as laying hens, or even full-grown broilers.

    3. Preserves: if you like to can or make preserves, why not bring some to the farmer’s market?

    Learn to Heal and Treat Illnesses Naturally…

    4. Sell young: Whenever your goats, pigs, rabbits, or cows have babies, you can sell them! You can keep your milking animals in fresh milk every year and make some money on the side this way!

    5. Honey/Beeswax: Beekeeping is a wonderful way to help the environment and make some extra money. You can sell raw honey, which is a coveted health food, or make and sell candles with the beeswax!

    6. Fresh or dried herbs: herbs are typically easy and cheap to grow and require minimal care and overhead. They’re easy to harvest and process and you can sell fresh or dried bunches.

    7. Seedlings: starting seedlings in 2″ pots in the springtime to sell as seedlings is a great way to earn some extra money, especially if they are organic and heirloom

    8. Rent land: if you have extra land you are not using, you can rent out parts of it for hay, pasture or farming

    Learn to be a Master Carpenter at Home>>>

  • Harvesting Rainwater (Video)

    Harvesting Rainwater (Video)

    I love to see how real-life homesteads operate, and of course YouTube is great for this. Seeing different rainwater collection setups is particularly appealing, and I really enjoyed this short little video on this guy’s simple rainwater catchment system. Catchment is something that doesn’t have to be too complicated and that can benefit your homestead or garden greatly, once you start to collect rainwater you’ll see every drop of rain on the ground as a wasted resource! Enjoy this short, informative video on a basic rainwater catchment system that anyone can enjoy!

    If you enjoyed this, you might also like….

    Last Resort Home Defense and More…

    Natural Healing Secrets You Need to Know…

    The Healthy Primal Diet Everyone Should Try…

  • Great Depression Era Dandelion Salad (Video)

    Great Depression Era Dandelion Salad (Video)

    I found this awesome YouTube channel recently called “Great Depression Cooking”, which features a 94-year-old woman, Clara, going through common recipes used during the Great Depression.

    I thought this particular video on dandelion salad was great for homesteaders to know, or anyone really, because it’s simple, nutritious, and almost everyone has dandelion growing in their yard or nearby their house. I think my favorite part of this video, however, is watching Clara carefully pick and clean the dandelion, explaining that it’s free, and all it takes is patience. It made  me think about how much more work people used to put into getting and processing food, and of course, that’s what homesteading is all about! Putting in the extra effort to get free, natural, sustainable food that you grew and harvested yourself. If you aren’t homesteading yet, regularly harvesting and processing dandelion greens would be a great habit to get into to develop the patience! Enjoy.

    If you enjoyed this, you might also like….

    Last Resort Home Defense and More…

    Natural Healing Secrets You Need to Know…

    The Healthy Primal Diet Everyone Should Try…