Blog

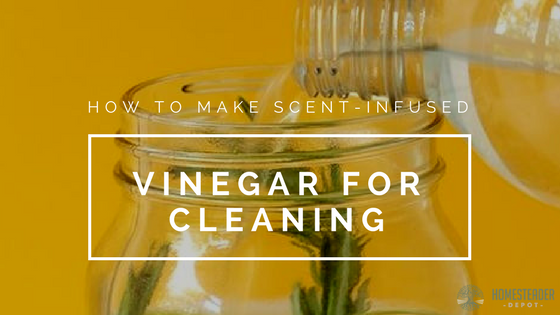
  • How to Make Infused Vinegar for Cleaning

    How to Make Infused Vinegar for Cleaning

    If you want to clean using natural, green cleaning products, but miss the fragrant smells of conventional, store-bought cleaners, then this is a great idea for you.

    Scent-infused vinegar is a really great, and cheap way, to make your own fragrant cleaners that actually work. We’re definitely fans of essential oils here, but we understand a lot of people aren’t ready to make the dive into buying them, or aren’t sure how to use them properly.

    This recipe is cheap, easy, involves no essential oils, and cleans amazingly well. You even can most likely make your own custom cleaner with a scent that you love using leftover scraps from your kitchen! Let’s begin.

    How to Make Scent-Infused Cleaners

    The basic formula for these cleaners involves soaking your fruit, herbs, or flowers in in vinegar for a few weeks, then using that vinegar as the base for a simple homemade cleaner. Here are some ideas for infusions you can use:

    • pine needles
    • citrus peels
    • fresh lavender sprigs
    • fresh rosemary sprigs
    • cinnamon sticks
    • eucalyptus leaves
    • rose petals
    • gardenia blossoms

    What you need to get started is one of the above, some other fragrant plant of fruit, (or any creative combo you can come up with!), a jar with a lid, and some regular white distilled vinegar. Keep in mind, the vinegar should be able to fill roughly 1/3 of a spray bottle when you’re done, but it doesn’t have to be perfect.

    For the following cleaner, you will need that spray bottle, some distilled water, and if you want a little extra cleaning oomph, a dash of dish soap. 


    Directions: 

    1. Take the scent of your choice, and, if they’re large like sprigs, roughly chop them. You don’t have to worry too much though, you just need to be able to stuff them in a jar.
    2. Put your herbs, leaves, peels, etc. in the jar, and cover with vinegar.
    3. Put the lid on the jar securely.
    4. Place in a cool, dark place, for 2-3 weeks. You can even do 1 if you’re in a hurry, it will still be lightly infused.
    5. When you’re ready to make your cleaner, strain whatever you have been infusing out of the vinegar, and pour your vinegar into your spray bottle.
    6. Fill the rest of the spray bottle with the distilled water (really, you can use tap, but distilled is just more sanitary) and a dash of dish soap if you like.

    And that’s it! Use this as you would your regular cleaner, and you’ll be amazed at how good it cleans and how delightful it smells.

    If you enjoyed this, you might also like….

    Can You Defend Your Family When SHTF?

    Natural Healing Secrets You Need to Know…

    Effective Primal Diet Hacks…

  • Clever Ways to Teach Children About Self-Reliance

    Clever Ways to Teach Children About Self-Reliance

    Kids these days! The new generation seems to be so fixated on their devices and pop culture, and I think a lot of us who grew up with these things are looking at today’s youth and shaking our heads.

    But of course, the truth is, that adults as well as kids need to learn more about self-reliance and basic survival skills, because our world is in a precarious state! Start them young, and we just might be able to raise a few kids who can carry on the traditions and self-reliance of past generations.

    Here are a few ideas for basic skills to expose your kids to that will give them a leg-up in a self-reliant lifestyle, should they learn to pursue it one day.

    Gardening

    Gardening is a really fun way to show kids how our food system works, and to get them involved in homesteading, even if you’re an urban homesteader. Small children especially love watching seeds sprout and grow, and appreciating where our food comes from.

    Cleaning

    Keeping a house clean and organized is actually becoming a lost art, and getting children involved in the things they might otherwise take for granted such as washing dishes, cleaning floors and windows, vacuuming, and laundry, will help them realize just how much effort goes into keeping their lives comfortable.

    Raising animals

    Raising chickens in your backyard or even just designating pet care to your children can give them an idea of what it takes to sustain life and how to use animals for survival and self-reliance, as well as help them to understand just what a big job it might be to take care of the pony they keep asking for.

    Basic vehicle care

    Get older kids involved in changing a tire or changing oil, so that they realize the vehicle they get driven around in every day takes maintenance and work to keep up. As a matter of safety, especially, teenagers should not be learning to drive unless they also know basic vehicle maintenance and safety.


    Let’s raise the next generation up right so they know how to take care of each other; and us!


    If you enjoyed this, you might also like….

    Can You Defend Your Family When SHTF?

    Natural Healing Secrets You Need to Know…

    Effective Primal Diet Hacks…


  • Why Are My Plants Turning Yellow?

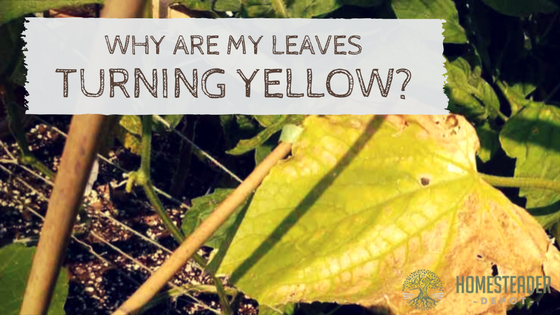
    Why Are My Plants Turning Yellow?

    Yellow leaves are never a happy sight to see on plants you’ve been caring for and watch grow. And they’re not a good sign. Yellow leaves on plants or entirely yellow plants can be indicative of a number of different issues. Here are some of them:

    Pests

    One possible cause of yellow leaves is pests that are living on the plant and leaves and taxing the plant’s energy and resources. To determine if this is the cause, inspect the plant carefully to see if you can find any pests. To treat this, you’ll need to eliminate the pests themselves. Neem oil or insect-killing soap are great organic options for a pesticide.

    Overwatering 

    Plants can become yellow if they get too much water, and poor drainage or too much clay content in the soil can be a common culprit of this. To combat this, try to mix some sand into the soil or waterless.

    Boost your plants growth by 10 TIMESin half the time…with the help of fish.  Learn More Here>>>

    Lack of sunlight

    Sunlight is what plants need to thrive, and if they’re not getting enough and aren’t shade-tolerant plants, this might be a cause of yellowed leaves. If this is the case, your leaves will be floppy and faded in color. If you have potted plants, try moving them somewhere they’ll get more sun, or, if your plants are in the ground, transplant if you can or simply choose a sunnier spot for these particular plants next year.

    Dehydration

    Not enough watering can also cause yellowed leaves, as plants require water to transport the essential nutrients of the soil to their foliage. If leaves feel crunchy and dry, dehydration is probably the culprit. Make sure your plants receive enough water and check daily for the moisture content of the soil. Soil should hardly ever be completely dried out if you stick your finger into it.

    Nutrient deficiency 

    If the leaves of your plants are yellowing, they could be deficient in any number of essential nutrients. If you haven’t been fertilizing or amending your soil, be sure to give them some compost tea or store-bought organic fertilizer for either growth or blossom, depending on what stage they are at, and buy some nutrient testing strips to test the nutrient content of your garden so you can amend appropriately.

    Plants are just like people, they need proper food, hydration, and care to thrive! Help respond to your plant’s needs by checking for these important issues and address them today.

     Check THIS OUTBreakthrough in Electric Car Technology Powers An Entire Home>>>


  • Butchering a Year’s Worth of Chickens (Video)

    Butchering a Year’s Worth of Chickens (Video)

    A few days ago we shared a video of some new homesteader’s first time butchering chickens, well, this is the opposite extreme! Seasoned homesteader and YouTuber Justin Rhodes shares his experience of butchering a whole year’s worth of chickens in one day.

    Videos like this are really inspiring and motivating to me, and stand as a reminder that while it takes lots of hard work, self-reliance is not entirely outside of the realm of possibility.

    Watch as this family butchers enough Cornish game hens to eat at least one a week for a year! They raised them all themselves and they didn’t take long to mature, so to me it sounds like a really great breed to have to stock up on a long-term supply of meat. Check it out:

    If you enjoyed this, you might also like….

    Can You Defend Your Family When SHTF?

    Natural Healing Secrets You Need to Know…

    Effective Primal Diet Hacks…

  • Easiest Indoor Herbs to Grow

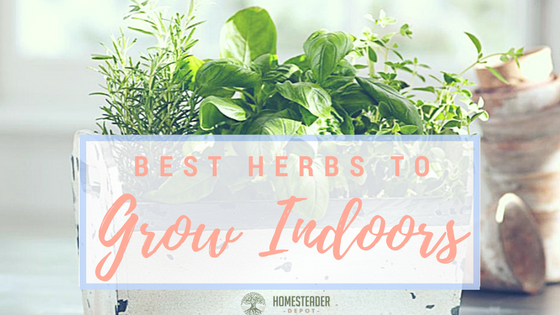
    Easiest Indoor Herbs to Grow

    Herbs are a wonderful way to start gardening, either in a starter garden, on your patio, or even your windowsill. They don’t usually require a whole lot of work, are fine in containers, and are wonderful for adding fresh, healthy flavor to all kinds of dishes!

    Of course, if you want to use herbs primarily for cooking, or simply want a house plant that provides more than just decor, indoor herbs are perfect. Here is a list of some of the easiest herbs to grow indoor:

    Basil

    Basil is so easy to grow anywhere, and that includes indoors. You can start them from seed right in the pot, and simply place in a southward facing window so it gets lots of warm sun, which it loves, and you’ll have one happy plant!

    Lemongrass

    Lemongrass is incredibly easy and hands-off to grow. All you need is one small stock to get started, and it will take off! You can use the stocks and leaves for all kinds of delicious dishes.

    Chives

    Chives produce quickly and easily and require little light, so they’re a breeze to grow indoors. Like lemongrass, you can start them from already established plants by digging part of it up, including the roots, and placing in its own pot with potting soil. Cutting the leaves off stimulates more growth, so it’s also perfect for regular use in the kitchen!

    Parsley

    Parsley is a staple of many cooks, and it doesn’t require very much light or maintenance to grow indoors at all. It does take a little longer than other herbs to get established, but once it does, you’ll have regular access to fresh sprigs to finish off any delicious meal.

    Peppermint

    Peppermint thrives in the shade, making it a great choice for indoor gardens. It’s a crawler and grows fast, so if you plan on using it regularly, it’s ideal for cooking. You can throw in cold summer drinks, brew your own delicious (and healthy!) mint tea, or add to desserts and many Asian dishes. Yum!

    If you enjoyed this, you might also like….

    Can You Defend Your Family When SHTF?

    Natural Healing Secrets You Need to Know…

    Effective Primal Diet Hacks…

  • Best Brands That Are Non-GMO (Infographic)

    Best Brands That Are Non-GMO (Infographic)

    We feel strongly about living a healthy lifestyle, one that is both self-reliant and supportive of businesses that promote sustainable foods.

    This infographic lists some of the best natural food brands that contain non-GMO ingredients, so you know you’re getting the healthiest, most whole ingredients for your family.

    A lot of “natural” food brands just package themselves as healthy but really use GMO ingredients and donate to pro-genetic modification lobbies and companies, so it can be hard to make informed decisions on the fly at the grocery store.

    So we put together this list of a few companies you can be sure are totally safe and committed to healthy, natural, organic, and non-GMO ingredients. Enjoy!


  • 5 Ways to Cut Back on Weeds

    5 Ways to Cut Back on Weeds

    Weeds are one of the biggest downsides of gardening. Just as soon as you get the whole garden weeded it seems like they’re sprouting up again.

    It is true that weeds are nearly impossible to fully get rid of, but fortunately, there are ways to stunt them so much they’re barely a problem in your garden.

    Here are ten ways to reduce your need for weeding.

    1. Mulch

    Mulch is the go-to for many gardeners, and for good reason. You can use all different kinds of organic material for mulch, such as hay, grass clippings, leaves, wood chips, even store-bought organic mulch. It will also retain moisture in the soil, which is great for the warmer, dryer months.

    2. Plastic 

    A very common conventional way to keep weeds back, black plastic will keep the soil completely dark so any unwanted plants simply can’t thrive. A plus for using plastic is it will keep your soil warm, so it’s great for early spring planting.

    3. Cardboard 

    Cardboard is an excellent and, if you have enough leftover cardboard boxes, a very affordable way to keep weeds back in your yard or garden. It will block out light like the plastic and mulch do, but unfortunately, water doesn’t penetrate it very well so it’s better for outer edges of gardens or walkways. It’s awesome if you want to cover up a resting garden bed, as it will naturally decompose into the soil eventually.

    4. Boiling water

    Boiling water, like cardboard, is probably best for walkways or along yard or garden edges. It’s ideal for in between bricks or cement. It’s as simple as it sounds, though of course you’ll want to be careful not to splatter yourself with boiling water! Simply boil a kettle and pour over the plants you want to kill.

    5. Vinegar

    Another method you won’t want to broadcast over your whole garden so as not to kill the plants you do want, vinegar still works great for killing individual leaves. One awesome trick is to put a dog cone around the weed you want to kill, and then spraying the dickens out of it with vinegar.


    Weeding can seem like such a time-consuming part of gardening, so try some of these methods out to keep back your weeds and free your time for other things!

    If you enjoyed this, you might also like….

    Are We In The End Times?

    Complete Health Transformation Without Drugs or Surgery…

    Having Trouble Sticking With Paleo?

  • How to Grow Watermelon in a Pot

    How to Grow Watermelon in a Pot

    There’s nothing quite as refreshing on a hot summer day as a nice, juicy watermelon.

    Unfortunately, the watermelons you find in the supermarket are often conventional and even GMO. If you’d like to harvest some of your own this summer, you don’t need a whole field, you can grow them right in your backyard or porch!

    Here’s how:

    Container: 

    Watermelons will need a large, deep container, at least 2′ deep, so that it’s long taproot will have enough space to expand. Choose something sturdy as well, and with proper drainage.

    Soil:

    Watermelons like both sandy and loamy soil, with plenty of airy and well-drained substrate and a pH around 6-6.8. Well-composed animal manure is very helpful in achieving the right texture and soil nutrients for watermelon.

    Propigation: 

    Due to the taproot of watermelon, it will need to be sowed directly into your container as it does not transplant well. Sow 3-4 seeds in one pot in the early spring, as soon as temperatures are above 65 degrees. It should sprout within 6-10 days, after that, choose the heartiest seedling and thin out the rests.

    Placement: 

    Watermelons like lots of sun so be sure to place them somewhere they will get direct sunlight for at least 6 hours out of the day. They will also want to climb, so a sturdy trellis is very important. This can be placed directly in the pot once the plant is big enough to train up it, or you can place the pot at the bottom of a freestanding trellis.

    Watering:

    Watermelon, true to its name, is a very thirsty plant, so you will want to make sure it gets plenty of water and also is draining properly. Water at least once a day.

    Care:

    Fertilize accordingly for both growth and fruiting, and make sure to prune appropriately. This means removing any sickly or weak branches, and try to keep a central stalk by removing any extra branches as they sprout.

    Harvesting: 

    Harvest time will vary from plant to plant, but it is typically around 30-50 days after flowering. When the fruit is ripe, it won’t look any different than the younger fruit, so you’ll have to “thump” the side of the fruit to see if it sounds dead and hollow; that’s how you know it’s ripe!


    Enjoy!

    If you enjoyed this, you might also like….

    Can You Defend Your Family When SHTF?

    Natural Healing Secrets You Need to Know…

    Effective Primal Diet Hacks…