Tag: diy homestead

  • 5 Step DIY Soap

    5 Step DIY Soap

    Making your own soap can be a fun and creative experience. You have the advantage to create a product that is safer than those available in stores and something that is free of perfumes or chemicals. You can also save money over time by making your own soap when compared to products in stores that contain the same natural ingredients. Need another good reason? You can sell it and make a reasonable profit to help you buy the things you need.

    If you are creative with making soap, you can use molds to make natural skin care products into tiny works of art. Or you can make basic soap that is just as nourishing for your skin. There are various recipes and methods that you can try for soap-making so that each batch you make can be different and unique.

    You can use milk or water to create your homemade soap, but using milk can sometimes be tricky, and the recipes that you may find in books or online may not mention that you can substitute milk for water. If you decide to use milk, keep in mind that it will cause the mixture to heat up faster, so you may want to wait until you are more experience with soap-making before you start using milk. However, once you do, the milk will give your soap a creamier color. Natural goat’s milk is a good source if you want to try it.

    Using colors in homemade soap is a fun way to make the process more creative. You can use natural colorants such as spirulina, cocoa, or paprika to create a rainbow of colors. A mixture of Spirulina and nettle creates green soap while paprika crates a nice orange tone. Cocoa can turn out either brown or purple, and annatto creates a bright yellow soap.

    How to Make Homemade Natural Soap

    The equipment that you will need for soap-making shouldn’t be used for anything else, and it should be very clean. For mixing bowls, you should use glass, stainless steel, tempered glass, or enamel. Do not use copper or aluminum since they can react to the lye. Use styrene plastic or silicone spoons for mixing. You can use silicone baking pans or purchase special molds designed especially for soap-making. You will also need a quart and a pint-sized canning jar, newspaper, stainless steel thermometer, and an old towel.

    Additives

    There are several additives that you can use when making soap including herbs like lavender and chamomile, essential oils, natural colors, oatmeal, ground coffee, salt, or aloe vera gel.

    Ingredients:

    • 2/3 cup coconut oil
    • 2/3 cup olive oil
    • 2/3 cup almond or grapeseed oil
    • ¼ cup of lye
    • ¾ cup of cool water

    Directions

    Cover your work area and put on protective gloves. Measure water into a quart jar. Measure lye, making sure you have the exact amount. Slowly pour lye into the water, stirring as you pour. Stand back to avoid any fumes. When the water clears, set aside.

    Add all three oils together in the pint jar. Heat up in microwave or place in a pan of water to heat up to 120 degrees. The lye should have come down to around 120 degrees by then. Wait for both to cool to between 105 and 95 degrees. You don’t want it to get any cooler than that or it will ruin the soap.

    Related Article:  “Homemade Citrus Cleaner”

    Once everything is at the right temperature, pour oils into a mixing bowl. Slowly add the lye, stirring until it’s mixed. You need to get the lye in contact with the soap as much as you can. After around 5 minutes of stirring, the soap mixture should lighten in color and thicken. Once it has a pudding texture, it is at “trace”.

    Add in herbs, essential oils, and any other additives. Stir thoroughly and pour the mixture into molds. Cover with plastic wrap. Set it in the old towel and wrap up. This will keep the heat inside and start the soap making process

    After 24 hours has passed, it’s time to check the soap. If it is still soft, allow it to sit for 12-24 more hours. Once it’s cold, place on parchment paper. Allow the soap to cure for 4 weeks and turn it once a week to expose all sides to air. Once it is fully cured, wrap the soap in wax paper or place in an airtight container.

  • 3 Effective Sheep Shearing Techniques

    3 Effective Sheep Shearing Techniques

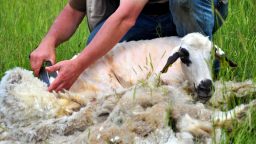
    Despite some claims from animal rights groups, shearing is necessary to maintain the health and comfort of your sheep.

    There are 2 main reasons you need to have your sheep sheared once a year.

    • If the sheep’s thick wooly coats are not removed before the summer months, they can become very uncomfortable. Additionally, the amount of dirt that can amass and become matted to their bodies could develop into a health risk.
    • The wool from certain breeds is a valuable commodity and a good source of annual income. When raised correctly with a proper diet, a single sheep can grow up to 10 pounds of wool.

    Whether or not you are keeping them as a source of income or food, your sheep will need you to get them ready for the summer months to maintain a happy and healthy lifestyle on the farm, ranch, or homestead.

    Note: To make this process go a lot faster, take a look at these awesome shears I found on Amazon at a 65% discount right now <PanelTech Sheep Shears>

    There are a number of techniques out there, and like a person’s handwriting, each individual will develop a style of their own as they practice and get better.  Go get started, here are some basic steps, and tips to follow.

    Starting Position

    Some experts say start by laying the sheep on one side, others recommend starting on their backs with their feet in the air. Depending on the size of the sheep, you can decide what will work best for you.

    Shearing the Brisket

    No matter the technique or starting position you use, most experts say to start shearing on the brisket, or belly area.  If you are planning to sell your wool, the belly area is often too dirty to sell, so starting there will allow you to tackle the worst areas around the belly and crotch areas and get rid of them before you move on to the more valuable areas.

    When you start shearing, make sure your blows (strokes) are long and confident.

    Move down the belly area, around the crotch and the tail.  Separate the wool removed from these areas and discard.

    Start on One Side and Work Toward the Middle

    The removal of the brisket wool will leave a nice starting place to move onto the sides.

    To continue, start on the back leg, shear around it, and then shear up to the shoulder in a long clean blow. Trim the head and neck then work your way back down and around.

    Repeat this on the other side then finish with the back.

    When finished the ultimate goal is to have a single layer of wool that can be rolled or folded up for transport.

    Tips for Maneuvering Your Sheep

    To get your sheep into the positions needed to access each area, you can apply the following techniques.

    To control the head

    Place your thumb in the sheep’s mouth behind the incisor and wrapping your fingers under its chin.

    Take a firm but gentle hold of one of the ears and use to guide the head and body.

    To hold in place while shearing

    Rest the sheep’s body against your legs or between your knees.

    Lay the sheep on its side and straddle with your legs.

    Keep in mind, the calmer and more comfortable the sheep is, the less they will want to wriggle out of your control to get away.  This is especially important for larger sheep breeds to ensure a successful shearing experience.

    Sheep shearing is not an easy task, but the rewards are worth the effort, both for you and your sheep.  Professional shearers make it look easy but remember, they’ve had years and years of experience.  Like most things worth doing, practice makes perfect.

    Bonus: Want to take your identity off the grid?  <<<Click Here and Become INVISIBLE>>>

  • 7 Steps for Easy Canning

    7 Steps for Easy Canning

    If you decide to get into the wonderful world of canning, be prepared to experience some of the more flavorful food you’ve ever experienced at a fraction of the cost. Canning allows you to pick or buy produce when it’s at its peak maturity and preserve that flavor year-round. The simplest canning process is Water Bath Canning.

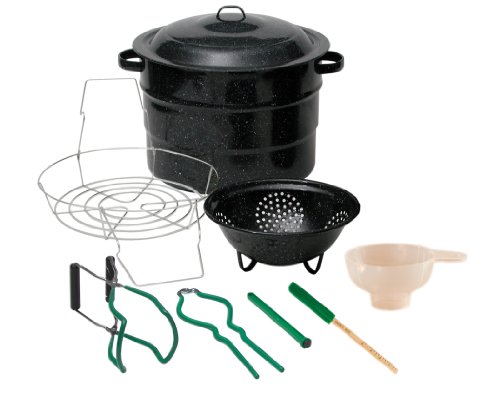
    To get started you’ll need a few inexpensive basics, many of which you may already have, or be able to find at your local thrift store or flea market. The absolute essential musts are:

    • A pot that holds enough water to cover any sized jar.
    • A Jar Lifter or Canning Rack, or at least something to help you remove the jars from boiling hot water.
    • A set of jars with the seals and rings intact.

    I found this inexpensive, complete set on Amazon “9 piece canning set”

    Getting to Work

    Step 1

    Fill your canning pot about one-third full of water and a secondary pot completely full.  Heat water until hot, not boiling.

    Step 2

    Wash your jars seals and lids, then keep warm until ready to be filled.

    Step 3

    Prepare food and fill jars according to the recipe you are using. Remove air bubbles by running a non-metallic utensil around the inside of the jar. Wipe the rim of the jar with a clean, damp dish towel or paper towel.

    Step 4

    Place the seal and ring on the jar and gently finger tighten.

    Canning is a great way to “stockpile food”, check out this “Complete System for Building a Delicious Food Stockpile”

    Step 5

    Place a small board or hand towel in the bottom of your canning pot to keep the jars from making contact with the bottom.  Place jars in your canning pot making sure the water can flow freely around the jars. Add hot water as needed until the jars are covered at least halfway up.

    Step 6

    Cover and bring to a full boil. Start timing according to your recipe.

    Step 7

    When your time is up, turn off the heat, carefully remove the jars and set upright to cool. As the jars cool, the seals pull down into the vacuum that is created and compress with a small pop.

    When They’re Cool

    After jars have cooled, press on the lid to check the seal.  It should be sucked down, not popped up.

    If you find a jar didn’t seal, just put it in the fridge and use the food within 2-3 days like you would leftovers.

    Caps will sometimes rust if left on during storage so it’s a good idea to remove the screw caps then wash the jars.  If one gets stuck, just leave it one and try to use that jar of food first.

    Label the jar with the food type and date and store them in a dark, dry and relatively cool area like a kitchen pantry.  Avoid storing them in direct sunlight, or in utility rooms with where they will be exposed to heat or high humidity.

    A Note on Jelly, Jam, and Preserves – What’s the Difference?

    They may all look the same in their jars, but there are differences, mostly in what form the fruit is in when it’s prepared for canning.

    Preserves

    Once upon a time, preserved fruit was just that. Whole or large chunks of fruit preserved in sugar for use out of season. Not designed to spread on toast, they were more often opened and served as a side dish in the absence of fresh produce.

    Jams

    These still contain pieces of fruit but they have been pulverized into pulp.  Lately, Jams and preserves have become almost interchangeable but at one time there was a considered difference between the two.

    Jelly

    Jellies are made using only the juice of the fruit that is then thickened so it can stand on its own.  Usually with pectin, sometimes with gelatin.

    Tip: How to Properly Store Your Food and Increase its Shelf Life

  • DIY Animal Shelter

    DIY Animal Shelter

    Many structures you see on larger farms will often rival a designer house in style and amenities. However, if design awards are not what you are looking for but only to keep your friends protected from the elements, this basic structure will do.  A simplified shelter with basic material will satisfy all of these requirements.

    What You’ll Need

    • 3 Posts = Eight-Foot (8’) Long Pressure Treated Four-Inch by Four-Inch (4”X4”)
    • 3 Posts = Ten-Foot (10’) Long Pressure Treated Four-Inch by Four-Inch (4”X4”)
    • 6 Roof Boards = Eight-Foot (8’) Long Pressure-Treated Two-inch by Six-inch (2”X6”)
    • 17 Roof Joists = Ten-Foot (10’) Long Pressure-Treated Two-inch by Six-inch (2”X6”)
    • 34 Joist Connectors
    • Framing Nails
    • 34 Metal Hurricane Straps
    • 160SF of Roofing Materials
    • Roofing Hardware
    • Siding (optional)
    • Basic Tool Kit
    • Circular Saw

    Laying Out the Grid

    To begin, plan the location of your shelter by laying out a 2 by 3 grid with the point 8’ apart.  This will be where the poles are positioned.  When you are finished you will have an 8’ x 16’ area with 2 rows of 3 posts each

    Dig the Post Holes

    The post holes should be a minimum of 2’ deep and 1’ wide. If you live in a consistent freeze thaw cycle area, increase your minimum depth to 4’.

    Set Your Posts

    Set your 4” x 4” posts into place, all the 8’ long post in one row of three and all the 10’ long posts in the other row of three.

    The 10’ posts will form the front of the barn, so make sure you place them on the side you plan to be the front.

    Pour enough pre mixed cement to fill the hole at least 1’ (12”).

    Wait at least 2 days for the fill to set.  Check the manufacturer’s directions for precise mixing and setting instructions.


    Once set, backfill the rest of the hole with the loose dirt removed when dug.

    Compress the dirt as you fill in the space, checking regularly to make sure your post remains square and straight.  You can use your string line to gauge if it’s straight.  Once each pole is backfilled they will probably be slightly different heights due to differences in the hole depths and settling.  Determine the height of the shortest pole in each row and trim the top of the other 2 to make each row even.  Remember, you want an angled roof, so keep the front row at least 1-2 feet higher than the back.

    Roof Support Beams

    Attach your six 8’ long 2”x6” boards around the top of the structure, connecting the posts and forming a large rectangle at the top.

    Roof Joists

    For this simplified angled roof, traditional trusses are not needed.  Use your roof joists to join the front and back sides of the structure across the top.  You can buy connectors to make this job easier and more secure.  Starting at one end of the stall, attach the roof joists 12” or 1’ apart from each other, with the 2 ends flush with the roof boards.  Connect the joists and roof boards with hurricane straps for added strength against high winds.

    Roofing Material

    Finish your roof with the roofing material of your choice.  Follow the manufacturer’s instructions for installation and additional accessories or tools needed for the process.

    Siding

    For basic siding that can be used as a wind break, use additional 8’ long 2x6s placed horizontally around at least 3 sides of the stall.  Start the bottom on the ground or a few inches above it.  Create “stripes” around the barn by spacing each level an inch or two above the previous one until you reach the top

    Once you have the basic plans down, you can easily utilize them for additional structures on your land for extra storage or workspace.

    Try this:  DIY Home Energy System

  • 3 Keys to Choosing the Perfect Livestock

    3 Keys to Choosing the Perfect Livestock

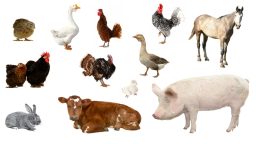
    A farm or homestead without livestock seems unusual, to say the least.  Whether you see yourself with a flock of cheerful chickens, a herd of graceful goats or a few calming cows, livestock are a valuable food source that should be planned for carefully, then cared for consistently.

    Are You Ready to Be Available Every Minute of Every Day?

    Are you prepared to be “on-call” for your animals 24 hours a day, 7 days a week, 365 days a year? When you enter the world of livestock, a few things to be aware of are:

    • Newborns usually come in the middle of the night.
    • Orphaned or abandoned babies will need you to feed them around the clock.
    • Escaped animals and flattened fencing will need attending to immediately, even in 110o F heat.

    Just like having kids, keeping livestock can tie you down in ways you can’t even imagine.  And, they won’t eventually grow up and learn how to take care of themselves like kids will.

    Basic Ownership Preparation and Considerations

    Before you add animals to your homestead, evaluate your situation and skills to see if you have what you need to support the new lives coming in. The following points will help you in your evaluation.

    Research, research, research-Knowledge is power!  Educate yourself on each of your options before you make any purchases.

    Talk to the Local Vet-Find out what animals the veterinarians in your area are qualified to treat.  This info alone can go a long way in helping you decide what livestock to get.

    Similar Article: “Are You Ready for Livestock?”

    Look for a Soul Mate-If you have a loud and abrupt personality, and so does your livestock, you could easily run into more issues than you want to deal with. Assess yourself and research compatible animals. In the same breath, many species require brute strength to safely interact with them, make sure you don’t take on more than you can handle.

    Enjoy the Animals-You must honestly take pleasure working with the kind of livestock you choose.

    Have Their New Home Ready and Waiting-Make sure you have ample land, structures, and resources before you finally bring them home.

    So, What Are Your Options?

    Here is some basic info on the most common livestock homesteaders consider when adding to their property.

    Beef Cattle

    Beef cattle are low maintenance and don’t need complex facilities. Most people are able to handle cattle with minimum issues and local vets can usually treat them. If you decide to go the milk cattle route, you will need to make sure you have the proper equipment to handle the milking process and storage.

    Goats

    According to a publication by Florida A&M University, 70% percent of the world population eats goat regularly. If that’s not to your fancy, dairy products like goat milk and cheese are another good protein source. Additionally, known to eat just about anything, you can picket them or corral them in a different area each day and never have to mow your lawn again.

    Rabbits

    Whether for meat, fiber, or just to have as a pet, rabbits can bring a lot to a homestead.  Just don’t go too far too fast.  Proceed carefully and know your limits.  And, keep the males away from the females unless you want your “herd” to expand exponentially.

    Related Article: “Beginners Guide to Buying Rabbits”

    So, whether you go small, medium, or large, make sure you are thoroughly prepared to take on the challenges adding livestock to your way of life can produce.

    Chickens

    Chickens need very little besides food, water, a safe place to sleep, and a few hours from you each week to gather eggs and clean the roosts.  For that relatively little amount of effort, you will be rewarded with fresh eggs and roast chicken on Sundays (or Mondays, or Tuesdays….)

    If chickens are your choice, I suggest taking a look at this guide to building the perfect chicken coops to protect your new friends and future food source <<<Click Here>>>

    Pigs

    Pigs are one of the easiest animals for your homestead because they will eat literally anything, they will be your living compost.  No need to throw away and waste anything edible, your pigs will take care of that.

    They are also great at killing parasites that may harm you other livestock, they have different internal parasites that can digest other animal parasites.  Let them graze with your other animals to help clean up the pasture and keep everyone healthy.

    The obvious reason would be the delicious meat such as ham, sausage, and bacon.

    In conclusion, livestock is a great source for food if a self-sustaining homestead is what you are looking for.  Even though it may take some time, research and hard work, the end result will be worth it.

    Here are some other food options for your “Survival Farm”


  • Become a Better Homesteader Using These 4 Tips

    Become a Better Homesteader Using These 4 Tips

    When it comes to homesteading, there is no such thing as knowing too much or working too hard. Yet, many people want to get into this lifestyle without truly understanding what it means or by looking for shortcuts. Instead of trying to find the “easy” way to be a homesteader, you need to find ways that you can become a better homesteader. The life is not always easy, but it can be extremely rewarding. The following are a few tips that will help you to get into the right mindset and to make sure homesteading for the long haul is right for you.

    Learn to Live With Less

    This does not mean you need to give up all the things that you enjoy. It simply means that you need to learn to live within your means, which is something that so many people today have a problem doing. You do not need to have the latest phone and all the latest gadgets.

    You do not need to spend on all the fancy, shiny new equipment, and gear that you think you need for the homestead either. If you need a tractor, you do not have to buy one that is brand new. Buy a used one and learn how to do the repairs yourself. This leads us into the next thing you will want to do to become a better homesteader.

    Learn a New Skill Each Day

    You are never done learning when it comes to homesteading. There is always something new that you can learn, and you should make it a point to try to learn something each day. It might be something simple, such as how to cook a new meal or how to clean a fish. It might be something more complex, such as making repairs to that tractor we mentioned earlier. Strive to learn something new and find people who are willing to teach you things. You can also share the knowledge you have with them.

    Learn this simple step by step process to recondition old batteries and NEVER buy batteries again>>>

    Focus on the Task at Hand and Work Hard at It

    When it comes to homesteading, you can’t put things off until later in most cases. If you do, you will have too much work piling up and it will be overwhelming. You need to have a plan of action for each day and you need to focus on each of the tasks you need to get done. If there are others in the family, spread out the tasks and chores among everyone and work together to get things done.

    Consider New Ways to Boost Your Income

    Another way to improve as a homesteader is to find some ways to make some extra income that you can invest into the homestead or put into your savings. If you are doing woodworking or making soap or candles, for example, you could sell those goods online and at craft shows. There are plenty of ways that you can make money doing what you love.  Take a look at the following links to learn some super simple crafts:

     >> 5 Step DIY Soap

    >> 16,000 Woodworking Plans

    These are just some of the ways that you can become a better homesteader. Start implementing these tips now, and keep on learning.


  • How to Build a Potato Tower

    How to Build a Potato Tower


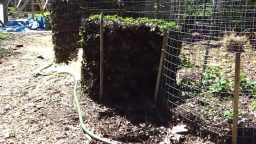
    Potato towers are a way to grow more potatoes in a smaller area by growing vertical.  There are a variety of techniques to build potato towers using different materials but the basic principles are the same.  This article will describe how to build a potato tower using fencing or hardware cloth.


    • You will need some hog wire, no climb fence, or hardware cloth that is 4 feet tall and at least 6 feet long, at least 2 stakes to support the fencing but preferably 4, wire or zip ties to secure the fencing to the stakes, compost, straw, and sprouted seed potatoes.
    • First, drive your stakes into the ground. If you have 4 stakes, put them in a square pattern with dimensions that will allow the fencing to wrap completely around, if you have only 2 stakes you will make a round tower with the stakes on opposite sides.
    • Secure your fencing to the first 3 stakes leaving one end open for you to work in, or both of the stakes with one end open.
    • Add soil or compost in the center and straw around the outside so that the soil will not spill out. Once you have 8 inches of depth plant your seed potatoes and cover them with more soil or compost.
    • Secure the fencing to close up the tower

    Now all you have to do is wait until the potato plants have grown out of the soil to a height of 6 to 8 inches, once they have, add more soil until the plants are only an inch or so out above the surface, and add more straw to the perimeter to contain the soil.  Keep the tower wet, it will drain much more than the ground will and will need to be watered regularly.  To harvest, simply remove the fencing, no need to dig and risk damaging your potatoes.

    If you enjoyed this, you might also like….

    Last Resort Home Defense and More…

    Natural Healing Secrets You Need to Know…

    The Healthy Primal Diet Everyone Should Try…