Page 3 of 15
1 2 3 4 5 15
diy – Page 3 – Homesteader Depot

Tag: diy

  • Super Simple DIY Fishing Net

    Super Simple DIY Fishing Net

    Time is always scarce on a homestead so spending days on end catching 1 fish at a time is not the best use of your limited time.  How can you catch crazy amounts of fish in a short amount of time so you can get back to doing other necessary things on your homestead?

    If you use fishing and fish as a regular food source, a net is basically a mandatory piece of equipment. If you find you need a larger net than you want to spend your hard-earned cash on, you can DIY it for a fraction of the cost using some twine and nails.


    What you will need:


    • Nails
    • Hammer
    • Netting or other sturdy Twine
    • Scissors
    • Area large enough to work


    To start, decide how wide you want your net to be.  Then place two nails into a wall or beam high enough to accommodate the length of the net you want to end up with.


    Stretch a piece of your twine between the 2 nails and secure it so that the length is tightly strung with no dipping.


    Cut additional pieces of twine, each one double the length you want the final net to be.


    For example.  If you want an approximately 6’ x 6’ net, your nails will be 6’ apart and the cross piece of twine will stretch across that length.  Each subsequent piece will be cut to 12’ lengths.


    Next, attach the double lengths at even spaces across your cross string. To do this, fold the length in half, hold the center loop behind the cross string and feed the ends of the length around the cross string and through the loop, then tighten, creating 2 vertical strings hanging down the length of the net.


    Do this for each double length, spacing them evenly as you go and adjust as needed.


    The space between each tied length will determine how big the holes of the net will be.  If you want a tighter net to hold smaller fish, place them closer together.  This will also be what determines how many double lengths you need to make.


    As stated above, each double length creates 2 vertically hanging strings, or one set, when tied to the cross string. We are going to refer to each of the hanging sets as 1, 2, 3, 4 etc. and each set has a left string and a right string, so there will be 1 left, 1 right, 2 left, 2 right, etc.

    Start by taking string 1 right and 2 left and holding them together.  Make a loop around your finger with the two pieces being held together as one and feed the end through to create a knot, joining the 2 pieces below the cross piece.  Adjust as needed to balance the knot evenly between the vertical lengths to create an upside-down triangle between the knotted pieces and the cross piece.


    Continue this process with 2 left and 3 right, then 3 left and 4 right, making a line of knots across the width of your workspace until you have your first row completed.  At this point, strings 1 left and your last set’s right string will be hanging free on either end of the area and all the set will be joined to their neighbor by a knot.


    Start the second row by taking 1 left and 1 right and knotting them, then 2 left and 2 right, 3 left and 3 right, and so on.


    Continue this pattern until you get to the bottom of your twine, tie off the ends and presto!  Your very own fishing net.


    This technique can be used for any size net you may need.


    Alternatively, if you tie your double lengths to a pre-existing circular frame, you can use the same process to create a dip net, just make sure to keep alternating knot rows and tie off the bottom when you reach the depth you want.


    Happy Fishing!


    More interested in sport fishing?  Get the insider, professional fly-fishing tricks, tips, and techniques HERE.


  • DIY Animal Shelter

    DIY Animal Shelter

    Many structures you see on larger farms will often rival a designer house in style and amenities. However, if design awards are not what you are looking for but only to keep your friends protected from the elements, this basic structure will do.  A simplified shelter with basic material will satisfy all of these requirements.

    What You’ll Need

    • 3 Posts = Eight-Foot (8’) Long Pressure Treated Four-Inch by Four-Inch (4”X4”)
    • 3 Posts = Ten-Foot (10’) Long Pressure Treated Four-Inch by Four-Inch (4”X4”)
    • 6 Roof Boards = Eight-Foot (8’) Long Pressure-Treated Two-inch by Six-inch (2”X6”)
    • 17 Roof Joists = Ten-Foot (10’) Long Pressure-Treated Two-inch by Six-inch (2”X6”)
    • 34 Joist Connectors
    • Framing Nails
    • 34 Metal Hurricane Straps
    • 160SF of Roofing Materials
    • Roofing Hardware
    • Siding (optional)
    • Basic Tool Kit
    • Circular Saw

    Laying Out the Grid

    To begin, plan the location of your shelter by laying out a 2 by 3 grid with the point 8’ apart.  This will be where the poles are positioned.  When you are finished you will have an 8’ x 16’ area with 2 rows of 3 posts each

    Dig the Post Holes

    The post holes should be a minimum of 2’ deep and 1’ wide. If you live in a consistent freeze thaw cycle area, increase your minimum depth to 4’.

    Set Your Posts

    Set your 4” x 4” posts into place, all the 8’ long post in one row of three and all the 10’ long posts in the other row of three.

    The 10’ posts will form the front of the barn, so make sure you place them on the side you plan to be the front.

    Pour enough pre mixed cement to fill the hole at least 1’ (12”).

    Wait at least 2 days for the fill to set.  Check the manufacturer’s directions for precise mixing and setting instructions.


    Once set, backfill the rest of the hole with the loose dirt removed when dug.

    Compress the dirt as you fill in the space, checking regularly to make sure your post remains square and straight.  You can use your string line to gauge if it’s straight.  Once each pole is backfilled they will probably be slightly different heights due to differences in the hole depths and settling.  Determine the height of the shortest pole in each row and trim the top of the other 2 to make each row even.  Remember, you want an angled roof, so keep the front row at least 1-2 feet higher than the back.

    Roof Support Beams

    Attach your six 8’ long 2”x6” boards around the top of the structure, connecting the posts and forming a large rectangle at the top.

    Roof Joists

    For this simplified angled roof, traditional trusses are not needed.  Use your roof joists to join the front and back sides of the structure across the top.  You can buy connectors to make this job easier and more secure.  Starting at one end of the stall, attach the roof joists 12” or 1’ apart from each other, with the 2 ends flush with the roof boards.  Connect the joists and roof boards with hurricane straps for added strength against high winds.

    Roofing Material

    Finish your roof with the roofing material of your choice.  Follow the manufacturer’s instructions for installation and additional accessories or tools needed for the process.

    Siding

    For basic siding that can be used as a wind break, use additional 8’ long 2x6s placed horizontally around at least 3 sides of the stall.  Start the bottom on the ground or a few inches above it.  Create “stripes” around the barn by spacing each level an inch or two above the previous one until you reach the top

    Once you have the basic plans down, you can easily utilize them for additional structures on your land for extra storage or workspace.

    Try this:  DIY Home Energy System

  • Homestyle Skillet Pizza (Video)

    Homestyle Skillet Pizza (Video)

    Who doesn’t love pizza? Ordering in from your local pizzeria is great, but like so many things in life, homemade is always better. You get fresher dough, you can tailor ingredients to your personal

    A really fun and easy way to make homemade pizza taste delicious and cook perfectly is to cook it in a skillet, like this video shows. Cast iron skillets are so useful in the kitchen, but they don’t have to be restricted to stir-fries and bacon! Baking in cast iron is a great way to add some versatility to your dishes and your cooking talents.

    Enjoy, and bon appetit!

    If you enjoyed this, you might also like….

    Long-Term Survival for Homesteaders…

    Natural Healing Secrets You Need to Know…

    Effective Primal Diet Hacks…

  • Healthy Sweet Tea (Video)

    Healthy Sweet Tea (Video)

    Well, Memorial Day has come and gone, and while it’s not officially summer until June 21st, the bar-b-ques have started, the pools are open, and you’ve probably already done some tanning in your front lawn.

    With summer often comes delicious sweet tea, which is a staple summer drink in the South (apparently, this is what “tea” means in the Southern states. There is no other kind of tea but sweet tea, so don’t ask, or at least this is what I’ve been told).

    The downside of many sweet teas, especially those purchased at the store as opposed to homemade, is they’ve got lots of sweeteners and even sometimes artificial coloring. It’s very easy to make sweet tea at home, and you can even make it healthy. While unrefined organic cane sugar is better than nothing, you can step it up a notch by using stevia instead, as used in this video. Enjoy, and happy summer!

    If you enjoyed this, you might also like….

    Long-Term Survival for Homesteaders…

    Natural Healing Secrets You Need to Know…

    Effective Primal Diet Hacks…

  • Easy and Effective All-Natural Homemade Citrus Cleaner

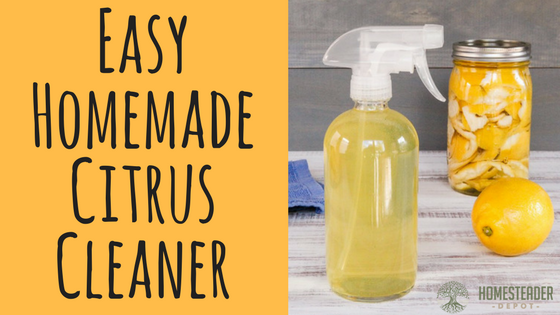
    Easy and Effective All-Natural Homemade Citrus Cleaner

    There are so many reasons to make your own cleaning products at home. You can save money, avoid nasty, harmful chemicals, avoid keeping toxic products under the sink if you’ve got a small child, do less damage to the environment, the list goes on.

    However, one of the key features of pre-made, store-bought cleaning products is their strong smell. Sometimes it can be very unpleasant and overwhelming, of course, especially if you’re not used to them anymore, but if you’re not, you might associate that clean, sweet smell of a scented cleaning product with cleanliness itself.

    And it actually makes sense that a fresh aroma would be associated with cleanliness. While most store-bought products these days are artificially scented to enhance the sensation of cleanliness, many of the scents they use are derived from (or imitations of) plants that are naturally deodorizing, antibacterial, or antimicrobial.

    This is why I absolutely love making my own homemade citrus cleaner. It not only smells amazing, but the naturally occurring oils in citrus help to clean better, too! Not to mention, it costs literally pennies to make. You can use discarded citrus peels from oranges, lemon, or even grapefruit after you’ve already enjoyed the juicy goodness of the fruit, and just some vinegar and distilled water, and you’re good! How easy is that?

    Here’s how:

    Ingredients

    • Leftover citrus peels
    • Distilled white vinegar
    • Distilled water
    • Jar
    • Spray bottle
    • Time

    Instructions

    1. Take your citrus peels and stuff into your jar. Try to really stuff them in there so they will stay in place; you don’t want them all floating at the top. You will probably want to use a quart mason jar, but there’s no exact science here. Anything you can fit at least a few cups of liquid in will work.
    2. Next, cover with pure distilled white vinegar. And make sure you actually do cover the citrus. If you don’t manage to cover it all, it’s not the end of the world, but again, you don’t want all the peels floating at the top.
    3. Set aside for 1-3 weeks. The longer you let it sit, of course, the more potent the citrus scent will be.
    4. When you’re ready to use, simply strain out the peels, pour into a spray bottle, and dilute with distilled water (you can really use tap if you’re not too fussy). You want to go for about 2 parts citrus vinegar and 1 part water, so if you don’t have enough citrus vinegar, you can use some regular white vinegar. If you have too much, just pour back over the citrus with some more vinegar and start over! You can reuse the citrus peels at least one more time before they lose their potency.

    That’s it! Hope you enjoy this fresh, clean alternative to simple water and vinegar as much as I do.

    If you enjoyed this, you might also like….

    Discover How This “Magical” Towel Cleans With Only Water, Replaces Expensive Paper Towels and Toxic Cleaners, and Can Help You Save Hundreds Of Dollars Per Year While Saving Our Environment>>>

  • Homemade Suet Cakes for Chickens

    Homemade Suet Cakes for Chickens

    Suet cakes are a great treat for your chickens, especially as the summer heat creeps in and they have a hard time sticking to their normal activities.

    Chickens love to peck and scratch, it’s truly what they live for. If you have chickens in a coop who can’t freely forage this way, they might end up getting bored and unhappy. And bored and unhappy chickens means less eggs and less delicious meat! It is vital not just for the animal’s quality of life but also for the “services” they provide you to keep them occupied and entertained.

    Homemade suet cakes are a great way to do this! The tightly packed little cakes full of delicious treats (well, treats to a chicken) will keep them happily busy pecking away to get them.

    This recipe is a very easy and healthy way to provide your chickens with this diversion. It contains coconut oil, which is a great source of fat for your chickens, as well as naturally antifungal and antibacterial, which is super crucial for keeping their digestive systems, feathers, and feet clean and healthy.

    A note: this is just a treat for your chickens, and shouldn’t be used as a replacement for their regular feed or time spent outdoors if you’re able to let them roam at all. It’s just a fun way to supplement their regular diet and daily activities.

    Do Laundry With NO DETERGENT…Heres How>>>

    Ingredients and supplies 

    • coconut oil
    • mix of grains (pre-mixed chicken feed, or any combination of grain or seed your chickens enjoy)
    • Muffin tin
    • Room in your freezer for the muffin tin

    Directions 

    1. In a saucepan over low heat, melt your oil. How much you need will depend on the volume of the grain you use, but you can start with about 2-3 cups.
    2. Once the oil is liquid, stir in your grains.
    3. You will want to completely coat the grains with oil, so that there’s hardly any oil pooling around them. However, you don’t want there to be any dryness in the mixture. Try to think of the oil hardening; you’ll want a ratio that will allow for the oil to hold all the grains in place and form a cake.
    4. Spoon your mixture into the muffin tins. Flatten with a rubber spatula at the top.
    5. Freeze for about an hour, then remove.
    6. Tip your muffin pan upside down to remove the cakes. At this point, you can give one to your chickens and put the rest in a ziplock bag to keep in the freezer.

    In the summer heat, your bored chickens will love this healthy, fun, and not to mention cold, treat!

  • Chicken Coop for $1 and an Hour to Make (Video)

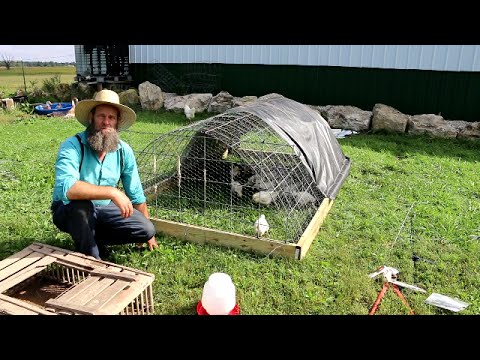
    Chicken Coop for $1 and an Hour to Make (Video)

    Ever had a poultry overload on your homestead? Or maybe you’d like to get started raising chickens but have very little space, time, and funds.

    This video from Off Grid With Doug and Stacey shares their very easy, cost-effective chicken coop idea that takes very little time to make. This is perfect if you’re adding a few extra hens to your homestead but have no place to put them, or need to quarantine a new or a sick animal. It’s also perfect for small yards or gardens, and of course, anyone with a small budget! Enjoy:

    If you enjoyed this, you might also like….

    Is Your Home Secure?

    Natural Healing Solutions…

    Why Everyone is Switching to the Primal Diet…

  • How to Make Aromatic Potpourri

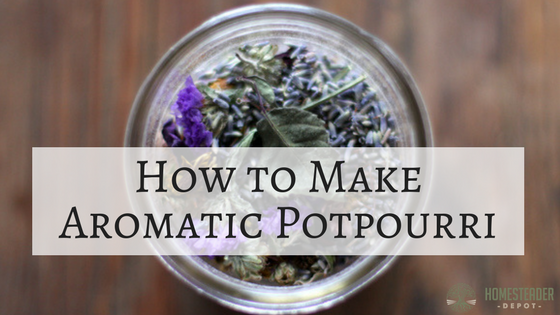
    How to Make Aromatic Potpourri

    If you are a flower gardener or simply love the smell of fragrant potpourri, you should definitely learn to make your own. You can harvest and process your own flower petals or buy your own and make several sachets to give to friends and family. There are few more thoughtful, easy homemade gifts than an aromatic sachet of potpourri!

    The most common bases for potpourri are rose petals and sweet geranium leaves. If you grow roses, this is a wonderful way to use the petals once the flowers begin to die. You can add to these whatever you like, and we’ve got some great ideas for you.

    There are two main types of potpourri: dry and moist. Dry potpourri is very easy, as long as you are sure you have very dry ingredients. You simply dry out whatever fragrant flowers and herbs you’d like to use in a dehydrator or oven, and pack into sachets. Moist potpourri can be a little trickier.

    Moist potpourri can be a little trickier. You need to have the right balance between moisture and dryness, so it might take a little trial and error. What you want is to get your ingredients to a sort of leathery consistency, so that they are not too wet to store but not so dry that they lose fragrance. Once you have achieved this consistency, however, if you pack them into jars with some salt to absorb any excess moisture, they are delightfully aromatic. You might wonder why they’re worth the effort, well, while dry potpourri is certainly easier, moist potpourri is far more fragrant.

    Dry potpourri is ideal for putting in drawers or storage boxes to keep things smelling good when they are put away, or tossing in bedding. You can also leave it sitting in a bowl in your living room or bedroom for a pleasant aroma. Wet potpourri, however, is best suited for this latter purpose.

    Long-Term Survival for Homesteaders…

    How to Make Potpourri

    Since moist potpourri can be a bit tricky, we will focus on how to make dry potpourri to get you started.

    First, you will want to gather together your ingredients and make sure they have properly dried. Depending on what you are using, this might be very easy, or it might take a bit more patience. Many flowers and herbs can simply be hung upside down for a few days, left to dry in a paper bag, of spread out on some cloth or butcher paper in a cool, dry place for a few days. Or, if you have a dehydrator, this can speed things up, just be careful not to dry them so much that they become impossible to handle.

    Factors such as the thickness and moisture content of your ingredients, your given environment, and the method you choose to dry your ingredients with, will all have an impact on just how effectively they dry. So use your best judgment.

    Once you have your ingredients properly dried and gathered together, place them all in a large bowl or on a large tray. Mix together. Then, distribute into bags and tie. A small scoop helps a lot here, but you can just use your hands as well.

    For bags, you can buy some specially made, or simply sew very simple ones out of muslin and secure with a pretty ribbon. You can get creative though, lace is really nice-looking and linen is a classic.

    You can also reserve some to keep in bowls around the house. This is a lovely way to add scent and a touch of vintage decor to your home. Adding some potpourri to an antique crystal bowl is particularly chic, and an incredibly easy way to dress up your home decor. You can, of course, use any bowl, even a small mason jar with a ribbon tied around it would be very farmhouse chic and incredibly cheap and easy to do.

    Speaking of mason jars, if you don’t feel like fussing with bags or bowls, simply filling some small mason jars with potpourri and covering with a piece of fabric and a ribbon, or even a mason jar ring, is a very quick and easy way to store and use your potpourri. With a small enough jar, you can keep this in a dresser drawer to keep your clothes smelling fresh, or place around your home for fragrance and style. This is also a great way to store damp potpourri if you are bold enough to try your hand at making it.

    Here are some great ideas for ingredients to use for both wet and dry potpourri:

    • rose petals
    • sweet geranium
    • cloves
    • rosemary
    • lemon peels 
    • bay leaf
    • thyme
    • lavender
    • verbena
    • rosemary
    • violet
    • mint
    • cinnamon cloves
    • orange peels
    • allspice 

    Potpourri makes a wonderful gift for friends and family, or simply a great natural way to improve the fragrance in your home. If you have lots of fragrant flowers and herbs around your homestead, see what you can come up with! You’ll be happy you did.

    Natural Healing Secrets You Need to Know…