Page 5 of 15
1 3 4 5 6 7 15
diy – Page 5 – Homesteader Depot

Tag: diy

  • Making Chicken Feed: Pros and Cons (Video)

    Making Chicken Feed: Pros and Cons (Video)

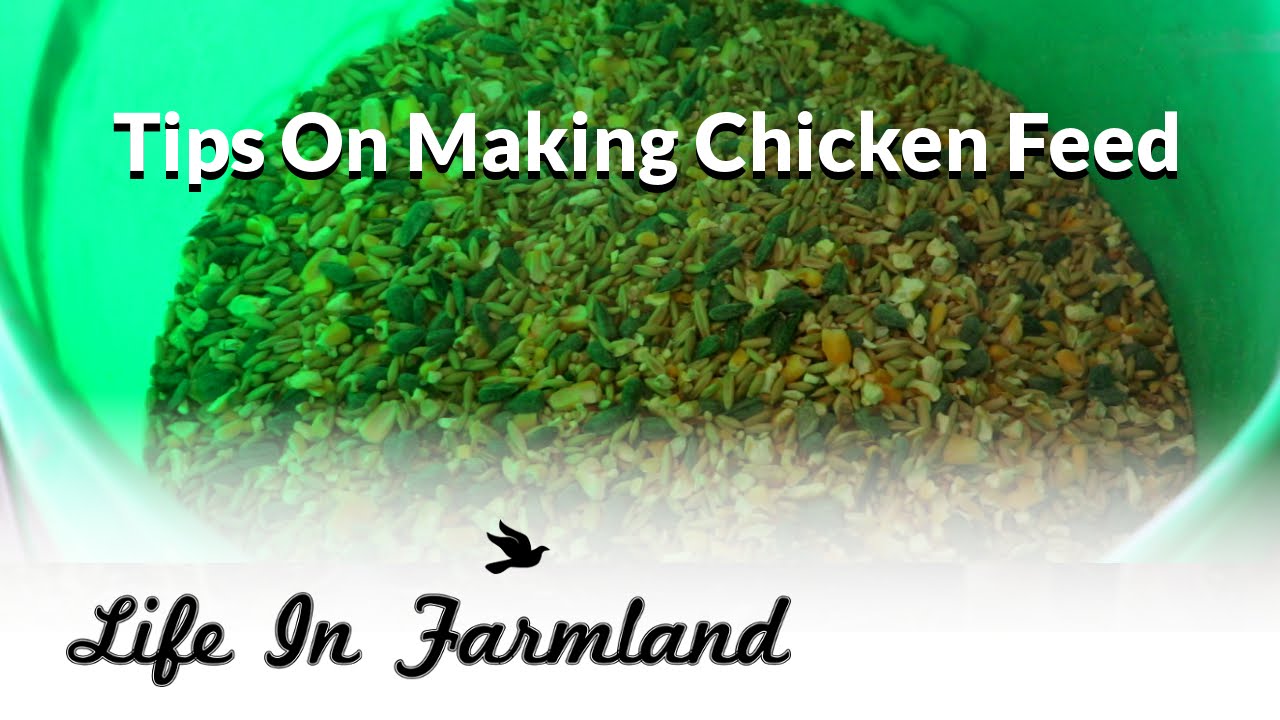
    As with all things DIY, I’ve always assumed that making your own chicken feed would be healthier, and more affordable. However, I’ve been reading that while that can be true, it’s not always the case.

    These homesteaders and YouTubers have been making their own chicken feed, and received a lot of questions about how to do it and how it’s been working out, so they made this video in response. They break down the pros and cons of the method they’re using, how they store it, how they’re chickens like it, and the ingredients of their feed.

    It seems to me these ingredients could end up being more affordable in the long run than store-bought chicken feed, if you can buy the ingredients in bulk at a good price, but I think whether or not you could find the ingredients in bulk. Food and grain prices vary from region to region, so you’re most likely going to have to improvise and see what works for you, your region, and your chickens and needs for them.

    At any rate, I always really enjoy hearing directly from other homesteaders about projects like this, so this was a very informative and useful video overall. Check it out:

    If you enjoyed this, you might also like….

    Do You Have What You Need to Hold Down the Fort?

    Natural Healing Secrets You Need to Know…

    Effective Primal Diet Hacks…

  • The Benefits of Homemade Soap

    The Benefits of Homemade Soap

    When was the last time you looked at the ingredient list on the soap that you buy at the grocery store? Most people never stop to take the time to look at this list, just getting what they’ve always bought or whatever marketing plan and commercials have told them a good soap should be. When you start to look at the ingredient list though, chances are good that you will find quite a few things that you can’t pronounce, including chemicals that may not be as good for your skin as you believe. It makes far more sense to go natural with your soap, as it can have some benefits.

    Cold process soap, the type that uses lye, is the best type of homemade soap. You do not have to worry about the caustic qualities of lye, as the saponification process takes care of this. It is relatively easy to make, and it works well to break down dirt, which can provide you with a clean feeling on your skin without any “residue” that you might feel from chemical-laden store bought soap. Essential oils can be added to the soap, which provides a nice scent, along with better moisturizing capabilities, making it great for the skin. Since it is natural, it also happens to be good for the environment.

    When it comes to getting these quality cold process soaps, you have a couple of options. You can find sellers online who are making these soaps, for starters. This might be a good solution when you want to test out just what a difference the natural soaps can make. You could also find people in your area who make soap and buy or barter with them. Of course, as a homesteader, it is also a good idea to take some time and learn how to make this soap on your own. This is a fantastic skill to have.

    If you liked this, you’d also like…

    The Secret to Sticking With the Paleo Diet…

    The Ultimate Natural Medicine Course…

    The Little-Known Benefit of Doing Yoga…

  • Simple Yet Healthy Homemade Ketchup

    Simple Yet Healthy Homemade Ketchup

    Ketchup is an American staple, but did you know you can make it very easily at home? Unfortunately, a lot of store-bought ketchup is made with loads of sugar and sometimes even artificial coloring and flavoring.

    If you’re craving some delicious ketchup but want a healthy, whole-food version that doesn’t sacrifice health for taste, I’ve got the perfect recipe! This recipe uses all natural, easy-to-find ingredients, and instead of lots of cane sugar like regular ketchup typically has, it requires just a bit of honey and coconut sugar, which are much healthier and both have a very low GI index compared to other sweeteners.

    At the end, I’ve got a suggestion for an easy fermented version, if you’d like to make this ketchup even healthier by adding some natural probiotics.

    Give it a try today and you’re sure to be making it regularly.

    Effective Primal Diet Hacks…

    Ingredients
    • 2 6-ounce cans of tomato paste
    • 12 ounces filtered water
    • 6 tbs apple cider or white vinegar
    • 6 tbs honey
    • 1 tbs coconut sugar
    • 2 tsp salt
    • ¼ tsp garlic powder
    • ¼ tsp onion powder
    Directions
    1. Empty the tomato paste out into a medium saucepan.
    2. Adding a few tbs of water at a time, blending completely with the tomato paste before adding any more water. This will make it easier
    3. Add the rest of the ingredients once all the water is blended completely with the tomato paste, and stir until smooth.
    4. Put the saucepan over medium heat, and bring to a simmer.
    5. Reduce heat, keeping it a simmer, and cook for 10-20 minutes, stirring frequently. Watch for splattering, it’s virtually unavoidable, but try to keep the simmer as low as you can to avoid a big mess.
    6. Remove from heat, and let cool to room temperature.
    7. Once cool, pour into a jar or bottle, cover, and keep in the refrigerator.
    8. For a very easy fermented version, before refrigerating, stir in a few tablespoons of whey. Then, cover and let culture at room temperature for 12-24 hours before refrigerating.

    That’s it! Enjoy your delicious homemade ketchup on french fries and burgers or any other way in which you use ketchup.

    Natural Healing Secrets You Need to Know…

  • How to Use Activated Charcoal

    How to Use Activated Charcoal

    I’ve mentioned activated charcoal a few times on this site as a great natural first aid product to have on hand, which it definitely is.

    It’s probably on my top 5 list of things to have in a natural medicine cabinet, because it can be used in a number of different ways, and is great for homesteaders.

    Activated charcoal has been used for centuries due to its ability to absorb toxins and impurities. In many emergency rooms, poison victims may be treated using a large dose of activated charcoal, which can absorb the toxin to be passed naturally through the bowels.

    For this reason, it is an excellent first aid item to have on hand at all times. If someone in your home ingests toxins or potentially spoiled food, activated charcoal can be taken internally to reduce the absorption of the poisons. You will always want to check with poison control or a medical practitioner in the case of anything seriously life-threatening, but if you have a simple case of food poisoning from some bad Chinese food, activated charcoal will definitely reduce your symptoms greatly.

    It is also a great beauty product; you can use activated charcoal to naturally whiten teeth on a regular basis. Simply sprinkle some on your toothbrush, brush all over your teeth, let sit for 10 minutes, and rinse. This is an incredibly effective and simple method of teeth whitening that’s far, far safer, not to mention cheaper, than your average drug store solution.

    Activated charcoal can also be used in face masks to naturally remove impurities and blemishes from the skin.

    Mixed with baking soda, activated charcoal can draw out poison from bug bites, so it’s great to have on the homestead for the occasional wasp sting or spider bite. You can also use it as the base for an old-fashioned drawing salve.

    Activated charcoal can be easily purchased at most drug stores or health food stores, or ordered online. It’s quite affordable, and always prudent to keep a bottle in your cabinet. You’ll be glad you did!

    If you enjoyed this, you might also like….

    Can You Defend Your Family When SHTF?

    Natural Healing Secrets You Need to Know…

    Effective Primal Diet Hacks…


  • How to Make Your Own Seed Tape

    How to Make Your Own Seed Tape

    Continuing in the theme of spring from our last few posts, let’s talk about seed tape today, and how easy it is to make your own!

    Seed tape is a great way to easily plant your first spring crops, because you can guarantee proper placement and spreading of the seeds, as well as greatly reduce your time spent planting.

    Not to mention, the tape itself helps germination, by keeping the seeds protected and moist.

    Here is a very simple tutorial for how to make your own seed tape, that will certainly save you time and money. It only takes a few basic supplies, that are usually easy to find at any grocery store. Let’s get started so you can get planting!

    What you need: 

    • White party streamers
    • Measuring tape
    • Thin-tipped marker
    • Seeds you plan on planting
    • 1 tbs cornstarch
    • 1 cup water
    • 1 small paintbrush

    Directions

    1. In a small saucepan, combine the cornstarch with one cup of water, and mix well.
    2. Cook mixture over medium heat, stirring constantly, until it becomes thick and gel-like.
    3. Once it has a gel-like consistency, remove from heat and let cool to room temperature.
    4. As your cornstarch “glue” is cooling, cut your streamers into the length you’d like your rows to be.
    5. Using your marker and ruler, and referring to the seed packets, mark the points on the streamer you’d like to put your seeds. So, for example, if you are planting kale seeds that need to be 2″ apart from each other, make a hash mark on every 2″ on your streamer.
    6. One the glue is cooled, using your paintbrush, dab some on the streamer at each hashmark, and stick the seed to this, completing with another dab of glue if needed. Repeat until you’ve completed the whole length of the streamer.
    7. When you’re finished, paint a thin strip of glue along one side of the streamer, so you can roll it in on itself, making a long tube to plant.
    8. Once the glue has dried completely, it’s ready to be rolled up and stored or planted.

    That’s it! Happy planting 🙂

    If you enjoyed this, you might also like….

    Do You Have What You Need to Hold Down the Fort?

    Natural Healing Secrets You Need to Know…

    Effective Primal Diet Hacks…

  • The Best Essential Oils to Start a Collection

    The Best Essential Oils to Start a Collection

    There’s a lot of hype about essential oils out there, and it really is for good reason. Essential oils are a wonderful addition to any natural medicine cabinet.

    But it can be overwhelming trying to get yourself set up with some essential oils, and you can easily get sucked into some of the network marketing companies that sell essential oils for a very high price. or a bundle of several oils at once. You can easily spend up to a few hundred dollars on small bottles of oil that you won’t even use!

    There are literally dozens of types of essential oils out there to get, so how do you know which ones you will actually use? You might have one oil recommended to you for a certain remedy, but if you invest in a bottle, will you use it again?

    Here are some of the most common essential oils, that have the most versatile uses, and are also the easiest to find. There’s a lot of obscure oils out there that have a great place in natural medicine, of course, and can offer great help to certain remedies. But these oils are the best, all-purpose oils, that you will most likely find yourself reaching to time and time again, who have a long list of uses.

    When you are purchasing essential oils for the first time, make sure to pick something you’ll actually use. Good quality essential oils will work wonderfully well, and a little bit goes a long way, so one small bottle actually might last you years. Consider one of these for your starter oil, and you definitely won’t run out of ways to use it.

    A quick note on the term “carrier oil” which I use in this guide. A carrier oil is a non-essential oil that you use to apply essential oils topically. Since essential oils are highly concentrated, you usually only need 1-3 drops for topical use, and if you don’t have the resources to make your own balm, adding the oil to a carrier oil can help to quickly apply an essential oil directly to you skin. Some great carrier oils are olive, almond, or coconut oil, but you can use whatever you have on hand in a pinch.

    Some great carrier oils are olive, almond, or coconut oil, but you can use whatever you have on hand in a pinch. Simply pour some of the carrier oil into your hand, and add 1-3 drops of the essential. Mix it around with your finger, and apply.

    If you are considering starting your essential oil collection, I highly recommend investing in a good carrier oil as well. My personal favorite is almond oil, since it’s great for your skin and generally affordable.

    Now, on to our essential oils!

    Lavender

    I wrote a whole post about lavender alone, so you can refer to that for more detail. But lavender always tops my list for useful essential oils. It smells amazing, has been used for centuries, and has a list of uses as long as your arm. You really can’t go wrong with lavender oil as a staple in your medicine chest.

    Tea tree

    Tea tree oil is another great starter essential oil. It is naturally antibacterial and antifungal, so it’s great for everything from DIY all-purpose cleaner to treating athlete’s foot or dandruff. As a cleaning product, it works amazing well to sanitize and deodorize every room in your house, and it smells really clean and lovely too. Way better than Pine-Sol, and healthier too!

    Peppermint 

    Peppermint is another favorite of mine for many reasons. It is great for diffusing, especially if you’re battling a cold, and can be added to a carrier oil for a natural alternative to Vick’s vapor rub, or to sooth sore muscles and other aches and pains. You can dab a little on a sore tooth or add a few drops to some water for a very effective homemade mouthwash. It is also a great addition to homemade toothpaste if you miss the minty-freshness of conventional toothpaste. It is also great as a natural spider repellent around the house.

    Cinnamon

    Cinnamon is another great essential oil for dental issues, it can numb an aching tooth or flavor mouthwash and toothpaste. If you’re a fan of air fresheners or scented candles, cinnamon is a much safer and chemical-free alternative to these toxic, synthetic scents. It is another great oil to diffuse when you are suffering from a cold, it will deodorize the air and also help break up phlegm or congestion.

    There is also one amazing,  near-miraculous use for cinnamon oil: ant repellant. Nothing banishes ants from your kitchen like a few regular sprays of water with a bit of cinnamon essential oil in it. You’ll be amazed; the ants will never come back. It is on this list for that reason alone, although it’s still a very effective oil in other ways as well! Read more about this in my latest post on banishing ants for good.

    Eucalyptus 

    Eucalyptus, like tea tree oil, is a great antifungal and antibacterial oil that has a lot of medicinal uses. It’s ideal for diffusing when sick, or adding to your chest in a carrier oil if you have a cough, congestion, or to ease asthmatic symptoms. Many people love the fresh, earthy scent of eucalyptus, so it’s not only medicinal when diffused, but a wonderful air freshener. You can also use it topically in a carrier oil to relieve sore muscles or tension.


    Essential oils have so many uses around the house, and these are some of the best to start with. You might not even want to buy any more after getting any one of these staples, or you might find yourself hooked! Let us know if you’d like to know more about less common essential oils and their uses, and we’ll be sure to get that posted for you as well.

    If you enjoyed this, you might also like….

    Can You Defend Your Family When SHTF?

    Natural Healing Secrets You Need to Know…

    Effective Primal Diet Hacks…


  • Homemade Rosewater Recipe

    Homemade Rosewater Recipe

    Rosewater is exactly what it sounds like: water infused with roses. It’s simple, but it’s incredibly effective to tone, moisturize, and give a wonderful scent to skin and hair.

    You can use it in many different ways, as a toner for your skin, a quick moisturizing spray, to add to homemade lotions or remedies or just as a natural perfume.

    You can make a bottle of homemade rosewater very easily and use for yourself or as gifts, or even as a chic and easy addition to a farmer’s market stand for your homestead.

    Wherever you live, if you happen to grow your own organic roses, this is a great way to use them up once they’ve faded. Or, if you don’t grow roses but still want to make this rose water, try to find fresh cut roses that were grown organically, or buy some dried rose buds or petals online that are certified organic.

    If you intend to use the rosewater on your skin, you definitely don’t want to use conventional rose petals, because as your skin is your largest organ, you definitely don’t want to be absorbing trace pesticides through your open pores.

    Do you have BACK PAIN? Give this a try>>>

    A quick note: this recipe will work with any amount of roses you have, just follow the directions and it will work.

    Ingredients 

    • organic roses
    • distilled water

    Directions

    1. If you are using fresh roses, remove the petals from the leaves completely.
    2. Put your petals in a saucepan, and cover with just enough distilled water to cover.
    3. Bring to a simmer and cover.
    4. Let simmer for 20-30 minutes until petals have lost their color.
    5. Remove from heat and strain the petals out. Let cool, and store in a glass bottle.

    That’s it! You can now use your rosewater to add to luxurious baths, homemade facial toner, or even to cook with; rosewater is a staple in many Middle Eastern dishes. Enjoy!

    If you enjoyed this, you might also like….

    Natural Healing Secrets You Need to Know…

  • How to Use Bentonite Clay

    How to Use Bentonite Clay

    If you don’t already have bentonite clay stashed away in your natural medicine cabinet, you should.

    Bentonite clay, which is a sedimentary clay made up of weathered and aged volcanic ash, is an amazing natural health tool with a wide variety of uses around the homestead. It’s strong electromagnetic pull naturally draws out toxins, heavy metals, and impurities and can be used both topically and internally.

    Here are just a few of the ways you can use bentonite clay for your natural medicine chest

    Toothpaste

    Bentonite clay can be used as a base for natural, homemade toothpaste, including this tooth powder recipe.

    Deodorant

    Many natural, DIY deodorant recipes call for bentonite clay, and it can actually help reduce the negative impact of commercial deodorants by drawing out toxins they can leave behind.

    Facial Mask

    Mixed with any number of other beneficial ingredients or simply made into a smooth clay with water, bentonite clay masks can help smooth and condition skin and reduce acne and other imperfections.

    Drawing salve

    As part of a healing drawing salve, bentonite clay is wonderfully beneficial for many skin irritants and conditions.

    Hair mask

    You can actually use bentonite clay as one method for cleaning your hair with the no-poo method, or as an occasional hair mask to help minimize residue left by commercial hair products or to combat dandruff or chronically oily hair.

    In Soap

    When added to homemade soap, bentonite clay can help create a very soothing, medicinal soap.

    In Calamine Lotion

    We posted about homemade calamine lotion awhile back, and bentonite clay works great as a base for this.

    Detox Drink

    You can actually drink bentonite clay either in conjunction with other detox recipes or on it’s own, and it can do some serious detox in your body (just make sure to drink enough water and eat enough fiber to filter all the toxins out).

    Detox Bath

    Probably one of the easiest and most effective ways to use bentonite clay is to throw it into a bath and soak for 10-15 minutes. This will draw toxins and heavy metals out of your body and into the water, so follow with a quick shower to rinse it off!

    If you enjoyed this, you might also like….

    Do You Have What You Need to Hold Down the Fort?

    Natural Healing Secrets You Need to Know…

    Effective Primal Diet Hacks…