Page 1 of 10
1 2 3 10
food – Homesteader Depot

Tag: food

  • How to Grow the Perfect Cucumbers

    How to Grow the Perfect Cucumbers

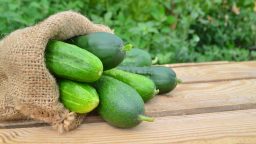
    Cucumbers are the perfect vegetable even though scientifically, they’re considered to be a fruit. No matter what you classify them as what matters is that they are extremely tasty and rather versatile. They taste great on salad, can be eaten alone, and are used in dozens of recipes. In addition, there’s nothing quite like a cucumber that you grew yourself, in your backyard garden. Although the kind grown outdoors tend to have spines and bumps on them, making them not-so-pretty to look at, they taste good. In order to produce a garden full of tasty cucumbers, you need to know what to do.

    Start Them as Seeds

    Cucumbers survive the act of transplantation well, so they can be started as seeds in small pots or in larger seedling containers. You can either put them outdoors or in a greenhouse, depending on the overall air temperatures. If it’s too cold, the seeds won’t sprout. It has to be a consistent 68 degrees Fahrenheit in order for them to grow properly. If you have the luxury of growing your seedlings indoors, under a grow light, then this won’t be an issue. The best thing is that cucumber plants grow fairly quickly, so if you have a shorter growing season, they will still bear fruit.

    Related Article:  7 Tips to Grow the Perfect Tomatoes

    Thin Your Seedlings

    Once your seedlings start to grow, you’ll need to thin them. There should be only one per small pot or section of your seedling container. Choose whichever one looks the strongest and remove the others to give it plenty of space to grow.

    This Crazy 56-Year-Old Geography Teacher in Memphis, Tennessee Believed He Could Change the Energy World… And Somehow He Did It.  Don’t believe me, check it out here>>>

    Plant Them Outside

    Once the weather warms up for good, it’s time to move your cucumber plants outdoors. They do grow well in containers and grow bags, as long as those pots are large enough. Choose ones that hold at least seven gallons of soil, and note that you’ll need one of them for each plant. Fill the pots with potting soil (which has properties that promote drainage and prevent root rot) and then plant your cucumber seedlings in them. If you’re placing your cucumbers in the ground, choose a location that gets plenty of sunlight.

    Since cucumber plants turn into vines, they’ll need room to grow. Now is the time to put a trellis or cucumber frame behind them. As the plants start to vine out, encourage them to grow up the trellis or frame. However, if you’re growing them in pots on a porch, you won’t need these extra accessories, as the cucumbers can be “coerced” into growing over the porch rails.

    Suggested Article:  Why are my Vegetables Not Growing?

    Watering and Care

    Cucumber plants are prone to powdery leaf mildew, so keep an eye on those leaves. Make sure that the soil is kept moist, particularly once they start to grow fruit. Fertilize your cucumber plants at least once per season, or more often if you’re growing them in a pot or grow bag. The nutrients in that soil will vanish fairly quickly, so you’ll need to fertilize them at least once a month. If you see signs of powdery leaf mildew or other problems, make sure to deal with them quickly, as you don’t want your plants to get damaged. Other than this, cucumbers are fairly easy to care for. They’ll produce plenty of slightly spiny fruits throughout the growing season.

    Picking Your Cucumbers

    Remember to keep an eye on your cucumber plants. Once your cucumbers have reached a length of around five to six inches (or larger or smaller depending on the variety) and are nice and green, a clip from the plant. This will encourage the plant to keep growing, producing even more cucumbers for you to enjoy.

    “Earth’s Largest Database of Woodworking Projects”

  • 4 More Simple Ways to Improve Soil Quality

    4 More Simple Ways to Improve Soil Quality

    Growing your own fruits and vegetables is much easier when you have great soil. If yours is filled with too much clay, is infiltrated by tree and shrub roots, or has nutritional deficiencies, then you won’t be able to produce as many of them as you’d like. Or, you could end up with great quantities of fruits and vegetables, but they won’t be very large. Either way, your plants will struggle. The best thing that you can do in order to reverse this is by improving the overall quality of your soil. There are several useful (and fairly simple) methods to do this. Here they are.

    Use a Cover Crop That Adds Nutrients

    Some crops are called “cover crops” because they add nutrients to the soil when they are allowed to break down and cover it. (After they’re grown in that same soil, of course.) These cover crops, including buckwheat and clover, can be planted during the off seasons. They’ll stay alive through winter and early spring, and then, when you’re ready to till your garden, just plow the plants into it. Not only will they act as mulch, but they’ll help enrich your soil.

    Turn Your Perennials Into Mulch

    Adding mulch to your soil does much more than keep it warm, ensure that it stays moist, and prevent weeds from taking root. It also adds some nutrients to the soil. What you can do in order to make your own mulch (or at least, enhance the type that you buy) is chop up any trimmings from your perennials and add them to it. Things like shrub trimmings, bits of perennial plants, and even small branches pruned from your trees all can be added to your mulch. As they break down, they’ll help your soil’s nutritional content.

    Allow It to Dry Out Before Tilling

    Sure, it’s good to plant your crops after rain, because the soil is nice and moist. This doesn’t mean that you should till it at this point though. Instead, wait until your soil has dried out, and then till it up. Otherwise, you risk taking all of the oxygen out of the soil and damaging its overall structure. You won’t be able to grow as much in this damaged soil. It’s best to test your soil by grabbing some of it with your hand and squeezing before you bring out the rototiller. If it crumbles into dust in your hand, then it’s time.

    Related Article: 4 Critical Methods to Improve Your Garden Soil

    Test Your Soil and Then Add To It

    One of the best ways to improve your soil quality is by testing it, and then adding in what it appears to be missing. There are test kits on the market that can tell you what your soil is lacking. They are easy to use, as most involve placing a scoop of soil in a test tube and then adding some chemicals to it. If you want results that are more detailed than that, you can purchase the type of test kit that you need to send out to a lab. You’ll get your results in a few weeks.

    Suggested Article: How to Test Your Soil Using Only a Mason Jar

    After you find out what your soil is lacking, you can add that exact compound to it. For example, if it lacks nitrogen, just add some organic fertilizer that contains nitrogen to it. The test results might also include some suggestions for improvement, and give you the names of a few products that you can use. However, this depends on the exact test. No matter what, you’ll know exactly how to improve your soil in order to grow the best crops possible. That’s what every homesteader wants.

    Here are some other food options for your “Survival Farm”

  • 8 Items to NOT Include in Your Compost

    8 Items to NOT Include in Your Compost

    Creating a compost pile is always a good idea. You’ll get to reuse food scraps that would otherwise end up in the trash, and then eventually in a landfill. On top of this, compost piles create new, fresh soil that contains plenty of nutrients. Your plants will love it. However, before it gets to that point, you need to understand the basics of composting, which involve knowing what you shouldn’t put into a compost bin. Many of these items are downright harmful to your compost and will cause a number of problems. Avoid adding them to the pile at all costs.

    Citrus Peels

    While fruit waste of all kinds can be added to a compost pile, you should avoid adding in those citrus peels. They take way too long to decompose and can affect the overall balance in your pile. Your goal is to make soil, and you won’t be able to use it for much when it contains whole chunks of orange, lemon, lime, and grapefruit peels in it.

    Animal Feces

    It’s understandable that you want to do something with your cat or dog feces besides putting it in the trash. However, if you add it to your compost pile, you risk contaminating it with parasites and microorganisms. You don’t want them getting anywhere near your plants, especially if you grow your own vegetables.

    Onion Peels

    A good compost pile contains a balanced combination of food scraps and other waste that break down slowly over time. In some cases, you might want to add some worms to your pile in order to help this process along. Onion peels will hurt, rather than help, here. Not only do they slow down the decomposition process, but they also hurt your worms.

    Save Money When Doing Laundry…Take a look at this new technology and never buy detergent again>>>

    Sticker Labels

    You’ve no doubt seen those annoying sticker labels that appear on fruits and vegetables. Yes, they serve a purpose – helping the cashier code in the right items during checkout – but they don’t do much else. You can’t even add them to your compost pile, because they won’t biodegrade. They’re actually made of plastic, not paper.

    Paper That’s Coated or Glossy

    When you’re adding items to your compost bin, you do need to balance out those fruit and vegetable scraps with some paper. However, it needs to be the right kind of paper. You can’t use glossy or coated paper. Those enhancements are made of plastic, which prevents the paper from breaking down properly.

    Tea Bags and Coffee Filters

    While used tea leaves and coffee grounds absolutely can be added to your compost, the items that you use to make that tea and coffee cannot. Your tea bags and coffee filters need to be placed in the trash unless you’ve determined that they’re made of natural materials. Many consist of synthetic polyester fibers that won’t break down properly, if at all.

    Meat Scraps of All Kinds

    The meat of any sort can’t be placed in a compost bin. This means that you can’t include any beef trimmings, leftover cooked chicken (or uncooked chicken), fish bones, or anything that came from an animal. The problem here lies not so much in getting those items to biodegrade (they will, along with everything else around them), but in the smell that they give off while doing so. All of the animals in your neighborhood will end up rooting through your compost bin looking for food.

    Used Charcoal

    It can be tempting to dump leftover charcoal in your compost bin, but you shouldn’t do it. This material actually contains a lot of sulfur, which can upset the overall balance of your compost. It’s even worse if your charcoal has been treated or soaked in fire starting liquid.

    The #1 problem with the “Plant-Based Diet”? (solved) — Learn More Here>>>

  • 11 Simple Ways to Practice Sustainable Gardening

    11 Simple Ways to Practice Sustainable Gardening

    How much do you know about sustainable gardening? These useful tips might just fill in any gaps in your knowledge! The more you know about these practices the better. Do you think that you’ll use some of these in your garden this year?

    1) If you own cats or dogs, brush them and then sprinkle some of their hair around the edges of your garden. Sure, it might look weird, but it will keep any critters away. They’ll smell your predators and steer clear of your vegetables.

    2) Place a laundry sink in your yard, near where your vegetable garden is located. A bucket underneath will collect the water that runs through it as you hose off your newly picked fruits and vegetables. Then, you can use that water in your garden.

    3) Don’t use a machine to pull up weeds. Instead, get on your hands and knees and pull them the old-fashioned way – with your hands, or, if you need to, with a hand tool. You’ll have a better appreciation for your garden and the earth this way.

    4) Instead of using pieces of plastic in order to mark your plants, just grab some twigs. Shave off a section of the bark and write on it with an environmentally friendly marker. The best thing about this is that the twig will end up decaying over the course of the season, helping the composition of your soil.

    5) Repurpose old pieces of concrete that you find lying about. They make great stepping stones and even garden borders. Plus, they add a little rustic look to things, thanks to their broken edges.

    10 Medical Supplies You Need To Stockpile Before It’s Too Late

    6) Create a hot sauce spray in order to keep pests off of your plants. Certain ones will not appreciate the flavor of the spray that ends up on the leaves. (Note: this takes care of many critters as well.) Just mix some ground cayenne pepper, Tabasco sauce, and water in a spray bottle.

    7) Rather than buy twine to use as garden ties, just use some old pantyhose. You can even cover growing melons and other trellised vegetables in it, and then tie the pantyhose to the trellis. This is a great way to reuse something that would otherwise end up in the trash.

    8) Make your own mulch out of old tree limbs, pieces of branches that you’ve pruned off of your hedges, or anything else that you remove from your perennials. As long as it’s small enough, and you can guarantee that it won’t sprout seedlings, it’s safe to use. This is a great way to use yard waste.

    Suggested Article: Why do You Need a Greenhouse and Things to Look for?

    9) Turn vegetable trimmings into stock. Rather than throw the ends of things right into the compost bin or the trash, place them in a freezer bag. When you have enough in the bag, make stock with them (all that you need is some water, those veggies, and a pot over low heat). Then, skim your stock and place the vegetable bits into your compost pile.

    10)  When you’re planting your vegetables, create a furrow on either side of them. This will hold water for some time, and allow that water to go straight to the roots of the plants. It’s like creating a mini irrigation system in your yard.

    11) Save items throughout the year and use them for other purposes in your garden. For example, you can use leftover rags (ripped into strips) as markers or ties. You can turn old popsicle sticks into plant markers. There are plenty of things that you can reuse as long as you get a little creative. This is one of the hallmarks of sustainable gardening.


    Learn how to Stockpile Antibiotics and other House Hold Meds Without a Prescription!!!

    It is simple, completely legal, and perfectly safe.

    The best part is you can also use it for other medicines that require a prescription like insulin or Humira for example.

    >> Find Out More Before Big Pharma Shuts It Down


  • 5 Great Uses for Cheesecloth in Your Garden

    5 Great Uses for Cheesecloth in Your Garden

    Cheesecloth is a very useful material. While it has its obvious uses in the kitchen, including cheese making and filtering various products, this fabric can also be used in your garden. One of the reasons why you can use it outdoors is the fact that it’s such a natural material that it can be composted. On top of this, you can use it more than once, turning your small investment into something that will stick around for a while. Here are some additional uses for cheesecloth – and all of them take place outdoors in your garden.

    Protect Your Plans

    Your young plants need protection from the elements. This means that they need to be covered, especially when they’re still in the seedling stage. If you don’t have the space to start your seeds indoors and need to place them outside (as long as your climate allows for it, of course), then you can create a small covered “house” for your plants. Leave them in the large planter, place some stakes in the four corners, and then drape your cheesecloth over it. The cheesecloth will protect those seedlings, while still allowing plenty of air, light, and water in.

    Scare Away Pests

    Did you know that you can keep pests out of your garden with cheesecloth? This is another great use for this material. All that you need is a pair of scissors, some small stakes, and a liquid that will keep squirrels, rabbits, raccoons, and more at bay. Ammonia is a great example. You want to use something that won’t harm your plants. Just slice the cheesecloth into strips, dip them in the liquid, and then tie them to the stakes. Plant the stakes near the crops that you want to protect.  Check out: 5 Tricks for Keeping Animals Out of Your Garden

    Create Plant Food from Compost

    Cheesecloth can even help you create plant food from compost. How? All that you need is to grab a scoopful of compost from your bin. Place it in a square of cheesecloth and fold up the corners. Then, tie them closed with a piece of string. It’s like you’re making a tea bag – and that’s exactly what this is. Place your cheesecloth bag, with the compost in it, of course, into a watering can full of water. Let it steep for around half an hour, and then remove the bag. Pour the water, which is now mixed with nutrient-rich plant food, onto your plants. Voila! All-natural fertilizer.  Check out: Benefits of Compost Tea

    Tie Your Plants to Stakes

    If you have plants that waver in the wind, either because they’re too tall to support themselves or too young to stay up properly, you can use strips of cheesecloth to tie them into place. Some plants, especially those with thin, young stems, can droop over, causing damage. Thankfully, tying these plants to a support system, like a series of stakes or even a trellis, can give them the support that they need in order to remain healthy. Just make sure to not tie them to the stakes too tightly, as that can damage them as well.

    Start Your Seeds

    You can make a sprouter for beans or sprouts out of a simple canning jar and a piece of cheesecloth. Soak your bean seeds or sprouts overnight and then place them into the bottom of a canning jar. Take your canning jar and remove the metal lid, leaving behind only the band. Cut a small square of cheesecloth and fit it over the top of the jar, securing it into place with the band. Leave the jar in a sunny area, and keep removing and then adding more water every day, until you see the sprouts emerge.

    Check out this WEIRD fabric that has recently replaced paper towels in Americans kitchens>>>

  • 7 Clever Uses for Cheesecloth

    7 Clever Uses for Cheesecloth

    How much do you know about cheesecloth? This porous cloth was initially designed to help cheesemakers squeeze the liquid out of cheese curds, hence its name. However, it has a number of other uses as well – many of which you probably never considered. Here are seven of these incredibly clever uses for cheesecloth. You’ll want to keep some in your home after reading them.


    1) Polishing Your Silver

    All that you need in order to make your silver shine is a little silver polish, some water, and a piece of cheesecloth. The steps are very easy. Start by moistening the cheesecloth by dipping it in the water. Squeeze out any excess water. Then dip the wet section of the cloth in the silver polish (or squeeze it on, depending on the type of polish). All that you have to do next is rub your silverware or your pots and pans until they shine, repeating the process as necessary.


    2) Making Herb Bundles

    Have you ever wondered how chefs manage to make their soups and stews taste so nice, even if there isn’t any evidence of herbs and seasonings in them? Cheesecloth is the answer to that question. Cut a small square of cheesecloth and wrap some herbs up in it. Tie the bundle tightly with a piece of clean string – butcher’s twine will work well. Place the bundle in the soup or stew and fish it out before serving. The flavor of the herbs will soak through the cheesecloth.


    3) Quick Bandages

    If you cut yourself in your kitchen (or anywhere else in your home, for that matter) and don’t have any gauze in your first aid kit, then grab a piece of cheesecloth. It won’t stick to your wound and will provide a clean cover until you can get some proper bandages. Just make sure to place some antibacterial ointment on the wound first. The cheesecloth will last until you can make it to the emergency room, if the cut it bad enough, or until the bleeding stops and you can place a proper bandage on it.

    Breakthrough in Electric Car Technology Powers An Entire Home>>>

    4) Dust Some Sugar on Your Baked Goods

    If you’ve ever made a mess of your baked goods when you sprinkled powder sugar on them, then we have a good solution. You can place the powdered sugar in a jar, top it with a tightly wrapped piece of cheesecloth, and then begin dusting the tops of them with it. The pores in the cheesecloth are just the right size, so you won’t make a mess.


    5) Food Drapes and Covers

    The next time you want to protect your food before it is served, rather than reach for plastic containers or glass lids, use a piece of cheesecloth. It will neatly cover everything, preventing your contaminants from touching your dishes. On top of this, cheesecloth is very sanitary.


    6) Straining Your Food

    Sometimes you need to strain things before you serve them. Since this is the original use for cheesecloth, it works perfectly. Just be careful when you’re straining the hot stock and other things, as you don’t want to burn yourself. Place the cheesecloth in a bowl and pour the contents of your pot into it. The cheesecloth will do its job, and once you lift it up, you’ll notice just how nicely contained everything is.


    7) Baste Your Thanksgiving Turkey

    There are several different ways to baste your Thanksgiving turkey, although cheesecloth is the most effective. Start by soaking your cheesecloth in a mix of melted butter, herbs, seasonings, and even some turkey stock. Then lay it over your turkey until everything has sunk in. You won’t regret it!

    Power Efficiency Guide Will Change the World Forever>>>

  • Simple Pig Weighing Hack

    Simple Pig Weighing Hack

    Did you know that it’s entirely possible to figure out how much your pig weighs without putting it on a scale? Instead, you can use a number of things that you probably have lying around your house to figure out your pigs weight. A few quick measurements and calculations are all that it takes. This is much easier than trying to hoist your pig onto a scale. We’ll cover this useful pig weighing hack and some additional information here.

    Why Do You Need To Know How Much Your Pig Weighs?

    If you’ve been trying to determine when your pig is ready to be slaughtered, or your kids want to use him or her for a 4-H project, then you need to know how much it weighs. It’s good to measure and weigh your pig on a regular basis to ensure that it’s getting enough food and growing at the proper rate. You can then place these measurements in a chart and keep track of growth rates as they compare to the amounts of food provided.

    What You Need To Get Started

    Gathering your supplies constitutes the first step to determining your pig’s weight. You’ll need a tape measure, some twine, and the most important thing – a calculator. Obviously, you also need a pig. Without one, this entire endeavor is fruitless.

    Taking the Measurements

    The best time to take these measurements is while your pig is eating. This provides a good distraction, and you won’t have to deal with attempting to measure a moving animal. You also don’t want to have to dive into the mud in order to handle this task, so don’t do it while it’s wallowing either.

    Once you’ve located your pig at the trough, pull out your tape measure or piece of twine. Whichever is easier to use. You’ll measure the twine at some point anyway, so if you have a tape measure, cut out a step and just use it.

    The very first measurement is the length. This is the total length; from the base of the pig’s tail all of the way to its ears. It’s best to go from the top, measuring along you pig’s back. Hold the tape measure flush in order to get an accurate reading.

    The next measurement is the heart girth. Wrap the tape measure around the body of your pig, parallel to its legs. This is essentially the pig’s circumference as if it were a tree or something.

    Once you have those two measurements, you’ll need to apply them to the formula. This is the heart girth number squared multiplied by the length, which is then divided by 400. Here’s an example:

    A pig has a 60” length and a 54” heart girth. Your formula is 54 X 54 X 60 = 174,960. Then that last number is divided by 400: 174,960/400 = 437.4. The pig weighs 437.4 pounds. That weight includes every part of the pig, organs and all. Once the pig is butchered, you’ll lose about 100 pounds of that weight. This means that you’ll get around 330 pounds of meat from it.

    Conclusion

    Knowing how much your pig weighs is important. We already mentioned the ways in which you can track its growth over time, noting how much you feed it in order to see the ratios form. If your kids are using your pig as their 4-H or county fair project, then that data is very important. You also need to know when the pig will be ready to be butchered. This measurement formula is actually very accurate and will come in handy. It sure beats putting your pig on a scale!

    If you find THIS PLANT in your backyard, whatever you do, DO NOT touch it>>>

  • Super Easy Homemade Buttermilk

    Super Easy Homemade Buttermilk

    Buttermilk isn’t something that you only need to buy at the store. Instead, you can make it yourself. The results will be much tastier and better for you. The buttermilk that you find in the dairy section (if your grocery store even carries it) is cultured. This type takes at least 24 hours to make, and you need to start with cultured buttermilk, making it a bit redundant, or active buttermilk culture. This process is fairly labor intensive. However, if you have a recipe that requires buttermilk and you don’t have any on hand, these quick methods will work nicely. You’ll have your own buttermilk within minutes. Are you ready?

    Option Number One

    This method produces buttermilk quickly and easily. It all starts with either lemon juice and vinegar, as well as some milk. For every cup of milk, add one tablespoon of lemon juice or vinegar to it. Place them in the same glass and let it sit on your counter for ten minutes. While the results aren’t properly cultured buttermilk (this is actually an acidified version), you’ll end up with a type that will work nicely in recipes. The acid in the milk will work to activate the baking soda or baking powder in the batter, just like it’s supposed to.

    Option Number Two

    You’ll need a few more ingredients for this buttermilk. It all starts with yogurt or sour cream and some milk. Heck, even the milk is optional – you can use water instead. The ratios are 3/4 of a cup of yogurt or sour cream to a ¼ cup of milk or water. As with the previous recipe, combine the liquid and the semi-solid in a cup and let it sit on your counter for ten minutes. You may have to stir them a bit to make everything smooth, but in the end, you’ll end up with enough buttermilk for any recipe.

    Now For Something Different

    The two previous methods described how you could make buttermilk just by letting your dairy products curdle for a few minutes. The next two are more complicated, as you’ll be making actual cultured buttermilk, just like the kind that you see in the grocery store.

    Option Number Three

    This recipe starts with cultured buttermilk. Yes, this is the same thing that you’ll be making, only you’ll end up with much more it. Think of it as a good way to never run out of buttermilk. Pour six ounces of cultured buttermilk into a glass jar. A quart jar will work perfectly. Then add in three cups of whole milk. The fresher the buttermilk, the better, since the cultures will be more effective and the process will work properly. Once you have the buttermilk and the milk in the jar, put the lid on and shake it well. Then, find a safe spot to place it. The mixture needs to sit out for 24 hours at room temperature.

    At the end of that time period, check your buttermilk. It should be thick enough to coat the walls of glass and taste just like typically cultured buttermilk. If you don’t need to use it right away, place it in the refrigerator. It should last for several weeks in there.

    Option Number Four

    This method is very similar to the previous one; only you use active buttermilk cultures instead of the buttermilk itself. The mixture needs to sit out for between 12 and 24 hours, and you need to get the ratio of cultures to milk correct. This usually is written on the packaging.

    Ideally, you’ll never run out of buttermilk thanks to these helpful methods.

    HOW TO START A HIGH-PERFORMANCEHOMESTEAD FROM THE GROUND UPLearn More Here>>>

    Here is a great video showing how simple and easy making your own buttermilk really is…

    https://youtu.be/zJbw9rXQjYI