Page 3 of 3
1 2 3
food preservation – Page 3 – Homesteader Depot

Tag: food preservation

  • Canning Stone Fruits (Infographic)

    Canning Stone Fruits (Infographic)

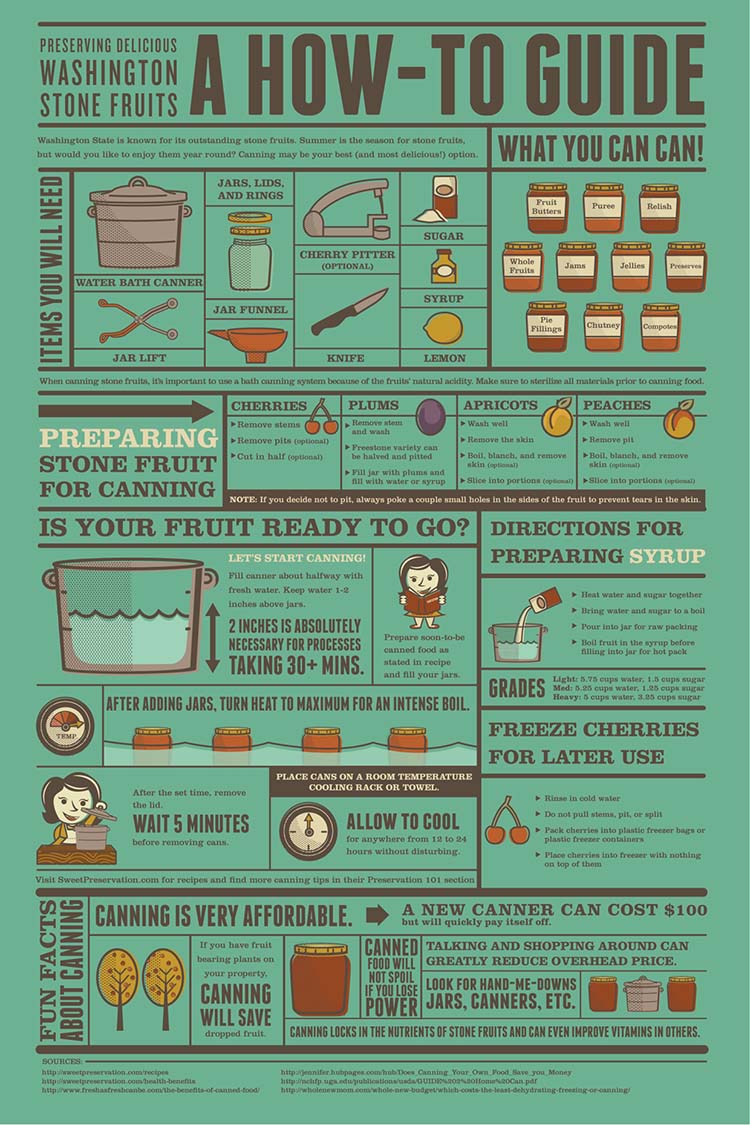
    I have always been fascinated by canning, and I’d love to do more of it myself. It always seems kind of intimidating, but it’s really not too complicated, and this handy infographic from SurvivalLife.com breaks canning stone fruits down into simple steps.

    Stone fruits are some of the easiest items to can, and the steps taken in this guide can be followed with a $10 canning kit from Walmart or any grocery store. Cherries, plums, apricots, and peaches, make great preserves, from jams and jellies to easy pie fillings.

    I think my favorite thing about canning is how long preserves last, up to several years when stored properly, and how an afternoon of canning can produce months of delicious preserves. If you don’t have a local supply of seasonal stone fruits, you could always wait until they’re on sale at your grocery store, buy a bunch and try your hand at canning them!

    Canning Info


    Natural Healing Techniques Doctors Don’t Want You to Know…

    The Weight-Reducing Magic of Yoga…

    The Ultimate Woodworking Course..

  • Creative Ways to Freeze Eggs

    Creative Ways to Freeze Eggs

    If you are ever faced with an abundance of eggs and not enough time to make something with all of them, it can be overwhelming! Eggs, especially of the farm-fresh variety, are such awesome, healthy, cheap (or free, if you have your own chickens!), and versatile sources of nutrients that it is imperative to use them efficiently.

    One really great option for preserving eggs with any of the following freezer methods is not only having eggs through the winter as production slows, but also to make them quick, easy, and relatively mess-free to use!

    Baking in Muffin Tins

    A really simple way to preserve eggs is to bake them individually in muffin tins and then freeze. They can be reheated quickly and easily for egg muffin sandwiches in the morning! Way cheaper and healthier than the fast food alternative.

    What you do is lightly coat muffin tins with cooking spray or butter and crack an egg in each round. Bake at 350 degrees for about 30 minutes, then let cool, stick in Ziplock bags, and simply pop in the freezer! These will last up to a year frozen.

    Freezing Raw 

    This works surprisingly well for scrambled eggs or being added to any kind of batter.

    What you do is beat together the raw eggs and pour into ice cube trays. 2 cubes is about 1 egg. Once frozen, you can pop them out of the tray and put them in a Ziplock bag. Just thaw in the refrigerator overnight to use the next morning. These will keep up to 6 months.

    Related Article:  Why Are My Chickens Not Laying Eggs?

    Freeze Scrambled

    This is a very easy way to freeze and reuse, for things like breakfast burritos or easy morning scrambles. It’s about as simple as it sounds: scramble up the eggs you want to preserve, let cool to room temperature, wrap up in freezer parchment paper and stick in a zip-lock bag. They will last up to a year. Simply thaw in the fridge overnight; you can also store these in the fridge and they will last up to a month!

    If you enjoyed this, you might also like….

    Easy to Build Root Cellar in Your Own Back Yard

    Eat Like Your Ancestors…

  • Easy Pickled Garlic

    Easy Pickled Garlic

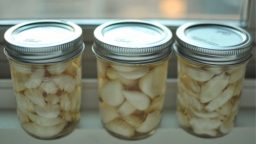
    Pickling garlic is a great way to preserve it for the winter, or if you don’t grow garlic, to ensure that you always have it on hand. You may have seen minced garlic or even whole garlic cloves in the store, but those typically have lots of preservatives in them or take on the flavor of whatever they’re preserved in. This recipe isn’t like them.

    This method will keep your garlic tasting fresh, and just like garlic. Since it is preserved in vinegar, when you’re ready to use it, you can simply rinse off the vinegar and use as you would fresh cloves of garlic.

    Before we dive into the recipe, I wanted to share this awesome video for a super quick and easy way to peel an entire head of garlic that will make this recipe go a lot faster:

    Ingredients: 

    4 head of garlic, peeled using method from video above

    2 half-pint mason jar

    1-2 cups vinegar

    *Note: these are rough estimates, since heads of garlic can vary. The idea is to have enough garlic to fill your jar of choice, and enough vinegar to fully immerse the garlic once in the jar. 

    Directions: 

    1. Once your garlic is all peeled, trim any brown spots off and put in a large bowl with a little soap to get them clean.
    2. Rinse thoroughly in a strainer
    3. Bring your vinegar to a boil on the stove
    4. Dispense your garlic out into the jars
    5. Pour the hot vinegar over the jars, and screw the lid on tight
    6. Let the jars sit out on the counter overnight, until they are room temperature
    7. Once they have fully cooled, transfer to the refrigerator for long-term storage

    This garlic will keep in the fridge for up to a year. Use as you would regular garlic, simply rinsing off the vinegar with cold water if you want to avoid the taste of vinegar in the dish you are preparing. Enjoy!

    If you liked this, you might also enjoy…

    Become a Master Healer at Home

    Anaerobic Weight Loss Fitness…

    The Ultimate Woodworking Course..


  • Preserving Meat with Salt

    Preserving Meat with Salt

    Whether your homestead is off-grid, you don’t have enough room in your freezer, or you want meat that could last when power is interrupted, salting is a great time-tested option.  In this article, we will discuss dry salting.  The process works by using the salt to draw out the moisture from the meat and any potentially harmful bacteria until microbial growth is prohibited.  It is basically chemically induced dehydration.  There is always a risk of food poisoning when one is consuming meat that is moths, or even a year old, get properly prepared and use caution when salting your meat so that you can benefit from a method of food preservation that has helped keep people alive for thousands of years.


    Getting Started

    To get started you will need containers, preferably ceramic or glass, that will be able to hold all the meat that you want to preserve and have room left to accommodate the salt.  You will also need to locate a place to store the meat while it is curing.  Ideally, you are looking for an area that is dry and that will remain above 32 degrees Fahrenheit and below 40 degrees Fahrenheit.

    Prepping the Meat

    Cut the meat into pieces, the smaller the pieces are the more surface area of meat will be exposed to the salt, and therefore the quicker the curing.  Most sources will tell you that 1 ounce of salt will cure up to 25 pounds of meat.  But salt is not expensive and food poisoning is deadly so I would error on the side of caution.  Put a thin layer of salt on the bottom of your container, start adding meat that you have rubbed with salt to the container leaving a thin gap on the sides of the container and in between each piece of meat, fill in the gaps with more salt, put a thin layer of salt on top and cover with a cheese cloth.  Store this in a cool dry location.  The curing should be done in a month.

    Checking on the Meat

    Check on the meat periodically.  If the meat still contained a lot of blood, or if moisture got in the area you are storing the meat, the salt may become so moist that it cannot sufficiently dehydrate the meat.  If this occurs, simply remove the meat, clean the container, and repack it with fresh salt.  After the curing is successfully completed you can remove the meat and wrap it in moisture-proof paper or plastic and can store at room temperature.


    Dry salting can keep meat for months, this could be what you need to get you through the winter or a disaster that leaves you without power.


    If you liked this, you might also enjoy…

    Natural Healing Techniques Doctors Don’t Want You to Know…

    The Weight-Reducing Magic of Yoga…

    The Ultimate Woodworking Course..

  • Tips for Making Your Own Crispy Pickles

    Tips for Making Your Own Crispy Pickles

    Do you and your family love the taste of fresh crunchy pickles? If you do, and you are a homesteader, you have probably been trying to make your own pickles. It is not a difficult process, but you might’ve found that pickles you’ve made don’t quite have the same snap and crunch that you really like. Fortunately, you don’t have to live with soggy, bendy pickles for much longer. Just use the tips that follow and you will find that your pickles will have a much more significant crunch.

    One of the first things you want to do is make sure you’re using the freshest cucumbers possible. When you go to the grocery store to buy cucumbers or, even better since you are a homesteader, go out to the garden and pick the cucumbers, you want to use them right away. The fresher the better, as this will typically mean the texture is going to be crisper.

    Another good tip is to cut off the blossom end of the cucumbers. This is one of the best ways to make sure the cucumbers are nice and crisp. The reason for this is because this area of the cucumber has microbes that can cause the pickles to become soft. Also, make sure that you do not keep the pickles in the canning pot for too long. Be aware of what the timer says when you are making the pickles and take them off right away. Otherwise, the additional heat has the potential to soften the texture. Just make sure they have enough heat to kill any bacteria that may be on the vegetables.

    Now that you have a few more tips on your belt for making pickles, get out there grab some cucumbers so you can start making the best pickles of your pickling career!


    If you liked this, you might also enjoy…

    Natural Healing Techniques Doctors Don’t Want You to Know…

    The Weight-Reducing Magic of Yoga…

    The Ultimate Woodworking Course..


  • Canning Tips for Those Just Starting Out

    Canning Tips for Those Just Starting Out

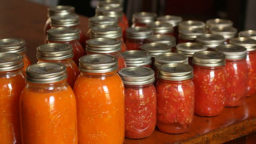
    You are a homesteader, then it typically means you have a garden. This means you are growing vegetables and fruit more than likely. You cannot eat all the food right away in most cases, so you want to can it to preserve it. There are some excellent benefits to canning in addition to having all that extra food in the house.

    One of the primary benefits is that you do not have to worry about any added chemicals to the food. In addition, it tends to taste quite a bit better than commercial canned food. It is also quite a bit easier than most people think, and it can be fun.

    First of all, you need to make sure you have all the right equipment. You need to have a number of canning jars and lids, as well as a canner. Those just beginning will likely want to start with a water bath canner. You can find kits available, and they will usually include tongs for lifting the jars as well as a ladle.

    Make sure you sterilize the jars, the lids, and the rings. You can do this by washing them in warm soapy water, rinsing them, and then boil them. A good tip is to remove the jars when you’re ready to can, but leave the lids and rings in the water until you are ready to close up the cans – this ensures they remain sterile.

    In addition, be sure to slice up your fruits or vegetables to the right size for the jars, and only fill up to the fill line on the jars. Follow the instructions for your canner, and then let the jars cool once you have finished canning. Label them and then store them in dark place.

    If you liked this, you might also enjoy…

    Natural Healing Techniques Doctors Don’t Want You to Know…

    The Weight-Reducing Magic of Yoga…

    The Ultimate Woodworking Course..

  • 2 Ways to Preserve Spinach

    2 Ways to Preserve Spinach

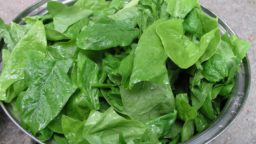
    Spinach is a very easy vegetable to grow, and it offers a ton of nutrients. Plus, it’s tasty, and you can use it for numerous recipes. Of course, if you want to use your spinach after the growing season is done, you’re going to have to know how to properly preserve it. Here are a couple of simple preservation techniques that will keep your family eating spinach all year long.

    Dehydrated Spinach

    Rinse your spinach, remove any brown or unappetizing spots, and cut off or tear out thick stems. Once your leaves are prepared, lay them out evenly on a tray and place them in your dehydrator (or oven) and dehydrate your leaves for between three and four hours at 125 degrees. Basically, you want them to crumble when you touch them but not to be burnt.

    Now you can use your dried leaves to make a powder for sauces and smoothies, or you can crush them and add them to other dishes, as well.

    Homemade Frozen Spinach

    Do the same prep you’d do for dehydrated spinach, but you don’t have to worry about removing large stems. Once you’re done with this, chop your spinach leaves and stems up, and then put them in a pot of boiling water for 60 seconds. Take them off the heat, strain them, and immediately throw them in a bowl of ice-cold water.

    Once they’re chilled, spread your leaves and stems on a towel and let them dry. Once dry, pack them into freezer-proof bags and throw them in the freezer. Now your family will have ready-to-cook frozen spinach from your garden all year long.

    What do you think? Would you use either or both of these methods to preserve your spinach and enjoy its delicious nutrients for the rest of the year?

    Sources:
    http://montanahomesteader.com/preserving-spinach/
    http://dorisandjillycook.com/2010/06/11/three-ways-to-preserve-greens/
    http://www.thekitchn.com/we-tried-3-ways-to-store-salad-greens-and-heres-our-winner-tips-from-the-kitchn-211770

    If you like this, you might also like:

    Advanced Gardening Course To Accelerate Your Food Production…

    Survival Medicine & Wilderness Survival…

    Survival Techniques From Long Ago, Re-purposed For The Modern Era…