Page 2 of 3
1 2 3
food production – Page 2 – Homesteader Depot

Tag: food production

  • Making Your Own Sprouted Flour

    Making Your Own Sprouted Flour

    You may have heard that sprouted flour is healthier than regular flour, and this is definitely true. When wheat is allowed to sprout before it is ground into flour, it breaks down the antinutrients that are the plant’s natural defense system, which can be difficult for us to digest. This is one possible reason for so many people having gluten and wheat allergies in recent years.

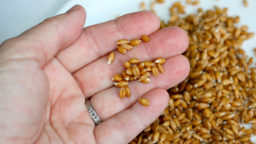
    Before modern industrial harvesters and mills, wheat used to be cut and lay to dry in the field, allowing the wheat berries as they’re called to naturally sprout before grinding.

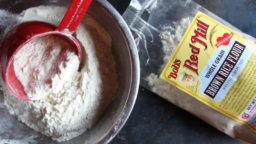
    Sprouted wheat flour can be quite pricey-but, with the right equipment, it’s very easy to make at home!

    What you need:

    • Wheat berries: you can usually find these in the bulk section of your health food store. You’ll definitely want organic, and if you can’t find them locally you can usually find them online.
    • A flour mill-you can buy a hand-powered mill, a special attachment for your Cuisinart, or an electric mill. You can also use a coffee grinder or a high-powered blender, but you’ll probably have to experiment to see how these work for you before trying to grind several pounds of flour at once.
    • A dehydrator-the sprouted berries will need the be thoroughly dehydrated before being ground into flour, so a dehydrator will accomplish this best, although if you can set your oven low enough this also might work.

    What to do: 

    1. Sprout the wheat: once you have your equipment and have bought some wheat berries, you will probably want to make a small batch first to see how it goes. But either way the process will be the same: take the amount of what you will want to sprout, and fill mason jars about halfway with the berries. The soak in water for 24 hours, covered. Then, drain the water, and cover with plastic or metal mesh if you can, and tilt upside down with the bottom resting on a towel. This will keep the excess moisture draining. If you can’t do this, regularly strain out what water  you can to avoid molding. It is sprouted when the wheat berries have cracked open and you can see green underneath, or a small tail is sprouting from them. They can be eaten fresh like this, or dehydrated to make the flour:
    2. Dehydrate the sprouted berries: check the manual of your dehydrator to see how long you should dry the berries for and at what temperature, but it will probably be at about 115 F for 12-24 hours. Check after about 8 to see if they’re dry, and then every few hours after that. You want them to be as dry as possible.
    3. Grind the flour: follow the directions for whatever mill or grinder you have, or, if you’re experimenting with a blender or coffee grinder, just start with a small amount to see how well they can be ground. The consistency of the flour is up to you, but you will probably want it to be very fine.
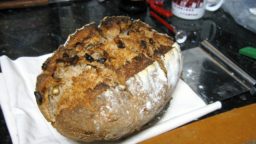
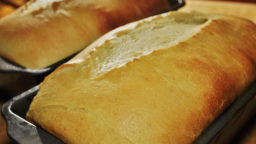
    4. Enjoy! Once you have the amount of flour you would like to use, you can use it as you would regular whole wheat flour. It’s probably best to keep the rest of your sprouted berries in a sealed container in the refrigerator, and grind the flour fresh each time you’d like to use it.

    If you like this, you might also like:

    Advanced Gardening Course To Accelerate Your Food Production…

    Survival Medicine & Wilderness Survival…

    Survival Techniques From Long Ago, Re-purposed For The Modern Era…

  • How to Make A Sourdough Starter

    How to Make A Sourdough Starter

    Sourdough starters can be purchased online or you might even have a friend or relative who’s already making them who’d be willing to share. They’re easy to pass around, and you can use just a small amount to grow as much as you want! That’s the beauty of sourdough.

    To grow your own, you don’t need anything more than flour, water, and time. Let’s begin!

    What you need: 

    • a mason jar or similar sized glass or plastic container, no metal
    • measuring cups and spoons
    • plastic wrap
    • flour (at least a pound to be safe)

    What you do: 

    1. Combine 3/4 cup of water with 3/4 cup + 2 tbs flour and stir vigorously in your container. Once bubbles are formed and you have a nice, thick, evenly combined batter, cover with plastic wrap and set on your counter. It will need to be placed somewhere that is warm, at least 70 degrees F, where it won’t be disturbed.
    2. Over the next 24 hours, bubbles should start to appear. During this period, stir the mixture occasionally to attract more yeast and air into the starter. The bubbles mean the yeast is becoming active and alive, that’s what you want!
    3. On the third day, its time to feed the yeast! Add another 3/4 cup flour and 3/4 cup water and stir vigorously, then cover and let sit once again.
    4. On the fourth day, your starter should be noticeably bubbly and have doubled in size. You will also notice that active-sourdough
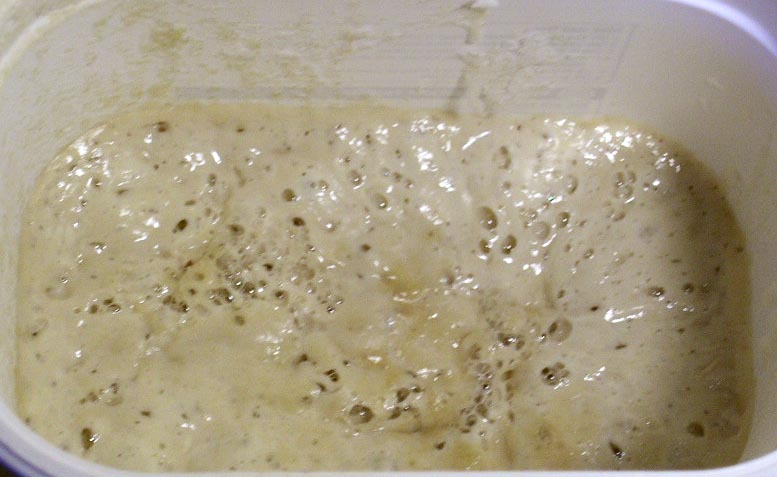
very distinct sour smell that is signature to sourdough. It is active when it is light with many big bubbles, like
      in the photo.
    5. If your starter is not this active yet-don’t worry! Just keep feeding it, it might just need another day or so. Every climate and local yeast available is going to be different.
    6. If your starter is ready-you can use it! Take about half out and use in a sourdough recipe of choice. Just make sure to add the same amount of flour and water back to your starter. Let it become active again, and either continue to reuse, or put it in the fridge to be “dormant”. Just make sure that if you do want to do this, that it is active before adding it to the fridge, and also don’t put an airtight top on it-or it might explode! You can put a sealed top on it after a few days, but let it breathe at first.

    And your done! What’s your favorite sourdough recipe?

    If you like this, you might also like:

    Advanced Gardening Course To Accelerate Your Food Production…

    Survival Medicine & Wilderness Survival…

    Survival Techniques From Long Ago, Re-purposed For The Modern Era…

  • 2 Ways to Preserve Spinach

    2 Ways to Preserve Spinach

    Spinach is a very easy vegetable to grow, and it offers a ton of nutrients. Plus, it’s tasty, and you can use it for numerous recipes. Of course, if you want to use your spinach after the growing season is done, you’re going to have to know how to properly preserve it. Here are a couple of simple preservation techniques that will keep your family eating spinach all year long.

    Dehydrated Spinach

    Rinse your spinach, remove any brown or unappetizing spots, and cut off or tear out thick stems. Once your leaves are prepared, lay them out evenly on a tray and place them in your dehydrator (or oven) and dehydrate your leaves for between three and four hours at 125 degrees. Basically, you want them to crumble when you touch them but not to be burnt.

    Now you can use your dried leaves to make a powder for sauces and smoothies, or you can crush them and add them to other dishes, as well.

    Homemade Frozen Spinach

    Do the same prep you’d do for dehydrated spinach, but you don’t have to worry about removing large stems. Once you’re done with this, chop your spinach leaves and stems up, and then put them in a pot of boiling water for 60 seconds. Take them off the heat, strain them, and immediately throw them in a bowl of ice-cold water.

    Once they’re chilled, spread your leaves and stems on a towel and let them dry. Once dry, pack them into freezer-proof bags and throw them in the freezer. Now your family will have ready-to-cook frozen spinach from your garden all year long.

    What do you think? Would you use either or both of these methods to preserve your spinach and enjoy its delicious nutrients for the rest of the year?

    Sources:
    http://montanahomesteader.com/preserving-spinach/
    http://dorisandjillycook.com/2010/06/11/three-ways-to-preserve-greens/
    http://www.thekitchn.com/we-tried-3-ways-to-store-salad-greens-and-heres-our-winner-tips-from-the-kitchn-211770

    If you like this, you might also like:

    Advanced Gardening Course To Accelerate Your Food Production…

    Survival Medicine & Wilderness Survival…

    Survival Techniques From Long Ago, Re-purposed For The Modern Era…

  • How to Make Yogurt

    How to Make Yogurt

    Yogurt has increased in popularity in recent years, and for good reason. It’s a wonderful source of healthy fat and protein as well as millions of beneficial probiotic bacteria. It’s also delicious!

    Did you know you can make your own easily at home? Yogurt is nothing more than cultured milk, and, like sourdough, all you need is a starter to get going-which is actually just about 1/4 of a cup of yogurt!

    There are many different methods for making yogurt, and this is simply one of them. You can make it in a specially-designed yogurt maker, in a crock pot, even in an oven or a crock. You’ll have to figure out what works best for you, but this will give you a good idea of the process and what you might need to start your own yogurt making process!

    (Note: this recipe is for regular pasteurized milk, not raw. We’ll have to do a recipe on raw milk yogurt in the future)

    What you need: 

    To make yogurt, you only need a few things:

    • Quart mason jar
    • Candy thermometer
    • Sauce pan
    • A quart of organic milk (not ultra-pasteurized)
    • 1/4 cup yogurt starter (yogurt with “live active cultures” on the package, only use plain with no added ingredients)

    Instructions: 

    1. Bring 6 cups of milk to 160-175 degrees F on the stove. Watch closely-it gets hot very quickly.
    2. Allow the milk to cool to 110 degrees. Check frequently-you don’t want it to get too cold, it has to be right at 110.
    3. Skim off any layer that has formed once the milk is cooled to 110, and pour into the mason jar. Add your starter and mix thoroughly.
    4. Put a lid on the jar and keep at this temperature. This is the trial-and-error part, and you’ll have to figure out the best way to do this for you. You can wrap the jar in towels and put in an insulated grocery bag or cooler, or even the oven (turned off) with the light on. You can also just place the jar in a crock pot filled with an inch or so of water if you can set the temperature to 110.
    5. Check it 12 hours later to see if it has turned into yogurt. Check carefully to retain the heat if you need to let it sit for another 12 hours.
    6. To get a thicker yogurt, you might want to strain it through cheesecloth in a bowl in the fridge overnight. Either way, store in the refrigerator and use within 2-3 weeks. Enjoy!

    If you like this, you might also like:

    Advanced Gardening Course To Accelerate Your Food Production…

    Survival Medicine & Wilderness Survival…

    Survival Techniques From Long Ago, Re-purposed For The Modern Era…

  • A Simple Guide to Alternative Flours

    A Simple Guide to Alternative Flours

    There are many reasons people are flocking to alternative flours today. Gluten intolerance is becoming very common, but there are also many diets that eliminate wheat or grains, such as the whole 30, primal or paleo diets. There are a few reasons gluten-free and grain-free diets can be beneficial for your health, but that’s another post for another today. Today we’d just like to discuss a few of the basic non-wheat flours. This is useful to know for homesteaders, in case you’re interested in growing and milling some of your own flours.

    A note: all grain-free flours are also gluten-free, but the distinction here is that the “gluten-free” flours are not grain-free. 

    Grain-Free Flours 

    Coconut flour: coconut flour is one of the more popular alternative flours on the market right now, and is highly nutritious (as is almost every coconut product). It is rich in fibers and vitamins. It’s texture is gritty and because it is grain-free, is most commonly used in grain-free diets. It can be rather expensive, but most recipes that call for it don’t require very much.

    Almond flour: definitely the simplest of these flours to make at home, you can just soak, grind up, dehydrate and re-grind almonds. Like coconut flour, this is expensive at the store, but you also won’t use very much per recipe. With a lovely flavor, this has all the nutrients of almonds: iron, protein and omega fatty-acids.

    Arrowroot powder: A very light flour, it has a consistency like corn starch and can be used in just the same way. Like coconut and almond flour, this is another grain-free option for paleo recipes, and when combined with egg and milk, imitates gluten very well.

    Tapioca flour: Very similar in consistency and usage to arrowroot powder, the two are virtually interchangeable. Another grain-free flour, this is a great item to have on hand for grain-free baking.

    Garbanzo flour: Almost always found in any pre-mixed all-purpose gluten-free flour, it is very effective in gluten-free recipes as far as imitating the binding effect of wheat. The one set-back is the distinct taste, so it’s best used in savory recipes.

    Gluten-Free Flours

    Corn flour: Distinct from corn starch and corn meal, all three have different textures from each other but are all great options for gluten-free baking. Corn flour is the most similar in texture to wheat flour and is typically used in dishes like masa harina or tamales.

    Rice flour: Known for its gritty flavor, rice flour definitely needs to be used with other flours, but will add a wonderful nutritious value and flavor to whatever it is used in.

    Sorghum: Sorghum imitates the consistency of wheat flour very nicely, so it is a great addition to any gluten-free flour blend. It has a lovely texture and flavor.

    Other flours worth mentioning: quinoa, fava bean, potato starch and potato flour, amaranth (grain-free), teff, millet, buckwheat, oat, millet (gluten-free)

    If you like this, you might also like:

    Survival Techniques From Long Ago, Re-purposed For The Modern Era…

    Advanced Gardening Course To Accelerate Your Food Production…

    Survival Medicine & Wilderness Survival…

  • Top 3 Reasons You Should Be Growing Your Own Food

    Top 3 Reasons You Should Be Growing Your Own Food

    Whether or not you’re a homesteader, there’s no arguing that vegetables fresh from the garden just taste better than the ones you buy at the store. Even organic store-bought veggies just don’t have that same delicious taste that you get from vegetables that you grew yourself. If that isn’t enough to convince you to grow your own food, let’s take a look at just a few of the top reasons you might want to start a garden today:

    No Fear of Food Recalls

    Every year, we hear about different food recalls in different areas. People get sick from eating tomatoes, spinach, lettuce, and all kinds of other vegetables. That’s something you won’t have to worry about with food from your own garden. While others are looking forlornly at the produce section of the store, wondering what’s safe, you can pick anything you want and eat it without a care in the world.

    Less Wasted Cash and Food

    On average, American households throw away about $600 per year in over-ripe, damaged, or rotten produce. When you put in the time and effort to grow it, though, you’re a lot more likely to plan when to eat it instead of just letting it go bad in the fridge. And, when you do have over-ripe vegetables, they can go straight to compost instead of going in the garbage.

    It’s Better for the Environment

    Think of all of the fuel and labor it takes to get vegetables from factory farms to the store, and then there’s the fuel you spend driving to and from the store, as well. Add to that any packaging that’s used in the process, and you have a pretty big impact on the environment. With your own garden, you can just walk out the back door and pick your veggies, leaving a much smaller carbon footprint behind.

    Sources:
    http://www.gardenweasel.com/top-10-reasons-to-grow-your-own-garden/
    http://www.cookinglight.com/food/in-season/reasons-to-garden

    If you like this, you might also like:

    Advanced Gardening Course To Accelerate Your Food Production…

    Survival Medicine & Wilderness Survival…

    Survival Techniques From Long Ago, Re-purposed For The Modern Era…

  • Crock Pot Sourdough Recipe

    Crock Pot Sourdough Recipe

    Sourdough bread is delicious, and nutritious! When made with a real sourdough culture, it breaks down the anti-nutrients in the wheat that are commonly attributed to gluten intolerance and allergy. There’s also no better-tasting sourdough than when it is made fresh at home.

    A very easy way to make sourdough is right in your crock pot! If you don’t have a bread maker or don’t want to heat up your kitchen in the hot summer months, crock pot sourdough is a wonderful option. It also makes for a very easy way to rise the sourdough.

    First, you’ll need your culture. This is the most time consuming, but once you have one going, it’s a lot simpler to make loaf after loaf. This blogger seems to have originated crock pot sourdough, and also has a recipe on her website for the culture.

    Once you have a bubbly, active sourdough culture, you can follow this recipe here for delicious crock pot sourdough:

    Crock Pot Sourdough Recipe

    1 cup active culture

    3 cups flour (you can use some combination of white, white whole wheat or whole wheat if you like)

    salt

    warm water

    olive oil for greasing

    1. In a large bowl or food processor, quickly stir or pulse the salt throughout the flour. Then add the culture and mix or pulse until blended.

    2. Next add 1 cup of warm water, and stir or blend until you have a uniform dough that can be formed into a ball. You might need to add either more flour or water as needed. Should be sticky, but not too wet.

    3. Let rise overnight, either in the bowl or food processor, lightly covered, or, for a really nice, steamy rise, you can heat up your crock pot for a few minutes, then grease, and put the dough in to rise.

    4. Once the dough has at least doubled in size, it’s ready to cook. If it’s been rising outside the crock pot, dump it out onto a floured surface and reshape slightly into a loaf if needed. Then place in the greased crock. If it has been in the crock already, simply move on to the next step:

    5. Cover the crock with a dish towel or paper towel to absorb the moisture as the bread cooks. Then, cover with the crock pot’s lid. Set to low for about 1.5 hour, then check. when it’s done, it will be browned around the edges and no longer sticky and doughy on the top. It might need an extra .5 hours to achieve this.

    6. It’s hard to get a really crispy top in the crock pot, so you might want to finish it off for 2-3 minutes in the broiler-just watch it carefully so it doesn’t burn! This step is totally optional.

    7. Set on a cooling rack and once the loaf is cool enough to touch, enjoy! It’s best served fresh with warm butter and honey.

    If you liked that, you might also like:

    Advanced Gardening Course To Accelerate Your Food Production…

    Survival Medicine & Wilderness Survival…

    Survival Techniques From Long Ago, Re-purposed For The Modern Era…

  • 5 Healthy-Sounding Food Additives to Avoid

    5 Healthy-Sounding Food Additives to Avoid

    We all know how  many unpronounceable additives there are on ingredient labels these days, and it can be overwhelming trying to decipher even seemingly natural food brand’s ingredients. Because we don’t all have time to Google every ingredient in the supermarket isle, here are five healthy-sounding ingredients that should be avoided.

    Enriched Wheat

    Enriched wheat has long been recommended by doctors as a nutritious way to consume wheat, but it’s actually far from healthy. As real nutrients are stripped from the wheat in modern refining, enriched wheat and flour simply has synthetic nutrients added back in. Enriched flours of all kind should be avoided.

    Soy Lecithin 

    A lot of people seem to be waking up to how unhealthy soy is, and this innocent-sounding soy product is hidden away in a lot of very healthy looking food products. This emulsifier is really just a nasty bi-product of soy oil production, full of chemical solvents and pesticides.

    Natural Flavor

    The word “natural” essentially means nothing these days-especially on food labels. The same rule applies to natural flavor. What most people think when they read this, and understandably so as this is what it literally means, is flavors derived from natural sources. But the problem with “natural flavor” is it can be almost anything-including forms of MSG. Vegans in particular should take note-these can often come from strange chemicals derived from beaver glads or beetle shells.

    Corn

    While your Ezekiel brand sprouted corn tortillas are probably safe, many food products have all sorts of super-processed corn derivatives and the majority of the time it’s going to be GMO. It’s nearly impossible to determine if you’re buying organic or GMO-free corn these days.

    Canola Oil 

    Canola oil has been commonly marketed as a healthy oil for decades, but it is in reality far from healthy. “Canola” is not actually a plant but simply a marketing term for the oil commonly derived from rapeseeds. Agro-giant Monsanto created Roundup-ready rapeseeds in the 90’s, and now roughly 90% of the world’s rapeseeds are GMO.

    If you liked that, you might also like:

    Learn How To SUPER-CHARGE your garden or farm…

    Click Here To Get The Best Survival Medical Course…

    Check Out These Mind Blowing Survival Skills…