Page 8 of 23
1 6 7 8 9 10 23
gardening – Page 8 – Homesteader Depot

Tag: gardening

  • Grow 53 Plants in 4 Square Feet (Video)

    Grow 53 Plants in 4 Square Feet (Video)

    We’ve been talking a lot about urban homesteading here lately, and when you’re talking about gardening in an urban or suburban environment, space is always going to be an issue.

    A lot of urban gardeners are turning to vertical gardening, which is an excellent way to maximize space and production when growing area is limited.

    This is a very inspiring example of vertical gardening, in which a whopping 53 plants is grown in a four square foot area. Imagine how much you could grow on a single porch or patio! Check it out:

    f you enjoyed this, you might also like….

    Home Defense in the End Times…

    Natural Healing Secrets You Need to Know…

    Eat Like Your Ancestors…

  • Back to Eden Gardening Explained

    Back to Eden Gardening Explained

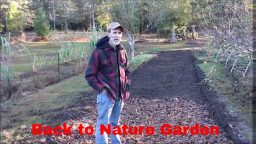
    Last week, we shared a video from YouTubers Deep South Homestead of their “Back to Nature” gardening method that they improvised themselves.

    They got this idea after they tried the Back to Eden gardening method with poor results. This method of gardening may have failed in their area for any number of reasons and their improvisation was clever.

    The Back to Eden gardening method is still worth a try in your area, and is a very clever and natural way of starting a garden. It’s a bit like lasagna gardening in that you are building your own soil, and start in the fall so the “ingredients” of your garden beds can break down over the winter.

    It was developed by a man named Paul Gautschi who has been using this method in his garden for over 20 years. It has grown popular after the release of a film on the method, aptly titled “Back to Eden“.  You can watch the film there for free, or, for a quicker explanation, keep reading.
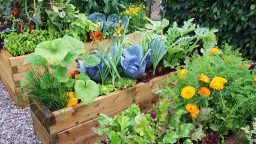
    Garden Plot

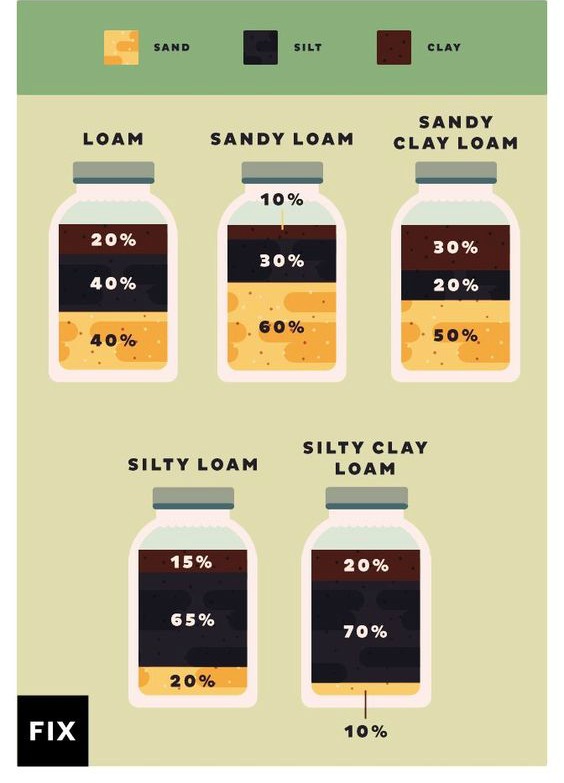
    Start by choosing your space. Anywhere that has been plowed at some point or cleared out to use for gardening will do, virtually. You do need loose soil underneath, so make sure it is ready for planting in some capacity and not hard, packed soil.

    First layer

    Once you have your garden bed plotted out, it’s time for your first layer. Lay old newspaper down in an even layer all over the garden bed. If it’s at all windy where you are you’ll probably want to move on to the next step simultaneously, or have someone spray a light mist of water over the newspaper to keep it on the ground as you move on.

    Second layer

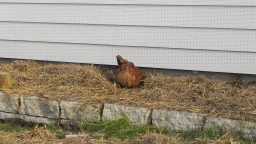
    Next, you will need lots of manure. If you have your own animals, great, if not, check with local farmers to see if they’ll let you come pick up some buckets of manure. Horse or cattle ranches will probably be particularly happy to share.

    Spread it out over your newspaper, in a nice, even, relatively thick layer.

    Third layer 

    Finally, top this with wood chips. Wood chips aren’t hard to get for free, if you look in the right places. Spread these all over your manure layer.


    Now, wait for a season. The components of your garden will break down over time, creating wonderfully nutritious soil to plant in. The wood chips will eliminate the need for excessive weeding.


    When you’re ready to plant, simply spread the woodchips back a bit and sow or transplant directly into the manure layer. The three layers of this garden will create the perfect environment for plants to grow and the nutrition they need to be healthy.


    That’s it! Have you ever tried this gardening method? Let us know!


    If you enjoyed this, you might also like….

    Can You Defend Your Family When SHTF?

    Natural Healing Secrets You Need to Know…

    Effective Primal Diet Hacks…

  • A Simple Guide to Starting a Beehive (Video)

    A Simple Guide to Starting a Beehive (Video)

    Last week, we shared the very cool idea to make a beehive using mason jars, so since it did not come with instructions as to how to actually start a hive, I thought I’d go ahead and follow up with that one.

    Bees are a wonderful thing to do on the homestead, or even in your backyard, if you’re able to. Raw honey is one of the most valuable and nutritious substances on the planet, so raising bees is a space and time efficient way to produce food on a small scale, and a wonderful addition to any homestead or self-sufficiency operation.

    It can a bit overwhelming getting started, though, from choosing your bees, setting up your hive, getting protective gear, etc. This video is a great introductory course for beekeeping, and will help demystify the process and get you well on your way to functional, thriving hive in no time.

    Be sure to let us know what else you’d like to learn about bees!

    If you enjoyed this, you might also like….

    Can You Defend Your Family When SHTF?

    Natural Healing Secrets You Need to Know…

    Effective Primal Diet Hacks…

  • Growing Cauliflower in a Container

    Growing Cauliflower in a Container

    Cauliflower is a great vegetable. It’s nutritious, delicious, and has grown in popularity in recent years since it makes a great base for many grain-free dishes.

    If you’d like to grow your own, you don’t need a garden to do it; cauliflower 
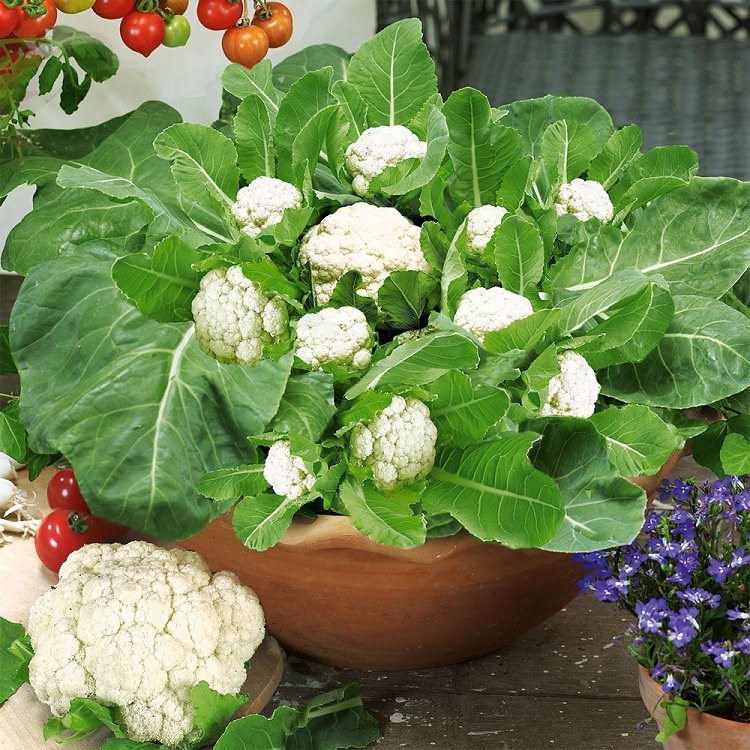
can be grown in a container, if you follow the right steps.

    First of all, cauliflower needs really high-condition soil. Use premium potting soil and loamy, well-amended soil to plant it in. You can direct sow in the container or start in 2″ pots and transplant after it’s sprouted.

    To choose a container, you’ll need something that is at least 12″ deep and 10″ wide, so the cauliflower has plenty of room to grow. You will also need to make sure there’s plenty of drainage in the container. This is a great example of a happy cauliflower plant in an appropriate container:

    Once your cauliflower seedling is in it’s container, you’ll want to make sure it’s always properly watered. Cauliflower is a thirsty plant and requires moist soil to grow nice, full heads, so try not to ever let your soil dry out.

    Once you’ve got a bit of a head growing, cover the head with the inner leaves by breaking or tying them up. this is called blanching, and will protect the head from harsh sunlight.

    Speaking of sunlight, make sure you put your cauliflower in a partially sunny spot, where it can get at least four hours a day of direct sunlight.

    Cauliflower is also a very hungry plant and will need frequent fertilizer. As I mentioned, make sure it’s planted in very well-amended soil, and afterwards, fertilize with a 10-10-10 mix monthly.

    You may or may not need to mulch, depending on how frequently you can water and what time of year you are growing your cauliflower. If you are having issues with the soil drying out quickly or it’s a particularly hot time of year, you might want to mulch a bit while the plant is still young.

    Your cauliflower will be ready to harvest typically about 3-4 months after planting, and you can determine this by the size of the head. If it is between 6-12 inches and still tightly compact, you’re good to go! Enjoy the fruits of your container garden and throw it into some cauliflower pizza crust, grain-free fried “rice”, or just steamed plain with butter. Yum!

    If you enjoyed this, you might also like….

    Can You Defend Your Family When SHTF?

    Natural Healing Secrets You Need to Know…

    Effective Primal Diet Hacks…

  • Companion Planting: A Simple Guide (Infographic)

    Companion Planting: A Simple Guide (Infographic)

    Companion planting can be kind of confusing. If something goes well together, does that mean it might not go well next to another plant? Companion planting is really important to understand and utilize, because you can really maximize space, productivity, and also repel pests, with the right combination.

    It is also true, however, that planting “bad neighbors” together might result in increased pests or unhappy plants. There are a ton of potential good combinations out there, but it’s good to know the bad ones too, so you can prevent unhappy neighbors!

    This great little infographic for visual learners like myself, from TipsPlants.com, breaks down some good and bad garden neighbors, as well as some excellent pest repellants you could plant around the border of your garden or in between your vegetables to ward off the worst kinds of neighbors, that is, garden pests!

    Have you ever tried companion planting with any success? Let us know in the comments below.

  • How to Test Your Soil Using Only a Mason Jar

    How to Test Your Soil Using Only a Mason Jar


    When starting a garden, it’s crucial to know what kind of soil you’re working with. It will help you determine what to plant and how to amend your soil. All soil is comprised of three basic components: sand, silt, and clay, and varying combinations of these three components determine what type of soil you have.

    Loamy soil is ideal, and it is typically more or less an even mix of sand, silt, and clay. It is slightly spongy and moist, but still light enough that it doesn’t get packed down too easily. In essence, it’s just right. To achieve this ideal soil, you would want to add whatever component your soil is lacking.

    To test your soil, all you need is a mason jar, some water, and a little bit of time.

    How to perform a mason jar soil test

    1. First, you need your soil sample. Don’t just grab a handful off the top though, dig a bit into some well-tilled soil, “stir” around a bit with your trowel, and get a good scoop from below the surface of your garden bed or the ground you are testing.
    2. Once you have a nice sized scoop of dirt, fill your mason jar about halfway with the dirt.
    3. Fill the rest of the way up to the lip of the mason jar with water, leaving about 1″ of air.
    4. Attach the lid to the jar securely, then shake vigorously. This will cause the dirt to settle once you’ve put the jar back down, as well as break up any sizable clumps of dirt.
    5. Set the jar back down and leave overnight. In the morning, you’ll have your results!

    On the bottom will be sand, then silt, and then clay. Here’s a quick and easy guide to how to read your results and what they mean for your soil type:

    If you enjoyed this, you might also like….

    Gardening…NO SOIL NEEDED…

    Bury a Shipping Container…WHY?

    4 Critical Methods to Improve Your Garden Soil


  • 5 Ways for Your Chickens to Earn Their Keep

    5 Ways for Your Chickens to Earn Their Keep

    Chickens are more than just egg producers, if you utilize them correctly, they can be a vital part of a smoothly running homestead! They are excellent additions to any gardening effort, and can even be useful with raising larger poultry as well!

    Here are some ideas for how to get the most out of your chickens, and as all these ideas utilize what chickens are born to do, your hens are guaranteed to be more happy as well! And happy hens means more eggs. It’s a win-win for everyone!

    1. Prep garden beds

    You will probably want to keep your chickens away from your vegetable garden most of the time, but when you’re preparing a new bed or digging up an old one, they’ll love to help you out! As they scratch and peck, they will turn the soil and also contribute some valuable manure. The bugs and scraps of roots and leaves they’re sure to find are also wonderfully nutritious for them, which makes for delicious and healthy eggs!

    2. Turning your compost

    So they’re not exactly going to help turning over your whole compost pile, but they’ll definitely still help in the same way they will your garden bed. Let them hang out when you’re turning your compost pile, and they’ll help break it down faster by gobbling up the creepy crawlers and many scraps of organic waste that are still intact.

    3. Fertilizer

    For both 1 and 2, chickens will contribute to your garden and compost pile by producing manure in the process of pecking and scratching through that will add valuable nitrogen to your soil or compost. But you can also collect it right in their pen to add to your compost pile or garden for regular fertilizing or making a quick compost tea.

    4. Grass and weed control 

    Chickens can’t exactly mow lawns, but they can help with seriously fast growing weeds or grass. If you have tough-to-reach parts of your lawn that require more than simple mowing, let your girls at it!

    5. Waste disposal 

    Finally, and probably my personal favorite, is how quickly your chickens can turn kitchen scraps into nutritious eggs and valuable fertilizer for your garden. Fruit and veggie scraps and any leftover grain products are absolutely delightful treats for any self-respecting chicken. Just keep a container with a lid on your counter and bring to your chickens with their evening meals.


    Chickens are awesome in so many ways, and with these simple tips, you can really get the most out of your girls (and your rooster too, he’ll love to help!)

    If you liked this, you might also enjoy…

    The Sinister Future of the US…

    Pure, Natural Healing…

    Donald Trump’s Words of Warning…


  • Back to Nature Garden (Video)

    Back to Nature Garden (Video)

    This is a super cool concept that I’ve often wanted to try myself. The folks at Deep South Homestead, one of my favorite YouTube channels, have tried the “Back to Eden” gardening method, without much success. Back to Eden is the gardening method that was shown in the film by the same name, that involves layering wood chips and manure that sit for a season. The idea is to mimic the natural formation of soil in the forest.

    Danny from Deep South Homestead explains in this video that because of termites infesting their wood chips, that Back to Eden did not work for them, so they tried their hand at their own method, that they call “Back to Nature”. They decided to mimic what was happening to the soil in the forest on their homestead, by layering oak leaves and rabbit manure, turning it with a tractor and leaving it for a season, to plant their tomatoes in in the spring. You can see how he set his up and hear more about his plans for it in the video below. Enjoy!

    If you liked this, you might also enjoy…

    Holistic Medicine Basics

    Ever Considered Taking Yoga? Read this

    The Ultimate Woodworking Course..