Page 5 of 13
1 3 4 5 6 7 13
homesteading – Page 5 – Homesteader Depot

Tag: homesteading

  • The Best States for Homesteading

    The Best States for Homesteading

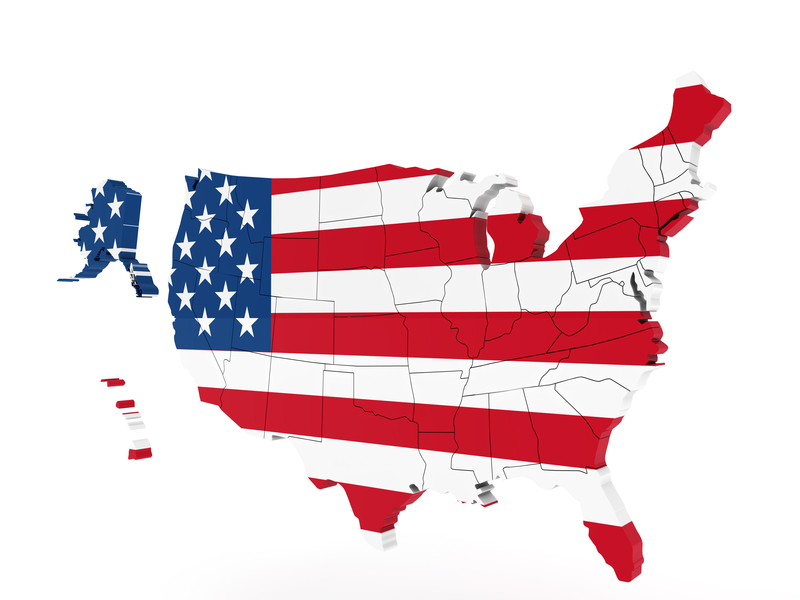
    If you’re interested in homesteading – and we assume you are or you wouldn’t be here – you might be wondering where to start your homestead.

    It’s a good question. After all, some states are better suited to homesteading than others. You might already live in a state with a lot of homesteaders – or perhaps you live in a city and you want some advice about where to shop for a homesteading property.

    We’re here to help. There’s no one-size-fits-all answer, but we’ll run down our top picks and explain why we like them.

    Oregon

    Our first pick is Oregon, located in the Pacific Northwest. We chose it because it’s one of the most naturally abundant places in the country.

    Oregon and its neighbor, Washington, offer an embarrassment of riches for homesteaders. Berries and other natural edibles grow wild. The oceans and rivers are teeming with fish.

    For hunters and fishers, Oregon offers deer, bear, rabbits, salmon, and a host of other wildlife. People who want to live off the land would do well to consider this area for their homesteads.

    Virginia

    If you dream of owning a farm, you need to choose a place with rich, nutrient-dense soil, a temperate climate, and plenty of precipitation. Our next pick fits all those requirements. We’re talking about the state of Virginia.

    Suggested Article: “The Reality of Homesteading: What No One Tells You”

    Virginia is considered a Southern state but it’s not as hot as states further to the South. The generous annual rainfall ensures that you won’t have to worry much about irrigation. The soil is rich and capable of sustaining a wide variety of plants.

    One thing we love about Virginia is that you don’t need a ton of space to have a sustainable homestead. If you choose the right plants and use your land wisely, you can grow all the food you need even if you can’t afford a massive spread.

    Arizona and New Mexico

    You might not think that the desert is a good place to have a homestead, but don’t rule it out. One of the benefits of homesteading in the Southwest is that land there is both inexpensive and abundant.

    While the prices are unbeatable here, it is essential to keep in mind that growing plants and raising livestock in the desert is a challenge. You’ll need to work with the land and not against it if you want to be successful.

    Of course, the desert is a surprisingly bountiful place when you know what to look for. Desert-dwelling natives hunted native animals and found ways to prepare and preserve the foreboding-looking plants that grew in the desert.

    Montana

    Some people who are interested in homesteading find the idea appealing because they can change their view from city skyscrapers and suburban strip malls to views of mountains, prairies, and trees.

    There’s a reason they call Montana “Big Sky Country.” The wide-open landscapes are ideal for raising livestock and farming. The views are incomparable.

    Quick Tip:  “Why You Should Keep a Homesteading Journal”

    The weather in Montana can be harsh in the winter, but if you’re looking for a location that’s rural and has the breathtaking views you desire, you might want to consider it. And if Montana doesn’t appeal to you, Colorado is another option that fits the same criteria.

    Alaska

    When it comes to homesteading in the United States, Alaska seems like the final frontier. It’s certainly the most remote location on our list, and one of the most beautiful.

    Homesteading in Alaska has its challenges. The state is far to the North and has a cool climate. It doesn’t get much sun during the winter months and that can make solar power an unreliable source of energy.

    However, for homesteaders who don’t mind a challenge, Alaska has a lot to offer. It’s an especially good choice if you want to get away from the burdens of civilization.

    Are you homesteading in a state that didn’t make our list? Sing its praises in the comments!

    [Self Reliance Video] Solar expert Stan reveals his SOLAR INDUSTRY SECRET <<<Watch Here>>>


  • Do-It-Yourself Worm Casting Methods for Compost

    Do-It-Yourself Worm Casting Methods for Compost

    If you’re a homesteader, you probably know all about composting. Composting kitchen scraps are one of the best ways to fertilize your garden without chemicals and pesticides.

    Some of the most effective composters use worms to break down food. If you have a worm composter, then you might not know that worm castings – the black waste that worms produce – is arguably the single best fertilizer known to man.

    The challenge is finding a way to harvest the worm castings – also known as black gold – without disturbing or harming your worms. You also want to make sure to preserve any eggs in the castings since those will hatch and provide you with a steady supply of worms.

    When Is It Time to Harvest?

    The first thing to cover is how to know when it’s time to harvest the castings. The best way to tell is to examine the food bedding in the vermicomposter. When most of it appears to be a rich, black soil, it’s time to harvest.

    The key is to wait until what you’ll be harvesting is mostly castings. That way, you’ll have the richest possible fertilizer to use.

    Method #1: Using Food to Move Worms

    The worms in your composter will migrate to new food sources when you provide them. One of the easiest ways to harvest their castings is to move their food source and wait until they’ve relocated.

    If you have a multi-tray worm composter, simply move the food to the tray above the one you want to harvest. You’ll have to be patient. The worms may take up to a month to relocate. Once they do, you can simply sift through the tray to find any remaining worms. Place them in the tray with the food.

    You’ll also want to be on the lookout for eggs in the soil. Worm eggs are small, round, and a yellowish color. You’ll want to place the eggs in the new food bed. That way, they’ll have a food source when they hatch.

    Method #2: Using Light to Relocate Worms

    Worms are subterranean creatures who prefer dark to light. In fact, they will naturally turn away from light and migrate to a new location when it’s present.

    For that reason, a simple way to move the worms out of the tray you want to harvest is to shine a light at one end of it. They’ll move to the other end and burrow in, leaving you free to sift through the castings, remove remaining worms and eggs, and replace the food bed.

    It’s important to note that exposure to direct light can dry out and even kill worms. An alternative method is to gently move the castings down to one end of the tray, creating a mound. The worms near the top will burrow down the bottom. Then, you can scoop castings from the top and sides.

    These first two methods are both for people who prefer not to handle their worms.

    Method #3: Hand Sorting

    The third and final method is to sort through the castings by hand, removing worms and eggs as you go. Some people don’t like this method. However, if you’re not squeamish, it’s arguably the quickest method because you won’t have to wait for the worms to move on their own.

    There are two methods you can use. The first is to empty the whole tray and sort through it, picking out worms and eggs and replacing them in the tray with a new food bed for the worms. The second is to sift a handful at a time.

    We’ve found that kids love to help with this method. Provided they’re old enough to know not to squeeze the worms, why not let them help?

    How do you harvest worm castings? Let us know in the comments!

  • 5 Ways Pigs Are Valuable Beyond Just Meat

    5 Ways Pigs Are Valuable Beyond Just Meat


    When you are living off the land, owning animals that can provide you with food can be extremely beneficial. You may grow plenty of crops and fill your pantry with canned vegetables, but if you aren’t getting enough protein, you won’t have the energy to tend to your farm and home.

    While there are some homesteaders who don’t want to commit to raising a large farm or a herd of cattle, there are plenty of other animals such as chickens or turkeys that can ensure you have meat and eggs throughout the year. They are also low-maintenance so that you don’t have to waste a lot of your time caring for them.

    Pigs are another option that will provide you and your family with plenty of meat. While they do require plenty of food, they aren’t as difficult to raise as you may think.

    Here are a few good reasons why you should consider adding pigs to your homestead.

    1. They Will Eat Anything

    Yes, pigs eat a lot, which can be a disadvantage, but they will eat a lot of anything. Many homesteaders make their own dairy products such as cheese or butter. If you have excess whey left over from making cheese, you can feed it to the pigs. They will also eat excess milk from dairy animals, extra eggs from chickens, or any cooked leftovers that you have lying around. That means no more food thrown out the back door and nothing goes to waste.

    1. They are Excellent Tillers

    Pigs will till any area that you place them in. Many people think that the rooting that pigs do naturally is a bad habit and it should be stopped. But it’s only a terrible thing if you have them in an area where you don’t want to disturb the soil. The tilled land where pigs once lived is a suitable place to grow vegetables. That is because along with loosening up the soil, it is also well-fertilized.


    3. They Help Eliminate Parasites 

    Pigs are a dead-end for parasites that often become an issue with other farm animals such as cattle, goats, or sheep. Since pigs have internal parasites that are different from other animals, they help clean up the land when they follow other grazing animals. If you place your pigs in a field with grazing animals such as sheep or goats, the pigs will consume the eggs and larvae of the parasites on those animals. Their bodies are capable of digesting the parasites without harm. Goat parasites will not survive inside of pigs.


    1. You Receive an Abundance of Meat

    The best thing about raising pigs is the amount of meat that you can get from them. You can add more variety to your diet and create a wide range of meals for your family all while homesteading. And the best thing about it is that you know where the meat came from. You raised the pigs humanely and know exactly what type of diet they consumed.

    Suggested Article: “5 Keys to Choosing the Perfect Livestock”

    1. Extra Income

    If you end up with more meat than you need, you can always sell the additional meat for profit. Many people will raise pigs just to sell the meat and not keep it for themselves, while others may raise additional pigs to sell. You can choose to sell the pig itself or the meat after it is butchered. Either way, you end up with a substantial profit that can help with supplies during the winter.

    If you want to have enough pork for your entire family, you should get two to three piglets in the spring. Raise them throughout the summer and then butcher them that fall. Then you can do the same the following year. Raising a pig for that period of time will usually produce around 170 to 200 pounds of meat, which should be more than enough meat to keep any homesteader happy.

  • 3 Effective Sheep Shearing Techniques

    3 Effective Sheep Shearing Techniques

    Despite some claims from animal rights groups, shearing is necessary to maintain the health and comfort of your sheep.

    There are 2 main reasons you need to have your sheep sheared once a year.

    • If the sheep’s thick wooly coats are not removed before the summer months, they can become very uncomfortable. Additionally, the amount of dirt that can amass and become matted to their bodies could develop into a health risk.
    • The wool from certain breeds is a valuable commodity and a good source of annual income. When raised correctly with a proper diet, a single sheep can grow up to 10 pounds of wool.

    Whether or not you are keeping them as a source of income or food, your sheep will need you to get them ready for the summer months to maintain a happy and healthy lifestyle on the farm, ranch, or homestead.

    Note: To make this process go a lot faster, take a look at these awesome shears I found on Amazon at a 65% discount right now <PanelTech Sheep Shears>

    There are a number of techniques out there, and like a person’s handwriting, each individual will develop a style of their own as they practice and get better.  Go get started, here are some basic steps, and tips to follow.

    Starting Position

    Some experts say start by laying the sheep on one side, others recommend starting on their backs with their feet in the air. Depending on the size of the sheep, you can decide what will work best for you.

    Shearing the Brisket

    No matter the technique or starting position you use, most experts say to start shearing on the brisket, or belly area.  If you are planning to sell your wool, the belly area is often too dirty to sell, so starting there will allow you to tackle the worst areas around the belly and crotch areas and get rid of them before you move on to the more valuable areas.

    When you start shearing, make sure your blows (strokes) are long and confident.

    Move down the belly area, around the crotch and the tail.  Separate the wool removed from these areas and discard.

    Start on One Side and Work Toward the Middle

    The removal of the brisket wool will leave a nice starting place to move onto the sides.

    To continue, start on the back leg, shear around it, and then shear up to the shoulder in a long clean blow. Trim the head and neck then work your way back down and around.

    Repeat this on the other side then finish with the back.

    When finished the ultimate goal is to have a single layer of wool that can be rolled or folded up for transport.

    Tips for Maneuvering Your Sheep

    To get your sheep into the positions needed to access each area, you can apply the following techniques.

    To control the head

    Place your thumb in the sheep’s mouth behind the incisor and wrapping your fingers under its chin.

    Take a firm but gentle hold of one of the ears and use to guide the head and body.

    To hold in place while shearing

    Rest the sheep’s body against your legs or between your knees.

    Lay the sheep on its side and straddle with your legs.

    Keep in mind, the calmer and more comfortable the sheep is, the less they will want to wriggle out of your control to get away.  This is especially important for larger sheep breeds to ensure a successful shearing experience.

    Sheep shearing is not an easy task, but the rewards are worth the effort, both for you and your sheep.  Professional shearers make it look easy but remember, they’ve had years and years of experience.  Like most things worth doing, practice makes perfect.

    Bonus: Want to take your identity off the grid?  <<<Click Here and Become INVISIBLE>>>

  • Can Rabbits Contribute to a Homestead?

    Can Rabbits Contribute to a Homestead?

    Not just for pets, including rabbits on a homestead can be a great way to contribute to your food supplies, both as a food source and a natural fertilizer for your garden.  If you’re into fiber arts or want some extra money, angora rabbits give an additional benefit just by growing their fur.

    Rabbits for Manure

    A single rabbit can produce approximately a pound of dry manure each week.  That’s roughly 50 pounds a year. This high-quality soil conditioner is usually low in weed seeds thanks to the prepared foods typically used to feed them.  It also contains an excellent nutrient content that beats cows, horses and goats both when used fresh and when dried.

    The application can be done a few ways depending on what you need it for.  If you are feeding ornamental plants, top-dress them with fresh manure.  For produce gardens, mix it with your compost pile and let sit for at least 3 weeks before spreading on the garden areas.

    Need worms for your compost pile?  Start a worm farm under the rabbit hutch using red wigglers.  This will assist with odor control in the hutch, and provide you with a great source of worm castings, compost worms, and the manure.

    NOTE:  If your wigglers freeze to death during the winter, just replace them come spring. Learn more here: “Worm Farming”

    Rabbits for Meat

    Once you’ve gotten your “herd” started, rabbits are a really good way to add to your food sources with very little extra money.  We all know the old cliché “breeds like rabbits” and it’s true.  A well cared for trio will provide low-fat, low cholesterol, high-quality meat for years to come.

    Related Article:  “Simple Guide to Raising Meat Rabbits”

    Although some breeders consider some rabbit breeds too little to butcher, like the Mini Rex, any rabbit can provide meat when you need it.  If food is going to be your primary goal for adding rabbits to your property, some breeds developed especially to be a meat source include the Californian, the New Zealand and the Giant Chinchilla.

    Rabbits for Fiber

    Although not great for eating, angora wool rabbits will provide fertilizer and a little extra money for your trouble.  If you know someone into fiber art, this resource is amazing for fiber artists. It is excellent for spinning and weaving or can be sold raw.

    Of course, with added benefits comes added responsibility.  Angoras need regular grooming to keep them in immaculate condition, sometimes up to once a day.  Wool collections can be done quarterly by shearing.

    If fiber production sounds like a great idea, here are some breeds that will work.

    English Angora

    A smaller type of angora, English rabbits require more maintenance than other angoras.  But, at an average of 5-7 lbs., you can have a few more in the same space and still receive a good production of wool.

    French Angora

    A little larger at 7.5 to 9.5 lbs. the French rabbit’s wool is a litter rougher than the English but needs less maintenance.

    Giant Angora

    True to its name, the Giant Angora Rabbit averages about 10.5 lbs.  Giants are white with red eyes.

    Some Final Info that Could Become Veeery Helpful…

    To keep your rabbits healthy and reduce the possibility of stomach and tooth issues, avoid sweet foods like fruits and carrots and focus on grasses, and non-sweet veggies.  Sugary foods can lead to an imbalance of bacteria in their tummies and make them sick.

    And, finally, an important word on reproduction.  Rabbits are able to conceive again less than an hour after giving birth!  (Yikes!)

    So, if you’re long-term plans are to start slowly, keep a firm eye on the male at all times!  If they aren’t already, separate them and keep them separate before, during and immediately after the birthing.

    More Info:  “Comprehensive Guide Covering Everything You Need to Know About Raising Rabbits”

  • 7 Steps for Easy Canning

    7 Steps for Easy Canning

    If you decide to get into the wonderful world of canning, be prepared to experience some of the more flavorful food you’ve ever experienced at a fraction of the cost. Canning allows you to pick or buy produce when it’s at its peak maturity and preserve that flavor year-round. The simplest canning process is Water Bath Canning.

    To get started you’ll need a few inexpensive basics, many of which you may already have, or be able to find at your local thrift store or flea market. The absolute essential musts are:

    • A pot that holds enough water to cover any sized jar.
    • A Jar Lifter or Canning Rack, or at least something to help you remove the jars from boiling hot water.
    • A set of jars with the seals and rings intact.

    I found this inexpensive, complete set on Amazon “9 piece canning set”

    Getting to Work

    Step 1

    Fill your canning pot about one-third full of water and a secondary pot completely full.  Heat water until hot, not boiling.

    Step 2

    Wash your jars seals and lids, then keep warm until ready to be filled.

    Step 3

    Prepare food and fill jars according to the recipe you are using. Remove air bubbles by running a non-metallic utensil around the inside of the jar. Wipe the rim of the jar with a clean, damp dish towel or paper towel.

    Step 4

    Place the seal and ring on the jar and gently finger tighten.

    Canning is a great way to “stockpile food”, check out this “Complete System for Building a Delicious Food Stockpile”

    Step 5

    Place a small board or hand towel in the bottom of your canning pot to keep the jars from making contact with the bottom.  Place jars in your canning pot making sure the water can flow freely around the jars. Add hot water as needed until the jars are covered at least halfway up.

    Step 6

    Cover and bring to a full boil. Start timing according to your recipe.

    Step 7

    When your time is up, turn off the heat, carefully remove the jars and set upright to cool. As the jars cool, the seals pull down into the vacuum that is created and compress with a small pop.

    When They’re Cool

    After jars have cooled, press on the lid to check the seal.  It should be sucked down, not popped up.

    If you find a jar didn’t seal, just put it in the fridge and use the food within 2-3 days like you would leftovers.

    Caps will sometimes rust if left on during storage so it’s a good idea to remove the screw caps then wash the jars.  If one gets stuck, just leave it one and try to use that jar of food first.

    Label the jar with the food type and date and store them in a dark, dry and relatively cool area like a kitchen pantry.  Avoid storing them in direct sunlight, or in utility rooms with where they will be exposed to heat or high humidity.

    A Note on Jelly, Jam, and Preserves – What’s the Difference?

    They may all look the same in their jars, but there are differences, mostly in what form the fruit is in when it’s prepared for canning.

    Preserves

    Once upon a time, preserved fruit was just that. Whole or large chunks of fruit preserved in sugar for use out of season. Not designed to spread on toast, they were more often opened and served as a side dish in the absence of fresh produce.

    Jams

    These still contain pieces of fruit but they have been pulverized into pulp.  Lately, Jams and preserves have become almost interchangeable but at one time there was a considered difference between the two.

    Jelly

    Jellies are made using only the juice of the fruit that is then thickened so it can stand on its own.  Usually with pectin, sometimes with gelatin.

    Tip: How to Properly Store Your Food and Increase its Shelf Life

  • Cooking Skills Every Homesteader Should Cultivate

    Cooking Skills Every Homesteader Should Cultivate

    One of the primary reasons many people homestead is to have a closer relationship with the source of their food. You yearn to grow your own vegetables, raise your own meat and dairy, forage, and hunt; essentially, to be independent of the increasingly complicated globalized food system.

    These are certainly noble aspirations, and we share them here. Going back to a simpler time, to our roots, is something many of us are striving for in this modern world. Only a few generations ago, many people lived much more self-reliant and independent lives, and with the precarious situation our whole planet seems to be in so many ways, it’s very tempting, and quite prudent, to try to return to these traditions.

    There is, however, much more to going back to our roots than simply gardening and raising livestock. As we explained in a recent post on reading antique cookbooks, cooking was very different a century ago and much more centered around the kind of food systems many homesteaders desire to return to.

    If you want to be more independent, there are a number of cooking skills that can help. Whether you are homesteading out in the country or simply trying to live a more wholesome life in the suburbs or a city, these are skills that are invaluable to cultivate and can have a great positive influence on your cooking and health.

    1. Cooking over an open fire

    This is bare bones basic cooking, and everyone should (but most likely won’t) know how to do this. If you ever go camping or have bonfires, you should be working on cooking over an open fire. There are many methods of how to do this, and yes, bar-b-que (sort of) counts. The thing is, we just get so used to our gas or electric ranges we never learn the art of controlling the heat ourselves, other than turning a knob, and this takes a huge aspect of cooking out of the equation. If you work on only one basic cooking skill, this should be it.

    2. Cooking in a wood oven

    This is very similar to cooking over an open fire in that we have become spoiled by modern ranges and can greatly benefit from learning this art. Wood ovens are great staples to have on a homestead anyway, for many reasons, and odds are if you plan to go off-grid or are caught in a grid-down situation, you might need to rely on a wood stove and oven to prepare your food.

    3. Butcher whole animals

    This is a big one, especially if you want to raise your own meat. If you live in a community, you probably have a butcher you can bring your animals to once you’ve slaughtered them, and this is definitely a great resource to have. The thing is, as great as it is to support your local butcher and we’d highly encourage you to keep him in business, you should also be learning to do it yourself when you can. Because let’s be real: it’s not entirely self-reliant if you have to rely on someone else to do the really hard part.

    Try to find ways to integrate butchering into your cooking life. Even if you don’t raise animals, simply buying a whole chicken and learning to properly section it off not only saves money but is good experience. If you do raise animals, take some time to learn to butcher them yourself. It’s hard work and you don’t want to get stuck having to learn how to do it when your life depends on it.

    4. Curing Meat 

    Curing meat is a very underrated method of food preservation. We constantly advocate for learning to preserve your own food, such as canning or lacto-fermenting, or culturing of any kind, and these methods of food preservation is all the rage these days. Less popular but equally important is learning to cure meat. If you are raising your own meat, this is essential. Curing can help preserve meat for a very long time, and of course,  make it absolutely delicious as well. This age-old method of curing meat has been used for centuries, since long before refrigeration, and shouldn’t be underestimated.

    5. Cooking with cast iron 

    You may already be familiar with cooking with cast iron, but if you’re not, you should seriously consider investing in a skillet or dutch oven. No cookware lasts as long or endures as much wear and tear. There’s a reason it has been a staple in Western kitchens for years. It’s the original non-stick skillet, and you can easily clean and maintain it using some oil or lard (how old-fashioned is that?), making it a great option for off-grid kitchens without running water as well. Where all other pots or pans will eventually deteriorate or break, cast iron will last forever.

    It’s great to start homesteading and create a more empowering relationship with your food, but don’t forget to learn how to cook it in a more traditional way!

    If you enjoyed this, you might also like….

    Long-Term Survival for Homesteaders…

  • Off-Grid Outdoor Kitchen Tour (Video)

    Off-Grid Outdoor Kitchen Tour (Video)

    If you’re an aspiring homesteader, this will be better than anything on HGTV to you. This amazing outdoor kitchen is any homesteader’s dream summer kitchen and I was super excited to see this video appear on one of my favorite homesteading YouTube channels.

    Summer kitchens are so essential to the homestead. Cooking can get incredibly hot as the weather gets warm, and having the option to cook outside can greatly reduce the temperature of your home, helping to keep it as a cool haven from the oppressive summer heat.

    Also, as you begin to harvest both from your garden and your flocks or herds, it is great to have all the space to process lots of produce or butcher animals. I have major homesteading envy watching the tour of this awesome kitchen!

    If you enjoyed this, you might also like….

    Long-Term Survival for Homesteaders…

    Natural Healing Secrets You Need to Know…

    Effective Primal Diet Hacks…