Tag: reuse

  • 3 Surprising Ways to Reuse Old Electrical Cords and Cables

    3 Surprising Ways to Reuse Old Electrical Cords and Cables


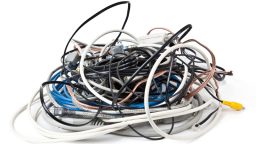
    Since the dawn of cable TV, the number of electrical type cording we have around the house has expanded almost exponentially.  What started with coaxial and extension cords now include shorted out or plain outdated AV connectors, HDMI wiring, and USB cords in about every shape, size, and color.

    If you are anything like my family, you have at least one box filled with outdated wiring, some of which is so old you probably have no idea what ancient piece of tech you’ve since gotten rid of it used to go to. The first idea we usually have is to toss them in the trash.  Next time you are ready to purge your collection, stop and consider one of these options instead.

    1.     Sell Them

    Does this sound familiar?  You’ve upgraded your camera/laptop/computer/monitor/etc. and now you have a collection of accessory cords that still work perfectly, but you have absolutely no use for.

    Believe it or not, there are techies out there who may want them.  They may need a replacement cord for an item they refuse to part with, they may be “frankensteining” their own unique machine and need just the spare cord you want to part with.

    If you’ve managed to keep track of the specs of some of your cords and the stuff they went to originally, you can sell these cords online or at your next garage sale and make a little extra cash on something you would otherwise toss aside.

    Bring batteries back to life with this simple battery reconditioning resource…never buy batteries again!  Learn More Here >>>

    2.     Recycle Them

    It probably won’t shock you to hear that electronic cords and cables are not biodegradable.  Fortunately, recycling is getting easier.  Even if your local curbside service doesn’t take them, you can do a search for electronic recycling in your area.  Best Buy has a recycling program for electronics.  The policy changes occasionally so check with your local store to see what they currently take, how much at once and if there are any fees.

    Suggested Article:  5 Creative Ways to Reuse Old Cans

    3.     Upcycle Them

    One of the things most of these cords have in common is copper. Copper is not only a good conductor; it looks good all by itself.

    Copper wire has many distinctive properties that have made it a go to wire for projects.  The wires flexibility is matched by its versatility.

    Although some wire crafting projects require special tools, plus time and years of practice, others are relatively easy and can be accomplished with just a few basic tools from your toolbox and time to have fun. Using copper wiring for a project adds an additional level of aesthetic that will enhance the finished product even more.

    You can “harvest” the copper wire from cables for homemade jewelry and other craft projects.  Collect your copper by using wire snips to cut it out of the PVC covering and dielectric spacers.

    Depending on the type of cord you are cutting open, you can end up with different gauges by using not only the main wiring but by unbraiding the thinner wire that makes up the protective guard.

    One of the easiest copper wire projects you can do it creating ire Word Art. The process is simple.

    • Use MS Word or a similar program to type your word in the font you want to copy and then select the font size you want the project to be.
    • Print out your final design on paper to use as a guide.
    • Using wire snips, needle nose pliers and regular pliers, bend the wire to create the shape of the letters, checking your design by laying the wire on the printout.
    Try this: Trick to Recondition and Reuse Old Batteries>>>

  • DIY Recycled Planters

    DIY Recycled Planters


    When you are getting ready to start seeds for spring planting, you may find yourself with more seeds than starter containers.

    Instead of running right out and buying some at your local garden center, try digging through your plastic recycling bin instead.  Empty plastic soda and water bottles are durable enough to handle taking on plants but easy to cut down, trim and otherwise alter to create a handy little planter to suit your needs. Here are two options to create plastic planters.


    Standard Planter

    Cut or punch drain holes around the bottom of the bottle. Any easy way to accomplish this is to turn the bottle upside down and use an awl, drill or screw and screwdriver to punch through the plastic.

    Most bottles have a built-in pattern you can follow.  Just place a hole in the center of each raised area of the bottom, so when its flipped back over, the holes will be evenly spaced at the very bottom of the bottle.

    If you need to make the initial holes wider, a large screw will force the holes open more.

    Remove the top of the bottle. In case you were wondering why we didn’t do this first, leaving the top on makes the bottle more stable and easier to work with when punching the holes in the bottom.

    A good guide to measure how far down to cut is to remove the part above the top of the label on the bottle.  If that has worn off or been removed already, your best guess will be fine.

    A sharp pair of utility scissors, or a utility knife or box cutter are good options to make a clean cut all the way around the bottle.

    And, there you have it, a basic round planter that will provide good drainage for your fledgling plants.

    Self-Watering Seed Starters

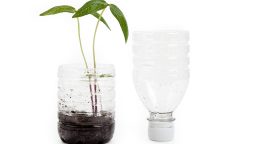
    This method not only lets you keep the moisture level of your soil easier to control, but it also uses the entire bottle, even the cap, so there is no waste material going back into the recycling bin.

    1. Cut your plastic bottle in half, separating the top from the bottom.
    2. Punch a hole into the middle of the bottle cap.
    3. Take 12-18 inches of yarn or string, fold it in half and tie a loop at the end of the folded side.
    4. Thread the loop through the hole in the cap so that the knotted loop will be located on the inside of the bottle cap with the two ends hanging out the other side.
    5. Screw the cap back onto the top of the bottle, making sure the loop sits loosely inside the top of the bottle.
    6. Fill the bottom part of the bottle with a few inches of water and the place the top upside down in the bottom so that the two ends hang from the cap and get submerged in the water.

    Once everything is in place, the string/yarn will draw water up into the soil that surrounds the loop in the top.  To add water, you’ll only need to lift the top part out, fill the bottom area and replace the top.

    You’ll be able to see exactly how much water is there and know precisely when its time to top it off.

    Suggested Article: DIY Plant Propagating

    Now You Can Get Planting

    Once completed, you can use these upcycled planters like you would any other to get your seeds started.  Place them all together on a shelf in your kitchen or back porch for a delightful display that is also practical and useful.


    Take a look at this “Medicine Chest” — how to deal with a disaster using alternative medicine.  Check it out here>>>


  • Simple Reduce – Reuse – Recycle Methods

    Simple Reduce – Reuse – Recycle Methods


    If you are a parent, the words “Reduce – Reuse – Recycle” may conjure up the theme music of Bob, the Builder.  But, that’s not a bad thing, unless you can’t get it out of your head.

    I used to enjoy watching that show with my son when he was still part of “Bob’s” demographic because very often they gave the adults sitting through it really good ideas about upcycling stuff.

    If you’re looking for ways to put into action the three R’s at home, here are some ideas to get you started.


    Paper Products

    Egg Cartons –  Great to sort and organize small items, either in a drawer or in a storage box.  Since they are easy to cut apart, you can trim them to fit just about any space or secure more than one together to expand the storage options.

    Have a year-round garden?  You’re probably always looking for containers to start seed.  Paper egg cartons are great for this since they provide excellent drainage.  Plus, since they are biodegradable, you can plant the whole “cup” once the baby plant is ready, instead of making a mess trying to transfer the soil.

    Toilet Paper Rolls: Also can be used as seed starters.  Cut each roll in half. Wrap 4 or more mini-rolls together with a rubber band or bungee cord, fill with potting soil and place in a shallow container or tray.

    8.5 x 11 Paper: Create notepaper pads by cutting down the used paper.  Then clip them together or stack them in a small box with a pencil for a convenient note area.

    Packing Paper: Fold into long thin pieces approximately a quarter inch to an inch wide and use the strips to weave baskets. Decorate before you weave them or after to get interesting patterns and designs.

    Gift Wrap and Old Magazines: Looking for something to do in the winter when all the chores are done?  Roll a thin strip of used wrapping paper or old magazines into different sizes of paper beads to use in future jewelry and craft projects.  Or, take up Quilling, the art of rolled paper.


    Brown Wrapping Paper or Grocery Bags: Paper grocery bags are one of my favorite things to upcycle.  I crumple it up and then flatten it to use a background for photos and artwork.  I wrap book with it for a more decorative display on my bookcases (my HTML and CSS Coding for Dummies manual looks a lot better in brown).  I even used it to cover the top of a desk to give my office a new look.

    Last year I used brown paper grocery bags and my scrapbooking stamps to create one of a kind gift boxes for Christmas gifts.  The shoe boxes I refuse to throw out came in handy for that project as well.

    Newsprint:  Makes a great mulch for the garden. To use it, tear it into strips, then lay it around your plants. Have more than you need for mulching?  Toss the extra shreds on the compost pile.

    Do you keep chickens or other livestock that required bedding?  Shredded paper works well.  Then, when its time to lay down fresh, you have extra fortified mulch/fertilizer for your garden beds.

    Scrap Paper: Any other paper you can’t immediately find a use for can be stored in a plastic bag to keep moisture out and used when packing and shipping an item, or just storing something fragile away. It’s also good for kindling if you have a fireplace.  Just steer clear of shiny paper, they contain additives that smoke very badly and release toxins into the air.


    Plastic

    Plastic Shopping Bags: This seemingly never-ending supply can be repurposed.  Use them a stuffing for plush items and pillows, braid them into rope for a variety of activities or crochet them into reusable bags.

    Plastic Bottles: Thanks to all the creatives out there, more and more ways of using plastic bottles are popping up every day.  From self-watering planters to chandeliers it appears that only your imagination is the limit when it comes to reusing them. For some fun idea, check out this post by DIYProjects.com.


    Glass

    Glass containers can be used indefinitely.  They can even help you reduce the number of plastic containers you end up with.  Try buying as many things in bulk and using your glass jars and bottles for storage.


    I hope at least one of these methods caught your attention and can be put to use immediately.  As always, leaving as little footprint on the earth is desired, so reduce – reuse – recycle.

    Click Here

  • Fascinating Ways to Reuse Old Sweaters

    Fascinating Ways to Reuse Old Sweaters

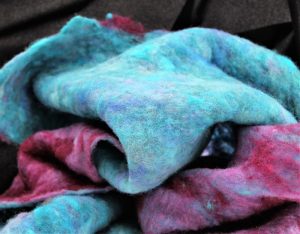
    If you are into crafting with felt pieces, it’s actually possible to create your own felt material just by cleaning out your closet. Then, for the low cost of a few washer/dryer cycles and detergent, you can have some large pieces to use that will let you “think big” for your next project.

    Felt itself is a non-woven textile. It is normally created by matting and compressing the fibers together until they connect to become a very sturdy fabric. Known as the oldest form of cloth, it has an extremely long historical record.

    Felt has been used in numerous cultures as fabric for rugs, tents, clothes and even footwear.

    When converting sweaters, the felting results when the wool fibers become agitated enough to bind to each other. As this happens, the fibers become fuzzy and stick so that fraying won’t take place. There are only two things that are important to sweater felting success, the fiber blend, and the knit stitch.

    Suggested Video:  “Learn how to purchase old batteries, recondition them, and sell them for a nice profit”

    While 100% wool is optimal, it may be hard to find since wool blends have become more popular.  For felting purposes, check the sweater’s tag and stick to those with 65% wool or more.

    As far as the knit stitch, this can be difficult to establish sometimes.  The easiest way to check is to see how stretchy the sweater is.  As a rule, the stretchier the sweater, the less likely you’ll be able to felt it successfully. Of course, if you’re not sure but know you don’t want the sweater anymore, there’s nothing wrong with giving it a try.

    Let the Felting Begin

    Felting sweaters is one of the easiest processes you will ever do.  To get started, you’ll need your washing machine to be free.  Put the sweaters in with approximately half the usual amount of detergent, and an old pair of tennis shoes.  Set the cycle for the longest, hottest option available on the machine.

    When the wash cycle is complete, move the sweaters (but not the shoes) into your drier. For this, you’ll also want to select the longest and hottest option.  Usually, this is the “cotton” cycle, but double check to see if a different option will be better.

    Suggested Article:  “13 Useful Ways to Reuse Eggshells”

    The sweaters are fully felted when all the fibers have become completely matted.  When this happens, there won’t be any fraying or unraveling when you cut them. If after the first round of washing and drying it doesn’t look like the felting is completed, repeat the process as many times as you need to. If you didn’t add the shoes the first time, find a pair for the subsequent times.  They help agitate the fibers more in the washer and speed up the process.

    Once completed, you should also notice that quite a bit of shrinking has occurred.  This is normal (and why you don’t usually wash sweater this way).  If you’ve reached a point where there is no fraying when you cut into the final product, you’re almost done!

    To make the most of your “new” craft supplies, you’ll want to cut them apart in a way that will give you the largest, flattest pieces to work with.  This will provide more options for the sizes of projects you can create later.

    For best results, cut a line from the armpit area up to the end of the neck opening on each side.  Then cut open each sleeve and up one side of the body portion.  When you are finished, you will be left with three large pieces of homemade felt material.

    DIY Home Solar Energy System <<<Learn How Here>>>

  • 13 Useful Ways to Reuse Eggshells

    13 Useful Ways to Reuse Eggshells

    If you raise chickens or simply eat a lot of eggs, you probably produce a lot of egg shells! And simply throwing them in the trash is a huge waste. Egg shells are loaded with beneficial nutrients and properties, and there are lots of ways to reuse them and make the most out of your chickens or grocery budget!

    First off, you need to make sure you store them properly. You might be able to get away with tossing them all in a 5-gallon bucket on your back porch, or, if that attracts pests or mold, you might want to take more precaution. Depending on how you reuse them, you also might want to sanitize them before storing.

    The easiest way to sanitize the egg shells is to rinse them off, the spread them out on a cookie sheet and bake at 350 degrees for about 15 minutes. This will kill any harmful bacteria that might otherwise fester in your eggshell stash.

    Then, simply store in any container of choice, and use as needed!

    Here are some of the many ways you can reuse eggshells around the house:

    Compost

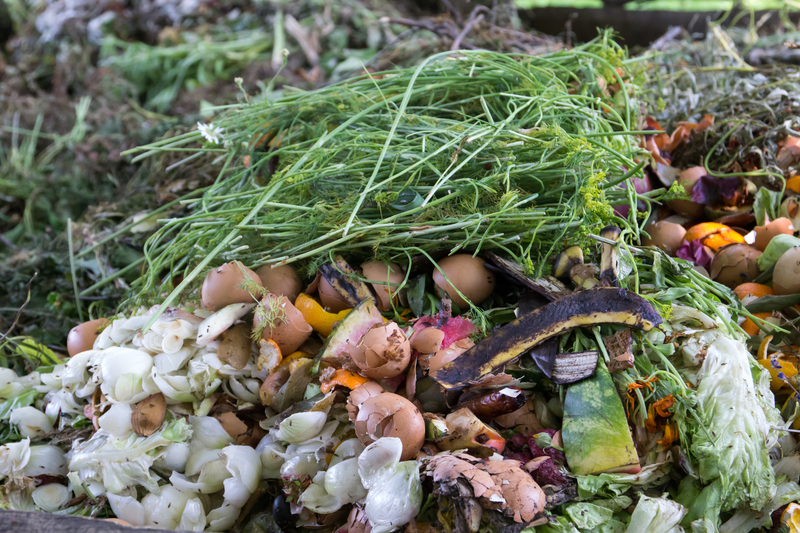
    The easiest way to put your egg shells to good use is to add them to your compost pile! They’re a great addition to any compost operation, and one of the most highly recommended organic materials to start a pile. You can save up a lot to get your pile started, and just toss freshly used shells on your pile as time goes on. If you’ve got a compost pile, you’ve always got something to do with leftover egg shells!

    Garden Fertilizer

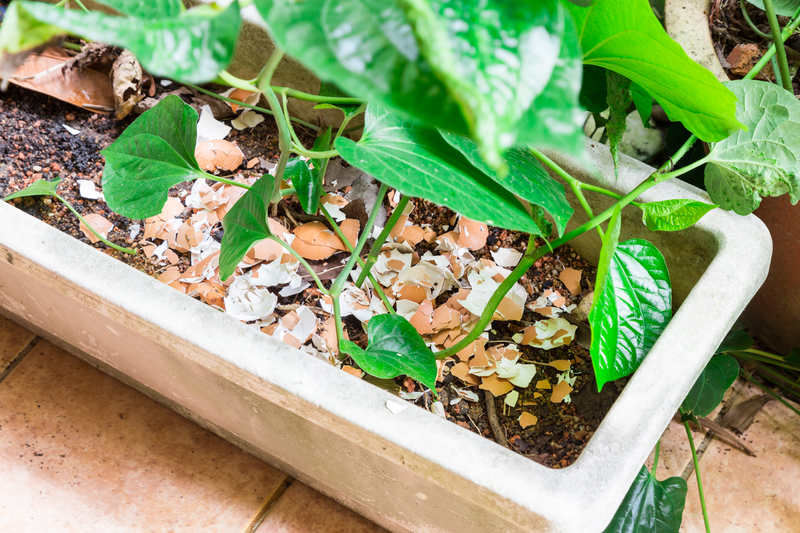
    Eggshells are a fantastic garden fertilizer, as they contain up to 97% calcium carbonite, as well as phosphoric acid, nitrogen, and calcium. You can grind them up in a food processor and sprinkle around your plants, or work into the soil of a new garden bed.

    Pest Control

    Eggshells also work as an excellent pest control! Use ground eggshells and sprinkle in a circle around any plants that have been attracting slugs or snails. The sharp fragments of eggshells will be very uninviting to these little pests, and have the added bonus of fertilizing your plants too!

    You can also deter cats (of all things) from using your garden as their own personal litter box by spreading roughly broken up egg shells around the edges. They won’t want to step on those with their delicate paws, trust me!

    Dietary Supplement

    You’ll want to make sure to use properly sanitized egg shells for this, and grind them up very finely. You can use a powerful food processor or a coffee grinder, and then add to gel caps or simply mix into food. This is an excellent source of calcium and other nutrients, and about as whole as it gets.

    Chicken Dietary Supplement

    Your chickens can benefit from those healthy nutrients too! Simply add to their feed for an added calcium boost. Their eggs will be very healthy, because they’ll be supplemented by, well, the exact nutrients they need for healthy shells!

    Seed Starts

    A very fun and clever way to use egg shells is to start seeds in them! Simply fill the shells with potting soil and plant seeds. Once they’re sprouted, all you’ll need to do is to gently crush the egg shell and plant directly in the ground! It will slowly break down as the plant grows, and fertilize the soil as it goes!

    Bird Seed

    Chickens aren’t the only birds who will enjoy your egg shells! If you crush them up and sprinkle them on the ground, you just might attract a few wild birds who will enjoy the nutritious treat.

    Household abrasive

    You can actually use finely ground eggshells as a handy, and totally natural, household abrasive. Add 1 cup finely ground egg shells to baking soda and use as you would Bon Ami for stubborn stains or grime. It’s excellent for cooked on grease and grime.

    Smoother Coffee

    You can actually add egg shells directly to your coffee to help reduce the acidity. Since egg shells are basic, they counteract the otherwise highly acidic coffee. Add a few egg shells in the machine with the ground coffee, or simply toss into your freshly brewed cup (although the former is probably preferable, I’m sure gritty coffee isn’t too appetizing to many people!)

    Natural Remedy

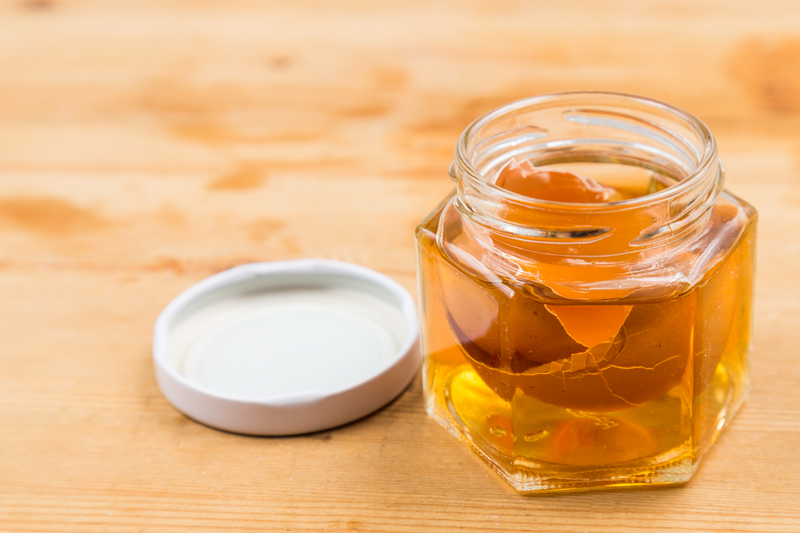
    Ground up eggshells can actually make a wonderful natural remedy for skin irritants. Let soak in some apple cider vinegar for a few days, and apply to minor rashes, hives, or bug bites.

    Face Mask

    You can even use eggshells in an all-natural, skin-firming face mask! Wisk up finely ground eggshells with 1 egg white, and spread on your face. Let dry, and rinse, following with toner and moisturizer.

    Suggested Article: “Apple Cider Vinegar for Beautiful Skin”

    Laundry Whitener

    This might be in the realm of old wives’ tale, but some say that if you toss some egg shells in with your whites, they’ll come out brighter!

    Candle Craft

    You can make adorable votive candles by pouring wax into an eggshell. Get creative with egg dying or colored wax! Very fun and frugal gift.

    Eggs are a fantastic food, and their shells are almost as versatile! Have you tried any of these eggshell hacks before? Let us know in the comments below.

    If you enjoyed this, you might also like….

    Long-Term Survival for Homesteaders…

    Natural Healing Secrets You Need to Know…

    Effective Primal Diet Hacks…


  • Ways to Recycle Sawdust

    Ways to Recycle Sawdust


    Woodworking projects and home repairs top the to-do lists of many homesteaders, but they generate a copious amount of a largely unwanted byproduct: sawdust. Before dumping your next shovelful of sawdust into the trash, take a look at this list of creative ways to make good use of it:

    • Use for traction when you’re stuck in the snow. Sawdust is traditionally used by logging truck drivers to prevent slipping and getting stuck in harsh winter road conditions. Keep a sealed bag or two of it in your trunk to spread around your tires for extra traction if you get stuck.
    • Keep on hand as a spill kit must-have. Sawdust is a very absorbent material and can quickly contain any spills such as oil or paint. Once the spill is soaked up, the sawdust sweeps up easily and with minimal dust.
    • Decorate with fake snow. Mix with white paint (acrylic or whatever is on hand) and glue to use for seasonal arts and crafts.
    • DIY firestarter bricks. Melt candle wax in a nonstick pot, add sawdust to achieve a thick consistency, pour into an ice cube tray or egg carton, and cool, and store with your camping gear or fireplace items. Use just like storebought firestarters.

      Power Efficiency Guide Will Change Our World Forever>>>

    • Keep weeds under control. Walnut sawdust has natural weed-killing properties. Sweep into the cracks of your driveway or walkway to prevent weed growth.
    • Use as a cement additive. Sawdust mixed into mortar aids in bonding building materials together. It also makes for a good recipe for casting moisture-loving planters.
    • Create a decorative garden path. Spread and tamp sawdust into a dirt walkway to curb erosion and create a soft, fragrant path through your garden or wooded lot.
    • Compost and fertilizer. Mix a little bit of sawdust with manure or a nitrogen source like blood meal. This both fertilizes plants and aids in water retention.
    • Mix with wood glue to fill cracks and holes. Mixed into a putty consistency with wood glue, very fine sawdust is often used by flooring professionals as a cheap, stainable wood filler.
    • Clean concrete floors. Lightly wet a small pile of sawdust with water and use a push broom to spread it around the concrete floor of any workspace. The wet sawdust will bind and absorb grime and hazardous fine dust.

        Check out THESE Effective Primal Diet Hacks…

  • 4 Crafty Ways to Reuse Mason Jars

    4 Crafty Ways to Reuse Mason Jars

    Mason jars. Are they not one of the best inventions of all time? Originally designed for canning, mason jars (or Bell, or Kerr, or other canning jars…wide-mouth canning jars are just all-around awesome) have so many uses. They’re sturdy, difficult to break, have a big capacity-well, a quart!

    Lately, the annals of Pinterest have shown us that there are dozens of ways to use mason jars, so we picked a few particularly clever uses.

    Mason Jar Herb Garden

    Probably the most homestead-applicable, a simple mason jar herb garden is pretty much exactly what it sounds like! In lieu of drainage, you simply place rocks or marbles at the bottom of the jar, then fill with potting soil, and finally your direct-sow seeds or plant your herb starts. This would make a great project for early fall, so you can enjoy fresh herbs inside throughout the winter.

    Suggested Article:  Five Ways to Preserve Herbs

    Fragrant Mason Jar Oil Lamps

    This requires a bit of craftiness, but it would make an awesome holiday gift and is also so pretty and rustic looking it’d be a great addition to any homestead decor. There are a couple of different methods – here’s one that’s perfect for the holidays. The cool thing about this one is you can add herbs, fragrant leaves, cinnamon sticks, or citrus peels that make a wonderful smell with the lamp is burned, and also make for a beautiful display.

    Weather-proof Matchbox

    A very un-glamorous but fantastic way to use a mason jar. A great option for a bug-out bag or camping. You simply fill the mason jar with matches, then cut the strike-anywhere surface off the box and affix to the lid of the mason jar. You have your matches protected from moisture and can strike them right on the lid of the jar. Perfect!

    Solar Lights 

    Ever try out those cheap solar lights to illuminate your paths only to find they get knocked over and broken in a stiff breeze? Well, you can simply remove the tops of these and place in-you guessed it-mason jars! You’ll have to pick some that fit a mason jar, of course, but these will illuminate the solar light beautifully and look way more stylish and rustic than those cheap plastic lamps. The glass will, of course, be breakable too, but being sturdier and heavier than the plastic lamps simply speared in the ground, they’re likely to hold up better. You can even bury them in the ground a few inches to ensure they don’t get knocked over easily.

    Related Article:  Solar Energy Options for Homesteaders

    These are just a few ideas for ever-versatile mason jars-I’m sure if you think outside the box you can think of cool ways to use them too! Ever tried a mason jar DIY craft?


    [Bonus] Never Buy New Batteries Again – Try this trick to recondition and reuse old batteries>>>


  • 10 Ways to Reuse Citrus Peels

    10 Ways to Reuse Citrus Peels

    Reusing things is more than just a habit for self-sufficient homesteaders; it’s an essential part of living. Food scraps are often tossed to animals, or composted for great gardening material. But there are many ways that you can reuse citrus peels,including lemons, oranges, grapefruits, and limes.

    1. Create an eco-friendly cleaning solution by tossing lemon peels into a re-sealable container, and adding just enough vinegar to cover the peels. After two weeks, the mixture will have taken on the smell of the lemons.

    citrus

    Related Article: Easy and Effective All Natural Homemade Citrus Cleaner

    2. Small pieces of lemon peel scattered around windowsills and other thresholds will help keep ants out of the home.

    3. Lemon peels can be used to polish chrome, copper, brass, and stainless steel.

    4. Leftover orange or lemon peels can be baked until they are darkened and dried, and then used as a natural fire starter.

    5. Boil orange peels, and then strain the peels out of the water. This liquid becomes a natural glass cleaner that won’t leave streaks like some vinegars. Toss the peels into the garbage disposal when you’re done to make your sink smell great.

    6. Cut up citrus peels of any sort can be added to brown sugar to keep it moist.

    7. Adding dried, chopped citrus peels to tea makes a flavorful treat that brightens up your afternoon break.

    8. Citrus is a great bug repellant. Fill a small herb pot with soil, coffee grounds, and some dried citrus peels. Plant your starter herb, and place on the picnic table, or near the window. Bugs won’t come near it.

    9. Make a citrus-infused oil to use for cooking.

    10. Dried lemon, lime, or orange peels added to either salt or sugar can make a wonderful skin cleanser. Try this one out for gifts next time the holidays roll around.

    A Revolutionary, Double Patented-Technology That Allows You To Wash Your Clothes Without Using A SINGLE DROP Of Toxic Chemical Detergent — Learn More>>>