Page 18 of 81
1 16 17 18 19 20 81
Ethan Archer – Page 18 – Homesteader Depot

Author: Ethan Archer

  • The Best Essential Oils to Start a Collection

    The Best Essential Oils to Start a Collection

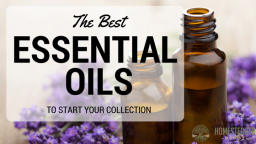
    There’s a lot of hype about essential oils out there, and it really is for good reason. Essential oils are a wonderful addition to any natural medicine cabinet.

    But it can be overwhelming trying to get yourself set up with some essential oils, and you can easily get sucked into some of the network marketing companies that sell essential oils for a very high price. or a bundle of several oils at once. You can easily spend up to a few hundred dollars on small bottles of oil that you won’t even use!

    There are literally dozens of types of essential oils out there to get, so how do you know which ones you will actually use? You might have one oil recommended to you for a certain remedy, but if you invest in a bottle, will you use it again?

    Here are some of the most common essential oils, that have the most versatile uses, and are also the easiest to find. There’s a lot of obscure oils out there that have a great place in natural medicine, of course, and can offer great help to certain remedies. But these oils are the best, all-purpose oils, that you will most likely find yourself reaching to time and time again, who have a long list of uses.

    When you are purchasing essential oils for the first time, make sure to pick something you’ll actually use. Good quality essential oils will work wonderfully well, and a little bit goes a long way, so one small bottle actually might last you years. Consider one of these for your starter oil, and you definitely won’t run out of ways to use it.

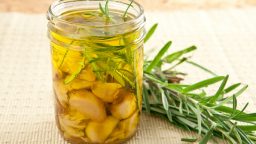
    A quick note on the term “carrier oil” which I use in this guide. A carrier oil is a non-essential oil that you use to apply essential oils topically. Since essential oils are highly concentrated, you usually only need 1-3 drops for topical use, and if you don’t have the resources to make your own balm, adding the oil to a carrier oil can help to quickly apply an essential oil directly to you skin. Some great carrier oils are olive, almond, or coconut oil, but you can use whatever you have on hand in a pinch.

    Some great carrier oils are olive, almond, or coconut oil, but you can use whatever you have on hand in a pinch. Simply pour some of the carrier oil into your hand, and add 1-3 drops of the essential. Mix it around with your finger, and apply.

    If you are considering starting your essential oil collection, I highly recommend investing in a good carrier oil as well. My personal favorite is almond oil, since it’s great for your skin and generally affordable.

    Now, on to our essential oils!

    Lavender

    I wrote a whole post about lavender alone, so you can refer to that for more detail. But lavender always tops my list for useful essential oils. It smells amazing, has been used for centuries, and has a list of uses as long as your arm. You really can’t go wrong with lavender oil as a staple in your medicine chest.

    Tea tree

    Tea tree oil is another great starter essential oil. It is naturally antibacterial and antifungal, so it’s great for everything from DIY all-purpose cleaner to treating athlete’s foot or dandruff. As a cleaning product, it works amazing well to sanitize and deodorize every room in your house, and it smells really clean and lovely too. Way better than Pine-Sol, and healthier too!

    Peppermint 

    Peppermint is another favorite of mine for many reasons. It is great for diffusing, especially if you’re battling a cold, and can be added to a carrier oil for a natural alternative to Vick’s vapor rub, or to sooth sore muscles and other aches and pains. You can dab a little on a sore tooth or add a few drops to some water for a very effective homemade mouthwash. It is also a great addition to homemade toothpaste if you miss the minty-freshness of conventional toothpaste. It is also great as a natural spider repellent around the house.

    Cinnamon

    Cinnamon is another great essential oil for dental issues, it can numb an aching tooth or flavor mouthwash and toothpaste. If you’re a fan of air fresheners or scented candles, cinnamon is a much safer and chemical-free alternative to these toxic, synthetic scents. It is another great oil to diffuse when you are suffering from a cold, it will deodorize the air and also help break up phlegm or congestion.

    There is also one amazing,  near-miraculous use for cinnamon oil: ant repellant. Nothing banishes ants from your kitchen like a few regular sprays of water with a bit of cinnamon essential oil in it. You’ll be amazed; the ants will never come back. It is on this list for that reason alone, although it’s still a very effective oil in other ways as well! Read more about this in my latest post on banishing ants for good.

    Eucalyptus 

    Eucalyptus, like tea tree oil, is a great antifungal and antibacterial oil that has a lot of medicinal uses. It’s ideal for diffusing when sick, or adding to your chest in a carrier oil if you have a cough, congestion, or to ease asthmatic symptoms. Many people love the fresh, earthy scent of eucalyptus, so it’s not only medicinal when diffused, but a wonderful air freshener. You can also use it topically in a carrier oil to relieve sore muscles or tension.


    Essential oils have so many uses around the house, and these are some of the best to start with. You might not even want to buy any more after getting any one of these staples, or you might find yourself hooked! Let us know if you’d like to know more about less common essential oils and their uses, and we’ll be sure to get that posted for you as well.

    If you enjoyed this, you might also like….

    Can You Defend Your Family When SHTF?

    Natural Healing Secrets You Need to Know…

    Effective Primal Diet Hacks…


  • How to Permanently Get Rid of Ants

    How to Permanently Get Rid of Ants

    Ants are a real drag to have in your home. And if you’re a homesteader, there’s a good chance you’re bringing lots of dirt inside from your garden or pasture, and with that comes ant eggs. Or perhaps you have lots of little nooks and crannies for ants to sneak in.

    Either way, if you’re battling ants constantly, year after year, you’re probably ready to be done with them. Ants are not only a big bother, they can actually pose a serious health risk if not addressed. It’s not common knowledge, but some ant species can actually transfer harmful pathogens into your living space, bringing with them sickness or infection.

    Of course, you could go for the expensive store-bought solutions that promise to banish ants completely. Unfortunately, those are not only highly toxic and dangerous to pets and small children, they also never work to fully rid ants from you home.

    The main ingredient in most commercial ant traps is boric acid, which is mixed with sugary substances to entice the ants. The ants then eat this, and bring it back to the colony, killing the rest of the ants, in theory. However, if you’ve ever tried these, you probably know how ineffective they can be, how quickly they dry out, and how you’re often left with nothing but useless traps and plenty of ants.

    Well, I have found a near-magical solution to banning ants, that has worked for me in several different houses, in several different climates, in fact.

    The secret ingredient is cinnamon essential oil, and the method couldn’t be easier.

    What you need

    • Cinnamon essential oil
    • Spray bottle
    • Tap water
    • Ants you’d like to kill dead

    What  you do

    1. Fill your spray bottle with tap water to the fill line.
    2. Add 5-10 drops of cinnamon essential oil.
    3. Spray.
    4. Banish ants from your home forever.

    Easy right? Very easy to make, and easy to use as well.

    The most crucial factor will be identifying where the ants are entering your home. Spray all around there, liberally, with your newly made ant repellant spray. Then, spray all along the path they normally take.

    If you want proof that this works insanely well, simply spray some in an ant’s path. Heck, you can even sprinkle some cinnamon right in their path to see how it works. They will always avoid it. Not sure why, but ants hate cinnamon.

    Every night as you clean up your kitchen, finish up by spraying the cinnamon oil spray all around. You probably won’t need it for long, but keep it in your kitchen for future use, just in case. You will be amazed at the results, trust me!

    If you enjoyed this, you might also like….

    Do You Have What You Need to Hold Down the Fort?

    Natural Healing Secrets You Need to Know…

    Effective Primal Diet Hacks…


  • 5 Ways to Preserve Garlic

    5 Ways to Preserve Garlic

    We’ve all experienced buying a head of garlic, and sooner or later those little sprouts pop out and we need to use it up as quickly as we can. Or perhaps you’re lucky enough to grow it yourself, or simply find yourself with entirely too much garlic on your hands from a deal at the farmer’s market or a Costco bag of organic garlic that was too good to pass up.

    Well, I’m actually a believer that there’s no such thing as “too much garlic”, because there’s always a way to use it up, if it’s turning too quickly for adding fresh to dishes.

    Garlic is such an awesome flavor to use in cooking, but it’s also highly medicinal, so it’s great to preserve and use up as much as you can, because you’ll essentially never run out of uses for it! Here are some of my favorite ways to preserve it:

    In Honey

    I wrote an article awhile back about how to make garlic-infused honey, and this still tops my list of not only best and easiest home remedies for a cold, but also one of the easiest and coolest ways to preserve garlic. You can check out that article for directions on how to make this wonder remedy, but the basic idea is that you preserve garlic cloves in honey, which makes it not only easy to consume garlic if you feel a cold coming on, but also blends the amazing healing power of these two great superfoods-raw honey and garlic-together.

    Garlic Infused Olive Oil

    This is a very simple way to preserve garlic, and very gourmet as well! Simply pack your freshly peeled garlic cloves in a jar and cover in oil. Cover with the lid and keep in a cool, dry place. You will probably want to wait a week or so before using the oil and/or the cloves inside, so that the oil can get nicely infused. This will keep garlic for at least a year, especially in a cool, dark cellar or pantry. Make in some fancy bottles for a wonderful gift, too!

    Garlic Powder

    Another very easy and handy way to preserve garlic is to make your own garlic powder. You can throw this in all kinds of dishes, or even blend with some raw honey if you can’t wait to infuse it. All you do is simply dehydrate your freshly peeled garlic according to your dehydrator’s directions (you can also mince it to dehydrate faster, but this requires more work), then run through a blender or food processor to make the powder. This is another excellent option for gifts, for your homestead farmer’s market stand (if you’ve got enough!), or to keep the delicious flavor of garlic on hand in your kitchen year-round.

    In Pesto

    If you’ve also got entirely too much basil on hand, you can kill two birds with one stone and make lots of pesto with your garlic and basil. All you really need is salt, olive oil, and of course your basil and garlic; you can add in pine nuts or cheese each time you use the pesto.

    Simply make a large batch of pesto by putting the ingredients togeter in a food processor until you have a  nice smooth paste. At this point, you can pack into ice cube trays and freeze, then store in zip lock bags in the freezer, or you can pack into jars and cover with more olive oil, and store in the refrigerator or freezer this way.

    However, there’s an even simpler way, if you’ve got the right equipment. You may have seen this floating around Pinterest, but some blender blades will actually attach to a pint-sized mason jar so you can quickly and easily blend anything up in the jar it’s stored in. This is a great option for bulk smoothie prep, and it works for pesto too.

    Simply back your ingredients into several pint-sized jars, store in the fridge or freezer, and each time you want to make a small batch of pesto, pop that jar on your blender lid (you’ll definitely want to make sure it fits before preparing these jars) and you’ve got fresh pesto ready for pizza night! How cool is that? This is definitely one of my favorite ways to keep garlic stored and ready to use.

    Roasted Garlic Butter

    Now, this is probably the most decadent way to preserve butter on this list, but man, you certainly won’t regret it. Roasted garlic butter is for sure a gourmet delicacy, and it’s a breeze to make at home. If you have a cow and make your own butter, this is a wonderful idea for something to sell, and once your customers taste it, they’re sure to come back for more.

    Simply roast your garlic heads in the oven, then mash the soft cloves into a paste, and run through a blender or food processor with softened butter, salt, and any herbs you like (optional). Throw this on some freshly baked bread, biscuits, or toss into anything you’re cooking, and you’ve got a wonderfully delicious, garlic-rich addition to any meal.


    Garlic is one of the best plants around. It’s medicinal, delicious, and, as we can see here, really fun and easy to preserve! Don’t shy away from buying lots of garlic next time you see a good deal and try any one of these fun recipes. You’re sure to be hooked!

    If you enjoyed this, you might also like….

    Do You Have What You Need to Hold Down the Fort?

    Natural Healing Secrets You Need to Know…

    Effective Primal Diet Hacks…


  • Homemade Rosewater Recipe

    Homemade Rosewater Recipe

    Rosewater is exactly what it sounds like: water infused with roses. It’s simple, but it’s incredibly effective to tone, moisturize, and give a wonderful scent to skin and hair.

    You can use it in many different ways, as a toner for your skin, a quick moisturizing spray, to add to homemade lotions or remedies or just as a natural perfume.

    You can make a bottle of homemade rosewater very easily and use for yourself or as gifts, or even as a chic and easy addition to a farmer’s market stand for your homestead.

    Wherever you live, if you happen to grow your own organic roses, this is a great way to use them up once they’ve faded. Or, if you don’t grow roses but still want to make this rose water, try to find fresh cut roses that were grown organically, or buy some dried rose buds or petals online that are certified organic.

    If you intend to use the rosewater on your skin, you definitely don’t want to use conventional rose petals, because as your skin is your largest organ, you definitely don’t want to be absorbing trace pesticides through your open pores.

    Do you have BACK PAIN? Give this a try>>>

    A quick note: this recipe will work with any amount of roses you have, just follow the directions and it will work.

    Ingredients 

    • organic roses
    • distilled water

    Directions

    1. If you are using fresh roses, remove the petals from the leaves completely.
    2. Put your petals in a saucepan, and cover with just enough distilled water to cover.
    3. Bring to a simmer and cover.
    4. Let simmer for 20-30 minutes until petals have lost their color.
    5. Remove from heat and strain the petals out. Let cool, and store in a glass bottle.

    That’s it! You can now use your rosewater to add to luxurious baths, homemade facial toner, or even to cook with; rosewater is a staple in many Middle Eastern dishes. Enjoy!

    If you enjoyed this, you might also like….

    Natural Healing Secrets You Need to Know…

  • The Real Benefits of Raw Milk (Video)

    The Real Benefits of Raw Milk (Video)

    I’ve written a bit about the benefits of raw milk on this site, and I’m a big believer in it. Raw milk might give many Americans who have gotten used to pasteurization pause, but the truth is, pasteurization actually reduces many of the natural health benefits of milk.

    Pasteurization has certainly helped with many food safety concerns as far as packaging and transporting food products in the US, but that really might be part of the problem. Or post-industrial world, reliant on national transportation grids to get our food to our door, totally removes the many benefits of a localized food system. Fortunately, many people are waking up to this, and if you’re lucky enough to live near a farm that sells raw milk, right from the cow’s udder, you can help close this gap and improve your health.

    This video from the Wenston A. Price Foundation, one of my favorite resources for nutritional and health information, explains the health benefits of raw milk and how to handle it properly. It is a great introduction to just how good raw milk is for you, and most importantly, why raw is best. Enjoy!

    If you enjoyed this, you might also like….

    Do You Have What You Need to Hold Down the Fort?

    Natural Healing Secrets You Need to Know…

    Effective Primal Diet Hacks…

  • Saving Space With Vertical Gardening (Infographic)

    Saving Space With Vertical Gardening (Infographic)

    We’ve written a lot about urban homesteading and space-efficient gardening for small yards, so I was really excited to find this infographic on FoodRevolution.org. It is a full breakdown of types of vertical gardening set-ups. It details which plants grow well on which kind of trellis, and also has some really creative ideas for DIY vertical gardens you can make with repurposed supplies you probably have lying around or could find easily at a thrift store.

    Vertical gardening is, in so many ways, the way of the future, as city planners look for ways to grow food in urban environments in a more efficient, eco-friendly way. You can participate in this revolution right in your own backyard-literally! You’ll love these ideas for creative vertical gardening, just in time for spring.

    If you enjoyed this, you might also like….

    Do You Have What You Need to Hold Down the Fort?

    Natural Healing Secrets You Need to Know…

    Effective Primal Diet Hacks…

  • How To Make Caramelized Onions in a Slow Cooker

    How To Make Caramelized Onions in a Slow Cooker

    I don’t know about you, but I love caramelized onions. What I don’t love is spending half an hour in front of my stove, stirring the onions and waiting for them to get to just the right degree of caramelized.

    Caramelized onions are a delicious addition to a wide variety of dishes, from soups to salads to pork chops and beyond. They can make a very simple, dressed-down seem like it’s straight out of a fancy French restaurant. Of course, the fancy part of it is probably due to the careful process of making caramelized onions, which many home cooks won’t feel they have the time for.

    This is why I was very thrilled recently to find this hack for making caramelized onions in a slow cook cooker.

    Not only does is this process a simple, hands-off way to make caramelized onions that doesn’t require constant stirring at the stove, but it can help you make a large batch of caramelized onions to keep in your fridge or freezer for many dishes to come. Not only can you add a lovely bit of gourmet class to each meal, you can do it with very little effort on your part!

    This is a great option for processing onions you find on sale, or a large harvest if you’re lucky enough to grow onions on your homestead.

    Here’s how:

    Ingredients

    1 large bag onions

    1/4 cup butter (1/2 stick typically)

    2 tsb salt

    4 tbs brown sugar

    Directions

    1. Slice your onions into thin rings, as best you can. They don’t have to be perfect.
    2. Place them in the slow cooker and cut the butter up into a few cubes, scattering them around the onions. Throw in the salt and brown sugar and give a good stir.
    3. Put your slow cooker on low.
    4. In about an hour, stir the onions again.
    5. Check the onions every now and then for about 8 hours, stirring when you can.
    6. Once they are brown and golden, you’ve got yourself easy caramelized onions! Let cool to room temperature and pack into bags and jars to refrigerate or freeze.

    How easy was that? I’m getting hungry just thinking of the delicious smell this will fill your kitchen with. Enjoy!

    If you enjoyed this, you might also like….

    Do You Have What You Need to Hold Down the Fort?

    Natural Healing Secrets You Need to Know…

    Effective Primal Diet Hacks…

  • 4 Things to Know About Goats Before You Get Them

    4 Things to Know About Goats Before You Get Them

    Goats are fantastic homestead animals, and we write about that all the time on this site. They can produce excellent milk, help you clear brush, grass, and shrubs, and can even been great companions.

    But you might have some misconceptions about goats you’re not aware of, so we thought we’d share four things you might not realize about goats. Before you purchase any, you should definitely be aware of these things, so you are not surprised when it’s not exactly like you thought!

    1. Cream doesn’t separate

    While the cream in cow’s milk naturally separates, providing you with more than enough rich cream to use and to make butter and buttermilk with, goat’s milk does not separate. You can still use it for lots of things, but it’s just not naturally separated. It takes quite a bit of effort to extract the cream, so you’re better off using it for something else.

    2. You will be up to your knees in milk

    Once goats start producing milk, you’ll have quite a lot. Definitely have a plan for how to use it, or you might find your fridge full of milk and yogurt! You can certainly make milk kefir, yogurt, and even ice cream with your goat’s milk, but that’s a lot of work and either way you might want to consider buying a second fridge or a mini-fridge to store the milk. You can always sell it too, but make sure you consider this first…

    3. It’s not always legal to sell

    Not every state allows the sale of raw milk for human consumption, so before you count on this, make sure to check local regulations regarding goat’s milk. It’s a great way to make some extra money, but just be sure it’s legal!

    4. They are stinky

    There are many ways to reduce their smell, of course, like lots of fresh bedding, well-ventilated shelter, and cleaning out their enclosure regularly. But in general, goats do just naturally smell rather strongly. Consider this when you’re planning out where to keep your goats!


    Consider these four points before buying goats so you can be well-prepared to care for and utilize them properly.

    If you enjoyed this, you might also like….

    Is Your Family Secure?

    Natural Healing Secrets You Need to Know…

    Effective Primal Diet Hacks…