Page 14 of 20
1 12 13 14 15 16 20
Health – Page 14 – Homesteader Depot

Category: Health

  • How to Make Pickles at Home

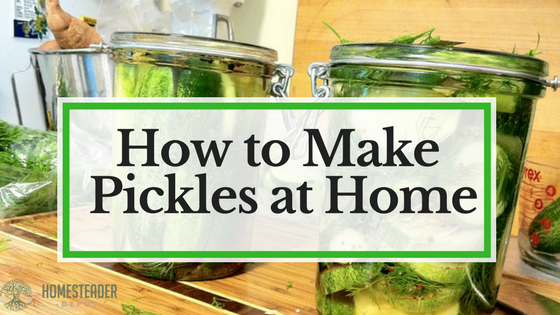
    How to Make Pickles at Home

    Pickles are one of the most classic and widely recognized forms of brine preservation. While the term “pickled” can apply to various forms of preserving various kinds of vegetables, what most of us think of when we think of “pickles” is the classic, brine-preserved cucumber that has become a staple of delis and diners across America. It most famously made its way into the American diet through Jewish delis in New York City, and, like any classic food, it can be made easily at home.

    While the formula is simple, however, there can be a bit of trial and error involved, and anyone who’s successfully made pickles can probably attest to this. There have probably been hoards of gray-haired European grandmothers throughout the ages who have perfected the art of delicious, crunchy, perfectly-pickled cucumbers, but for those who didn’t grow up learning at their Bubbie’s knee, it take a bit of practice.

    Fortunately, we can still learn from the masters, even if they’re not in our own family. Sandor Ellix Katz, author of Wild Fermentation: The Flavor, Nutrition, and Craft of Live-Culture Foods is not only an expert in the field of home fermentation, he also grew up in a Jewish community in Brooklyn, so he knows a good pickle when he, well, makes one.

    One of the most common mistakes made by first-time pickle makers is by only using a brine. This will result in mushy, soft pickles. What Katz discovered the hard way is that by adding fresh grape leaves, you can naturally preserve the crunchiness of the cucumber, as it absorbs the brine and takes on the delicious, salty sweetness that can only be acheived through pickling.

    To find fresh grape leaves is another story, however, and you might have some trouble, depending on where you live. Of course, if you grow grapes, you won’t even be worrying about this, but if you don’t, you can see if any homestead neighbors do. You can also check or ask at Middle Eastern restaurants or markets, or simply order dried ones online, which are a good substitute. You can also use black tea leaves. While grape leaves are the classic, black tea will perform the same function.

    This Odd Therapy Will Revolutionize Your Well-Being…

    The other crucial component is your equipment. We’ve included Katz’ suggestions, but there’s still room for improvisation. The important thing is to have a cyllindrical container and some way of weighing down the pickles so they remain submerged in the brine. See what you can come up with!

    So without further ado, here is Sandor Ellix Katz’ recipe for classic kosher deli pickles!

    Ingredients 

    Yields 1 gallon 

    • Approximately 4 lbs cucumbers, pickling variety preferable
    • 3/4 cup salt (kosher or sea salt is best)
    • Dill, either fresh and flowering, or the dried leaves and/or seeds (whatever you can find)
    • Several cloves of garlic
    • Grape leaves (these help the pickles retain their crunchiness)
    • Black peppercorns

    Equipment

    • Ceramic fermentation crock, or food-grade bucket, both cylindrical
    • Fermenting weight or large plate that fits inside the bucket
    • Either: 1-gallon bottle filled with water OR a large rock that has been boiled
    • Clean cheesecloth or dish towel for covering

    Directions 

    1. Rinse the cucumbers carefully, to avoid bruising. If you are using cucumbers that haven’t been picked fresh that day, soak them for a few hours in chilled water.
    2. Bring half a gallon of water to a boil on the stove, then remove from heat and stir in the salt, making sure it dissolves completely. This creates the 5% brine solution.
    3. Let the brine mixture cool until you can leave your finger in it for at least 10 seconds without it burning.
    4. As you are waiting for the brine to cool, clean your crock or bucket thoroughly using hot water and non-antibacterial soap, as well as your weight or plate.
    5. Peel and crush your garlic cloves, and place those along with the dill, peppercorns, and grape leaves at the bottom of your crock or bucket.
    6. Next, place your cucumbers in the crock or bucket, and then follow with the brine.
    7. Place your weight or plate on top, and weigh that down with the jug filled with water or the boiled rock. If the brine doesn’t cover the plate or weight, add more brine with the ratio of 1 tbs salt to each additional cup of water.
    8. Cover your crock or bucket with the cheesecloth or dish towel. This will keep dust, bugs, and any other small debris out of the pickels.
    9. Store in a cool, dark place.
    10. Check daily. Scum may start to appear on the surface, so remove this.
    11. After a few days, taste your pickles to see if they’re ready. This part is largely up to your own taste, once they taste good to you, they’re done! There’s no rule here; as long as they’re fermenting well and you like the taste, you can remove them when you please.
    12. You can let them continue to sit for one to four weeks, taking some out to enjoy as you go. At some point they will become fully sour, at which point you’ll want to move them to the fridge to slow the fermentation process.
    13. To safely move them to the fridge, transfer to a jar if you don’t have room for your whole crock or bucket in the fridge, but DO NOT COVER for a few days, leaving the cheesecloth, dish towel, or a paper towel secured with a rubber band on the jar. After a few days, you can cover with the jar lid.
    14. These will keep for a long time in the fridge, so you’ll probably eat them all up before they ever go bad! Such is the beauty of fermented foods.

    Enjoy!

    The ONLY Reason You’re Failing the Paleo Diet...

  • 6 Things You Should Do Before Getting Piglets

    6 Things You Should Do Before Getting Piglets

    I’ve raved quite a  bit in the past about how great pigs are. You can buy them as piglets for a very affordable price, and within a season have a hog big enough to fill your freezer with meat. For the initial start-up cost, space they need, food they eat, and meat they yield, they’re incredibly efficient animals to raise for meat. And, as someone who hates waste, I just love how much you can feed them!

    It’s also relatively easy to feed them virtually for free, which is another big plus. When you buy pork at the supermarket, you have no idea what the animals have been eating, and since pigs virtually retain everything they eat, conventionally-raised pork can be literally quite toxic. But if you raise them yourself, and can control what they consume, there’s no better source of clean, green, delicious pork!

    However, you should definitely know what you’re getting into before you run out and buy a small herd of piglets.

    Here are five things every aspiring pig farmer should know before bringing home piglets:

    1. Find a butcher

    No, seriously. If you live in an area where it’s quite common for local farmers to bring their animals to a butcher after slaughtering, they can be booked up months in advance. If you don’t plan on butchering the animal yourself, which is wise for your first season of pig farming, find yourself someone to butcher it for you before you invest in pigs so you’re sure when the time comes, you’ll be able to bring it in.

    2. Secure housing 

     .

    There are a couple of different options for a secure pigpen, and whatever you choose, make sure it is secure. Pigs are diggers, and many amateur pig farmers can attest to how easily they can plow through improvised fencing. An electric fence is a great option if you can afford it. Do some research into what pig farmers in your area do, as depending on the soil and the amount of rain you get, you might have to bury your fence pretty deep.

    Your pigs will also need adequate shelter to live comfortably, and for both shelter and fencing, you’ll have to bear in mind how big your pigs will get. They’re quite small as piglets, so make sure to think ahead and anticipate how much room they’ll need as they grow.

    The Secret to Sustainable Homestead Energy…

    3. Make a meal plan

    Ok, so it’s not going to be nearly as complicated as making a plan to feed your family, but before you bring piglets home, you’ll want to do some research into what you can feed them and where you’ll get it. You can feed pigs scraps from your kitchen and garden for sure, but they will most likely want more than that–a lot more. I already mentioned the many ways you can feed a pig for free, so check those suggestions out and see what you can find for free in your area before you get piglets so you’ve already got a game plan.

    4. Secure their water 

    Pigs aren’t the most delicate of creatures, and especially for little ones, you’ll want to make sure you can get them regular fresh water in a container they can’t tip over…or play with. You’re probably very familiar with the cliche of pigs rolling in the mud and well, it’s true, pigs love to play in the mud, and if you don’t secure their water trough, they’ll be playing in that as well. A heavy, metal trough that can’t be tipped over or easily accessed by the pigs will be your best bet to keep them hydrated and safe.

    The BEST Diet Hacks for a Primal Lifestyle…

    5. Arrange transportation 

    Another aspect of #1 is to make sure you can get them to the butcher when it time comes! Transporting piglets is easy, but transporting a full-sized hog is a totally different story. If you have a truck and trailer, make sure you have a means of herding the pig into the trailer. But don’t just expect them to saunter on up a ramp and into the back of a trailer, pigs won’t be naturally inclined to do that. If that’s your plan, make sure you start training them to do that right away, by doing practice runs starting at a young age. Kind of morbid to train a pig to virtually walk to his own death, I know, but just comfort yourself with the thought of all that delicious meat that will fill your freezer.

    6. Know your breed

    When you buy the piglets, make sure to ask the farmer who sells them to you all about the breed, and jots down their answers if necessary. You’ll want to know how big these porkers will get, what their personality is like, what cuts are the best on them, how tenacious they are at trying to escape, etc. Not all pigs are the same, and fortunately, if you buy your piglets right from the farmer, you can talk directly to the person who raised their parents so they can give you a good idea of what to expect from your own herd.

    Defeat Body Pain at Any Age…


  • How to Make Sourdough Without a Recipe (Video)

    How to Make Sourdough Without a Recipe (Video)

    I’m a huge fan of home fermenting and culturing of all kinds. Yogurt, kefir, kombucha, pickled vegetables, and my personal favorite, sourdough bread.

    Sourdough is not just a distinct flavor of bread, it gets its rich, sour flavor from the leavening culture that causes it both to rise, and changes the metabolic structure of the wheat. Sourdough is actually much healthier than breads that are not naturally fermented, because the culturing process actually breaks down the antinutrients that can make wheat difficult to digest. Some people who can’t otherwise eat gluten can still eat sourdough, actually!

    I have made sourdough at home for a few years, but I haven’t ever put a whole lot of time into learning the techniques that would make my homebaked loaves as good as those delicious boules you can get at chic, foodie restaurants and bakeries. My loaves are usually pretty dense, and while they have the delicious flavor of sourdough, they lack the air bubbles and lightness that make professionally baked sourdough loaves so delicious. Also, without those air bubbles to help with the rise and create that light dough, I get small loaves that are gone in a flash.

    There are a lot of very specific recipes out there for sourdough, and many people even recommend measuring your ingredients on a kitchen scale to get the ratio of flour, water, and starter just right. This does make a lot of sense, of course, considering breadmaking is a very specialized science, but it actually doesn’t have to be so complicated.

    So, how can you make delicious sourdough boules right at home, without the stress and headache of measuring ingredients or seeing recipes fail you because they simply don’t work in the climate of your kitchen or with your culture?

    By feel. 

    The thing about sourdough is, not all flour, sourdough starters, or kitchen climates are created equal, and your dough simply might not turn out the way it’s supposed to following an exact recipe.

    This excellent video walks you through the process of making a sourdough loaf without measuring, and by creating a dough that looks and feels a certain way, and how to handle it so it will get those coveted air pockets.

    I don’t know about you but I can’t wait to get my hands in some dough and try this out! Check it out:

    If you enjoyed this, you might also like….

    Do You Have What You Need to Hold Down the Fort?

    Natural Healing Secrets You Need to Know…

    Effective Primal Diet Hacks…

  • 5 Mistakes First-Time Chicken Farmers Make

    5 Mistakes First-Time Chicken Farmers Make

    When it comes to homesteading of all kinds, trial and error is a great way to learn. However, when you’re raising animals like chickens, you probably want to reduce the possible mistakes you can make.

    If you’re considering starting your own chicken flock, you’ll want to do it right. We’ve got a list of five common mistakes people make when they first start keeping chickens to help you avoid making them yourself.

    1. Not protecting against predators

    Like a fox in a hen house, many predators out there, depending on your region, will see your chickens as a delicious, juicy, jackpot. When you set yourself up with a coop or enclosure, make sure you know which animals in your area would like to get their hands (or paws, or claws…you know what I mean) on your chickens, and research which kind of barricade will keep them out the best.

    And be prepared by a threat from land, sky, even underground, in some cases. Hawks, foxes, coyotes, skunks, raccoons, weasels, bobcats, hawks, and even rats and domesticated dogs and cats, will have their eyes on your chickens, so secure accordingly. Having a guard dog that is trained not to harm the chickens themselves can greatly reduce the threat to your chickens, but you’ll also have to be realistic about a bit of trial and error here, as sad as it is. You might have to learn the hard way at some point that a predator might still be able to penetrate your barriers, so when you first start a flock, mentally prepare yourself for the possibility of this. It might cost you a few chickens, but learning the hard way is still learning.

    2. Failing to check local laws 

    Predators aren’t the only creatures that pose a threat to your chicken-raising operation; bureaucrats do too! Before you even begin to think about planning to raise chickens, check your local ordinances first. Not just zoning laws, but local homeowner’s associations as well. This will mostly apply to urban and suburban homesteaders, particularly if you live in some kind of gated community or apartment or condo complex. But even if you own your own home and have a decent-sized yard, there still might be strict regulations regarding the raising of poultry. If you are a homesteader on your own property, this is unlikely to affect you much, but you should check anyway, just to be safe, particularly if you plan on selling your eggs, meat, chicks, or chickens at any point.

    NEVER Buy Laundry Detergent Again>>>

    3. Not preparing for injury or sickness 

    Chickens are creatures like any other and are subject to injury or illness. There are a number of conditions that can affect birds, such as skin conditions on their feet, mites or pocks, thrush, botulism, cholera, and one you’ve probably heard of quite a bit in the news: bird flu.

    Familiarize yourself with common bird conditions, join local forums for chicken farmers so you know what’s in your area, and get yourself a good chicken first aid kit. There are a lot of great natural remedies for less severe conditions, as well as more conventional remedies you can stock up on beforehand to be prepared. You’ll also have to prepare yourself, at least mentally, for the possibility of having to separate a sick or injured bird from the flock; a simple dog or rodent kennel can work great for this but keep in mind that chickens can sometimes attack a sick or injured bird, so you’ll have to read up on re-introducing them to the flock.

    4. Taking on too many chickens

    Just because you have an established flock and a good coop doesn’t necessarily mean you’re equipped to take on new hens a neighbor or friend might be giving away. The size of your coop absolutely has to be appropriate for the number of chickens you have, and two or three extra can create cramped, unpleasant living conditions for all the chickens.

    When you set up a coop, make sure you’ve got enough space for each chicken. 5 sq feet per bird is a standard recommendation, not to mention enough a roost and nesting box for each hen (they only sleep in their nesting boxes when they’re sitting on eggs, otherwise they like to perch). If you want to be equipped for extra hens further down the road, and this is quite prudent if you plan on raising more chickens, set yourself up with a coop that can easily be added to and expanded on.

    5. Starting with chicks

    It’s quite standard to start with chicks when you’re beginning a flock, and many farm supply stores sell freshly hatched chicks, along with feeders, water bottles, and heat lamps to keep them warm. While certainly millions of chickens have been raised just fine like this, if you want to go an easier, cheaper, and more sustainable route, just get hens and a rooster. This might cost more money up front than a few chicks, but you’ll need fewer supplies, and, well, if you get a rooster, your chickens will be making their own chicks, for free, in no times.

    The thing is, hens take care of baby chicks infinitely more efficiently than humans do. All the gadgets people buy to raise up chicks are just meant to imitate what a mama hen will do for them instinctively. For the price of some chicken feed, you’ll get something much better than a heat lamp that’s totally sustainable: a hen to sit on the chicks when they’re cold, and direct them to food and water, not to mention keep track of them all day while you tend to all your other homestead tasks.

    If you let your hens raise up their own chicks, keep in mind you’ll still need to make sure there’s feed small enough for the baby chicks, and a water container they’re able to access, but otherwise, the mama will do the work for you.

    Hope this helps you prepare for chickens and avoid some common mistakes!

    Power Efficiency…This Simple Device Will Change the World Forever>>>


  • Dandelion Pesto Recipe

    Dandelion Pesto Recipe

    Dandelion is a wonderful plant, that the majority of Americans just think of as a weed. If you’re not already foraging your yard’s dandelion for natural remedies or food, you definitely should be.

    Dandelion grows virtually everywhere, and I can almost guarantee it’s growing somewhere near you, either in your backyard, local park, or any field or meadow nearby. It was a staple of Depression-era cooking, and it’s tasty, nutritious leaves can be prepared in a number of ways.

    You can easily eat them raw, but if you’d like to enjoy them in a very delicious way, try this amazing and tasty dandelion pesto. You can make a fancy, gourmet pasta dish out of foraged leaves, how cool is that?

    To harvest dandelion leaves, be sure to use a knife. The tough, stubborn roots can make it hard to harvest the whole plant, so you’ll want to dig in with a paring knife to uproot it properly.

    After harvesting, make sure to wash extremely thoroughly. Dandelion can retain a lot of dirt, so you’ll want to rinse it all under cold water, then soak it all in water with a dash of vinegar.

    After about 20 minutes of soaking, vigorously shake the dandelion leaves all around the water, then pour out the water, rinse, and fill your bowl with water again, shake the leaves out one more time, and rinse again. This should do it, but inspect the leaves as you prepare your pesto, just to be safe.

    Ingredients

    • 1/2 pine nuts
    • 3 garlic cloves
    • 2 bunches freshly harvested dandelion leaves.
    • 1 Tbs lemon juice
    • 1/2 cup olive oil
    • 1/2 tsp salt
    • 1/2 tsp black pepper
    • 1/4 cup Parmesan cheese
    • salt to taste

    Instructions

    1. Roughly chop your freshly washed dandelion leaves, so that they equal a loosely packed 2 cups.
    2. Roughly chop your garlic.
    3. Place the garlic, dandelion leaves, pine nuts, lemon juice, olive oil, salt, and pepper in a blender or food processor.
    4. Blend or pulse until smooth. You might need to stop and scrape down the sides with a rubber spatula a few times.
    5. Stir in the parmesan cheese until evenly incorporated.
    6. Serve fresh or refrigerate and eat within 3 days.

    Bon appetit!

    If you enjoyed this, you might also like….

    Do You Have What You Need to Hold Down the Fort?

    Natural Healing Secrets You Need to Know…

    Effective Primal Diet Hacks…

  • The Benefits of Homemade Soap

    The Benefits of Homemade Soap

    When was the last time you looked at the ingredient list on the soap that you buy at the grocery store? Most people never stop to take the time to look at this list, just getting what they’ve always bought or whatever marketing plan and commercials have told them a good soap should be. When you start to look at the ingredient list though, chances are good that you will find quite a few things that you can’t pronounce, including chemicals that may not be as good for your skin as you believe. It makes far more sense to go natural with your soap, as it can have some benefits.

    Cold process soap, the type that uses lye, is the best type of homemade soap. You do not have to worry about the caustic qualities of lye, as the saponification process takes care of this. It is relatively easy to make, and it works well to break down dirt, which can provide you with a clean feeling on your skin without any “residue” that you might feel from chemical-laden store bought soap. Essential oils can be added to the soap, which provides a nice scent, along with better moisturizing capabilities, making it great for the skin. Since it is natural, it also happens to be good for the environment.

    When it comes to getting these quality cold process soaps, you have a couple of options. You can find sellers online who are making these soaps, for starters. This might be a good solution when you want to test out just what a difference the natural soaps can make. You could also find people in your area who make soap and buy or barter with them. Of course, as a homesteader, it is also a good idea to take some time and learn how to make this soap on your own. This is a fantastic skill to have.

    If you liked this, you’d also like…

    The Secret to Sticking With the Paleo Diet…

    The Ultimate Natural Medicine Course…

    The Little-Known Benefit of Doing Yoga…

  • Dirt Cheap Foods for Homesteaders

    Dirt Cheap Foods for Homesteaders

    Whether you’re an urban homesteader or full-blown, land-owning, farmer, you have probably come to a time in your life at some point in which you had to keep your budget tight. If you are saving up for land, land development, or simply trying to budget and spend in a smarter way, food is always one of the biggest expenses, and it can be hard to know how to cut back on food spending without going for less healthy, processed foods.

    Fortunately, there are many wonderfully healthy and nutritious foods out there that are not only good for you, they’re dirt cheap too! I thought I’d put a quick list together of some of my favorite frugal foods for homesteaders and beyond.

    Beans

    Dry beans are always cheap, and a great source of protein and fibers. They’re a great survival food, too, since they keep for long periods of time, but on a regular basis not only will they save you lots of money by adding frugal protein to your meals, they’re very healthy as well.

    Lentils

    Lentils, like beans, are highly nutritious and healthy, and also frugal too! Sometimes simple green lentils are cheaper than any other dried bean, so stock up! You can make all kinds of delicious Indian-style dishes or warm, hearty lentil soup.

    Oatmeal

    Simple bulk rolled oats are healthy, delicious, and totally cheap! You can use them to make cookies, snack bars, or just whip up a quick and easy bowl of oatmeal for breakfast. They’re low-calorie, high in fiber and iron, and naturally gluten-free (although if you do have a gluten intolerance, make sure the oatmeal you buy indicates it’s gluten-free on the box because it is often produced in the same factory as wheat otherwise and might have traces of gluten).

    Rice

    You can’t really go wrong with rice, and together with dried beans, you’ve got a complete meal that’s easy to store for survival purposes. But by itself, it is a healthy, cheap way to enhance stir-fries, make pudding, risotto, and more.


    Canned tomatoes

    Canned tomatoes or tomato sauce are a really great and cheap staple to have on hand. Rather than buy expensive pasta sauce that has sugar and preservatives in it, if you keep canned tomatoes on hand you can always whip up your own, making delicious, healthy pasta and pizzas at home a breeze.

    Carrots and Celery

    These are great staple vegetables to have in your fridge. They’re not only cheap, they’re low-calorie and kid-friendly too. Prepare a large batch of veggie sticks at the beginning of the week and you’ll have a healthy snack to munch on all week that will keep you away from the potato chips!

    Apples

    Apples are another great option to keep in your fridge for healthy snacks all week long, and they’re cheap too! You know the expression, “an apple a day keeps the doctor away”? Well, there’s a good reason for it! Apples are high in fiber, vitamins, and minerals, and also loved by kids as well.

    Cabbage 

    Finishing off our selection of great, healthy, and affordable produce, cabbage is another great one to have on hand. You can use it in all kinds of dishes, and it will keep for a very long time in your crisper, unlike that ill-fated and expensive spring mix that will turn in a few days. Whip up some coleslaw, sauteed with sausage, make some classic cabbage wraps, the sky’s the limit.

    Potatoes 

    Potatoes are a great staple for your kitchen, and they’re always incredibly cheap. Potatoes get a bad rap, but they’re really quite healthy. Their skins are packed with vitamin C and antioxidants, and they’re a great alternative to grain for a healthier diet. Plus, there are so many possibilities for how to prepare them, they make for a really great frugal base for tons of delicious and hearty meals.

    Ground beef

    Probably one of the cheapest and healthiest meats, ground beef is not only frugal on its own, it can often be found at rock-bottom prices so you can stock up your freezer for next to nothing. Put in your pasta sauce, stir-frys, hamburgers, and more, it’s rich in iron and typically quite lean, so it’s a great source of protein that can’t be beaten.

    Ground turkey

    Also often frugal and found on sale, ground turkey is ideal to add some very low-priced protein to your diet. Kids often love turkey burgers too for their milder taste, and they’re easy to season accordingly.

    Popcorn

    Popcorn is cheap, lasts forever, and is much healthier than potato chips or other processed snack foods. Keep the kernels in your pantry for a quick, easy, warm bowl of buttery popcorn anytime. Kids love it, and will love to help you make it right on the stove!

    Seasonings

    Seasonings of all kinds, from garlic to dried herbs, to vinegar, and even mustard and other sauces, can all be found affordably and are essential for the frugal pantry. You’d be amazed at how much you can dress up your frugal food with a few dashes of delicious herbs. Always make sure to invest in flavor!

    Do you want to know another trick for homesteaders on a budget?

    Check out how you can…Bring Any Battery Back to Life, NEVER Buy Batteries Again!

  • Simple Yet Healthy Homemade Ketchup

    Simple Yet Healthy Homemade Ketchup

    Ketchup is an American staple, but did you know you can make it very easily at home? Unfortunately, a lot of store-bought ketchup is made with loads of sugar and sometimes even artificial coloring and flavoring.

    If you’re craving some delicious ketchup but want a healthy, whole-food version that doesn’t sacrifice health for taste, I’ve got the perfect recipe! This recipe uses all natural, easy-to-find ingredients, and instead of lots of cane sugar like regular ketchup typically has, it requires just a bit of honey and coconut sugar, which are much healthier and both have a very low GI index compared to other sweeteners.

    At the end, I’ve got a suggestion for an easy fermented version, if you’d like to make this ketchup even healthier by adding some natural probiotics.

    Give it a try today and you’re sure to be making it regularly.

    Effective Primal Diet Hacks…

    Ingredients
    • 2 6-ounce cans of tomato paste
    • 12 ounces filtered water
    • 6 tbs apple cider or white vinegar
    • 6 tbs honey
    • 1 tbs coconut sugar
    • 2 tsp salt
    • ¼ tsp garlic powder
    • ¼ tsp onion powder
    Directions
    1. Empty the tomato paste out into a medium saucepan.
    2. Adding a few tbs of water at a time, blending completely with the tomato paste before adding any more water. This will make it easier
    3. Add the rest of the ingredients once all the water is blended completely with the tomato paste, and stir until smooth.
    4. Put the saucepan over medium heat, and bring to a simmer.
    5. Reduce heat, keeping it a simmer, and cook for 10-20 minutes, stirring frequently. Watch for splattering, it’s virtually unavoidable, but try to keep the simmer as low as you can to avoid a big mess.
    6. Remove from heat, and let cool to room temperature.
    7. Once cool, pour into a jar or bottle, cover, and keep in the refrigerator.
    8. For a very easy fermented version, before refrigerating, stir in a few tablespoons of whey. Then, cover and let culture at room temperature for 12-24 hours before refrigerating.

    That’s it! Enjoy your delicious homemade ketchup on french fries and burgers or any other way in which you use ketchup.

    Natural Healing Secrets You Need to Know…