Page 1 of 2
1 2
crafts – Homesteader Depot

Tag: crafts

  • 3 Surprising Ways to Reuse Old Electrical Cords and Cables

    3 Surprising Ways to Reuse Old Electrical Cords and Cables


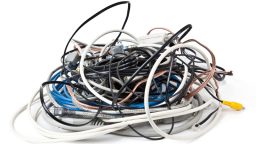
    Since the dawn of cable TV, the number of electrical type cording we have around the house has expanded almost exponentially.  What started with coaxial and extension cords now include shorted out or plain outdated AV connectors, HDMI wiring, and USB cords in about every shape, size, and color.

    If you are anything like my family, you have at least one box filled with outdated wiring, some of which is so old you probably have no idea what ancient piece of tech you’ve since gotten rid of it used to go to. The first idea we usually have is to toss them in the trash.  Next time you are ready to purge your collection, stop and consider one of these options instead.

    1.     Sell Them

    Does this sound familiar?  You’ve upgraded your camera/laptop/computer/monitor/etc. and now you have a collection of accessory cords that still work perfectly, but you have absolutely no use for.

    Believe it or not, there are techies out there who may want them.  They may need a replacement cord for an item they refuse to part with, they may be “frankensteining” their own unique machine and need just the spare cord you want to part with.

    If you’ve managed to keep track of the specs of some of your cords and the stuff they went to originally, you can sell these cords online or at your next garage sale and make a little extra cash on something you would otherwise toss aside.

    Bring batteries back to life with this simple battery reconditioning resource…never buy batteries again!  Learn More Here >>>

    2.     Recycle Them

    It probably won’t shock you to hear that electronic cords and cables are not biodegradable.  Fortunately, recycling is getting easier.  Even if your local curbside service doesn’t take them, you can do a search for electronic recycling in your area.  Best Buy has a recycling program for electronics.  The policy changes occasionally so check with your local store to see what they currently take, how much at once and if there are any fees.

    Suggested Article:  5 Creative Ways to Reuse Old Cans

    3.     Upcycle Them

    One of the things most of these cords have in common is copper. Copper is not only a good conductor; it looks good all by itself.

    Copper wire has many distinctive properties that have made it a go to wire for projects.  The wires flexibility is matched by its versatility.

    Although some wire crafting projects require special tools, plus time and years of practice, others are relatively easy and can be accomplished with just a few basic tools from your toolbox and time to have fun. Using copper wiring for a project adds an additional level of aesthetic that will enhance the finished product even more.

    You can “harvest” the copper wire from cables for homemade jewelry and other craft projects.  Collect your copper by using wire snips to cut it out of the PVC covering and dielectric spacers.

    Depending on the type of cord you are cutting open, you can end up with different gauges by using not only the main wiring but by unbraiding the thinner wire that makes up the protective guard.

    One of the easiest copper wire projects you can do it creating ire Word Art. The process is simple.

    • Use MS Word or a similar program to type your word in the font you want to copy and then select the font size you want the project to be.
    • Print out your final design on paper to use as a guide.
    • Using wire snips, needle nose pliers and regular pliers, bend the wire to create the shape of the letters, checking your design by laying the wire on the printout.

    Try this: Trick to Recondition and Reuse Old Batteries>>>

  • Simple Reduce – Reuse – Recycle Methods

    Simple Reduce – Reuse – Recycle Methods


    If you are a parent, the words “Reduce – Reuse – Recycle” may conjure up the theme music of Bob, the Builder.  But, that’s not a bad thing, unless you can’t get it out of your head.

    I used to enjoy watching that show with my son when he was still part of “Bob’s” demographic because very often they gave the adults sitting through it really good ideas about upcycling stuff.

    If you’re looking for ways to put into action the three R’s at home, here are some ideas to get you started.


    Paper Products

    Egg Cartons –  Great to sort and organize small items, either in a drawer or in a storage box.  Since they are easy to cut apart, you can trim them to fit just about any space or secure more than one together to expand the storage options.

    Have a year-round garden?  You’re probably always looking for containers to start seed.  Paper egg cartons are great for this since they provide excellent drainage.  Plus, since they are biodegradable, you can plant the whole “cup” once the baby plant is ready, instead of making a mess trying to transfer the soil.

    Toilet Paper Rolls: Also can be used as seed starters.  Cut each roll in half. Wrap 4 or more mini-rolls together with a rubber band or bungee cord, fill with potting soil and place in a shallow container or tray.

    8.5 x 11 Paper: Create notepaper pads by cutting down the used paper.  Then clip them together or stack them in a small box with a pencil for a convenient note area.

    Packing Paper: Fold into long thin pieces approximately a quarter inch to an inch wide and use the strips to weave baskets. Decorate before you weave them or after to get interesting patterns and designs.

    Gift Wrap and Old Magazines: Looking for something to do in the winter when all the chores are done?  Roll a thin strip of used wrapping paper or old magazines into different sizes of paper beads to use in future jewelry and craft projects.  Or, take up Quilling, the art of rolled paper.


    Brown Wrapping Paper or Grocery Bags: Paper grocery bags are one of my favorite things to upcycle.  I crumple it up and then flatten it to use a background for photos and artwork.  I wrap book with it for a more decorative display on my bookcases (my HTML and CSS Coding for Dummies manual looks a lot better in brown).  I even used it to cover the top of a desk to give my office a new look.

    Last year I used brown paper grocery bags and my scrapbooking stamps to create one of a kind gift boxes for Christmas gifts.  The shoe boxes I refuse to throw out came in handy for that project as well.

    Newsprint:  Makes a great mulch for the garden. To use it, tear it into strips, then lay it around your plants. Have more than you need for mulching?  Toss the extra shreds on the compost pile.

    Do you keep chickens or other livestock that required bedding?  Shredded paper works well.  Then, when its time to lay down fresh, you have extra fortified mulch/fertilizer for your garden beds.

    Scrap Paper: Any other paper you can’t immediately find a use for can be stored in a plastic bag to keep moisture out and used when packing and shipping an item, or just storing something fragile away. It’s also good for kindling if you have a fireplace.  Just steer clear of shiny paper, they contain additives that smoke very badly and release toxins into the air.


    Plastic

    Plastic Shopping Bags: This seemingly never-ending supply can be repurposed.  Use them a stuffing for plush items and pillows, braid them into rope for a variety of activities or crochet them into reusable bags.

    Plastic Bottles: Thanks to all the creatives out there, more and more ways of using plastic bottles are popping up every day.  From self-watering planters to chandeliers it appears that only your imagination is the limit when it comes to reusing them. For some fun idea, check out this post by DIYProjects.com.


    Glass

    Glass containers can be used indefinitely.  They can even help you reduce the number of plastic containers you end up with.  Try buying as many things in bulk and using your glass jars and bottles for storage.


    I hope at least one of these methods caught your attention and can be put to use immediately.  As always, leaving as little footprint on the earth is desired, so reduce – reuse – recycle.

    Click Here

  • How to Make Aromatic Potpourri

    How to Make Aromatic Potpourri

    If you are a flower gardener or simply love the smell of fragrant potpourri, you should definitely learn to make your own. You can harvest and process your own flower petals or buy your own and make several sachets to give to friends and family. There are few more thoughtful, easy homemade gifts than an aromatic sachet of potpourri!

    The most common bases for potpourri are rose petals and sweet geranium leaves. If you grow roses, this is a wonderful way to use the petals once the flowers begin to die. You can add to these whatever you like, and we’ve got some great ideas for you.

    There are two main types of potpourri: dry and moist. Dry potpourri is very easy, as long as you are sure you have very dry ingredients. You simply dry out whatever fragrant flowers and herbs you’d like to use in a dehydrator or oven, and pack into sachets. Moist potpourri can be a little trickier.

    Moist potpourri can be a little trickier. You need to have the right balance between moisture and dryness, so it might take a little trial and error. What you want is to get your ingredients to a sort of leathery consistency, so that they are not too wet to store but not so dry that they lose fragrance. Once you have achieved this consistency, however, if you pack them into jars with some salt to absorb any excess moisture, they are delightfully aromatic. You might wonder why they’re worth the effort, well, while dry potpourri is certainly easier, moist potpourri is far more fragrant.

    Dry potpourri is ideal for putting in drawers or storage boxes to keep things smelling good when they are put away, or tossing in bedding. You can also leave it sitting in a bowl in your living room or bedroom for a pleasant aroma. Wet potpourri, however, is best suited for this latter purpose.

    Long-Term Survival for Homesteaders…

    How to Make Potpourri

    Since moist potpourri can be a bit tricky, we will focus on how to make dry potpourri to get you started.

    First, you will want to gather together your ingredients and make sure they have properly dried. Depending on what you are using, this might be very easy, or it might take a bit more patience. Many flowers and herbs can simply be hung upside down for a few days, left to dry in a paper bag, of spread out on some cloth or butcher paper in a cool, dry place for a few days. Or, if you have a dehydrator, this can speed things up, just be careful not to dry them so much that they become impossible to handle.

    Factors such as the thickness and moisture content of your ingredients, your given environment, and the method you choose to dry your ingredients with, will all have an impact on just how effectively they dry. So use your best judgment.

    Once you have your ingredients properly dried and gathered together, place them all in a large bowl or on a large tray. Mix together. Then, distribute into bags and tie. A small scoop helps a lot here, but you can just use your hands as well.

    For bags, you can buy some specially made, or simply sew very simple ones out of muslin and secure with a pretty ribbon. You can get creative though, lace is really nice-looking and linen is a classic.

    You can also reserve some to keep in bowls around the house. This is a lovely way to add scent and a touch of vintage decor to your home. Adding some potpourri to an antique crystal bowl is particularly chic, and an incredibly easy way to dress up your home decor. You can, of course, use any bowl, even a small mason jar with a ribbon tied around it would be very farmhouse chic and incredibly cheap and easy to do.

    Speaking of mason jars, if you don’t feel like fussing with bags or bowls, simply filling some small mason jars with potpourri and covering with a piece of fabric and a ribbon, or even a mason jar ring, is a very quick and easy way to store and use your potpourri. With a small enough jar, you can keep this in a dresser drawer to keep your clothes smelling fresh, or place around your home for fragrance and style. This is also a great way to store damp potpourri if you are bold enough to try your hand at making it.

    Here are some great ideas for ingredients to use for both wet and dry potpourri:

    • rose petals
    • sweet geranium
    • cloves
    • rosemary
    • lemon peels 
    • bay leaf
    • thyme
    • lavender
    • verbena
    • rosemary
    • violet
    • mint
    • cinnamon cloves
    • orange peels
    • allspice 

    Potpourri makes a wonderful gift for friends and family, or simply a great natural way to improve the fragrance in your home. If you have lots of fragrant flowers and herbs around your homestead, see what you can come up with! You’ll be happy you did.

    Natural Healing Secrets You Need to Know…

  • 22 Ways to Use Beeswax

    22 Ways to Use Beeswax

    Beeswax is amazing. It is the only naturally occurring wax, and is produced in special wax glands of female honeybees. It takes 8 pounds of honey to produce 1 pound of wax! Vegetable waxes are rendered from fruit or leaves, while soy and paraffin waxes are produced by a toxic chemical process. Only beeswax is wax in its natural form, and simply can’t be produced in a lab, even in this day and age. But if you keep bees, you can essentially grow it in your own backyard!

    It has been used for centuries in many different ways, and there’s still plenty we can use it for in our daily lives. While one pound of beeswax can be relatively expensive, it can last you for a long time and serve many different uses. Many projects you will use it for will only require a small amount of beeswax, making it quite cost-effective, especially compared to purchasing a pre-made product that contains beeswax.

    Here is a list of 22 things you can do with beeswax. Each of the items on this list is something that can be made using beeswax or something that beeswax can be used for in its raw state.

    • Fabric waterproofing
    • Lotions
    • Balms
    • Ointments
    • Deodorant
    • Lipstick
    • Lubricate screws
    • Candles (DIY Beeswax Candles – Video)
    • Condition tools
    • Condition wood
    • Hair pomade
    • Beard wax
    • In grafting trees
    • Firestarter
    • Solid fuel
    • Condition leather
    • Sealing wax
    • Crayons
    • Polish copper
    • Season cast iron
    • Cover cheese
    • Treat snow shovels

    This is certainly just a small taste of ways you can use beeswax! If you buy a pound or so for one or two of these projects, or keep bees yourself, you’re bound to come across other ways you can use it in your home. It’s a great item to have on hand, especially for homesteaders. It’s one of the greatest naturally occurring products available to us, and we should take advantage!


    If you liked this, you might also enjoy…

    What Are the Signs of the End Times?

    Learn Natural Healing Secrets From the Masters

    Preparing for the Bubble to Burst 

  • How to Make a Holiday Wreath (Video)

    How to Make a Holiday Wreath (Video)

    A holiday wreath is a really easy way to dress up your house for the holidays without spending hours hanging lights that you’ll just take down in a few weeks anyway. And for homesteaders, why not make some wreaths out of found seasonal foliage on your property?

    Even if you don’t homestead, this easy, homemade wreath is a great alternative to artificial or expensive seasonal wreaths at Walmart.

    I think my favorite thing about this homemade wreath is that you can customize it to use whatever foliage and decorations you have, you could integrate Christmas tree ornaments, tinsel, even lights if you wanted to get really creative! Holiday decorations with a personal, homemade touch are so much simpler and classic and in my opinion, more festive! Have you ever made your own holiday decorations or wreaths? Share below!

    If you liked this, you might also enjoy…

    Become a Master Healer at Home

    Anaerobic Weight Loss Fitness…

    The Ultimate Woodworking Course..


  • Clove and Orange Christmas Decorations

    Clove and Orange Christmas Decorations

    As a kid I used to make clove and orange Christmas decorations but I hadn’t thought about them in years. I saw this video the other day and it reminded me of how sweet-smelling these decorations can be, and what a fun and simple craft for kids they are.

    In the winter time, indoor air can become stale really easily, especially since colder temperatures make it uninviting to open windows, but these cute and festive decorations also double as natural air fresheners.

    Chemical candles or Glade plug-in style air fresheners can pollute your home with toxic fumes and overwhelming, artificial scents, so this is a great alternative for fresh, sweet, holiday scents.

    If you liked this, you might also enjoy…

    Learn to Heal and Treat Illnesses Naturally…

    An Ancient Secret to Slimmer Waists…

    Learn to be a Master Carpenter at Home...

  • Homemade Bird Feeders

    Homemade Bird Feeders

    During the fall and winter, as trees die and snow eventually covers the ground, many birds have a harder time finding their food than during the spring and summer months. But unlike their hibernating woodland counterparts, birds still look for sustenance in the coldest months!

    A very nice way to help them out a bit, and attract beautiful birds into your yard is to make your own bird feeder. It’s very easy to make and doesn’t require much at all.

    This is a great indoor, snow day craft for little ones. You can make the bird feeders with them, then hang them on a tree within view of the house, and then watch the birds come and feed from it! So much better than TV.

    Another great thing about this craft is it uses pinecones, which can often be found on the ground in abundance during the winter. So if you have several on your property or in a park or along hiking trail you like to visit, this is a great way to use them up. It’d make a great activity for a children’s birthday party, or a homeschool or church group craft as well.

    What You Need:

    • Pinecones
    • Peanut butter
    • Cornmeal
    • Birdseed
    • Ribbon, twine or wire
    • Large bowls, pans or wide plates

    What You Do:

    1. Spoon some peanut butter into a bowl. It’s impossible to say how much you need as that will be based on the size of the pinecone and the consistency of the brand of peanut butter you have, but to give a rough idea, 1/2 a cup for 2 or 3 pinecones is probably a good place to start.
    2. Mix in a bit of cornstarch, about 2 tsp per 1/2 of the peanut butter, and stir to combine. You might need more; the idea is to make the peanut butter more gritty so that the birds can eat it easier.
    3. Pour your birdseed, about 2 or 3 cups to start, into your bowl, pan or wide plate. You just need a big enough area to be able to roll the pinecone around in the birdseed.
    4. Secure your ribbon, string or wire to the pinecone. You will probably want to tie it around the middle and train some up the side so that it can be hung. It doesn’t have to be perfectly symmetrical, it just has to be secure and able to be hung from a tree.
    5. Using a spoon or wide popsicle stick, spread the peanut butter mixture over the pinecone. Try to fill as much of the gaps as you can with peanut butter.
    6. Roll the pinecone in the birdseed, pressing the seeds into the peanut butter and the gaps in the pinecone.
    7. Shake the pinecone off over the container that the birdseed is in, just so you don’t make a mess on your way to hang them!
    8. Once you’re done putting the peanut butter and seed on the pinecones, hang them in a tree and enjoy the sight of happy birds with lots of free food!

    If you enjoyed this you might also like:

    How to get started with Aquaponics.

    Grow your own food, better, faster, stronger….

    DIY Home Energy System…

    Click Here To Get The Best Survival Medical Course…

  • 4 Crafty Ways to Reuse Mason Jars

    4 Crafty Ways to Reuse Mason Jars

    Mason jars. Are they not one of the best inventions of all time? Originally designed for canning, mason jars (or Bell, or Kerr, or other canning jars…wide-mouth canning jars are just all-around awesome) have so many uses. They’re sturdy, difficult to break, have a big capacity-well, a quart!

    Lately, the annals of Pinterest have shown us that there are dozens of ways to use mason jars, so we picked a few particularly clever uses.

    Mason Jar Herb Garden

    Probably the most homestead-applicable, a simple mason jar herb garden is pretty much exactly what it sounds like! In lieu of drainage, you simply place rocks or marbles at the bottom of the jar, then fill with potting soil, and finally your direct-sow seeds or plant your herb starts. This would make a great project for early fall, so you can enjoy fresh herbs inside throughout the winter.

    Suggested Article:  Five Ways to Preserve Herbs

    Fragrant Mason Jar Oil Lamps

    This requires a bit of craftiness, but it would make an awesome holiday gift and is also so pretty and rustic looking it’d be a great addition to any homestead decor. There are a couple of different methods – here’s one that’s perfect for the holidays. The cool thing about this one is you can add herbs, fragrant leaves, cinnamon sticks, or citrus peels that make a wonderful smell with the lamp is burned, and also make for a beautiful display.

    Weather-proof Matchbox

    A very un-glamorous but fantastic way to use a mason jar. A great option for a bug-out bag or camping. You simply fill the mason jar with matches, then cut the strike-anywhere surface off the box and affix to the lid of the mason jar. You have your matches protected from moisture and can strike them right on the lid of the jar. Perfect!

    Solar Lights 

    Ever try out those cheap solar lights to illuminate your paths only to find they get knocked over and broken in a stiff breeze? Well, you can simply remove the tops of these and place in-you guessed it-mason jars! You’ll have to pick some that fit a mason jar, of course, but these will illuminate the solar light beautifully and look way more stylish and rustic than those cheap plastic lamps. The glass will, of course, be breakable too, but being sturdier and heavier than the plastic lamps simply speared in the ground, they’re likely to hold up better. You can even bury them in the ground a few inches to ensure they don’t get knocked over easily.

    Related Article:  Solar Energy Options for Homesteaders

    These are just a few ideas for ever-versatile mason jars-I’m sure if you think outside the box you can think of cool ways to use them too! Ever tried a mason jar DIY craft?


    [Bonus] Never Buy New Batteries Again – Try this trick to recondition and reuse old batteries>>>