Page 2 of 3
1 2 3
food preservation – Page 2 – Homesteader Depot

Tag: food preservation

  • Cold Canning vs Water Bath vs Pressure Canning

    Cold Canning vs Water Bath vs Pressure Canning

    When considering canning as an option to preserve produce from your garden, which method should you choose? You may find that each method (pickling, hot water bath, and pressure) yields different benefits suitable for different veggies or products.

    Cold canning is fast, easy, and great for short-term storage. We pickle cucumbers, squash, peppers, and many other veggies.

    Water Bath Canning gets up to boiling temperature which works great with high acid vegetables like tomatoes. However most vegetables do not have a high enough pH to can with this method without adding an acid source.

    Pressure Canning gets your jar’s internal temperature up to 240 degrees Fahrenheit or higher. This is hot enough to prevent botulism and kill other bacteria that could cause serious health risks.

    Check out this short video to see each method’s pros and cons compared!

    If you liked this, you might also enjoy…

    The Secret to Sustainable Homestead Energy…

    The BEST Diet Hacks for a Primal Lifestyle…

    Defeat Body Pain at Any Age…


  • How to Store Food in Vacuum Packed Canning Jars (Video)

    How to Store Food in Vacuum Packed Canning Jars (Video)

    I’ve had a vacuum sealer for years that has an attachment on it for canning. I never thought much of it, and figured it required a bunch of fancy additional equipment to use. However, it recently just clicked that I can use it for vacuum canning! And it doesn’t take much at all, just a lid for my jars, and I’ve got plenty of canning jars already.

    So, I wanted to learn how to use it. This video is a great tutorial on how and why to use your canning attachment to your vacuum sealer. She explains how long the food will keep, where to find the accessories you’ll need for vacuum canning, how hers works, and gives a demonstration of the whole process. She also demonstrates how to re-open the can once it’s been sealed.

    To me, if you already have a vacuum sealer with a hose attachment, and aren’t already set up for canning (or even if you are), this seems like a really quick, easy, and mess-free way to preserve food through canning. Enjoy!

    If you enjoyed this, you might also like….

    Can You Defend Your Family When SHTF?

    Natural Healing Secrets You Need to Know…

    Effective Primal Diet Hacks…

  • How to Can Hamburger

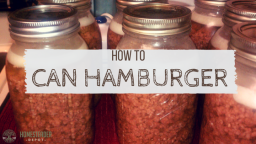
    How to Can Hamburger

    I’ve been sharing a bit about canning meat lately, and I thought I’d share an actual recipe for how to do it.

    Now, remember that you do need an actual pressure canner to can meat, but given the amount of foods you can preserve with a pressure canner, it’s definitely worth the investment.

    Any way in which you can preserve meat is great to be able to do, since it’s nutritious and caloric. When it comes to canning hamburger in general, this is a great option for meat canning as you can take advantage of sales (ground beef goes on sale often), buy and preserve in bulk, and then have a great little stash for cheap meals or even survival.

    Here’s how:

    What You Need: 

    • sterile canning jars and lids
    • ground beef (1 lb of beef fits pretty well in one pint canning jar, to give you an idea of how much of both you will need)
    • stovetop and skillet
    • pressure canner
    • beef or chicken stock or broth
    • salt

    Directions: 

    1. To start, make sure your jars are properly sterile, your meat is ready to go, your kitchen is clean, and your pressure canner is ready.
    2. Preheat your skillet and brown your meat gently. It doesn’t have to be entirely cooked, just browned a bit.
    3. As your browning the meat, but your lids in very hot water and set aside.
    4. When the meat is done browning, pack it into the jars, leaving 1″ at the top. When you’re finished, drain the grease from the jars.
    5. Next, pour in your stock or broth, leaving 1″ at the top.
    6. Add a teaspoon of salt to each jar.
    7. Using a clean, warm cloth, gently wash the lids of your jars to prepare for sealing.
    8. Place the lids on the jars and tighten until finger tip tight.

    The Canning Process

    Now that you have your meat in jars and ready to be canned, it’s time to move on.

    1. Place your pressure canner on the stove, with the rack on the bottom.
    2. Fill with 3 quarts of hot water.
    3. Add as many jars as you can fit in the canner, so that they are not touching.
    4. Put the lid on according to your model’s instructions, and set the oven to high. Do not put the gasket on yet.
    5. Wait about 10-15 minutes, until there is steam coming out of the steam vent.
    6. Once you see steam, set your timer for 10 minutes. After 10 minutes of exhausting steam has passed, then put on your gasket.
    7. Keeping your oven on a high setting, wait until the “topper” pops up, which should take about 5-10 minutes. Once the pressure gauge shows designated pressure of 11 lbs, gently lower your stove to keep it there, and set your timer for 75 minutes. Check periodically to make sure the pressure is maintained.
    8. After 75 minutes, turn off the stove and carefully remove your canner from the burner.
    9. Once the pressure has dropped to zero and the topper has gone back down, you can carefully remove the jars and place them on the counter to “pop”/seal.
    10. Once your jars are cooled and sealed, label them and store them.

    Your canned meat will last in a cool, dry pantry for 2-5 years.

    If you enjoyed this, you might also like….

    Can You Defend Your Family When SHTF?

    Natural Healing Secrets You Need to Know…

    Effective Primal Diet Hacks…

  • Dehydrating Food: A Beginner’s Guide

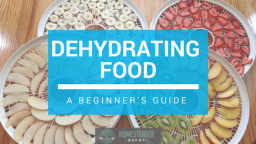
    Dehydrating Food: A Beginner’s Guide

    Dehydrating is a great option for preserving food for the long term, especially for gardeners or homesteaders. But even if you’re just an urban homesteader, it might be an excellent way to get started with food preservation. If you like to shop sales, frequent farmer’s markets, or grow veggies or herbs in your own little urban homestead, dehydrating is a great way to maximize your finds and easily store food for the long term.

    Here are some of the benefits to dehydrating vs. other food preservation methods:

    • it preserves the nutritional content of food
    • it condenses food and also makes it very lightweight, which is great for storage
    • it requires very little work to do
    • you can preserve a wide variety of foods with the same process

    Getting started 

    To get started, you will most likely want to purchase a dehydrator, but you can also dehydrate food using your oven. You simply put your oven on its lowest setting, crack the door, and let your food dehydrate for 6-24 hours, depending on what you are dehydrating.

    Effective Primal Diet Hacks…

    There are many dehydrators on the market, that range in size and efficiency. You will want to consider how much food you want to dehydrate at once, the storage space you have for it in your kitchen, how well-reviewed the model you’re looking at is, etc.

    What to dehydrate

    Once you have purchased a dehydrator, the sky is the limit on what you can dehydrate! You’d be surprised how much you can do with a dehydrator, from making jerky and pemmican to quickly rising dough and, of course, drying fruits, vegetables, and herbs. While there are many foods you can dry, here are some of the most popular and efficient foods to store by dehydration.

    • Apples
    • Oranges
    • Bananas
    • Berries
    • Fruit leather
    • Tomato sauce
    • Herbs
    • Peppers
    • Meat (for jerky)
    • Eggs (for powdered eggs)

    Most dehydrators will have a guide for what temperature to set for which type of food product you are drying, but you might need to adjust accordingly since not every food product will have the same level of moisture. Typically, you will dry stuff for a long period of time, from 6-24 and maybe even 48 hours.

    This long drying time doesn’t require much at all, all you need to do is process what you’re drying and lay it out in an even, thin layer on the trays of your dehydrator. You’ll want to check occasionally to see what kind of progress is being made. Most commonly, people will set their dehydrator up in the evening and dry overnight.

    Dehydrating is an age-old method of drying food that you might find becomes a staple method of food production and food preservation in your home. Just give it a try and see how you like it!

    Natural Healing Secrets You Need to Know…

  • The Coin in the Freezer Trick

    The Coin in the Freezer Trick

    Have you ever suffered from a long-term power outage or been evacuated from your home due to a natural disaster? In the event that nothing catastrophic ends up happening to your family, you will probably end up in a frustrating situation that many find themselves in after power has been out for a prolonged or unknown period of time:

    You don’t know how long the food in your freezer has been sitting in a freezer without power.

    So, the reason this might be relevant to homesteaders is if you are working on getting off-grid or already living this way, live in a rural area with frequent power outages or rely on unreliable sources of electricity like generators or solar panels, this could be insanely useful for times when your freezer for whatever reason loses power.

    It’s very important for food safety to be able to determine whether or not food in the freezer has completely thawed, so what you do is this:

    1. Find a small, freezer-proof container that you can keep in the freezer without taking up too much space. A small plastic Tupperware or disposable plastic cup would be perfect.
    2. Fill the container with water.
    3. Place in the freezer, and let it sit overnight, or until the water freezes completely.
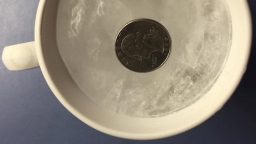
    4. Place a coin on the top of the frozen water.

    How It Works: 

    This is now your handy frozenness indicator. When your freezer loses power, over time, the water (and all your food) will begin to thaw. If the power goes back on before you are able to check, the water will freeze again. So, if the coin is sitting on the top of the water when you are able to get back to your freezer, or when the power goes back on, your food has remained fully frozen and won’t be spoiled. However, if it is sitting in the bottom of the cup, the food has thawed completely and is most likely spoiled.

    This is handy even if you remain at home, because in order to keep your food frozen as long as possible in a freezer that is not receiving power, you will want to keep it closed for as long as possible.

    Freezers are wonderful modern inventions that can keep food fresh for long periods of time! It’s important to have a backup plan in case they lose the power that makes them work.

    If you enjoyed this, you might also like….

    Fortify Your Home Against Disaster…

    Self-Sufficient Medical Secrets…

    Eat Like Your Ancestors…

  • Root Cellar Storm Shelter (Video)

    Root Cellar Storm Shelter (Video)

    I love things that have multiple purposes, and this root cellar storm shelter really takes the cake. A root cellar is definitely on the top of my list of features on a dream homestead, and for many locations in the US, having a root cellar that could double as a storm shelter is beyond ideal.

    We get more and more crazy every year, and no matter where you live, it’s very important to have a secure location that you can weather the storm out from. Not only will this underground root cellar and shelter provide safety and security, it would be already stocked with everything you need!

    I am definitely super inspired by this video and hope you will be too. Enjoy!

    https://www.youtube.com/watch?v=ndwHbfb2niE

    If you enjoyed this, you might also like….

    Home Defense in the End Times…

    Natural Healing Secrets You Need to Know…

    Eat Like Your Ancestors…

  • DIY Salt Cured Fish (Video)

    DIY Salt Cured Fish (Video)

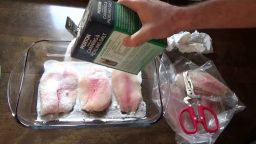
    I recently posted a video about curing bacon, because I love cured meats of all time (and who doesn’t love bacon?). Curing meat seems to be a great homestead skill to have, wherever you live!

    However, curing fish is new to me, and this video explains how. It seems like a really cool process, using pickling salt, the sun, and a wood oven to cure and dry the fish. Seeing projects like this always motivates me to learn new ways to preserve food and add to  my stockpile. Check it out:

    If you liked this, you might also enjoy…

    Become A Master Healer With This Revolutionary Course…

    Traditional Hindu Yoga for Weight Loss

    Improve Your Carpentry Skills Quickly and Easily…

  • How to Preserve Flour for Up to Five Years (Instructions and Video)

    How to Preserve Flour for Up to Five Years (Instructions and Video)

    Did you know there’s such a thing as canning flour? Neither did I, but I recently came across a video with instructions on how to do it. I’ve dealt with both weevils and pantry moths in the past, so I was pretty intrigued by this method, and it definitely seems like a surefire way to store flour for a long time.

    It’s not really as complicated as canning other types of food, but it follows the same principles. Here is what you need:

    Supplies: 

    Flour that you want to preserve

    Half-gallon canning jars and lids

    Canning funnel (very useful, but optional)

    Paper towels and dish towels

    Labels or marker

    Instructions: 

    1. Before you begin, start with properly sanitized jars. You can do this by washing, drying, and baking in the oven for about 20 minutes.
    2. When you’re ready to can your flour, preheat your oven to 215 degrees
    3. Using the canning funnel (if you’ve got one), fill your jars with flour. Make sure they’re packed in well, you can gently tap the car on the counter to let the flour settle in the jars.
    4. When your oven is preheated, move your oven racks so you will be able to fit the jars, and place them on a sheet in the oven, without the lids.
    5. Leave in the oven for 1-2 hours. This will dry out the flour and prepare the jars for the “canning” effect.
    6. After 1-2 hours has passed, take the jars out (carefully!) and place on a dish towel on your counter
    7. Wipe down the rims of the jars with a damp paper towel, then attach the lids as tightly as you can
    8. Leave the jars out overnight on the counter. In this time, they will cool and pop the lids out, completing the canning process.
    9. In the morning, label the jars with the date you canned them.
    10. Store in a cool, dark places, for up to five years.

    That’s it! Pretty cool huh? Check out the video if you’d like to see more:

    If you enjoyed this, you might also like….

    Home Defense in the End Times…

    Natural Healing Secrets You Need to Know…

    Eat Like Your Ancestors…