Page 4 of 4
1 2 3 4
recipes – Page 4 – Homesteader Depot

Tag: recipes

  • Simple Homemade Paleo Mayonnaise (Video)

    Simple Homemade Paleo Mayonnaise (Video)

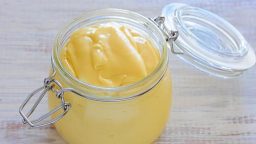
    Mayonnaise is a condiment staple that most houses stay well-stocked in. However, most store-bought mayonnaise, even the “natural” kind, is made from either unhealthy, caloric, “bad fat” oils, GMO soy ingredients, or both. Mayonnaise used to be something most homes made from scratch, and it is really quite simple to make your own, and requires ingredients you most likely already have!

    If the “paleo” part of this recipe sounds gross to you, don’t worry! “Paleo” mayonnaise is really no different than regular homemade mayonnaise. There are sometimes variations on this classic recipe, but it will taste no different than the mayonnaise you’re used to. Well, not necessarily: it might taste way better!

    Here’s a great video instructional on how to make this basic recipe. Enjoy!

    If you liked that, you might also like:
    Advanced Gardening Course To Accelerate Your Food Production…

    Survival Medicine & Wilderness Survival…

    Survival Techniques From Long Ago, Re-purposed For The Modern Era…

  • Great Depression Era Dandelion Salad (Video)

    Great Depression Era Dandelion Salad (Video)

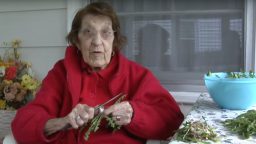
    I found this awesome YouTube channel recently called “Great Depression Cooking”, which features a 94-year-old woman, Clara, going through common recipes used during the Great Depression.

    I thought this particular video on dandelion salad was great for homesteaders to know, or anyone really, because it’s simple, nutritious, and almost everyone has dandelion growing in their yard or nearby their house. I think my favorite part of this video, however, is watching Clara carefully pick and clean the dandelion, explaining that it’s free, and all it takes is patience. It made  me think about how much more work people used to put into getting and processing food, and of course, that’s what homesteading is all about! Putting in the extra effort to get free, natural, sustainable food that you grew and harvested yourself. If you aren’t homesteading yet, regularly harvesting and processing dandelion greens would be a great habit to get into to develop the patience! Enjoy.

    If you enjoyed this, you might also like….

    Last Resort Home Defense and More…

    Natural Healing Secrets You Need to Know…

    The Healthy Primal Diet Everyone Should Try…

  • Good Girl Moonshine

    Good Girl Moonshine

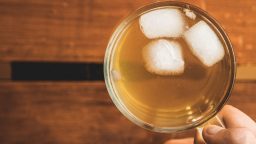
    If you’ve got a hankerin’ for a strong drink or are trying to kick a soda habit, Good Girl Moonshine is a great homemade drink alternative to alcohol or pop! It is healthy and detoxifying, and a very healthy habit to consume regularly. Also, this time of year, it’s a great option for beating colds or flus, or, since it’s still sizzling in many states, the heat too!

    This is my own personal version of a recipe found on Trim Healthy Mama,  so feel free to play around with the ingredients and make it your own.

    The crucial ingredients here are the apple cider vinegar and ginger. Apple cider vinegar is one of the healthiest ingredients you can add to your diet. It boasts a multitude of health benefits, too many to list here! Perhaps most ideal for a sickness-beating/healthy habit forming drink, it boosts the immune system, healthy digestion and assists with weight loss. Ginger does much of the same, killing germs and viruses and promoting healthy circulation.

    I have added turmeric, green tea and raw honey. Turmeric is another incredible herb with powerful anti-inflammatory properties and can sooth sore muscles and headaches. Green tea is an incredible antioxidant, and raw honey has great antibiotic properties.

    Recipe:

    • 1 cup green tea or herbal tea of choice (hot or cold)
    • 1 tbs apple cider vinegar
    • ginger to taste
    • turmeric to taste
    • raw honey to taste

    Brew tea hot or cold, and once it is fully steeped, add the rest of the ingredients and blend. You can make a large pitcher and drink over a few days, just make sure to mix again before serving. Enjoy!

    If you liked this, you might also enjoy…

    Natural Healing Techniques Doctors Don’t Want You to Know…

    The Weight-Reducing Magic of Yoga…

    The Ultimate Woodworking Course..

  • How to Make Elderberry Syrup

    How to Make Elderberry Syrup

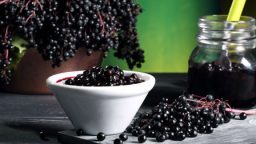
    Elderberries are a favorite for natural health enthusiasts, for their healing and soothing properties for colds and flus. Elderberry syrup is a popular way to consume it, and is far healthier that over-the-counter cough syrup full of chemicals, sugar, and drugs.

    They contain a high amount of vitamins A, B and C, which support the immune system and help fight off sickness. If taken before getting sick, they can help prevent an infection from spreading throughout the body, and if taken after getting sick they can help prevent the infection from spreading into the respiratory tract, making the sickness much worse.

    You can find elderberry syrup at your local health food store, but it can often be quite pricey. Making your own is a great alternative, it’s easy and far more affordable!

    What You Need:
    • ⅔ cup dried black elderberries
    • 2 Tablespoons fresh or dried ginger root
    • 1 teaspoon cinnamon
    • ½ teaspoon cloves or clove powder
    • 1 cup raw honey or maple syrup
    • mason jar or bottle
    • strainer
    Instructions:
    1. Put all the ingredients except the honey in a medium saucepan with about 3.5 cups filtered water
    2. Bring the mixture to a boil, and then reduce the heat to low and let simmer for about 45 minutes. After 45 minutes it should have reduced to about half.
    3. Remove from heat, and gently mash the elderberries
    4. Strain
    5. Let the mixture cool
    6. Once it is fully cool, and the honey and stir well
    7. Pour into a jar or bottle

    Keep your freshly made elderberry syrup in the fridge and take as needed. It can be taken daily as an immune-boosting supplement or when trying to prevent or heal sickness, although when you are sick, you will probably want to take or administer one does every 2-3 hours. A typical dose is .5-1 tbs for adults and .5-1 tsp for children.

    If you liked this, you might also enjoy…

    Natural Healing Techniques Doctors Don’t Want You to Know…

    The Weight-Reducing Magic of Yoga…

    The Ultimate Woodworking Course..

  • Fire Cider Recipe

    Fire Cider Recipe

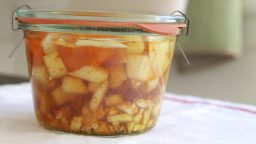
    Fire cider is a great recipe for health through the winter and warding off colds and flus. You can take regularly or whenever you are sick, as a remedy. It’s an old folk recipe that has many variations, this is just one of course. If you know anyone who makes it, ask them how they do it!

    It takes a month to properly ferment, but once it is complete you can take it by the spoonful as needed or add to juice or even as a flavoring to chicken or rice dishes. It lasts a long time so make a big batch once or twice a year and see how many different ways you can incorporate it into your cooking or health routine. Those who make it generally rave about it so give it a try and see how you like it.

    Ingredients: 

    • 1/2 cup grated ginger root
    • 1/2 cup grated horseradish
    • 3 tbs grated turmeric root or 1 tbs powdered turmeric
    • zest and juice from 1 lemon
    • 1 onion, chopped
    • 2 large hot peppers, chopped
    • 10 cloves of garlic, chopped
    • 2-3 sprigs of fresh rosemary or 2 tbs dried rosemary
    • 2-3 cayenne peppers or 1 tbs cayenne powder
    • apple cider vinegar
    • raw honey

    Recipe:

    Note: you will probably want to wear gloves while preparing this, and have your kitchen well-ventilated! If you are sensitive to onions and peppers, you might even want to consider covering your face and breathing carefully while you chop the onion and peppers.

    1. Prepare all your ingredients, carefully, and place them in a quart-sized jar.
    2. Cover with the apple cider vinegar. Stir all the ingredients vigorously.
    3. Place a piece of thin cloth over the top, and secure the lid over it.
    4. After a month, strain out the pulp and pour into a bottle or jar. Make sure to arefully squeeze all the juice out of the pulp.
    5. Once in your bottle or jar, stir in the honey. Add as much or as little as you like to get the desired sweetness
    6. Keep in  your cupboard and use as desired!

    If you liked this, you might also enjoy…

    Natural Healing Techniques Doctors Don’t Want You to Know…

    The Weight-Reducing Magic of Yoga…

    The Ultimate Woodworking Course..

  • DIY Mint and Vanilla Extracts

    DIY Mint and Vanilla Extracts

    Vanilla and mint extracts are great to have on hand for baking and cooking, especially with the holidays coming up. And what might be especially good news to gardeners with lots of mint to spare, you can actually  make your own extracts very easily at home!

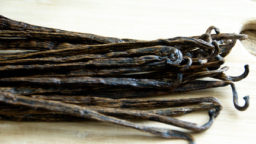
    For mint extract, either peppermint or spearmint, all it takes is lots of mint to harvest and some high-quality vodka. Vanilla, on the other hand, is probably not something you have growing in abundance in your backyard, and you might have to look for good-quality vanilla bean at your health food store or even online. But a little bit goes a long way, as you only need a few beans to make the extract and it will last for many recipes.

    Speaking of the holidays, these homemade extracts also make really great gifts! They unique and special, and also very affordable to make. They’d make great stocking stuffers or additions to gift baskets for relatives far away.

    What you need:

    Mint:

    1 Cup mint, washed and thoroughly dried

    12 oz. vodka

    Vanilla:

    3-4 vanilla beans, split completely open

    8 oz. vodka

    Jars, preferably dark

    Bottles, preferably dark. (You can use old vanilla or mint extract bottles)

    What you do:

    1. For the mint extract, stuff the mint in your container and cover with vodka. Lightly crush the leaves to release the flavor of the mint into the vodka. Seal the container.
    2. For the vanilla, simply put the beans into your container with the vodka and seal.
    3. Leave your extract in a cool, dark place for about 4 weeks. Shake occasionally.
    4. When your extracts are ready to use, strain out the vanilla or mint and pour them into your bottles, if desired. Keep in your pantry or on your shelf and use as you would store-bought extracts!

    Click Here To Get The Best Survival Medical Course…

    Check Out These Mind Blowing Survival Skills…

    See what is happening in this country and what you can do to protect yourself…