Page 34 of 89
1 32 33 34 35 36 89
Homesteading – Page 34 – Homesteader Depot

Category: Homesteading

  • How to Store Food in Vacuum Packed Canning Jars (Video)

    How to Store Food in Vacuum Packed Canning Jars (Video)

    I’ve had a vacuum sealer for years that has an attachment on it for canning. I never thought much of it, and figured it required a bunch of fancy additional equipment to use. However, it recently just clicked that I can use it for vacuum canning! And it doesn’t take much at all, just a lid for my jars, and I’ve got plenty of canning jars already.

    So, I wanted to learn how to use it. This video is a great tutorial on how and why to use your canning attachment to your vacuum sealer. She explains how long the food will keep, where to find the accessories you’ll need for vacuum canning, how hers works, and gives a demonstration of the whole process. She also demonstrates how to re-open the can once it’s been sealed.

    To me, if you already have a vacuum sealer with a hose attachment, and aren’t already set up for canning (or even if you are), this seems like a really quick, easy, and mess-free way to preserve food through canning. Enjoy!

    If you enjoyed this, you might also like….

    Can You Defend Your Family When SHTF?

    Natural Healing Secrets You Need to Know…

    Effective Primal Diet Hacks…

  • How to Make Raw Cat Food (Video)

    How to Make Raw Cat Food (Video)

    Wait! I know this sounds pretty gross, but it’s actually really cool. If you’re a cat person, you probably understand the desire to feed your feline friends something nutritious and delicious. Cats are notoriously picky eaters, and part of the reason this may be is that the majority of the time, they’re being fed cooked, grain-based foods they’re simply not meant to eat!

    Some of my favorite health-focused homesteaders on YouTube shared this video recently of how they make their raw, super affordable cat food.

    They start the video by explaining why they don’t enjoy making it, so if you think it’s gross, you’re not alone! But they also describe precisely why they continue to make this food, and how great it is for their cats.

    Cars are amazing homestead animals to have, and you want to keep them happy and healthy! Raw, homemade food is not only great for them, it’s cheap for you to make as well. Healthy and frugal is always a great alternative to store-bought, especially when it comes to keeping our furry homestead helpers satisfied. Enjoy!

    If you enjoyed this, you might also like….

    Can You Defend Your Family When SHTF?

    Natural Healing Secrets You Need to Know…

    Effective Primal Diet Hacks…

  • Reasons to Stockpile Alcohol

    Reasons to Stockpile Alcohol

    Whether or not you like to enjoy a refreshing cocktail after a long day of homestead duties, or you’ve been sober for years, there’s actually a lot of very good reasons to stockpile alcohol, for use around the homestead and also long-term survival.

    To be clear, when we’re talking about alcohol, we’re talking about liquor. There are many different kinds of liquor, obviously, so let’s discuss a bit what kind you’ll want to stockpile.

    First of all, rubbing alcohol, or isopropyl alcohol, is great to stockpile as well, for many reasons, but this is not what we’re talking about. It does deserve its own mention though, because many of the first-aid uses we’ll suggest for consumable alcohol (which rubbing alcohol is NOT), you can use rubbing alcohol for as well, so you might want to keep it around for those purposes.

    Second, many of the commercially-available liquor out there is flavored. For most of the uses we’ll describe, you probably won’t want to use flavored liquor. One reason is that it usually includes artificial flavorings and colors that would not be great to include for say, first aid uses or tinctures. They also won’t keep as long when opened, plus, they’re probably more expensive.

    So, for stocking up on alcohol, you’ll probably want to focus on plain, unflavored, quality vodka, whiskey, or gin.

    So, without further ado, here the best reasons to stockpile alcohol:

    Barter or trade: ah, the first reason isn’t to use it at all! When disaster strikes, being able to offer others alcohol might come in very handy for acquiring supplies or services from others in your community.

    Anaesthesia: after a disaster, you might find yourself needing to sedate a patient if you are performing any kind of painful medical procedure like a tooth extraction, setting a broken bone, and liquor will be very helpful for this.

    Cleaning wounds: alcohol is incredibly effective for sanitizing wounds, and also sterilizing medical supplies.

    Fire starting: while there are probably safer and cheaper methods for fire starting, and you’ll want to be very careful, alcohol is incredibly flammable and can be very effective in starting and sustaining a flame.

    Tinctures: probably the best reason for homesteaders to stock up on liquor; it can be used as the base for herbal tinctures for both wild and homegrown medicinal herbs.

    Stove fuel: you’ll need the right set-up for this, but alcohol can be used to fuel a stove, and is a popular emergency fuel.

    Cleaning a gun: any kind of alcohol is incredibly effective in cleaning a gun after use.

    Cold and flu medicine: while you shouldn’t be hitting the bottle too much while sick as it can lower your immune system, a small amount of liquor, such as a single shot or mixed in with herbal tea, can be very effective for killing sickness and clearing sinuses.

    Entertainment: don’t forget, you can still simply drink liquor, and keep guests or fellow homesteaders happy! Just be responsible and enjoy!


    These are some of the ways you can use alcohol for homesteading and survival. If you’ve got more suggestions, be sure to share in the comments!

    If you enjoyed this, you might also like….

    Are We In The End Times?

    Complete Health Transformation Without Drugs or Surgery…

    Having Trouble Sticking With Paleo?

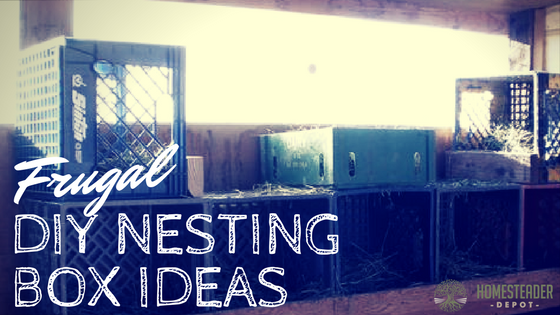
  • Frugal DIY Nesting Box Ideas

    Frugal DIY Nesting Box Ideas

    If you want your chickens to provide you with lots of wonderful, nutritious, farm-fresh eggs, they’re going to need some cozy nests to get the job done!

    You don’t need to spend an arm and a leg to trick your coop out with some nice, comfortable nesting boxes for your lovely egg-laying ladies.

    Here are some frugal nesting box ideas for you that can all be purchased cheaply, recycled, or even scavenged for, if you’re lucky!

    Dishpans

    Dishpans, the kind you can grab at Walmart or the Dollar Tree for very cheap, are great for nesting boxes, if you cut a shallow entry point for the chickens on one end, and stack them where they can easily access them. Simply fill with bedding, find a quiet, private place for them to go, and let your hens enjoy.

    Related Article: 5 Mistakes First-Time Chicken Farmers Make

    Bookshelves

    If you have any old bookshelves lying around, the little nooks would be perfect for some comfortable chicken privacy. Also, if you feel more confident that you could easily make a bookshelf than some fancy laying boxes, just use the same idea! Chickens like to “roost”, fly up into trees, so they’ll like something they can perch on and fly up and down from to lay their eggs.

    Milk crates

    Milk crates are one of the best kind of containers there are, especially for homesteaders! And you can probably find them for free, from friendly restaurants or businesses who discard them after deliveries. These are also great because they have holes all around, so they’re breathable and will dispose of some of the chicken droppings for you, without putting the eggs at risk. Fill with bedding and tuck away (maybe on your bookshelf?).

    Litter boxes

    If you’ve only got a few hens and some old litter boxes lying around or can find them cheaply or for free, they’re perfect for nesting boxes. They enclose the hen and are already designed for easy cleaning and bedding changes.

    NEVER Buy Laundry Detergent AgainLearn How>>>

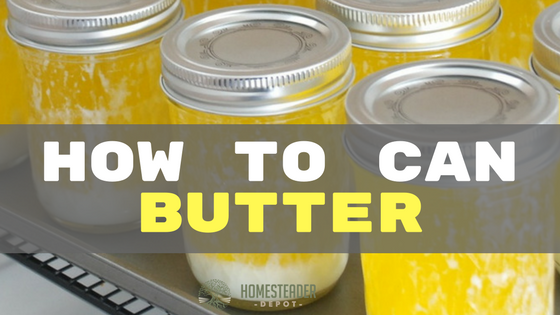
  • How to Can Butter (Yes, Really!)

    How to Can Butter (Yes, Really!)

    Lately, butter has come raging back as nutritionists reveal it’s actually quite healthy for you. For a few decades, butter was demonized as too fattening and unhealthy, but as vegetable-oil based alternatives were introduced, we saw obesity rates skyrocket. Not sure why no one ever noticed the correlation, but it turns out that in fact, the saturated fats that come from butter are not only better for you, they can ultimately help lose weight when coupled with a balanced diet full of “good” fats, and free of processed foods and sugars.

    I personally love butter, and was really excited to discover that you could, in fact, can it. How cool is that? Not only do you get to enjoy all the deliciously fatty butter you want, (goodbye, margarine!) you can also preserve it at room temperature for your survival or homestead pantry! I’m sold.

    So, here’s how you do it.

    First, you will need: 

    • Butter (you will need roughly 3 jars for each lb of butter)
    • 8-oz canning jars
    • Lids
    • Water bath canning kit
    • Ladle 
    • Canning funnel 

    Directions: 

    1. First, heat your jars up in a 250 degree oven for 20 minutes.
    2. Next, melt your butter in a saucepan over low heat. If you’re using a lot of butter, you might want to do this in batches.
    3. Stir gently to prevent burning, and let the butter melt and simmer a bit until there is a white foam at the top.
    4. As you’re doing this, place your lids in another pot over the stove, cover with water, and bring to a boil. Turn the heat to low to keep them warm while you work.
    5. Once the butter is melted and has a foam lip, ladle it into your jars, using your canning funnel. Leave 3/4″ head space at the top.
    6. Once the butter is poured into the jars, prepared your water bath.
    7. Wipe the jars off with a clean, damp rag to remove any butter that may have spilled on them. They won’t seal if they’re greasy!
    8. Place the lids and rings on the jar, and tighten loosely.
    9. Once the water in your water bath is warm, put the jars in. They need to be in at least 1″ of water.
    10. Once the water boils, set a timer for 10 minutes. When 10 minutes is up, let cool for another 10 minutes.
    11. Now, remove from the bath and place on a towel to dry. As you clean up, try to remember to shake the jars every few minutes, so the butter will remain a uniform consistency.
    12. Once it is cool, it’s ready to store! Keep in a cool, dark place, and enjoy!

    If you enjoyed this, you might also like….

    Are We In The End Times?

    Complete Health Transformation Without Drugs or Surgery…

    Having Trouble Sticking With Paleo?

  • The Health Benefits of Eating Liver

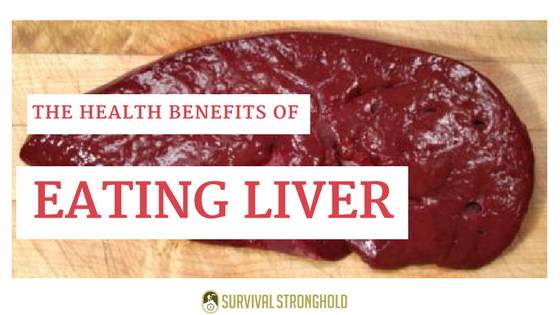
    The Health Benefits of Eating Liver

    Most people will turn their noses up at the suggestion of eating liver. What used to be a staple in many Western cultures has fallen out of favor in recent generations. However, liver is actually incredibly healthy, and also quite affordable.

    It’s coming back in fashion among foodies and health nuts, and for good reason. It’s packed with nutrients and vitamins, and, if you can find a way to prepare it that you enjoy, it is a great staple to add to a health-minded diet.

    Here are some of the many reasons to integrate liver into your diet:

    Protein: liver is an excellent source of protein. 3 oz of beef liver, for example, has 22 grams of protein.

    Vitamin A: this crucial vitamin is difficult to find from other food sources, but that same 3 oz helping of liver has a whopping 305% of our daily vitamin A requirement. You simply cannot beat that with any other food source.

    Potassium: potassium is really important for overall health, including heart health, circulation, support of the nervous system, and keeping hydrated

    Vitamin B: liver is packed with this commonly overlooked, incredibly healthy vitamin, particularly B12, which many people are actually deficient of. It boosts energy levels, supports red blood cells, and improves nervous function.

    Iron: there is a highly usable form of iron found in liver, and lots of it. It’s very important to get enough iron, especially for women, and liver is a great source.

    Be wary when you purchase liver, though, since it’s an organ, you’ll want to make sure you can get a clean source. Even if you can’t get grass-fed and/or organic, which is preferable, choosing liver from cows or chickens that have not been given antibiotics or hormones is much better than conventional.

    As for how to prepare liver, don’t worry! You don’t have to eat onions and liver all the time (unless you’d like to, of course!). There are many ways to feature it in your cooking more without having to eat it straight. Pate is a delicious way to eat it, and you can make it yourself at home cheaply and easily. It’s also packed with really great sources of fat! We’ve got a recipe coming up for that, so keep an eye out.

    You can also sneak it in stir-frys, diced and mix in with veggies, or puree and add in with any ground meat you cook. You can even dehydrate that and make your own supplement!

    Gross to many but incredibly nutritious, don’t hesitate to grab some liver next time you’re shopping for meat!

    If you enjoyed this, you might also like….

    Do You Have What You Need to Hold Down the Fort?

    Natural Healing Secrets You Need to Know…

    Effective Primal Diet Hacks…


  • How to Make Almond Milk (and Almond Flour!)

    How to Make Almond Milk (and Almond Flour!)

    I love recipes that kill two birds with one stone (come to think of it, if you know a recipe that does this literally, let me know!), and making almond flour out of the leftovers from almond milk couldn’t be easier, or healthier!

    It’s very simple, and all you need is almonds and clean drinking water.

    Almond milk is a great alternative to dairy whether you are on the paleo or whole 30 diets, are lactose intolerant, or just enjoy a delicious and wholesome nut milk!

    Homemade almond milk is not only cheaper than store bought kinds, it’s actually way healthier. Even the most seemingly healthy almond milk that is organic and non-GMO, still have gross preservatives in them that pretty much cancel out any other health benefit of delicious almond milk, not to mention half the time they’re also packed with flavoring and unnecessary sugar.

    Almonds are sweet enough on their own, so homemade almond milk is both delicious and require very little to make. Here’s how, and how to make almond flour with the discards!

    Ingredients:

    • almonds (2 cups is a good starting point)
    • filtered water
    • salt (optional)
    • vanilla extract (optional)

    Directions: 

    1. Fill a glass container with your almonds and cover with clean filtered water. A 3:5 ratio of almonds to water is fine, but you mostly just need to make sure the almonds are fully submerged.
    2. Let soak overnight.
    3. In the morning, drain off the water and rinse your almonds thoroughly under clean water, until the water runs clear.
    4. Place in a blender with the salt and vanilla extract, if you’re using them, and fill the rest of the blender with clean filtered water.
    5. Blend on high for a minute or two.
    6. Strain the almonds out with cheesecloth or a fine mesh strainer. I do this over a large pitcher so I can pour the fresh almond milk into a bottle easily.
    7. That’s it! Bottle your almond milk and store in the fridge; it will keep for 4-6 days.

    How to make almond flour

    So, you may ask, what do I do with all this crushed up almond I just strained out of my milk? That’s right: this is how we make the flour!

    1. First, try to squeeze out as much moisture as you can from the discarded almonds. Then, spread out on a baking pan or dehydrator tray in a thin layer.
    2. Set your oven to the lowest setting, place your pan in the oven, and crack the door. If you’re using an oven, leave it this way for about 4-6 hours. OR if you’re using a dehydrator, set it on the nut setting, if it has one, or around 115. Leave for 12 hours.
    3. Once your almond meal is crispy and completely dry, take out of the oven or dehydrator.
    4. Run the almond meal through the blender again, until it is like a fine meal. This will vary based on your blender’s strength if you have a grain mill, even better! You can also use a coffee grinder, but this will take awhile if it has a small capacity.
    5. And there’s your super frugal almond flour! Store in an airtight container in a cool, dry place, and use in any recipe that calls for almond flour.

    There you are, two awesome, healthy food products with one batch of almonds. Cool huh?

    If you enjoyed this, you might also like….

    Effective Primal Diet Hacks…


  • 3 DIY Solar Projects for Your Homestead

    3 DIY Solar Projects for Your Homestead

    The sun is an amazing source of energy, and it is entirely renewable and free. Unfortunately, most people think of solar energy as costly and complicated.

    You don’t need to break the bank and spend a fortune on fancy, on-grid solar panels to harness the power of the sun!

    First of all, we use the sun’s energy daily. Our garden thrives on it, our grazing animals live on solar-powered food (grass!), even our chickens harness the sun’s amazing power to produce eggs! Pastured meat, dairy, and eggs are actually one of the best ways to harness the power of the sun, and you probably didn’t even realize you were doing that every time you consume your own or buy grass fed meat, dairy or eggs. Pretty cool, huh?

    Of course, all the pastured animal byproducts in the world won’t necessarily be able to replace fossil fuels around the house (or could they? Hmmm…), so how can you cut the cost of installing and operating solar by setting it up yourself?

    Well, we set out to find some ways for you to DIY your own solar set-ups, and found three awesome video tutorials for easy, cheap solar power systems that you can use to power and heat your home. Check them out:

    DIY Solar Thermal Water Heater 

    This very cool, simple, and totally effective homemade solar water heater from off-grid solar project aficionado and YouTuber Desertsun02 is perfect for low-tech homesteads or camping/survival preparedness. Using some basic carpentry skills, copper tubing, and the mighty power of the sun, you can easily get and sustain nice, hot water for bathing. If you’ve ever had an electric water heater in your home, you’re probably fantasizing about the costs cut by heating bathing water with the sun! Very cool:

    DIY Solar Panel System: Small Affordable Setup 

    This is a very easy and simple solar system for those who don’t want to go full solar, but would like to have a back-up system to save a little money or be prepared for power failures or when SHTF. Homesteader and YouTuber Starry Hilder walks us through purchasing the components for, and setting up, a simple, affordable solar system, demystifying the process and offering reassurance that it really isn’t as complicated, expensive, or difficult as it seems at first. Great intro to DIY solar energy systems.

    >> Never Buy Batteries Again…Simple Battery Reconditioning – Click Here

    DIY Solar Furnace for Under $50

    This one seems almost too simple and easy to be true. For less than $50, this video shows you how to build and set up your own incredibly easy solar furnace. Can you imagine actually heating your house with solar power? How cool is that? This video has well over a million views on YouTube, so I think this guy is definitely on to something. Check it out:

    We love DIY almost as much as we love solar power, and it is really inspiring and cool to check out some of these impressive and affordable home projects for solar power. Give us a shout if you see some more cheap, easy DIY solar projects and we’ll try to feature them in a future article.

    If you enjoyed this, you might also like….

    >> Secret Power bank that slashes over 70% OFF your power bill overnight – Click Here For Details