Page 20 of 28
1 18 19 20 21 22 28
Self Reliance – Page 20 – Homesteader Depot

Category: Self Reliance

  • How to Make Raw Cat Food (Video)

    How to Make Raw Cat Food (Video)

    Wait! I know this sounds pretty gross, but it’s actually really cool. If you’re a cat person, you probably understand the desire to feed your feline friends something nutritious and delicious. Cats are notoriously picky eaters, and part of the reason this may be is that the majority of the time, they’re being fed cooked, grain-based foods they’re simply not meant to eat!

    Some of my favorite health-focused homesteaders on YouTube shared this video recently of how they make their raw, super affordable cat food.

    They start the video by explaining why they don’t enjoy making it, so if you think it’s gross, you’re not alone! But they also describe precisely why they continue to make this food, and how great it is for their cats.

    Cars are amazing homestead animals to have, and you want to keep them happy and healthy! Raw, homemade food is not only great for them, it’s cheap for you to make as well. Healthy and frugal is always a great alternative to store-bought, especially when it comes to keeping our furry homestead helpers satisfied. Enjoy!

    If you enjoyed this, you might also like….

    Can You Defend Your Family When SHTF?

    Natural Healing Secrets You Need to Know…

    Effective Primal Diet Hacks…

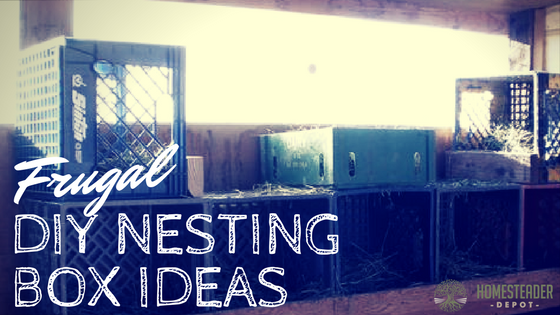
  • Frugal DIY Nesting Box Ideas

    Frugal DIY Nesting Box Ideas

    If you want your chickens to provide you with lots of wonderful, nutritious, farm-fresh eggs, they’re going to need some cozy nests to get the job done!

    You don’t need to spend an arm and a leg to trick your coop out with some nice, comfortable nesting boxes for your lovely egg-laying ladies.

    Here are some frugal nesting box ideas for you that can all be purchased cheaply, recycled, or even scavenged for, if you’re lucky!

    Dishpans

    Dishpans, the kind you can grab at Walmart or the Dollar Tree for very cheap, are great for nesting boxes, if you cut a shallow entry point for the chickens on one end, and stack them where they can easily access them. Simply fill with bedding, find a quiet, private place for them to go, and let your hens enjoy.

    Related Article: 5 Mistakes First-Time Chicken Farmers Make

    Bookshelves

    If you have any old bookshelves lying around, the little nooks would be perfect for some comfortable chicken privacy. Also, if you feel more confident that you could easily make a bookshelf than some fancy laying boxes, just use the same idea! Chickens like to “roost”, fly up into trees, so they’ll like something they can perch on and fly up and down from to lay their eggs.

    Milk crates

    Milk crates are one of the best kind of containers there are, especially for homesteaders! And you can probably find them for free, from friendly restaurants or businesses who discard them after deliveries. These are also great because they have holes all around, so they’re breathable and will dispose of some of the chicken droppings for you, without putting the eggs at risk. Fill with bedding and tuck away (maybe on your bookshelf?).

    Litter boxes

    If you’ve only got a few hens and some old litter boxes lying around or can find them cheaply or for free, they’re perfect for nesting boxes. They enclose the hen and are already designed for easy cleaning and bedding changes.

    NEVER Buy Laundry Detergent AgainLearn How>>>

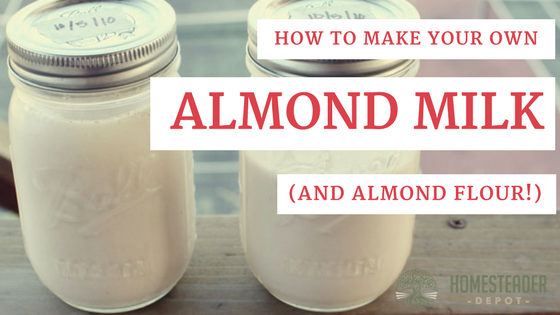
  • How to Make Almond Milk (and Almond Flour!)

    How to Make Almond Milk (and Almond Flour!)

    I love recipes that kill two birds with one stone (come to think of it, if you know a recipe that does this literally, let me know!), and making almond flour out of the leftovers from almond milk couldn’t be easier, or healthier!

    It’s very simple, and all you need is almonds and clean drinking water.

    Almond milk is a great alternative to dairy whether you are on the paleo or whole 30 diets, are lactose intolerant, or just enjoy a delicious and wholesome nut milk!

    Homemade almond milk is not only cheaper than store bought kinds, it’s actually way healthier. Even the most seemingly healthy almond milk that is organic and non-GMO, still have gross preservatives in them that pretty much cancel out any other health benefit of delicious almond milk, not to mention half the time they’re also packed with flavoring and unnecessary sugar.

    Almonds are sweet enough on their own, so homemade almond milk is both delicious and require very little to make. Here’s how, and how to make almond flour with the discards!

    Ingredients:

    • almonds (2 cups is a good starting point)
    • filtered water
    • salt (optional)
    • vanilla extract (optional)

    Directions: 

    1. Fill a glass container with your almonds and cover with clean filtered water. A 3:5 ratio of almonds to water is fine, but you mostly just need to make sure the almonds are fully submerged.
    2. Let soak overnight.
    3. In the morning, drain off the water and rinse your almonds thoroughly under clean water, until the water runs clear.
    4. Place in a blender with the salt and vanilla extract, if you’re using them, and fill the rest of the blender with clean filtered water.
    5. Blend on high for a minute or two.
    6. Strain the almonds out with cheesecloth or a fine mesh strainer. I do this over a large pitcher so I can pour the fresh almond milk into a bottle easily.
    7. That’s it! Bottle your almond milk and store in the fridge; it will keep for 4-6 days.

    How to make almond flour

    So, you may ask, what do I do with all this crushed up almond I just strained out of my milk? That’s right: this is how we make the flour!

    1. First, try to squeeze out as much moisture as you can from the discarded almonds. Then, spread out on a baking pan or dehydrator tray in a thin layer.
    2. Set your oven to the lowest setting, place your pan in the oven, and crack the door. If you’re using an oven, leave it this way for about 4-6 hours. OR if you’re using a dehydrator, set it on the nut setting, if it has one, or around 115. Leave for 12 hours.
    3. Once your almond meal is crispy and completely dry, take out of the oven or dehydrator.
    4. Run the almond meal through the blender again, until it is like a fine meal. This will vary based on your blender’s strength if you have a grain mill, even better! You can also use a coffee grinder, but this will take awhile if it has a small capacity.
    5. And there’s your super frugal almond flour! Store in an airtight container in a cool, dry place, and use in any recipe that calls for almond flour.

    There you are, two awesome, healthy food products with one batch of almonds. Cool huh?

    If you enjoyed this, you might also like….

    Effective Primal Diet Hacks…


  • 3 DIY Solar Projects for Your Homestead

    3 DIY Solar Projects for Your Homestead

    The sun is an amazing source of energy, and it is entirely renewable and free. Unfortunately, most people think of solar energy as costly and complicated.

    You don’t need to break the bank and spend a fortune on fancy, on-grid solar panels to harness the power of the sun!

    First of all, we use the sun’s energy daily. Our garden thrives on it, our grazing animals live on solar-powered food (grass!), even our chickens harness the sun’s amazing power to produce eggs! Pastured meat, dairy, and eggs are actually one of the best ways to harness the power of the sun, and you probably didn’t even realize you were doing that every time you consume your own or buy grass fed meat, dairy or eggs. Pretty cool, huh?

    Of course, all the pastured animal byproducts in the world won’t necessarily be able to replace fossil fuels around the house (or could they? Hmmm…), so how can you cut the cost of installing and operating solar by setting it up yourself?

    Well, we set out to find some ways for you to DIY your own solar set-ups, and found three awesome video tutorials for easy, cheap solar power systems that you can use to power and heat your home. Check them out:

    DIY Solar Thermal Water Heater 

    This very cool, simple, and totally effective homemade solar water heater from off-grid solar project aficionado and YouTuber Desertsun02 is perfect for low-tech homesteads or camping/survival preparedness. Using some basic carpentry skills, copper tubing, and the mighty power of the sun, you can easily get and sustain nice, hot water for bathing. If you’ve ever had an electric water heater in your home, you’re probably fantasizing about the costs cut by heating bathing water with the sun! Very cool:

    DIY Solar Panel System: Small Affordable Setup 

    This is a very easy and simple solar system for those who don’t want to go full solar, but would like to have a back-up system to save a little money or be prepared for power failures or when SHTF. Homesteader and YouTuber Starry Hilder walks us through purchasing the components for, and setting up, a simple, affordable solar system, demystifying the process and offering reassurance that it really isn’t as complicated, expensive, or difficult as it seems at first. Great intro to DIY solar energy systems.

    >> Never Buy Batteries Again…Simple Battery Reconditioning – Click Here

    DIY Solar Furnace for Under $50

    This one seems almost too simple and easy to be true. For less than $50, this video shows you how to build and set up your own incredibly easy solar furnace. Can you imagine actually heating your house with solar power? How cool is that? This video has well over a million views on YouTube, so I think this guy is definitely on to something. Check it out:

    We love DIY almost as much as we love solar power, and it is really inspiring and cool to check out some of these impressive and affordable home projects for solar power. Give us a shout if you see some more cheap, easy DIY solar projects and we’ll try to feature them in a future article.

    If you enjoyed this, you might also like….

    >> Secret Power bank that slashes over 70% OFF your power bill overnight – Click Here For Details

  • Thriving 23-Year-Old Permaculture Food Forest (Video)

    Thriving 23-Year-Old Permaculture Food Forest (Video)

    I recently had the pleasure of watching this amazing video on a 23-year-old food forest that Robert and Robyn Guyton have grown in the small town of Riverton on New Zealand’s South Island.

    This is the ultimate goal of permaculture, to create your own natural, sustainable ecosystem that you can live off of, but that thrives and grows on its own.

    It takes many years and a lot of patience to cultivate something like this, but hearing the couple talk about their relationship with their food forest and watching the blossoms, insects, and hearing and seeing the birds and other creatures that thrive in this amazing little ecosystem is incredibly inspiring.

    I think what makes this food forest particularly successful is their knowledge of and respect for the native species of birds, insects, and animals, and their willingness to serve and give back to the local ecosystem as well as benefit from it on their own.

    In a stressful and crazy world, take some time to appreciate the beauty of nature and set some goals of your own for your own little self-sustainable sanctuary one day. Enjoy!

    If you enjoyed this, you might also like….

    Can You Defend Your Family When SHTF?

    Natural Healing Secrets You Need to Know…

    Effective Primal Diet Hacks…

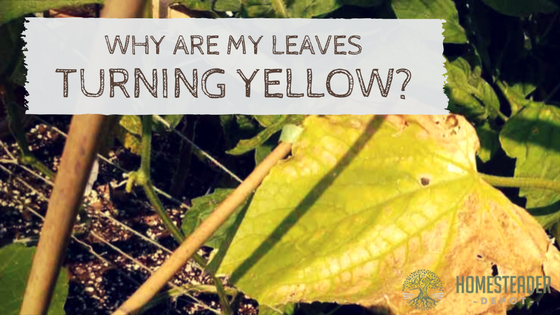
  • Why Are My Plants Turning Yellow?

    Why Are My Plants Turning Yellow?

    Yellow leaves are never a happy sight to see on plants you’ve been caring for and watch grow. And they’re not a good sign. Yellow leaves on plants or entirely yellow plants can be indicative of a number of different issues. Here are some of them:

    Pests

    One possible cause of yellow leaves is pests that are living on the plant and leaves and taxing the plant’s energy and resources. To determine if this is the cause, inspect the plant carefully to see if you can find any pests. To treat this, you’ll need to eliminate the pests themselves. Neem oil or insect-killing soap are great organic options for a pesticide.

    Overwatering 

    Plants can become yellow if they get too much water, and poor drainage or too much clay content in the soil can be a common culprit of this. To combat this, try to mix some sand into the soil or waterless.

    Boost your plants growth by 10 TIMESin half the time…with the help of fish.  Learn More Here>>>

    Lack of sunlight

    Sunlight is what plants need to thrive, and if they’re not getting enough and aren’t shade-tolerant plants, this might be a cause of yellowed leaves. If this is the case, your leaves will be floppy and faded in color. If you have potted plants, try moving them somewhere they’ll get more sun, or, if your plants are in the ground, transplant if you can or simply choose a sunnier spot for these particular plants next year.

    Dehydration

    Not enough watering can also cause yellowed leaves, as plants require water to transport the essential nutrients of the soil to their foliage. If leaves feel crunchy and dry, dehydration is probably the culprit. Make sure your plants receive enough water and check daily for the moisture content of the soil. Soil should hardly ever be completely dried out if you stick your finger into it.

    Nutrient deficiency 

    If the leaves of your plants are yellowing, they could be deficient in any number of essential nutrients. If you haven’t been fertilizing or amending your soil, be sure to give them some compost tea or store-bought organic fertilizer for either growth or blossom, depending on what stage they are at, and buy some nutrient testing strips to test the nutrient content of your garden so you can amend appropriately.

    Plants are just like people, they need proper food, hydration, and care to thrive! Help respond to your plant’s needs by checking for these important issues and address them today.

     Check THIS OUTBreakthrough in Electric Car Technology Powers An Entire Home>>>


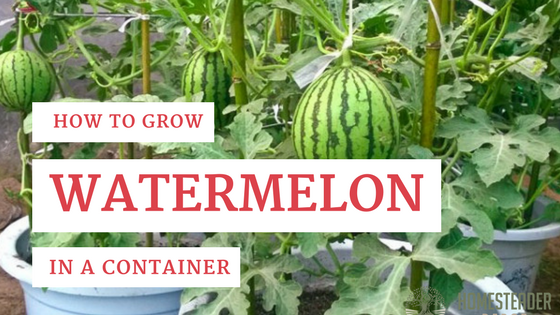
  • How to Grow Watermelon in a Pot

    How to Grow Watermelon in a Pot

    There’s nothing quite as refreshing on a hot summer day as a nice, juicy watermelon.

    Unfortunately, the watermelons you find in the supermarket are often conventional and even GMO. If you’d like to harvest some of your own this summer, you don’t need a whole field, you can grow them right in your backyard or porch!

    Here’s how:

    Container: 

    Watermelons will need a large, deep container, at least 2′ deep, so that it’s long taproot will have enough space to expand. Choose something sturdy as well, and with proper drainage.

    Soil:

    Watermelons like both sandy and loamy soil, with plenty of airy and well-drained substrate and a pH around 6-6.8. Well-composed animal manure is very helpful in achieving the right texture and soil nutrients for watermelon.

    Propigation: 

    Due to the taproot of watermelon, it will need to be sowed directly into your container as it does not transplant well. Sow 3-4 seeds in one pot in the early spring, as soon as temperatures are above 65 degrees. It should sprout within 6-10 days, after that, choose the heartiest seedling and thin out the rests.

    Placement: 

    Watermelons like lots of sun so be sure to place them somewhere they will get direct sunlight for at least 6 hours out of the day. They will also want to climb, so a sturdy trellis is very important. This can be placed directly in the pot once the plant is big enough to train up it, or you can place the pot at the bottom of a freestanding trellis.

    Watering:

    Watermelon, true to its name, is a very thirsty plant, so you will want to make sure it gets plenty of water and also is draining properly. Water at least once a day.

    Care:

    Fertilize accordingly for both growth and fruiting, and make sure to prune appropriately. This means removing any sickly or weak branches, and try to keep a central stalk by removing any extra branches as they sprout.

    Harvesting: 

    Harvest time will vary from plant to plant, but it is typically around 30-50 days after flowering. When the fruit is ripe, it won’t look any different than the younger fruit, so you’ll have to “thump” the side of the fruit to see if it sounds dead and hollow; that’s how you know it’s ripe!


    Enjoy!

    If you enjoyed this, you might also like….

    Can You Defend Your Family When SHTF?

    Natural Healing Secrets You Need to Know…

    Effective Primal Diet Hacks…


  • 4 Health Benefits of Frozen Blueberries

    4 Health Benefits of Frozen Blueberries

    Blueberries are well-known as a delicious source of antioxidants and valuable nutrients, and although they’re not as glamorous or trendy as acai berry, they’re actually more nutritious and top many dieticians have named them the #1 superfood out there.

    But did you know that when you freeze them, contrary to what you might think, it actually increases the nutrients?

    Anthocyanins are what gives blueberries their dark, rich color. They are a are a type of flavonoid, which is a phytonutrient found exclusively in plants, and they’re what make blueberries so incredibly healthy.

    What happens when you freeze them is that is that the cold temperatures disrupt the tissue structure of the delicate flesh, which actually makes the anthocyanins more available and easier to be absorbed when consumed.

    Anthocyanins have many great health benefits, such as:

    Improved memory

    By protecting your brain against cell damage, anthocyanins actually improve brain function by allowing our brain’s encoding and retrieval process more fluid. This helps us to remember things quicker and for longer periods of time.

    Heart Health

    Eating blueberries have been shown to drastically reduce one’s risk of heart disease, as the anthocyanins regulate and relax the arteries on our vascular wall, protecting them from damage. As a result, the overall blood flow improves, regulating blood pressure as well!

    Improved Digestion

    These healthy antioxidants also support our digestive system by protecting our digestive tract from damage. Often times, gastrointestinal health can actually be connected to the development of cancer, particularly in the colon, which is yet another reason why antioxidants are so important for a healthy diet.

    Frozen blueberries are not hard to acquire or use! You can buy them in bulk and freeze in Ziplock bags to throw in smoothies, yogurt, or baked goods. If you are looking for a quick and easy way to add lots of essential nutrients and antioxidants to your diet, give frozen blueberries a try!

    Breakthrough in Electric Car Technology Powers An Entire HomeFind Out More Here>>>