Page 3 of 4
1 2 3 4
recipes – Page 3 – Homesteader Depot

Tag: recipes

  • How to Make Healthy Gummy Candy

    How to Make Healthy Gummy Candy

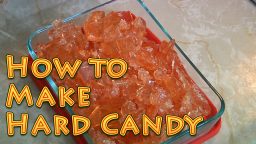
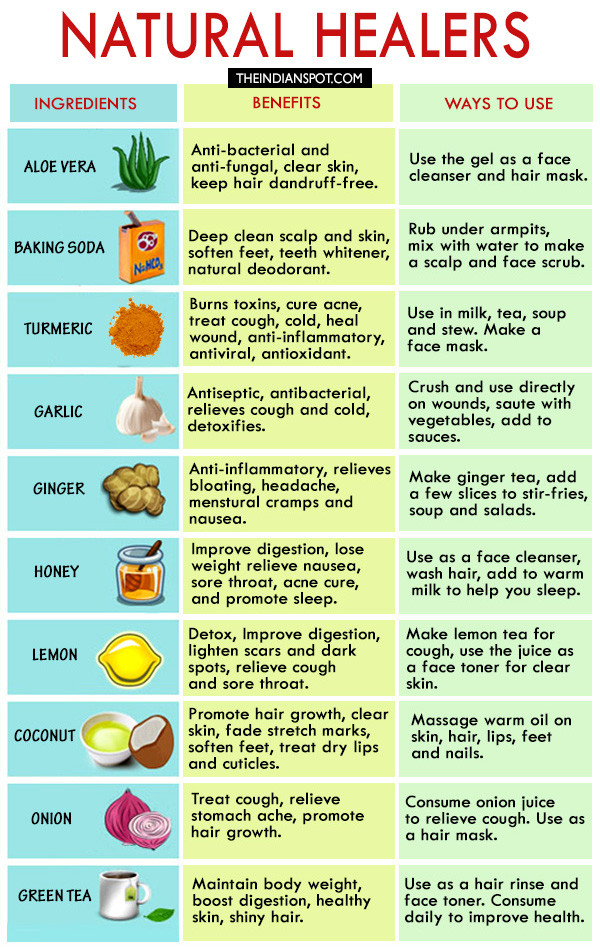
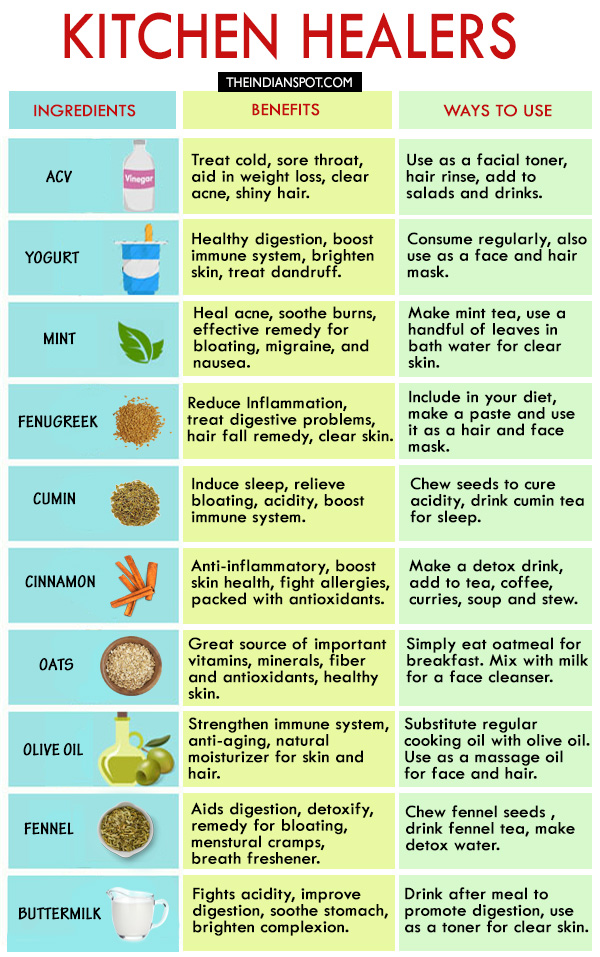
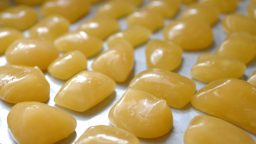
    Gummy candy is a great treat, but unfortunately, it’s usually loaded with dyes, preservatives and chemicals.

    Like many junk foods, there are healthy versions you can make at home, but DIY gummy candy has a unique quality among healthy alternatives to candy: it’s actually really good for you. 

    The base of homemade gummy candy is gelatin, which is an excellent source of protein, minerals, and vitamins that help improve skin, hair, nail, dental, and bone heath, ease the symptoms of arthritis, relieve tendonitis and other muscle and joint-related health issues.

    It’s amazingly good for you, but make sure you buy gelatin from grass-fed cows. Gelatin from feedlot cows is not anywhere near as healthy, as those animals are often unhealthy themselves and pumped full of antibiotics and hormones.

    Also, make sure you buy a gelatin that says it will dissolve in hot water and clump in cold water. If it says it will dissolve in cold water, it won’t work for gummies. Gummies have gotten very popular, so these days, most brands will probably indicate what you can use the gelatin for on the container.

    There are many different options for flavoring gummy candy, the sky is pretty much the limit! Just do a quick search on Pinterest and you’re bound to be overwhelmed by all the creative combinations foodie bloggers come up with.

    Here’s a very basic recipe to get you started:

    Ingredients and tools:
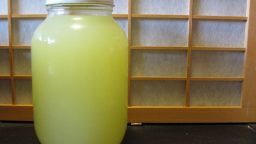
    • 3/4 cup fruit juice
    • 3 tbs raw honey or maple syrup
    • 3 tbs grassfed gelatin powder
    • Small saucepan
    • Candy molds or shallow glass pan

    Directions: 

    1. Get all your ingredients and your candy molds or glass pan together. If you are using a glass pan, gently grease it. Make sure you have everything measured and ready to go before you get started, as some steps are time-sensitive.
    2. Next, make sure you have room in your refrigerator for the gummies to cool once they’re in the molds or the pan. They will need to sit flat on a surface. I usually line my candy molds up on a baking sheet and make space for them before getting started. If your fridge is too full, you can also use the freezer.
    3. Gently heat the juice over low heat in a small saucepan on the stove.
    4. Stir in the honey or syrup until fully dissolved.
    5. Sprinkle in the gelatin, whisking to combine as you go. Continue to whisk until completely dissolved. You might have a few clumps, try to nudge these or press with a fork until they are broken up and dissolved, as best you can (a few small lumps won’t ruin it, if the rest of the gelatin is fully dissolved.
    6. Once your gelatin is fully dissolved, remove the liquid from heat and pour right away into your candy molds or pan.
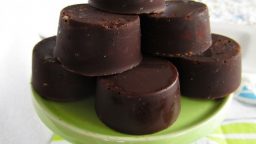
    7. Refrigerate for 1-2 hours, or freeze for 10-20 minutes. Once they’re fully solid, either pop out of the candy molds or cut up into squares.
    8. Store in an airtight container in the refrigerator, and enjoy!

    If you enjoyed this, you might also like….

    Can You Defend Your Family When SHTF?

    Natural Healing Secrets You Need to Know…

    Effective Primal Diet Hacks…

  • How to Make Hard Candy (Video)

    How to Make Hard Candy (Video)

    This is a homemade recipe I’ve always wanted to try, and this fun and informative video on how to make your own hard candy at home is really great!

    Using simple tools and ingredients that you probably already have at home, (with the exception of a candy thermometer, not everyone might have that), they walk you through the simple process with clarity and humor.

    Candy making is simple, but it’s also a very precise chemical reaction that’s taking place, as you bring the ingredients to extremely high temperatures to achieve the desired consistency, so I think it’s really useful to be able to see the process yourself before trying it out. Or all recipes, hard candy is probably a great one to follow a video recipe for.

    And of course, above all else, making your own hard candy is a great way to avoid the nasty chemicals and dye that is found in commercial candy. If you have an insatiable sweet tooth or want to give a really great gift to a friend or family member who does, this is a great way to ensure your sweets are much healthier! Enjoy!

    If you enjoyed this, you might also like….

    Home Defense in the End Times…

    Natural Healing Secrets You Need to Know…

    Eat Like Your Ancestors…


  • How to Use Extra Whey

    How to Use Extra Whey

    Every aspiring or seasoned dairy farmer is familiar with whey, the byproduct of making yogurt, cheese, and other delicious dairy products. In the process of making many of these dairy products, the whey is often discarded, but it’s actually quite nutritious on its own, and can be reused in many different ways. 


    • Use in almost any recipe in place of water or even milk. Whey adds depth of flavor to bread, soups, sauces, marinades, and main dishes. If you are overrun with whey, you can even boil pasta or rice with it!
    • Soak grains and legumes The acid and cultures in whey won’t harm anything in this process, they’ll enhance phytic acid breakdown for easier nutrient absorption.

    • An acid rinse on your shampoo “skip days”. If you’re familiar with the ‘no-poo’ or ‘low-poo’ method of washing hair and its benefits, you’ll be glad to know that whey makes a great, affordable acid rinse hair cleanser.
    • Feed pets and livestock. Pour a little whey over dry pet food or animal feed for a delicious treat!
    • Lacto-ferment your own sauerkraut, veggies, and condiments Uncooked sweet whey is great for preserving probiotic-rich foods to add to your pantry or stockpile.
    • Make more cheese! Ricotta, to be specific, is made with acid whey. So, if you’re dissatisfied with how much whey you end up with after making cheese, simply use it to make more.
    • If all else fails, compost Raw whey is a live, active element that is super beneficial for a healthy compost pile. If you’d rather just toss your extra whey, this is the best option.


    Many of us have been surprised and even a little disappointed at how much whey results from the dairy-making process rather than the desired cheese or yogurt. With the right mindset, though, whey can be an added benefit rather than a waste product.

    If you enjoyed this, you might also like….

    Home Defense in the End Times…

    Natural Healing Secrets You Need to Know…

    Eat Like Your Ancestors…

  • Coconut Oil Candy Recipe

    Coconut Oil Candy Recipe

    In case you have been living under a rock, coconut oil has soared in popularity in recent years for being an insanely healthy superfood. Regular consumption of coconut oil will provide a multitude of benefits, including:

    • Reducing wrinkles and sagging skin
    • Fighting fungus and bacterial infections
    • Supporting the pancreas, liver and kidneys
    • Preventing Alzheimer’s
    • Easing digestion
    • Improving bone health
    • Maintains healthy blood sugar
    • Reduces cholesterol

    The problem is, most people won’t feel like swallowing a spoonful of coconut oil daily. It is, of course, easy to incorporate into your diet by cooking with it or putting in smoothies, but if you are someone with a regular sweet tooth trying to eat healthier, this delicious recipe is a godsend.

    If you love chocolate, want to eat more coconut oil, and love easy recipes, this is for you!

    These delicious coconut oil candies are insanely easy to make, and totally delicious. And the very best part? They’re totally healthy for you, and you have an excuse to eat them every day. Also, since the main ingredient is good-fat-rich coconut oil, they’re filling so while they’re sweet and delicious, they’re also quite filling and satisfying.

    Ingredients: 

    • 1 cup organic coconut oil
    • honey, maple syrup, agave or stevia (to taste)
    • 1/4 cup cocoa powder
    • Candy molds, ice cube trays, or a small baking pan
    • 1/2 tsp vanilla extract
    • Salt (optional)

    Directions: 

    1. First, get your candy molds, ice cube trays, or baking pan ready. You will be pouring the candy mixture into whatever container you are using and refrigerating, so make sure you’ve got space in the fridge for it. If you’re using candy molds, it can be helpful to lay them all out on a candy sheet and clear one shelf of the fridge, for example.
    2. Melt the coconut oil in a small saucepan over low heat (unless it is warm enough in your home that it’s already in a liquid state, in which case, procced to step 3)
    3. Once the coconut oil is fully liquid (don’t let it get too hot, just warm enough to be melted), stir in your sweetener, vanilla extract, the salt if you’re using it, and the cocoa powder. 2 tbs of maple syrup is what I usually use, so just taste it to see its sweet enough for you.
    4. Mix everything thoroughly, then pour into your candy molds, ice cube trays, or pan.
    5. Refrigerate for about an hour, until the candy is fully hardened. Then transfer to an airtight container and keep in the refrigerator.

    Hope you enjoy these delicious healthy treats as much as I do!

    Natural Healing Techniques Doctors Don’t Want You to Know…

    The Weight-Reducing Magic of Yoga…

    The Ultimate Woodworking Course..

  • How to Freeze Lemons (Video)

    How to Freeze Lemons (Video)

    I saw this on Pinterest recently and I didn’t understand why it was such a big deal. Freeze lemons, OK, so what? Well, it turns out that lemons contain unique compounds called “lemonoids” which do serious battle against cancerous tumor, particularly from breast cancer.

    Lemon peels are packed with vitamins, way more than the actual lemon juice. Aside from being amazing cancer-fighting nutrient sources, they also help to detox the whole body from health issues like worms, parasites, fungi, and bacteria, which can be responsible for a multitude of overlying health issues and are not often addressed by modern medicine. Nature is so amazing!

    Since you probably don’t feel like chewing on some lemon peels, freezing lemons is a great way to ingest the vitamins. As this video shows, you can freeze the lemon to make it easy to grate, then use the grated lemon to add to all kinds of foods and drinks. I can’t wait to try this! Check it out:


    If you enjoyed this, you might also like….

    Home Defense in the End Times…

    Natural Healing Secrets You Need to Know…

    Eat Like Your Ancestors…

  • Food for Healing (Inforgraphics)

    Food for Healing (Inforgraphics)

    I am a huge fan of using food for natural remedies and anything DIY. Not only does it save a bunch of money to use natural remedies made with food, but it’s most often much healthier and with more readily available healing properties than the over-the-counter alternative.

    I’m often recommending food items for DIY natural remedies, as you’ll know if you follow this blog regularly, and in my personal research I’ve often found Indian bloggers and vloggers are well-versed in using food, herbs, and other plants for natural remedies and beauty treatments.

    I recently came across this great set of articles from, not surprisingly, TheIndianSpot.com, listing several common kitchen items and their uses for natural remedies and beauty treatments. It’s a really great and handy resource, and would be perfect if you’d like to figure out what you might be able to do with what you’ve got in your kitchen right now. Odds are, you’ve got the makings for some great home remedies or maybe a rejuvenating facial mask sitting right in your fridge. Check it out, and see what you can make!

    natural-healers

    kitchen-healers

    If you enjoyed this, you might also like….

    Home Defense in the End Times…

    Natural Healing Secrets You Need to Know…

    Eat Like Your Ancestors…


  • Easy Flourless Fudge Brownies

    Easy Flourless Fudge Brownies

    I’ve been on a grain-free kick lately. I’m not really “paleo”, but I do love trying out new paleo recipes as I enjoy experimenting with dairy- and grain-free recipes in the kitchen. I’m a big believer in butter and eggs, so I’d never give them up completely, but I think my favorite thing about learning paleo recipes is learning how to use non-dairy ingredients. It’s just a great cooking skill to have, plus, if I’m ever out of them and don’t feel like running to the store, which happens a lot in the winter time, let me tell you!

    This is a cool recipe that not only is free of wheat and gluten, but also has paleo options. If you have any gluten-free relatives coming over for the holidays, it would be a great option for a sweet and healthy(ish) treat!

    Ingredients: 

    • 10 ounces dark chocolate, chopped (Paleo alternative: unsweetened dark chocolate)
    • 4 tbs butter, chopped (Paleo alternative: virgin coconut oil)
    • 3/4 cup sugar (Paleo alternative: coconut sugar)
    • 3 eggs
    • 1/4 cup unsweetened cocoa powder
    • 2 teaspoons pure vanilla extract
    • 1/4 tsp salt

    Directions: 

    1. Preheat oven to 350 degrees
    2. Line a 8″ baking pan with parchment paper or aluminum foil so that it hangs over the edge
    3. In a double-boiler, or heat-safe bowl resting in a saucepan with simmering water, melt the chocolate and butter or coconut oil together until blended and smooth.
    4. Add the sugar, and blend well, then remove from heat and set aside
    5. In a separate bowl, blend the vanilla extract with the eggs and beat with a hand mixer for about a minute, until frothy.
    6. Add the cocoa powder and salt to the eggs, and beat until blended well.
    7. Combine the melted chocolate and sugar with the eggs and cocoa powder mixture, and blend until smooth and glossy.
    8. Pour the mixture into your prepared pan and bake for 25-30 minutes, keeping a close eye on it
    9. Remove from oven and allow to cool completely before cutting and serving.

    That’s it! Enjoy!

    If you liked this, you might also enjoy…

    Naturopathic Medicine at Home…

    Always Wanted to Try Yoga? Read this…

    Easy Carpentry Courses for the Average Person...


  • Don’t Be Without These Homemade Cough Drops

    Don’t Be Without These Homemade Cough Drops

    I never tire of homemade cold remedies. I got a pretty bad cold this week and really wished I had made some of these delicious homemade cough drops. A nasty cold is particularly awful to have during cold winter months.

    I will definitely be making more of these to have on hand the next time a cold hits. It’s simple, easy, and way better than your average chemical-filled cough drops. Regular store-bought cough drops often have artificial colorings and flavorings in them. They might be able to soothe your cough but they sure won’t help prevent cancer!

    Try this simple and wholesome recipe instead. Let’s get started.

    Ingredients:

    4 TBS coconut oil

    1/2 cup honey

    1 tsp ground ginger

    3/4 cup sugar

    1/2 tsp mint extract

    Directions:

    1. Prepare a loaf pan lined with parchment paper, lightly greased with coconut oil
    2. Over low heat, melt all the ingredients together in a saucepan
    3. Stirring constantly, slowly bring the mixture to a boil, at about 250 degrees. (This is called the “hardball” stage in candy making, the point at which the mixture will harden once it has cooled
    4. Carefully pour the mixture into the parchment-lined loaf pan and let cool until you can safely handle it, about 10 minutes. You won’t want to wait much longer
    5. Cut the hardened mixture up into whatever size pieces you like
    6. Individually wrap each piece in wax paper, aluminum foil or lightly dust with cornstarch to prevent sticking
    7. Store in an airtight container at room temperature. These will keep for about a year.

    Hope this is helpful for you this cold season! Would also make great gifts for any illness-prone relatives. Enjoy!

    Also, check out these — Holistic Medicine Basics