Page 3 of 20
1 2 3 4 5 20
Health – Page 3 – Homesteader Depot

Category: Health

  • Why Do You Need a Greenhouse and Things to Look for

    Why Do You Need a Greenhouse and Things to Look for

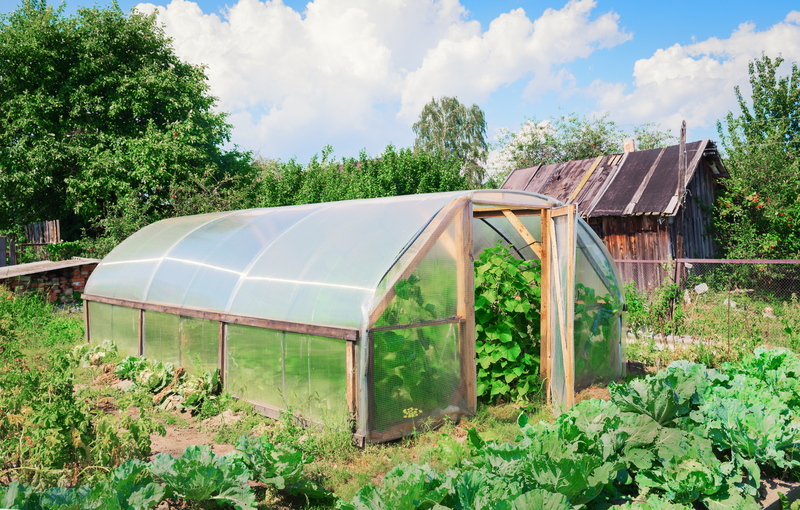
    Many avid gardeners have considered putting a greenhouse in their yards. There’s just something about having the ability to grow tropical and warm-weather loving plants year-round that really appeals to them. If you’re one of these people, then you need to read this primer about greenhouses. It contains just about everything that you need to know about them.

    What Is A Greenhouse?

    Let’s start by defining exactly what a greenhouse is. These are structures of various sizes that have clear walls and roofs. Some of the fancier greenhouses have glass walls, although you can use clear, plastic polycarbonate sheeting as well. A greenhouse is designed to provide a respite from the outdoor weather. It’s warm year-round so that plants easily grow inside of them. The clear walls let in plenty of sunlight, although the greenhouse might be built with an electrical system and some grow lights as well. This really allows the owner to control the overall temperature indoors. Some have a hydration system built-in as well, but it really is easy to use a hose, if you want a simple do-it-yourself greenhouse that your custom made on your own.

    Greenhouse Sizes

    One of the best things about greenhouses is that they come in various sizes. This means that you really can have one that fits your yard perfectly. You aren’t limited to the large commercial sized ones. Some come as small as a basic coat closet and hold seedlings. They work well if all that you want to do is plant seeds and allow them to grow slightly before the soil warms up in the spring. If you want something that can handle multiple plants and allow them to grow year-round, then you’ll want one that’s larger than that. Again, it all depends on the plants your overall vision for your greenhouse.

    Click here for some other projects you can build TODAY>>>

    Pick a Good Location

    Location matters, even with greenhouses. Yours should be located in an area of your yard that receives plenty of sunlight. Otherwise, your plants won’t grow properly – even if you have a grow light installed inside. You never want to have your greenhouse placed in a shady area of your yard. In addition to this, you need to run electric lines to it and possibly even water lines. If you can, place your greenhouse within ten to twenty feet of your own house, in order to make these things easier to install.

    What about Amenities?

    You need to think about your greenhouse as if it’s actually a house. By this, we mean that you need to consider which amenities you want it to have. Your two main options include lighting that will give your plants a boost and promote growth, even when the weather isn’t very sunny outside and a filtration system that waters the plants. Yes, you could use a portable grow light and a hose, but you also have the option of running electric lines and setting up an irrigation system. It all depends on your budget and just what you want to use the greenhouse for. There’s nothing wrong with installing a simple one that lacks these amenities.

    Building Your Greenhouse

    Just like with the amenities, you have two options to choose from here. You can either build your greenhouse yourself, which includes developing plans and literally making it from scratch or purchasing a commercial greenhouse. This latter option might involve having the greenhouse trucked to your yard and installed, or having a kit arrive in the mail that you need to build yourself. Either way, you end up with the perfect greenhouse for your needs.

    Ted is offering over 16,000, step by step, woodworking plans…check them out here>>>

  • Protecting Your Plants from Frost and Freeze

    Protecting Your Plants from Frost and Freeze

    Cold temperatures are not good for the plants in your garden. Many of them need air temperatures that are above 32 degrees Fahrenheit in order to survive unprotected. While others, such as pine trees and evergreen bushes, might be fine, you’ll have to take some steps to ensure that everything else in your garden (except for your annuals, of course) will survive the winter.

    Types of Plants

    The first step involves determining which types of plants that you have. This way, you’ll know whether you need to protect them or just let them go. For example, if you have annuals, then they won’t survive the winter. These plants will last for one growing season. Many of them will leave some seeds behind at the end of their life cycles, so they might reappear next year. It all depends on the plant. There are also tropical plants. While many of them will grow in a number of different climates as long as the weather is hot and humid, they won’t last through the first frost. The cold weather is more than they can bear, so they’ll die.

    In addition to this, there are perennials. There are two main types of them: root-hardy perennials and full hardy perennials. The first type of these plants has leaves and branches that seem to die in the winter, although their roots are still good. The roots will enter a dormant state and won’t come out of it until the temperatures improve. The other type of perennials – the full hardy ones – go dormant as well. Trees, various plants, and even some types of shrubs fall into this category. These plants will also stay dormant until the weather warms up, although they’ll spring back to life much more quickly.

    How to Stockpile for Free: By Growing Your Own Groceries>>>

    Protecting Your Plants

    Now that you understand the plants that are in your garden, the next step involves protecting them from the cold temperatures. It all starts with keeping an eye on the weather. As soon as fall hits and the mercury in your thermometer starts to slide downwards, you should move as many of your warm weather-loving and tropical plants indoors as you can. This means that plants like geraniums and petunias should be moved inside. It helps if you already have them housed in small pots in your yard. You’ll also need to dig up any bulbs that won’t survive the winter. For example, dahlia bulbs need to be kept warm and then replanted in the spring.

    Next, you need to take the necessary steps to protect the perennials that you can’t move into your home. The night before the first cold snap, give them plenty of water. You want to really soak the ground, as this gives their roots something to insulate them from the cold. Once this is done, get some old bedsheets and wrap them around the roots of the plants. Burlap works just as well. (Just make sure to never use plastic.) This will provide some additional insulation for the roots of the plants. You want to remove them as soon as the temperatures rise above freezing.

    Ideally, all of your plants will survive the freezing temperatures that are a major part of winter. However, you need to be prepared to replace some that won’t make it. Sometimes things are out of your control. In addition, if you purchase plants for your garden that are designed for your climate, then you’ll have fewer issues. These plants can either survive the frost and freezing weather, or their seeds will. Either way, you’ll have fewer headaches in the spring when you take a look at your garden.

    [Food Stockpile] Another “food system”? It’s better than a food system, it’s a complete food strategy>>>


  • 7 Clever Uses for Cheesecloth

    7 Clever Uses for Cheesecloth

    How much do you know about cheesecloth? This porous cloth was initially designed to help cheesemakers squeeze the liquid out of cheese curds, hence its name. However, it has a number of other uses as well – many of which you probably never considered. Here are seven of these incredibly clever uses for cheesecloth. You’ll want to keep some in your home after reading them.


    1) Polishing Your Silver

    All that you need in order to make your silver shine is a little silver polish, some water, and a piece of cheesecloth. The steps are very easy. Start by moistening the cheesecloth by dipping it in the water. Squeeze out any excess water. Then dip the wet section of the cloth in the silver polish (or squeeze it on, depending on the type of polish). All that you have to do next is rub your silverware or your pots and pans until they shine, repeating the process as necessary.


    2) Making Herb Bundles

    Have you ever wondered how chefs manage to make their soups and stews taste so nice, even if there isn’t any evidence of herbs and seasonings in them? Cheesecloth is the answer to that question. Cut a small square of cheesecloth and wrap some herbs up in it. Tie the bundle tightly with a piece of clean string – butcher’s twine will work well. Place the bundle in the soup or stew and fish it out before serving. The flavor of the herbs will soak through the cheesecloth.


    3) Quick Bandages

    If you cut yourself in your kitchen (or anywhere else in your home, for that matter) and don’t have any gauze in your first aid kit, then grab a piece of cheesecloth. It won’t stick to your wound and will provide a clean cover until you can get some proper bandages. Just make sure to place some antibacterial ointment on the wound first. The cheesecloth will last until you can make it to the emergency room, if the cut it bad enough, or until the bleeding stops and you can place a proper bandage on it.

    Breakthrough in Electric Car Technology Powers An Entire Home>>>

    4) Dust Some Sugar on Your Baked Goods

    If you’ve ever made a mess of your baked goods when you sprinkled powder sugar on them, then we have a good solution. You can place the powdered sugar in a jar, top it with a tightly wrapped piece of cheesecloth, and then begin dusting the tops of them with it. The pores in the cheesecloth are just the right size, so you won’t make a mess.


    5) Food Drapes and Covers

    The next time you want to protect your food before it is served, rather than reach for plastic containers or glass lids, use a piece of cheesecloth. It will neatly cover everything, preventing your contaminants from touching your dishes. On top of this, cheesecloth is very sanitary.


    6) Straining Your Food

    Sometimes you need to strain things before you serve them. Since this is the original use for cheesecloth, it works perfectly. Just be careful when you’re straining the hot stock and other things, as you don’t want to burn yourself. Place the cheesecloth in a bowl and pour the contents of your pot into it. The cheesecloth will do its job, and once you lift it up, you’ll notice just how nicely contained everything is.


    7) Baste Your Thanksgiving Turkey

    There are several different ways to baste your Thanksgiving turkey, although cheesecloth is the most effective. Start by soaking your cheesecloth in a mix of melted butter, herbs, seasonings, and even some turkey stock. Then lay it over your turkey until everything has sunk in. You won’t regret it!

    Power Efficiency Guide Will Change the World Forever>>>

  • 5 Simple (Yet Crucial) Guidelines of Winter Survival

    5 Simple (Yet Crucial) Guidelines of Winter Survival

    Spending some time in the woods in the wintertime, either voluntarily or because you wound up getting stuck out there, is no joke. You need to be able to take care of yourself, which means meeting all of your basic needs, lest you end up starving or freezing to death. Before the cold weather sets in for good, take the time to review these five guidelines of winter survival. Are you prepared?

    1) Stay in One Place

    If you’re waiting for a rescue after being stranded out in the cold for days, then you need to stay in one place. The temptation to go out to see if you can find your own way home may be tempting. You probably also think that the more you move around, the less likely you are to freeze to death. However, this just makes it tougher for any searchers to find you. Your footsteps will vanish as the snow continues to fall, leaving you unable to see where you’ve been, and for anyone to track you. Instead, stay put and set up a proper (or as proper as you can get, depending on your supplies) camp. This will give you the protection that you need, and allow others to find you.

    Suggested Article: How to Find Your Way When Lost in the Wilderness

    2) Be Prepared to Stay Warm without a Fire

    Ideally, you’ll have a fire to keep you warm when you’re out in the snow. This isn’t always possible, however. It might be snowing too hard for the fire to stay lit, finding dry wood to use as kindling may be tricky, and so on. Instead of relying on that fire, you need to be prepared to survive without one. Make sure that you’re dressed warmly, carry some extra blankets, and find whatever shelter that you can. It’s all about mind over matter at that point.

    How US Special Forces Start a Fire With LIQUID>>>

    3) Remain Confident

    Speaking of “mind over matter” – confidence goes a long way towards surviving the winter in the woods. You need to be as mentally prepared as you are physically. What do we mean by this? Well, you can pack all of the possible provisions that you can and be in great physical shape, but those will only take you so far, especially if you’re not mentally prepared to survive. Even if you have to repeat the words “I can do this” over and over again in your head as a kind of mantra, you need to remember that you can do this.

    4) Trap Prey In Order to Feed Yourself

    Getting trapped in the woods in the middle of a snowstorm is bad, but this situation is made even worse when you don’t have any food. You’ll need to trap prey and understand how to properly prepare it. Otherwise, you’ll end up starving to death out there if your rescuers are days or weeks away. Plus, solid food gives you the energy that you need in order to keep your body functioning and warm. Remember that you’ll need to cook your game properly, lest you end up with food poisoning. This can make a bad situation even more dangerous.

    Related Article: What’s Edible in Your Area?

    5) Be Able To Start a Fire without Matches

    It’s very easy to start a fire when you have matches and dry wood. But what happens if you don’t have these things? You’ll end up in trouble. You need to know how to start a fire without matches. This could involve using a bullet, or anything else that you have on hand. All that matters is that you can get that fire started. This is definitely something that you should practice, just in case.

    Related Article: 4 Ways to Start a Fire You’ve Never Heard of

  • Mold is Growing in Your Home RIGHT NOW…But Where?

    Mold is Growing in Your Home RIGHT NOW…But Where?

    If you’re sitting in your house sneezing, coughing, and dealing with skin, eye, and throat irritations, there is most likely mold present somewhere. People that are suffering from asthma or allergies know precisely how damaging mold can be to their health. Those with a healthy system aren’t going to notice mold growing somewhere quite as quickly. While you can’t control the mold you come in contact with outside of your home, it is possible to contain and eliminate it from your house. Start by checking some of the most common places where it gets found.

    What is Mold and Why Do You Have It?

    Your home offers the perfect growing conditions for mold. There is darkness, oxygen, warmth, and a place for it to reproduce. As soon as humidity levels rise or stagnant water is present from a water leak, the growth of mold is almost impossible to stop.

    It’s a fungus by definition. Microscopic spores float through the air, and when small clusters start to form, you can see them growing. The spores can cause attacks and other health issues with those that have existing breathing conditions. Without a health issue, you might not be able to tell there is even mold in your home. You should still be checking these common areas regularly to be sure.

    Basement

    The basement is most likely the darkest and dampest section of your home. When you walk down there, if you smell a musty odor, there’s a good chance it is mold. Some of the areas to look at while you’re in the basement inspecting for mold are:

    • Around ducts and pipes
    • Around the sump pump area
    • Anywhere the foundation is leaking
    • Windows or vents

    Prevent mold growth by using a dehumidifier and fixing any leaks.

    Suggested Article: 15 Things That Will Help Conserve Your home Energy

    Bathroom

    The bathroom is another damp area that is ideal for mold growth. You have to be sure that there is proper ventilation through the use of fans and windows to prevent it. While the mold on the tile is apparent because you can see it, there are other places to check like:

    • On the floors and wall
    • Sink and toilet
    • In the shower or tub

    This guy shows us clear as day how anyone can power with ZERO cost>>>

    Kitchen

    Mold in the kitchen tends to multiply because of the use of the hot water for dishwashing and a warm oven increasing the temperature. Food in the sink or left in the fridge can be sources for mold growth. With all the great real estate, make sure you’re looking at these areas:

    • Microwave and stove
    • Refrigerator and pantry
    • On, in, and around the kitchen sink
    • Trash cans
    • Cutting boards
    • Behind the stove

    Living Room

    You might think that there aren’t favorable conditions in your comfortable living room for mold, but there are. Think about when you or your kids eat in there. Food undoubtedly falls off the plate which can start mold growth. Houseplants also have the potential of producing mold. Look in these spots:

    • On the couch or the curtains
    • The plants
    • Chimney or fireplace

    Keep everything clean and use a dehumidifier to keep the humidity down in your living room to prevent mold growth issues.

    Bedroom

    All of your rooms are susceptible to mold, including your bedroom. Keep your humidity levels down and regularly check these areas for growth:

    • Windows and window sills
    • Mattresses
    • Vents for air conditioning and heat

    A waterproof mattress cover or a mold resistant mattress can assist with keeping mold out of the area where you sleep. If you see any condensation forming, clean it up and see if there need to be repairs made.

    Related Article: Simple Bed Bug Check

    Get instant access to over *16,000* woodworking projects in the next 5 minutes or less>>>

  • How to Check for Bed Bugs

    How to Check for Bed Bugs

    It seems as though bed bugs are everywhere anymore. Thanks to the media and the internet, people are more capable of sharing their experiences in hotels, cruise ships, trains, and planes when it comes to the little critters showing up. Just one pregnant bed bug coming home with you can lead to a complete infestation in your home in a few days or weeks. The first thing you should do when returning from a vacation or after bringing a piece of furniture into your home is looking for bed bugs. You have to know where and what to watch for before you can decide what the next steps to getting rid of them are. Find out about the process now, so you don’t have a much bigger problem to deal with down the road.

    Where to Look

    Bed bugs live and feed in areas that they have a host or a human body. They feed solely off of human blood, so they stick close to where they are going to have easy access to one when they get hungry. They will not travel to different locations unless the host moves or their infestation grows to a point where the single host isn’t enough for all of them anymore.

    Start in the room where it is assumed they are living. Check along the corners and joints of the bed frame, the cracks and crevices in the mattress, in baseboards, floorboards, and carpeting. You may even be able to see them on furniture near the bed. They like to stay in tight, dark areas to keep safe from predators.

    Whatever the reason for your cat’s inappropriate peeing and spraying, I have a very simple solution…>>>

    Signs to Watch For

    If you can fit a credit card into a spot, bed bugs can fit in there too. That’s why it’s hard to see physical signs of the annoying creatures with a visual scan. Aside from seeing the actual bugs, you may be able to notice signs that the insects were there eating or reproducing. Look for:

    • Blood spots – red, dark, and present wherever a bed bug may have been squished by a human body exposing the blood from their stomachs that they had consumed earlier.
    • Shed skin – bed bugs replace their outer shells as they grow. As a result, they leave behind an exoskeleton that is gold in color.
    • Fecal droppings – dark, thin streaks that smear red when rubbed with a wet cloth.
    • Bed bug eggs – eggs are white and look like rice. A pregnant female will drop two to five eggs each day.
    • The bugs – they’re a dark reddish-brown color and get about the size of an apple seed. They have six legs and antennae. Around the abdomen are hairs that create the illusion of dark bands.

    How to Do an Inspection

    You’re going to have the best chance at seeing a bed bug infestation if you use a magnifying glass and a black light flashlight. You should also have a tool to scrape in the cracks and crevices for the smaller matter. Start in one area of the room moving slowly around until the entire inspection is complete.

    Suggested Article: DIY Fruit Fly Trap

    Next Steps

    When you’re still unsure about whether or not you have bed bugs after an inspection, some monitors can be used on the legs of furniture that work as a trap. Set them out at night and in the morning you will be able to see the insects in the trap. After you confirm the presence of bed bugs, there are homemade sprays with chemical ingredients that can be sprayed on the infected areas. For severe infestations, you may want to consider calling in a professional company to ensure they are all cleared out.

    Discover How You Can Get Your Clothes Cleaned Without A Single Drop of Toxic Laundry Detergent…>>>

  • 11 Natural Coffee Alternatives

    11 Natural Coffee Alternatives

    For countless adults, coffee is a part of daily life. It could be one cup in the morning to get you motivated or several cups throughout the day to keep you energized and moving. For some it is merely a habit, others feel as though they need it, making it more of an addiction than an enjoyable morning refreshment. While coffee in low doses doesn’t seem to have any negative impacts, doctors have suggested that their patients reduce or eliminate coffee from their diets for various reasons. Thankfully, for those that have to or want to cut coffee out of their life, there are plenty of natural alternatives that give the same effects as your favorite cup of Joe.

    1.    Kombucha

    For thousands of years, kombucha has been used for its probiotics. It will give you a boost of energy, but there is a fermentation process that makes it have the same properties as alcohol. Don’t drink it in large amounts if you have to drive.

    2.    Water Infused with Fruit

    Water sounds boring. You may find it difficult to believe, but it can boost your energy levels. That’s even truer when you add in nutritious fruits like lemons.

    3.    Fruit Smoothies

    Milk and fruits rich in nutrients are great for you first thing in the morning in place of your regular coffee. More than that, it’s a filling refreshment that can be used as a meal replacement if you’re looking to cut back on calories or lose weight.

    4.    Chai Tea

    Chai tea gives you about a third of the amount of caffeine that regular coffee does when you want to find an alternative that reduces your caffeine intake. It tastes good as it is, or you can alter it by adding other ingredients like cream and sugar.

    5.    Teeccino Coffee

    The people at Teeccino coffee claim that their tea is the only coffee alternative out there that actually tastes like coffee. It’s both caffeine and acid-free making it healthier for your diet.

    6.    Postum

    Postum is a beverage that dates back as far as 1895. It’s warm and can be whipped up quickly by just adding some water. It’s caffeine-free but resembles coffee and works effectively for some as a substitute.

    7.    Matcha

    Matcha is unique because it can both boost energy levels and relax you when added to all different kinds of recipes. The taste is one that has to be acquired for most, but the number of benefits associated with the ingredient makes it worth it.  It has about half the amount of caffeine as a regular cup of coffee.

    8.    Green Tea

    Green tea is loaded with ingredients that are beneficial, and it’s often used in replacement for coffee. Improved skin and hydration are both advantages that come along with consuming green tea. There is about one-third of the amount of caffeine in a cup of green tea compared to your average serving of traditional java.

    9.    Hot Chocolate

    Hot chocolate is probably the most closely related to coffee if you’re looking for something to trick your mind into thinking you’re having your morning indulgence. There isn’t near as much caffeine, and the flavor makes it pleasurable to drink.

    10.    Rooibos Tea

    Even though Rooibos tea is caffeine free, there are other ingredients found in it that can increase energy and boost your metabolism naturally. You can even drink it right before you go to bed because it won’t keep you awake. Another name for the South African beverage is “red tea.”

    11.    Sparkling Water

    Sparkling water is infused with bubbles that give you the feeling you have a crisp and refreshing soda, but its way better for you than coffee. It’s also a little more satisfying than plain water.

    This easy, 3 minutes exercise completely cured my horrendous snoring and sleep apneaLearn Them Here>>>

  • 10 Substitutes for Baking Powder

    10 Substitutes for Baking Powder

    Baking powder is a widely used ingredient that makes your baked goods lighter and fluffier. The problem is, you might not always have it available to you. Instead of skipping the recipe altogether, discover some great substitutes that can be used in its place.

    Baking Powder Defined

    The composition of baking powder is sodium bicarbonate. It is known in the world of chemistry as a base that gets paired with an acid like cream of tartar or filler such as cornstarch. The leavening agent is used commonly in a variety of baking recipes.

    When the baking soda is mixed with water, the acidic component and the sodium bicarbonate react with one another allowing the release of carbon-dioxide gases. This reaction makes bubbles form, and that’s what adds the volume to baked goods, bread, cakes, and other foods.

    Baking soda and baking powder are two different ingredients that get confused frequently. Baking soda doesn’t have the acidic component however and must be blended with an acid to produce the same results as baking powder.

    If you run out of baking powder, try using one of these alternatives.

    1.    Plain Yogurt

    Plain yogurt has an acidic pH that adds the same effect as baking powder to your recipe. Mix ¼ teaspoon of baking soda and a ½ cup of yogurt and replace one teaspoon of baking powder. Be sure to reduce your liquid ingredients in an amount equal to your yogurt addition.

    2.    Buttermilk

    Buttermilk is similar to plain yogurt in makeup and can be used in the same manner when you don’t have baking powder as an option for your recipe.

    Suggested Article:  “Super Easy Homemade Buttermilk”

    3.    Cream of Tartar

    A two-to-one ratio of cream of tartar to baking soda creates the best finishes when using it as a substitute. ¼ teaspoon of baking soda and a ½ teaspoon of cream of tartar equals one teaspoon of baking powder.

    4.    Molasses

    Molasses is high in sugar and when using a ¼ of the liquid combined with a ¼ teaspoon of baking soda you can leave out a teaspoon of baking powder.

    You Are Not Failing Your Diet, Your Diet Is Failing YOU — Learn how To Create Quick & Easy Fat Burning Recipes That Will Taste Just Like Your Favorite Meals…Click here>>>

    5.    Vinegar

    White vinegar has a natural taste, and when paired with baking soda in cakes and cookies a leavening effect is produced. When your recipe calls for a teaspoon of baking soda, use a ¼ teaspoon with a ¼ teaspoon of baking soda and a ½ teaspoon of vinegar as a replacement.

    6.    Sour Milk

    Acidification has occurred in sour milk so using a ½ cup along with a ¼ teaspoon of baking soda can be used to replace a teaspoon of baking powder. Reduce your liquids by whatever addition of sour milk you’re using.

    7.    Club Soda

    Baking soda is found in club soda in the form of sodium bicarbonate. Use it to replace any liquids in your recipes that only require a small amount of lightness and volume. It can be used instead of milk or water for instance.

    8.    Lemon Juice

    Use ¼ teaspoon of baking soda, ½ teaspoon of baking soda, and ½ teaspoon of lemon juice to replace a full teaspoon of baking soda. There are high levels of citric acid in lemon juice that allow for the acid-based reaction that comes with baking soda.

    Related Article:  “10 Amazing Uses for Lemons”

    9.    Whipped Egg Whites

    Whipped egg whites create tiny bubbles that contribute to the rising of many baked goods. Pancakes, meringues, and soufflés often call for whipped egg whites. Beat them slowly until they foam and then increase the speed of your mixer until soft peaks start forming.

    10.    Self-Rising Flour

    Baking powder, salt, and all-purpose flour all makeup self-rising flour making it a good option if you run out of baking powder and baking soda. Just take out the baking powder, baking soda, and regular flour in your recipe and replace it with self-rising flour to help your baked goods rise.

    Never BUY Papertowels Again…Use THESE Instead>>>